This slab came from a tree planted in someone’s yard 67 years ago. It was the biggest burl I had ever worked with, and possibly the biggest I had ever seen. Naturally, I decided the sensible thing to do was cut it up and attempt to turn it into a desk.
The plan was simple enough: keep the natural color of the mappa burl, build a pair of curved solid wood legs, and give the top a polished, granite-like finish. The actual work involved gallons of epoxy, stubborn little holes, splintering wenge, and a fairly convincing demonstration that I still had a lot to learn about brushing polyurethane.
Beautiful wood does not necessarily make an easy woodworking project. This piece was a particularly good reminder of that.
Table of Contents
- Finding the Slab and Making the First Cuts
- Trying to Harden Soft Mappa Burl With Epoxy
- C-Channels, Chamfers, and a Lesson in Tear-Out
- Filling Burl Pits and Making the Live Edge Safer
- Making Curved Solid Wood Legs Without a CNC
- Repairing Wenge and Sanding the Curves
- A Removable Mounting System Made From Baltic Birch
- Building a Granite-Like Finish With Water-Based Polyurethane
- The Finished Desk
Finding the Slab and Making the First Cuts
I found these slabs while searching for unusual wood online. The supplier, Hamilton Lee Supply, appeared to be based in Houston. Their mappa burl looked good enough that I was prepared to pay for shipping, but a little more research revealed a second location in Battle Ground, Washington, less than an hour from me.
I drove up, looked at the wood in person, and bought two sister slabs. They were great to work with and even delivered them to my shop.
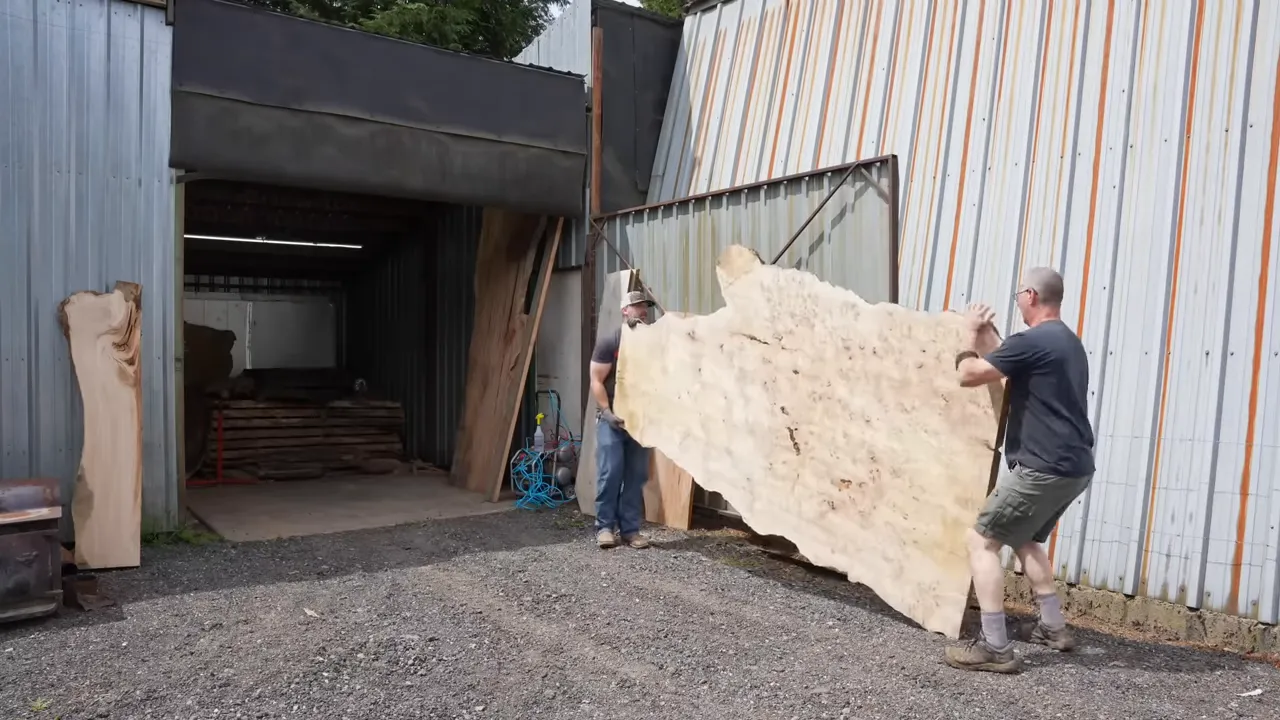
Despite its size, mappa burl is surprisingly light. If moving it around still looked difficult, I had just turned 40, and I don’t feel that requires any further explanation.
The bigger problem was softness. This wood needed a lot of work before it could become a surface someone would use every day. If you are choosing wood for your first project, use something more forgiving, like walnut or maple. Save the wild burl for when you are ready to add several extra jobs to every normal step.
I cut the big slab into smaller desk-sized sections with a track saw, then cleaned the live edges. A powered brush helped remove loose material, and small hand tools let me pick debris out of individual burl pockets.
Cutting up a slab like this is not the most economical way to use it. It also creates a layout you rarely see: live edges on the short ends of a desk rather than along its long sides. Making these builds for my business gives me some room to take those design chances. I wanted something different, even if it meant using an expensive slab less efficiently.
And if you would have kept it whole, that is completely fair. There is plenty of room in woodworking for someone else to buy the next slab and prove me wrong.
Trying to Harden Soft Mappa Burl With Epoxy
Before worrying about a polished finish, I needed to firm up the wood underneath it. The whole slab was soft, but a pale yellow section near the middle was especially porous. Water had wicked into that area after the tree was cut, leaving it noticeably softer than the surrounding wood.
My approach was to repeatedly soak the slab with deep-pour epoxy. The long working time mattered more than anything else. I wanted hours to keep redistributing resin over areas that continued absorbing it, rather than having the epoxy start curing while I was still working.
For this experiment, I added a little acetone to thin the epoxy and encourage it to soak into the porous areas. That was an experimental choice, not a manufacturer-approved mixing recipe. I was uncertain about its effect on the cured epoxy’s strength, so I would not treat this build as a universal recommendation to dilute resin. Check your epoxy manufacturer’s guidance before modifying its formulation.
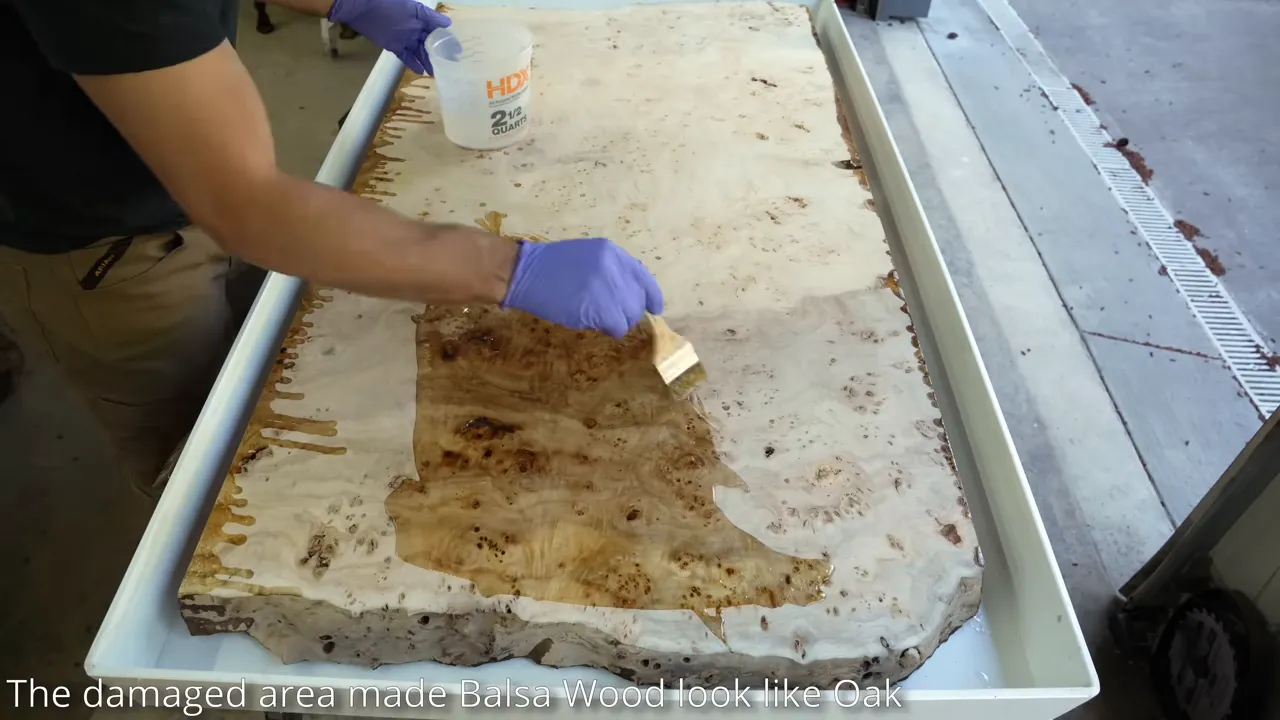
I spent most of a day essentially basting the slab. I used roughly three gallons of epoxy and estimated that around two gallons remained in the wood and its voids. It was noticeably heavier afterward than its untreated sister slab.
Once the epoxy cured, I took both pieces to Creative Woodworking for surfacing. For the treated slab, the goal was to skim the surface without unnecessarily removing the material I had just worked so hard to add.
There was an important limitation to this process that became clear later: absorbing a lot of epoxy did not mean the slab had become hard all the way through. When I drilled for mounting hardware, the interior was still fairly soft. The firmed-up layer appeared to extend only about a quarter inch below the surface.
That distinction matters. A harder outer surface and a fully stabilized slab are not the same thing.
C-Channels, Chamfers, and a Lesson in Tear-Out
The unusual orientation of this desk affected more than its appearance. Normally, my C-channels run across the shorter dimension of a tabletop. Here, because I had cut the desk across the original slab, the channels needed to run along the desk’s long dimension to address the direction in which this piece wanted to warp.
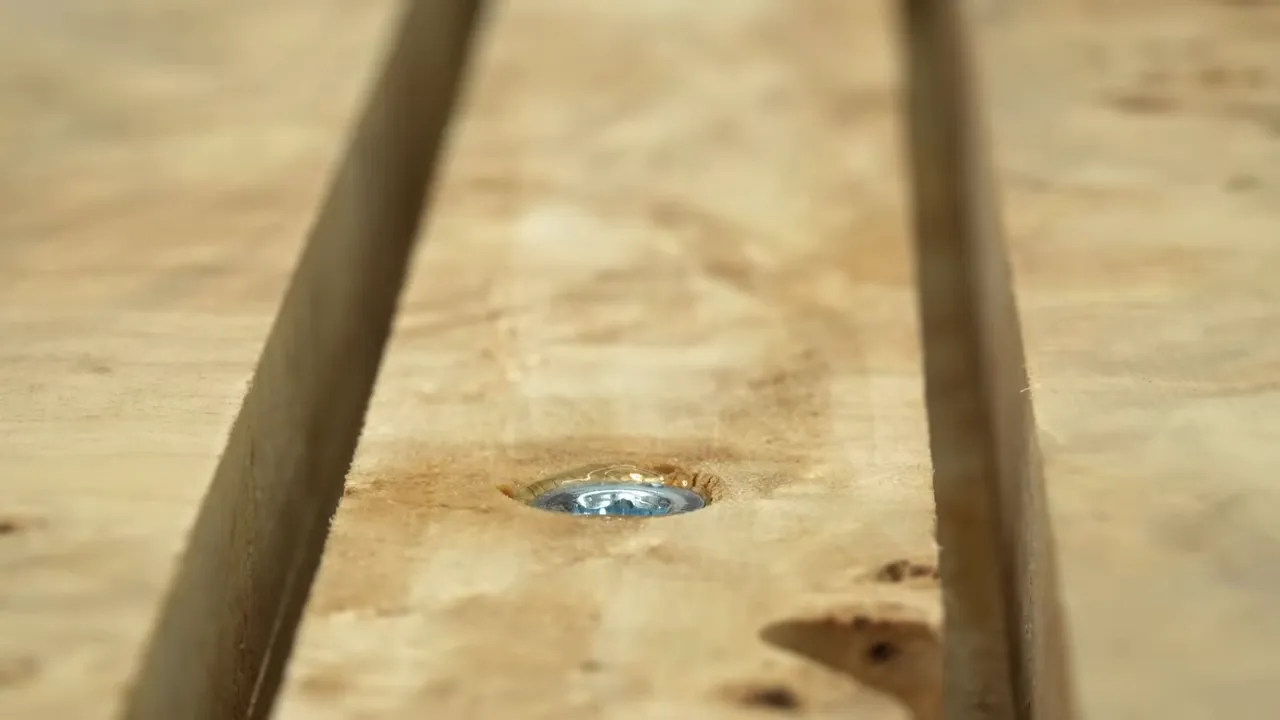
I routed recesses into the underside, drilled for threaded inserts, and installed the channels. The important point was to consider the wood’s orientation rather than automatically copying the hardware layout from a more conventional slab table.
For the straight edges, I wanted my usual shallow chamfer. A roughly 22-degree bevel gives a slab a more deliberate profile than a plain vertical edge without requiring much additional work.
I removed most of the material with the track saw, then used a custom chamfer bit to clean up the edge. Normally, that router pass gives me a better surface than the saw. On this soft mappa burl, it caused substantial tear-out instead.
The bit may also have been getting dull, but either way, this was not the result I wanted. I applied epoxy to firm up the damaged area before routing it again. In hindsight, stopping with the track-sawn edge probably would have saved some trouble.
Filling Burl Pits and Making the Live Edge Safer
Why I Used Fillers I Normally Avoid
My usual choices for small defects are epoxy and, in some situations, CA glue. I generally avoid rubbery hot-melt fillers on tabletops because they do not leave the texture I want. Wax fill sticks have a similar limitation: a little hole filled with something about as hard as a crayon is not ideal on an everyday work surface.
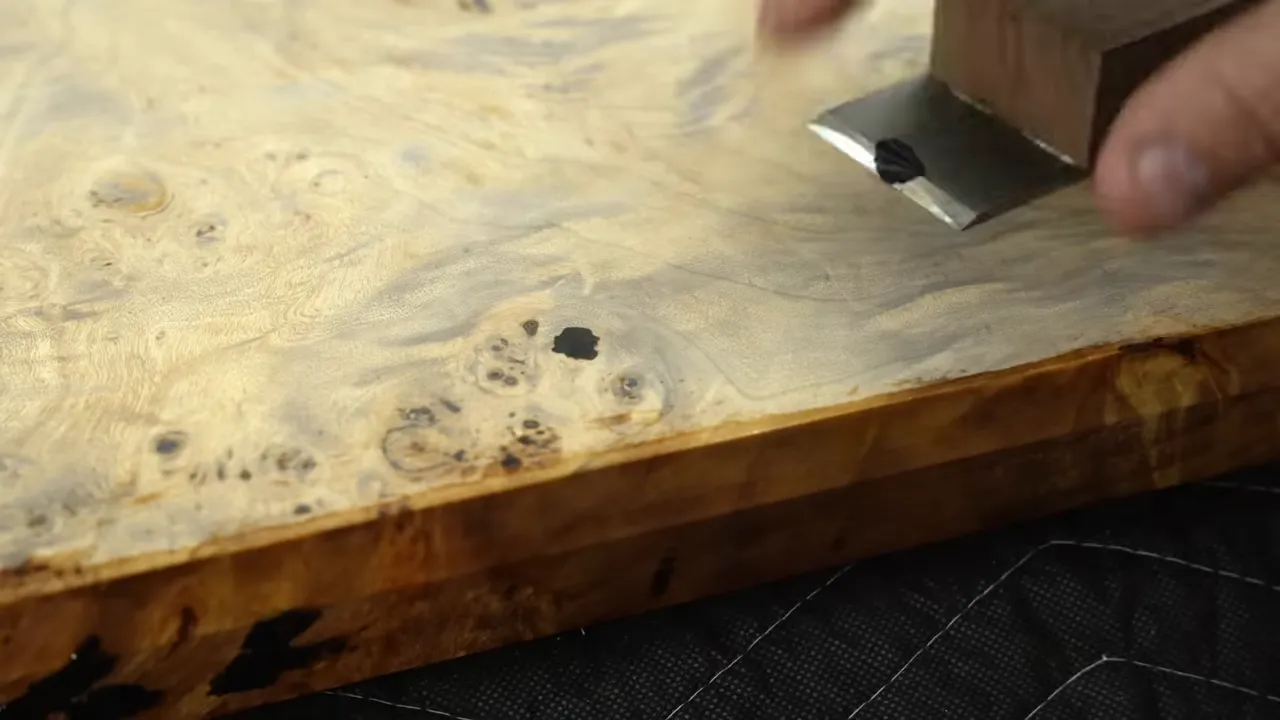
This slab forced an exception. Its tiny burl pits were incredibly stubborn. Epoxy and CA glue would go into them, then chip back out when I sanded or scraped the surface flush.
I used black hot-melt filler and wax fill sticks where the other options would not stay put, then scraped the repairs level. The planned film finish was the reason I was willing to use these softer fillers. They would be covered by polyurethane rather than left exposed as the final surface.
Keeping the Character Without Keeping Every Spike
The natural edges are some of the best parts of a burl slab. They can also be covered in little points that are perfectly positioned to catch a sweater, or worse.
I wanted to preserve the edge’s irregular character while removing the obvious hazards. A Dremel with a small sanding drum handled some areas, fine rasps handled others, and 400-grit paper softened the remaining sharp spots.
This was careful, localized shaping, not an attempt to turn the live edge into a smooth manufactured curve. I would remove a point, feel the area, and blend it back into the surrounding shape.
There was also far more sanding than any reasonable person wants to hear about. A homemade sanding glove helped me work around the contours, but it did not make the job disappear.
Making Curved Solid Wood Legs Without a CNC
I use steel table legs a lot. Clients ask for them, and they are wonderfully convenient to install. But a custom wood base can make a piece feel much more distinctive.
For a long time, I assumed curved solid wood legs required a CNC or a much more intimidating process. What I wanted was a repeatable method that a reasonably proficient woodworker could use, with legs that could still bolt on and off for shipping or moving.
The solution was a three-piece acrylic template system. This wineglass-shaped design was based on steel legs from Flowyline Design that I had used for years. Instead of machining an entire leg from one enormous blank, I could shape a foot, a stem, and an upper support separately, then join them.
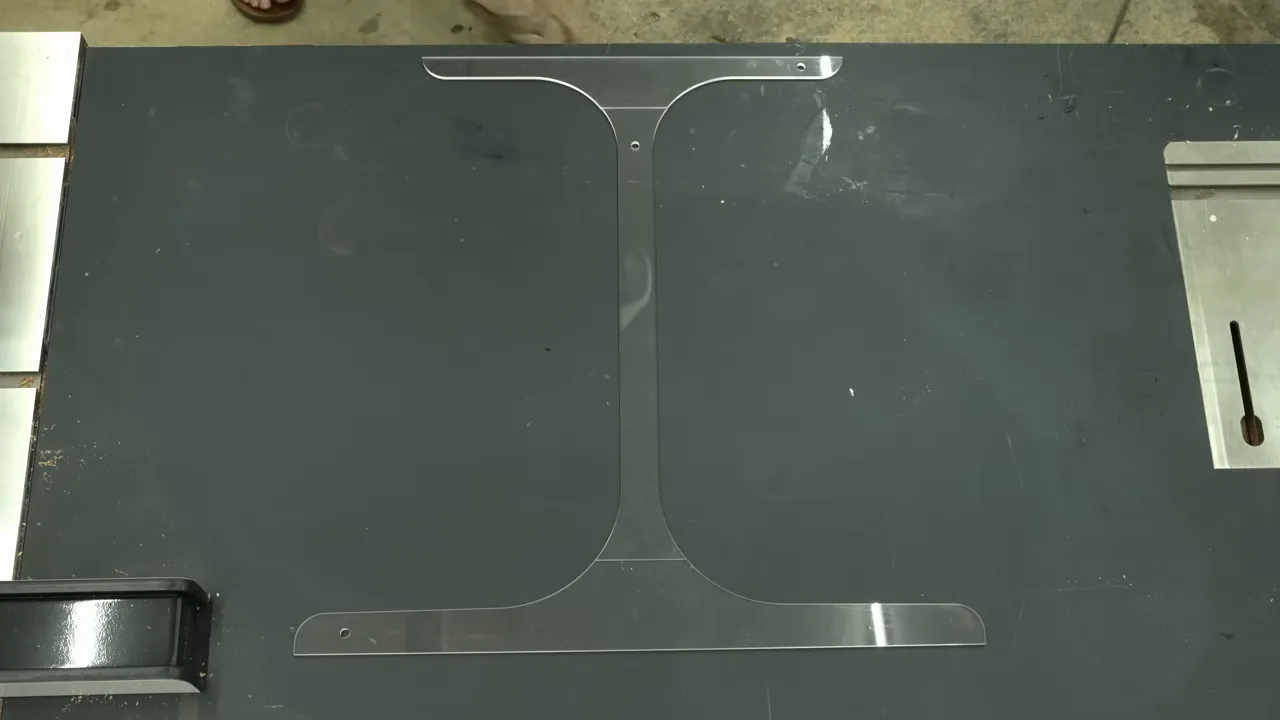
I chose wenge for the base. It is a dark African hardwood with a beautiful appearance that contrasts strongly with the pale mappa burl. For more background on the species and its working characteristics, the Wood Database’s wenge reference is useful.
My musical explanation is that if walnut is Led Zeppelin, wenge is Bob Seger. You probably recognize that you like it, even if you cannot immediately name it. Unfortunately, working with it was considerably less enjoyable than listening to it.
Preparing and Routing the Parts
I jointed and planed the stock before laying out the templates. If you do not own those machines, buying S2S material, meaning surfaced on two sides, can remove that part of the job. You still need suitably flat stock for the template work.
The basic sequence was:
- Trace each acrylic template onto the prepared wood.
- Rough-cut the shapes with a bandsaw or suitable jigsaw.
- Attach the template securely to the blank.
- Flush-trim the wood to match the template at the router table.
- Join the three shaped components into a complete leg assembly.
This is not a beginner woodworking project. The template simplifies the geometry, but it does not eliminate the risks of routing thick, curved hardwood. You need a good flush-trim bit, a suitable router table, and the experience to use both safely.
My biggest practical recommendation is to rough-cut closer to your layout line than I did. I left too much waste, which gave the router considerably more work than necessary.
The legs were about two inches thick, and my first bit could not reach the full thickness. I routed an initial section, then switched to another bearing arrangement so the already-shaped portion could guide the remaining cut.
Why I Abandoned the Puzzle-Piece Joint
My original template design included an interlocking connection. It was clever, right up until testing revealed that different flush-trim bits produced slightly different fits.
A connection that fit perfectly with one bit could fit poorly with another. I could have solved that by requiring a specific bit, but I would be annoyed if I bought a jig and then discovered my perfectly good router bit was not good enough for it.
I changed to a more universal connection instead. For this build, Domino loose tenons helped align the components and added some strength, and I assembled the parts with epoxy and clamps.
Repairing Wenge and Sanding the Curves
Wenge looks fantastic. Wenge also splinters, chips, and occasionally makes you question your material choices.
One tip blew out where the grain changed direction. I cleaned out the damaged area with a small router and chisels, fitted a wood patch, glued it in place, and reshaped the repair after it cured. Even sharp chisels struggled to leave a clean boundary in that grain.
The finished patch came out much better than the process suggested it would.
I used a Ridgid oscillating belt and spindle sander to refine the curved areas. I would eventually like a larger stationary machine, but that little sander has been genuinely useful for the money, especially in a smaller shop.
After shaping and rounding the edges, I sanded the legs through this progression:
- 80 grit
- 120 grit
- 150 grit
- 180 grit
- 240 grit
- 320 grit
- 500 grit
A very soft sanding pad made it much easier to follow the contours. The goal was a polished feel that suited the hard, dark wood.
I finished the legs with one coat of Rubio Monocoat. I deliberately did not try to match the top’s sheen exactly. With such contrasting woods, a slightly different finish on the base felt appropriate.
A Removable Mounting System Made From Baltic Birch
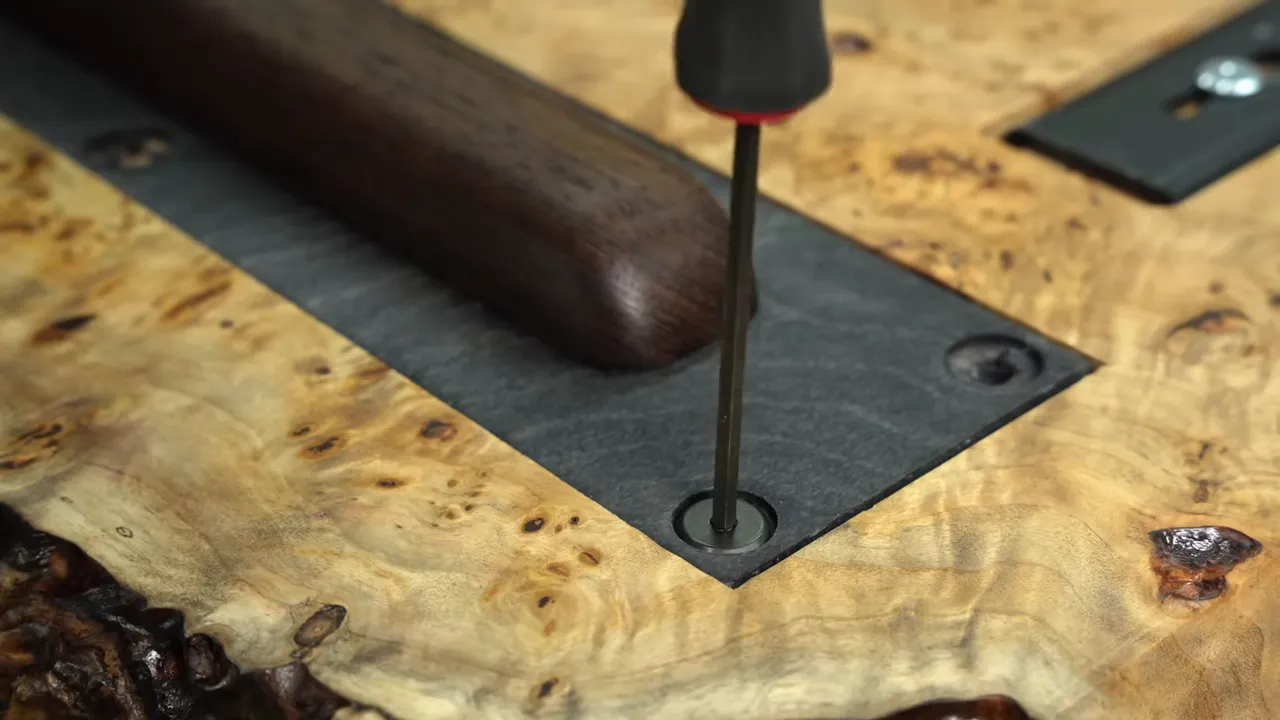
I wanted the legs to be removable without requiring an expensive metal mounting bracket. My solution was half-inch Baltic birch plywood, dyed black with a water-based dye.
I attached each leg assembly to its plywood plate using epoxy and number eight wood screws. The plywood provided a broader mounting surface that could then bolt to the underside of the desk.
The plates needed to be recessed. A thin steel plate can sometimes remain visible without drawing much attention, but I did not want a half-inch plywood edge showing in the desk’s side profile.
I routed pockets for the plates, used a template to locate the mounting holes, and installed threaded inserts in the slab.
Normally, I avoid adhesive on threaded inserts so I can remove them later if necessary. This was an exception. The wood inside the slab was still soft despite the epoxy treatment, so I added adhesive to give the inserts more bite.
Building a Granite-Like Finish With Water-Based Polyurethane
For the top, I chose a water-based polyurethane, a finish my friend Chris at Foureyes Furniture had pointed me toward. Water-based finishes generally add less amber color than oil-based finishes, which suited my goal of keeping this mappa burl relatively natural-looking.
I also needed a substantial film build. The plan was to level and polish the finish, and that requires enough material to sand without cutting through to bare wood.
A Foam Brush Worked Better Than My Regular Brush
My initial brushed coats were not good. There were lap marks and enough surface texture that I knew I had a fair amount of correction ahead of me.
I strained finish through a paint filter before applying another coat, but the application method was still a problem. Friends suggested spraying. Eventually, I would like a spray setup. For this build, I needed an option I could actually use.
A foam brush was a significant improvement. It was not perfect, but it left a much better surface than I had managed with the conventional brush.
Once I was confident I had enough finish built up, I moved to the final leveling and polishing sequence.
Leveling and Refining the Surface
I started the final polishing progression at 600 grit to remove the remaining application lines, then worked through:
- 600 grit to level the surface.
- 800 grit to refine the initial sanding scratches.
- 1,000 grit.
- 1,500 grit.
- 2,000 grit, using dry Mirka abrasive for the final stage.
The critical part was having enough finish underneath the sandpaper. Fine abrasives do not make it impossible to sand through a coating.
The Experimental Final Step: Rubio Over the Polished Film
After sanding to 2,000 grit, I applied Rubio Monocoat over the polyurethane and buffed it out. This is an unconventional combination, and I consider it an experimental technique rather than a standard finishing schedule.
The idea came from my epoxy tables. Applying Rubio over finely sanded epoxy had helped reduce the appearance of haze and fine sanding marks. I wanted to see whether I could get a similar effect over a polished film finish.
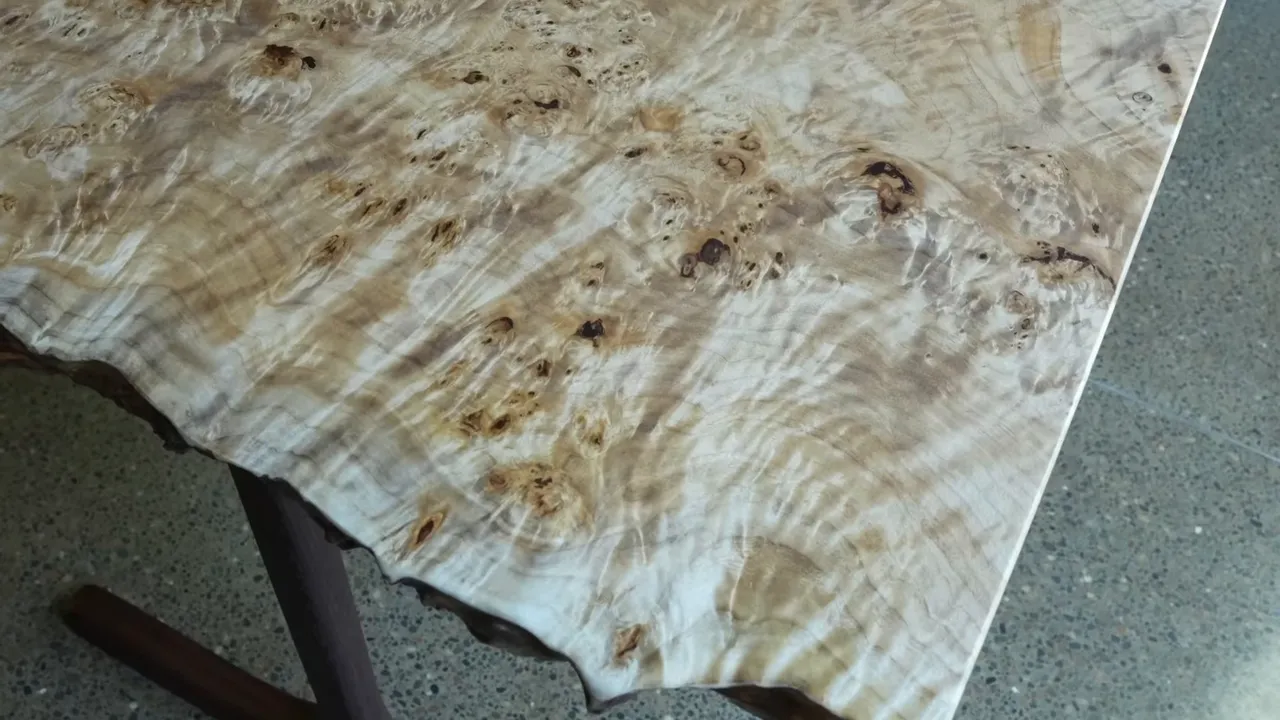
The result was a striking, granite-like appearance. The surface still showed all the figure of the burl, but the sheen had a smooth, polished quality that felt quite different from a typical wood finish.
I had tested a similar approach on a sample about a year earlier, and that sample was holding up well. I also found the surface could be touched up in place to some extent, although I would not turn that observation into a promise that every scratch through a film finish becomes an easy spot repair.
The Finished Desk
The final piece paired a light, highly figured mappa burl top with dark wineglass-shaped wenge legs. The live edges stayed on the short ends, the mounting plates disappeared into the underside, and the base could unbolt for moving.
I even put chairs around it for fun. It worked better as a small table than I expected, although I had built it with a desk in mind.
At the time of the build, I offered the finished piece in an eBay auction starting at one dollar, with shipping across the lower 48 included. Considering the original mappa burl slab cost $3,000, that was certainly one way to keep the business side interesting.
The most useful lessons were less dramatic: soaking soft wood with epoxy does not guarantee a hard interior, template routing rewards careful rough-cutting, and the finish you want may require correcting the finish you actually applied.
I would absolutely use these curved legs again. Wenge and I may need a little time apart first.
|


