I set out to build an outdoor table that would last a thousand years. Apparently, that is a loaded claim, so I revised the target to 1,100 years. Or maybe 100. Really, I want it to outlast me, which seems like a reasonable standard for a piece of patio furniture.
The result is a gigantic concrete tabletop on a reclaimed old-growth fir base. It is not an epoxy river table, and it is not a wood tabletop pretending it will enjoy being left outside. It is something I had never built before, which meant getting help from people who understood concrete and then finding several creative ways to make their advice more difficult to follow.
The goal was simple: a smooth, refined outdoor dining table with a thinner concrete top, a substantial timber base, and multiple lines of defense against the things that eventually destroy outdoor furniture.
Why Concrete Instead of Wood or Epoxy?
I love wood and epoxy. Neither would be my first choice for a large tabletop exposed to the elements. For this project, I wanted the surface to be concrete, but not the kind of concrete table that looks like somebody poured a sidewalk into a rectangle and called it furniture.
I wanted something closer to marble in how it felt: smooth, clean, and pleasant enough that you would actually want to rest your arms on it.
The other goal was to avoid unnecessary weight. I am not going to call the finished top lightweight. At roughly 800 pounds, that would be an impressive abuse of the English language. But a high-strength concrete mix allowed me to use a much thinner section than I could have with an ordinary bagged mix.
The tabletop design had three important parts:
- A 1 1/2-inch-thick perimeter to give the edge a substantial appearance.
- A 3/4-inch-thick center section to reduce the amount of concrete.
- A recessed steel support frame attached afterward to help keep the top from flexing.
For the concrete process, I leaned heavily on Tom at Fishstone and Mike Clifford of Modustrial Maker. This was my first concrete table. It was not their first time answering questions from someone making his first concrete table.
Building the Form, Starting With the Wrong-Sized Sheet
I protected my rolling workbench with plastic and brought over what was supposed to be a 4-by-10-foot sheet of melamine. I had been disproportionately excited about buying a sheet that was already exactly the size I needed.
Then I measured it. It was 49 inches wide.
An extra inch of tabletop was fine. The problem was that I had already sized other form components around the assumption that four feet meant 48 inches. My exciting opportunity to avoid making cuts had created several additional cuts. Woodworking is wonderful that way.
Once the dimensions were sorted out, I attached the perimeter strips. A useful trick from Mike was to draw a reference line for the screws, then countersink and fasten along that line. It is a small thing, but it keeps the screws aligned with the material they are supposed to enter.
Forming a Rounded Edge With Silicone
The finished face of the table would be cast against the melamine. That meant the details inside the form would become the details on the finished surface.
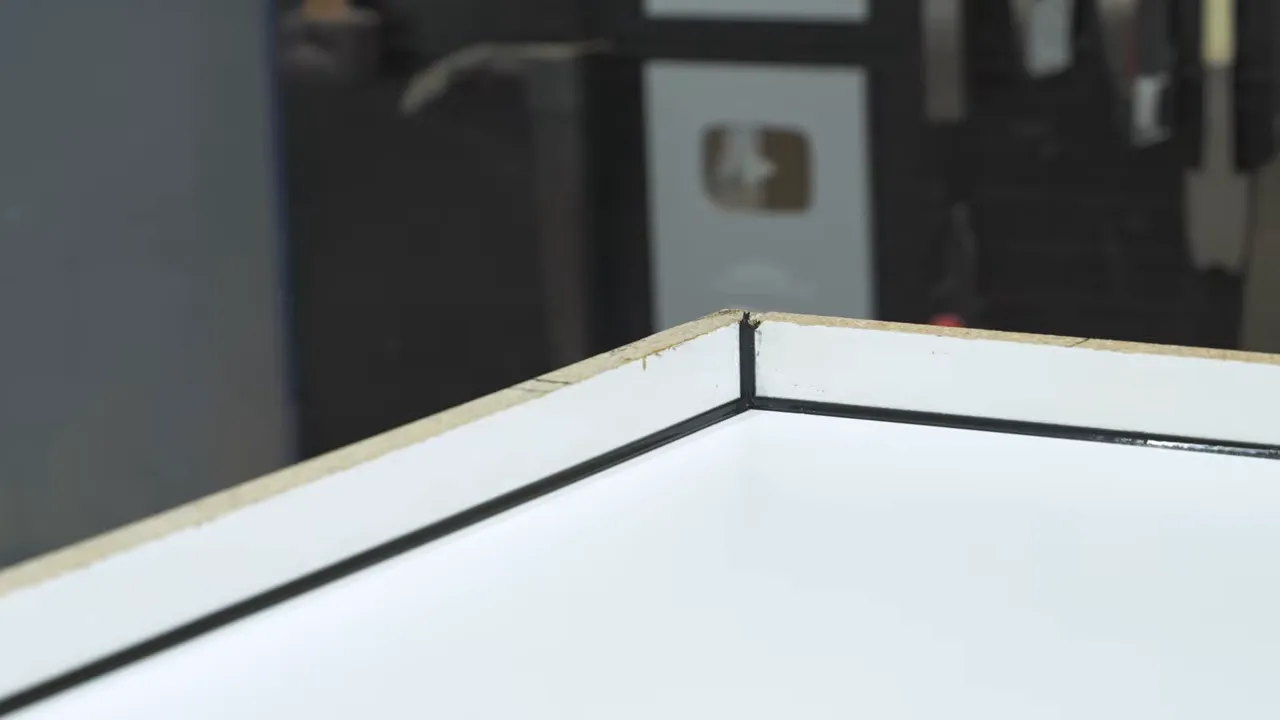
I ran silicone along the inside seams, then shaped it with a rounded fondant tool. Yes, a cake-decorating tool turned out to be one of the more useful pieces of equipment in this build.
The tool left a consistent radius with excess silicone on either side. Once the silicone cured, I peeled away the excess and was left with a clean, rounded transition. That radius would become the round-over on the top edge of the concrete.
Making the Removable Center Insert
To create the thinner center section, I made a large melamine insert that would displace concrete during the pour. Once removed, it would leave a recess for the steel support frame.
Mike suggested cutting its edges at about five degrees, similar to the lid of a jack-o'-lantern, so it would be easier to lift out. I also taped the edges, hoping that would help it release. That part was my idea, not an expert recommendation.
Pressure-treated boards attached across the insert served as handles and bridges. They rested across the form to hold the insert at the correct height instead of letting it sink into the concrete.
I even filled the screw holes on the concrete-facing side with wax to make everything perfectly smooth. I was proud of that detail. Later, it would become clear that I had spent time solving a very small problem while a much larger one waited patiently for me.
The Concrete Mix Was Not a Shovel-and-Water Situation
My previous approach to concrete was to buy a cheap bag, add water, and move it around with a shovel until it looked vaguely correct. This mix required actual measuring. Precise measuring. It was an uncomfortable amount of science for somebody used to describing dimensions as “about there.”
The concrete materials came from Fishstone, and that part of the project was not sponsored. Tom was simply very generous with his time and answered a lot of questions.
I used UltraCast 360, along with pigment, P-120 superplasticizer, and different reinforcing fibers for different layers.
As Tom explained it to me, the mix uses a range of very fine particle sizes, roughly 1 to 500 microns, which pack tightly together. The plasticizer helps produce a fluid mixture without treating extra water as the answer to everything.
The reinforcement also differed between the face and backing layers:
- The face layer used fine PVA fibers while keeping the finished surface smooth.
- The backing layers used alkali-resistant glass fibers for reinforcement.
- Glass-fiber scrim was embedded between layers as part of the reinforcing system.
I am deliberately not turning this into a concrete recipe. The proportions, mixing procedure, and timing need to follow the supplier’s specifications. Knowing enough to ask Tom was considerably more useful than pretending I had become Tom.
A Proper Mixer Was Essential
I nearly tried mixing this by hand. Buying a powered concrete mixer was one of the better decisions I made.
The Ridgid mixer I used was not the fanciest option available, but I could not have handled this pour properly without a suitable powered mixer. Between the measured ingredients, fibers, and repeated batches, a shovel was not going to cut it.
Pouring the Face, Reinforcement, and Thickened Perimeter
The first pour formed the finished top surface, even though it was at the bottom of the mold. I spread that face layer across the melamine and worked it into the form.
The stressful part was deciding when to add the reinforced backing layer. The face needed to set enough that the glass fibers in the next layer would not push through to the finished surface. But it could not be so far along that the layers bonded poorly.
That is a narrow-feeling window when you have never done it before. I checked with Tom and proceeded with considerably more confidence in him than in myself.
After adding the backing mix, I worked it into the face layer carefully, without pushing through it. Then came the glass scrim and additional concrete.
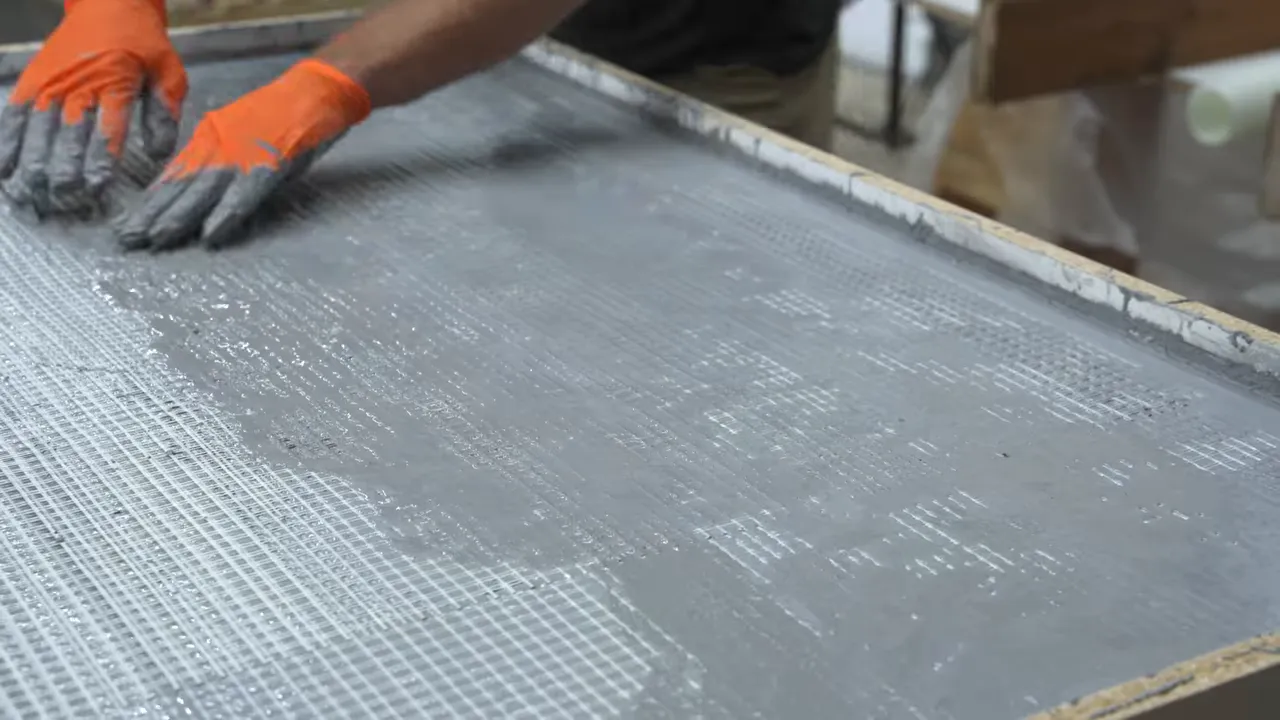
There was no rebar. That was intentional, based on Tom’s recommendation for this particular mix and reinforcement system. It was not a declaration that rebar is bad or unnecessary in concrete generally.
Once the center section had enough material, we lowered the insert into place and clamped its support boards across the form. I then filled around it to create the full 1 1/2-inch-thick perimeter.
I was also advised not to screed this fiber-filled mix like ordinary concrete. Instead, I checked the height and scooped out excess material, knowing there would be some grinding later.
Curing It Warm and Moist
Following the advice I had been given, I covered the concrete with plastic to retain moisture and added insulation to keep it warm.
A single sheet of foam would not fit neatly over the support boards, so I used heavy blankets. That seemed clever at the time. Unfortunately, the blankets pressed into portions of the concrete that were still soft enough to take an impression.
The underside ended up with a few gentle waves. They would not be on the dining surface, but it was a useful lesson: concrete can look set and still be soft enough for your brilliant insulation solution to leave its signature.
Turning Old-Growth Fir Beams Into a Clean Table Base
While the top cured, I moved to the part I understood better, at least in theory: building an enormous wooden base.
I found the reclaimed fir beams at a local antique store. These were legitimate old-growth timbers with extremely tight growth rings. We counted about 195 rings before losing track. Beside a modern construction 2-by-4, the difference was ridiculous.
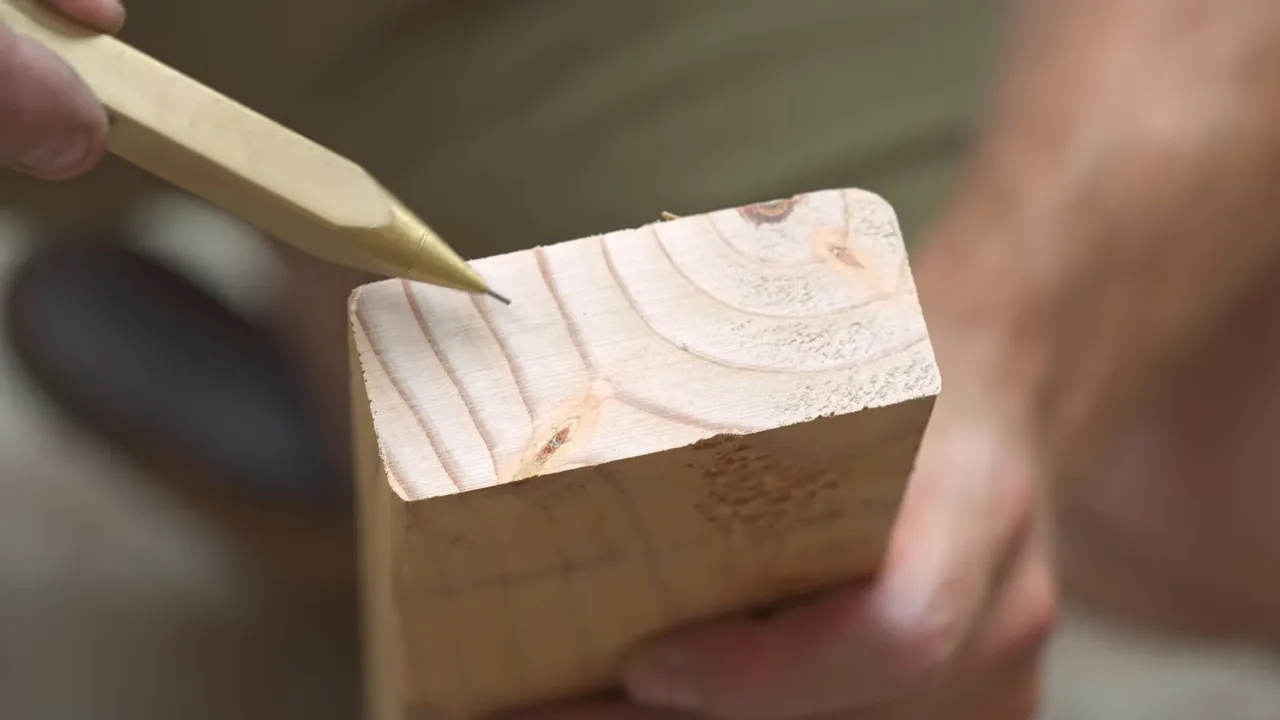
Before buying them, I checked multiple areas with my Wagner pinless moisture meter. The readings were around 12 percent, which looked appropriate for the air-dried material and the outdoor use I had planned.
I wanted the history of old timber without the rough, splintery barn-wood appearance. The beams needed to be milled into clean, accurately sized parts.
The Saw That Almost Cut Deep Enough
Splitting the roughly six-inch beams lengthwise should have been straightforward. I owned a heavy-duty track saw that could cut about 3.7 inches deep, enough to complete the cut from two sides. What I did not own was a long enough track for it.
I had longer tracks for my Festool, and I thought its cutting depth would get me close enough from both sides that a handsaw could finish the little bit in the middle.
The little bit was not little.
After discovering that my rip saw was not making much progress, I tried a good crosscut saw on the remaining rip cut. It worked much better. I appreciate using the correct tool, but sometimes the tool that actually gets the job done is more useful than the label on it.
I also used a massive 16-inch circular saw for the large angled cuts. Why not use that for the long rip cuts? Because I did not have a track for it, and I did not trust myself to freehand a perfectly straight cut down the length of these beams.
The Bug Damage Was Not “Character” I Wanted
Most of the milled timber looked fantastic. One piece had extensive insect galleries.
My first concern was whether the insects were still active. I talked to Aaron at Goby Walnut, who suggested leaving the pieces over a clean surface for a couple of days and checking for fresh piles of sawdust. We did that and found none, which made me more comfortable that the damage was old. It was not a guarantee, but it was reassuring.
I filled the damaged areas with epoxy and moved on.
I could give a speech about how the holes tell a story. The truth is that I wanted cleaner wood, and I did not like the holes. Reclaimed timber does not always let you order exactly the history you prefer.
Cutting and Assembling the Spider Base
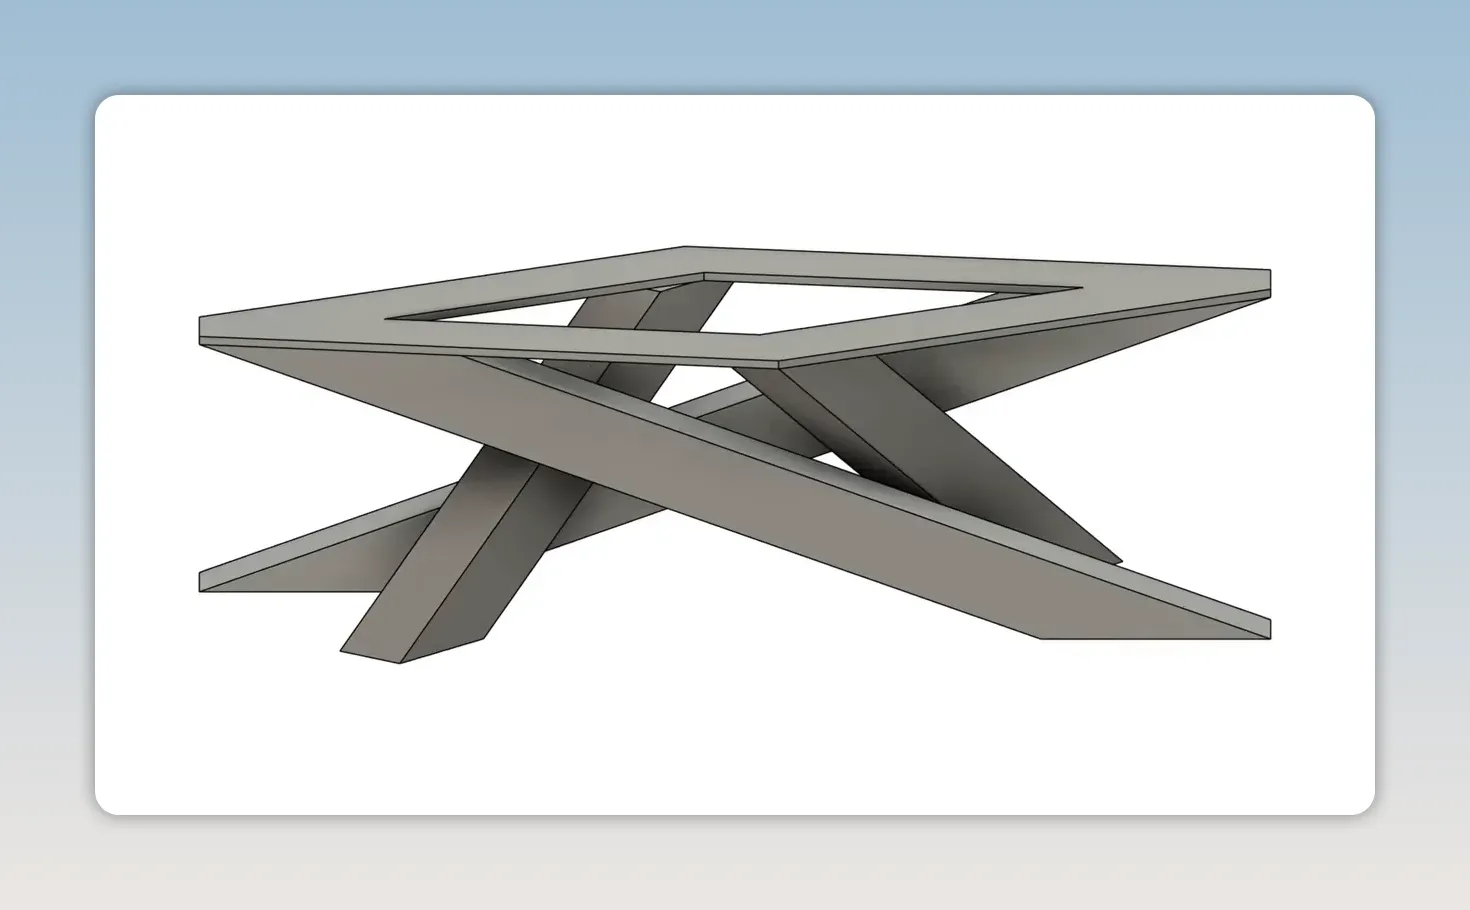
Scott made accurate computer renderings for the base, which gave us the angles and dimensions. The challenge was translating a drawing accurate to a tenth of a degree into cuts made with tools that were not quite that cooperative.
For the large angled cuts, we made a guide fence and a reference piece matching the distance from the saw’s fence-contact edge to the blade: 3 1/8 inches. That gave us a visible indication of where the blade would end up.
Our first big cut broke a little wood off as the heavy waste piece fell away. Scott suggested making a preliminary cut that left about the last inch attached, then making the final cut to the line. That avoided asking the finished edge to survive the full weight of the falling offcut.
Allowing the Mounting Frame to Move
The upper mounting frame was large enough that wood movement needed deliberate attention. Some of the angled connections spanned roughly 18 inches. Gluing everything rigidly across that width was not a good plan.
I used Domino loose tenons with two different fits:
- The center mortises were tight to establish the position of the joint.
- The outer mortises were oversized, and their tenons were left unglued so those portions could move.
The wood would still expand and contract whether I allowed for it or not. Ignoring that movement would simply encourage it to express itself through large cracks.
For clamping the angled parts, I superglued matching offcuts onto them as temporary clamping blocks. The blocks created parallel clamping surfaces. The superglue held well under clamping pressure but was brittle enough that a hammer tap could remove the blocks afterward.
A One-Off Design Requires a Lot of Adjustment
Small angle differences added up to about 1/8 to 1/4 inch of height variation. We corrected that during fitting, but it was a reminder of why experienced furniture makers keep good jigs for decades.
A repeatable jig would make this base faster and more accurate to build. Unfortunately, I enjoy making different things, which means repeatedly denying myself the efficiency of making the same thing.
The spider base also had a structural problem: its dramatic angled parts did not naturally want to stay together. It reminded me of the hammer trusses I admire in timber framing. The appearance is fantastic, but the connections have to do real work.
The Center Keystone and the Pegs That Would Not Fit
The center block was the keystone of the base. Once the legs were temporarily positioned, I could fit that block between them and tie the whole assembly together.
I glued it up from more of the same fir and checked the shape with a plywood template. After a test fit, I softened a few visible areas for appearance.
The first line of defense was thickened marine epoxy. I roughened the bonding surfaces, applied the epoxy, and lowered the block until it contacted temporary height stops. Ratchet straps and clamps held everything while it cured overnight.
The second line of defense was white oak timber-frame pegs. I originally planned one peg per leg, then decided on two. The idea was redundancy, not relying on one adhesive joint to do everything.
A simple drilling jig kept the peg spacing consistent, and tape on the bit marked the depth so I would not drill through the opposite side.
Measure the Pegs, Not Just the Drill Bit
The first peg did not want to go in. I redrilled the hole, got through that problem, and had a couple of successful installations before another peg became unreasonably difficult.
At that point, I did what any responsible woodworker would do: looked for someone else to blame.
The actual problem was measurable. Some pegs were around 0.77 inches or larger, while the holes were approximately 0.75 inches, possibly a little less. Other pegs were smaller and went in normally.
The lesson was to measure every peg before driving it into a finished assembly. Nominal size was not enough.
The troublesome installations left a few small gaps around the pegs. I filled those with waterproof wood glue and sawdust, then trimmed the pegs flush. It was not the flawless fit I wanted, but it was repairable. If the filler needs attention in several decades, I suppose that can be somebody’s afternoon project.
Leveling Feet, Water Clearance, and a Very Ordinary Finish
An outdoor table is likely to end up on a surface that is not level, so I added heavy-duty leveling feet. I recessed them because I did not want the entire base hovering an inch above the patio unless it actually needed adjustment.
A router jig helped locate the recesses and keep the holes straight. Then the router started smoking.
The culprit was pitch in the old fir, which gummed up the bit at high speed. That was a useful discovery, although continuing immediately to the next leg was not my finest troubleshooting sequence.
I chose threaded inserts with broad collars. Those collars spread the load against the wood instead of depending only on the insert’s grip inside the hole.
I also made two smaller changes that mattered for everyday use:
- I trimmed roughly half an inch off the sharp leg tips, because my feet spend a lot of time in flip-flops.
- I added small pads to lift the wood about 1/4 inch off the ground, reducing direct contact with standing water.
After sanding, I finished the base with Thompson’s WaterSeal.
It is not a glamorous answer. It is not an ancient recipe handed down by a mysterious furniture maker in the woods. It is simply a product I have used repeatedly outdoors and keep coming back to. I have had vertical fence surfaces continue to bead water about two years later, and refreshing the finish is straightforward.
Removing the Concrete Form Was the Real Test
Remember the tapered, taped, carefully waxed center insert that was supposed to lift right out?
It did not.
The handles failed to extract it. A battery-powered suction cup rated to hold around 300 pounds also accomplished essentially nothing.
I called Mike, who had dealt with something similar. His suggestion was to make cuts in the melamine so it could come out in sections. A few cuts did not solve it, so I kept cutting and carefully breaking away pieces.
The worrying part was reaching the concrete and finding the insert still stuck against it. All that work could have ended with a cracked slab during demolding.
Eventually, we got it out without breaking the concrete. The melamine did not survive, but I was no longer particularly concerned about its future.
The underside had small air pockets where the insert had trapped air. My beautifully waxed screw holes had not been the limiting factor in surface quality. The perimeter form, thankfully, released without a fight.
Grinding the Underside and Rounding the Edges
With the slab still supported in the form, I used a diamond grinding wheel to bring the underside perimeter down to the melamine reference line. I was surprised by how quickly it removed concrete compared with sanding wood.
I then used diamond hand pads to round the lower edge to match the radius cast into the top.
I had doubted that hand pads would produce a consistent round-over, but they cut quickly enough that shaping it was quite manageable. The entire underside took around 40 minutes.
Concrete dust is not something to casually inhale. For anyone planning similar work, OSHA’s crystalline silica guidance is a better starting point for dust control and respiratory protection than assuming that working outside solves the problem.
Attaching the Steel Frame Without Casting It Into the Top
Nameless Metal Fab welded the support grid from 3/4-inch tube steel with a 1/8-inch wall.
The grid fit inside the recess left by the center insert. On Tom’s advice, I attached it after casting rather than embedding it directly in the concrete. That kept the slab thinner and used less concrete. He also cautioned that differences in how the steel and concrete respond to outdoor temperature changes could contribute to cracking if the assembly were cast together that way.
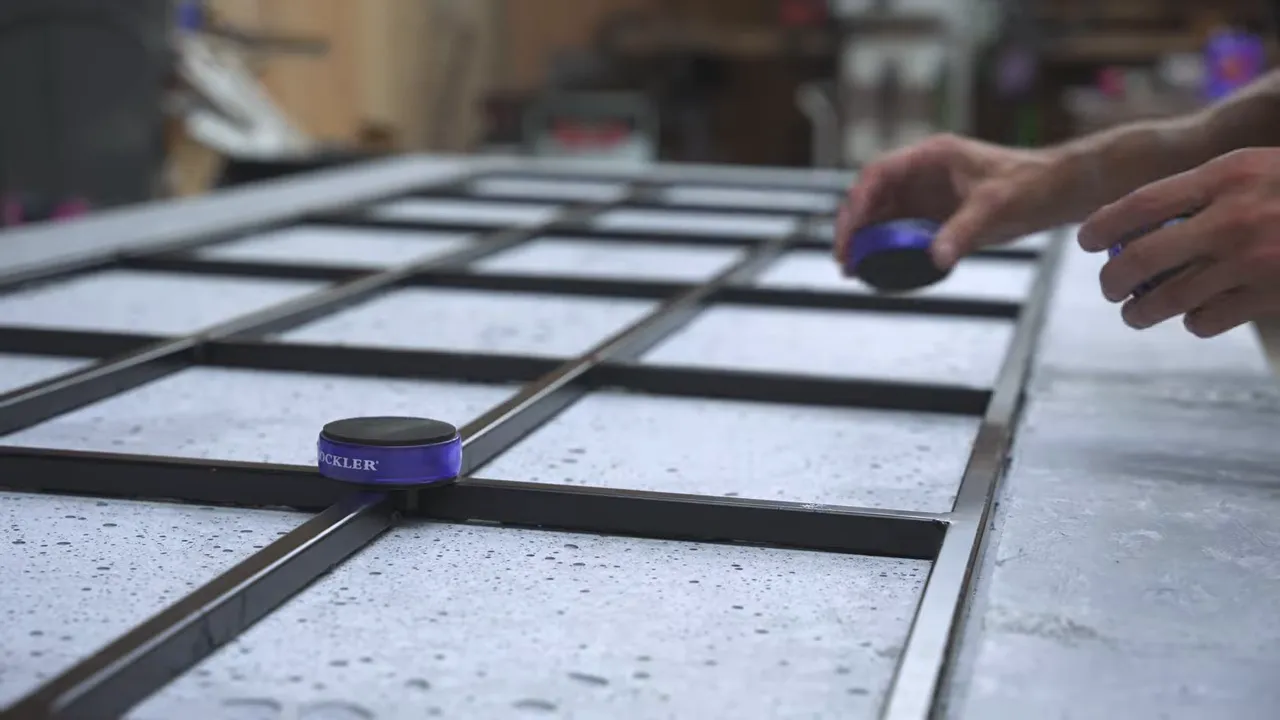
I bonded the frame with the same thickened marine epoxy. The clamps held it in position without being tightened so aggressively that they squeezed all the adhesive out of the joint.
I also epoxied wooden mounting blocks underneath the tabletop. Those gave me attachment points for the base without drilling concrete anchors into a center section only 3/4 inch thick. I did not feel like introducing a new opportunity to crack the slab that late in the build.
Making the Concrete Top Feel Like Finished Furniture
Flipping the slab finally revealed the face. Overall, it looked good, but there were streaks and variations I hoped sanding would improve.
I started with my heavy-duty woodworking sander and 3M abrasive discs. A first pass at 120 grit made the surface feel noticeably better.
Then I had to revise my initial enthusiasm. Sanding concrete with woodworking tools worked, but it did not work quickly. I went through a ridiculous number of discs.
For one table, I was willing to trade time and abrasives against buying a full concrete-polishing setup. If I do more stone or concrete work, dedicated tools will start to make considerably more sense.
Sealing, Then Refining the Surface
I used Fishstone’s two-part concrete sealer in several coats. The initial coat was diluted to help it soak in. Following Tom’s instructions, I applied it generously and kept rolling it as it began to dry.
The cured finish looked good overall, but it had a little roller stipple. I wanted the surface to feel more like smooth concrete and less like a coating with texture.
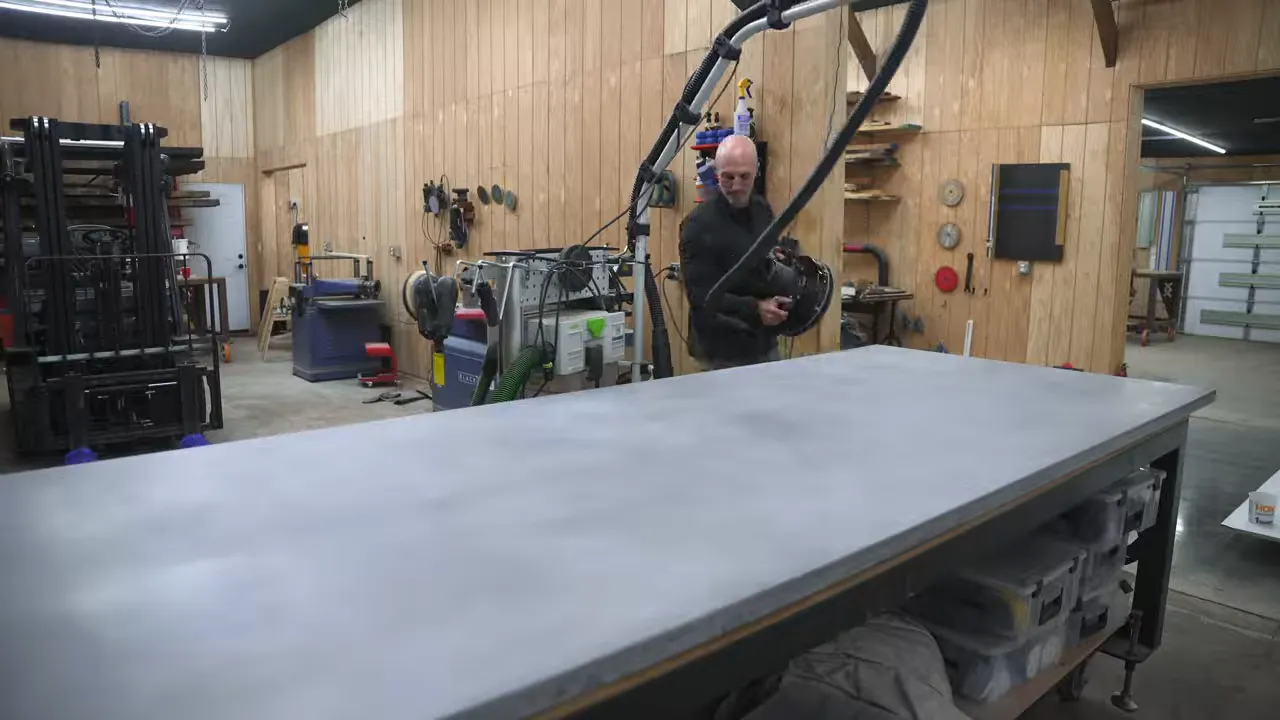
After it cured, I used 600-grit abrasive to knock down the high points. Then I went over the top and sides with a gray abrasive pad, roughly equivalent to 600 or 800 grit, to even out the sheen.
Was that bordering on unnecessary for an outdoor table? Absolutely. But I already had the large sander, and it only added about 10 to 15 minutes.
The Final Protective Layer
I finished the concrete surface with N3 Nano after the sealer and surface refinement. Although it was developed for wood furniture, my testing had shown useful protection on stone surfaces, including concrete, granite, and marble.
The appeal here was protection without adding a visibly thick film. The coating is only about two microns thick, so it does not turn a carefully smoothed surface into something that feels buried under finish.
I also refreshed the base with N3 before final assembly. None of this makes a table maintenance-free or proves it will last a century. It was another layer in a project built around stacking the odds in its favor.
|
Moving an 800-Pound Top Down a 1,000-Foot Driveway
At this point, the table was finished except for the small matter of transporting an enormous, unfamiliar slab without breaking it.
I was advised to carry it vertically rather than flat, which initially felt backward. Then I thought about how stone slabs are normally handled and transported.
We used slings and my tractor to lift it onto its edge and move it down the driveway. This was not a casual operation. Tractor forks behave differently from a forklift, and I was very aware that I had not tested this tabletop to failure. I had no idea whether a minor bump would be harmless or disastrous.
The transport method was what I had available, not a substitute for a properly planned slab-handling setup.
We got the top to the patio, repositioned it, and carefully lowered it onto the base. A few stainless-steel bolts secured it to the mounting points.
After all the measuring, pouring, fitting, grinding, and worrying, the final assembly came down to tightening a handful of bolts. I appreciated that. I had used up most of my enthusiasm for surprises.
A Table Built for a Longer Future
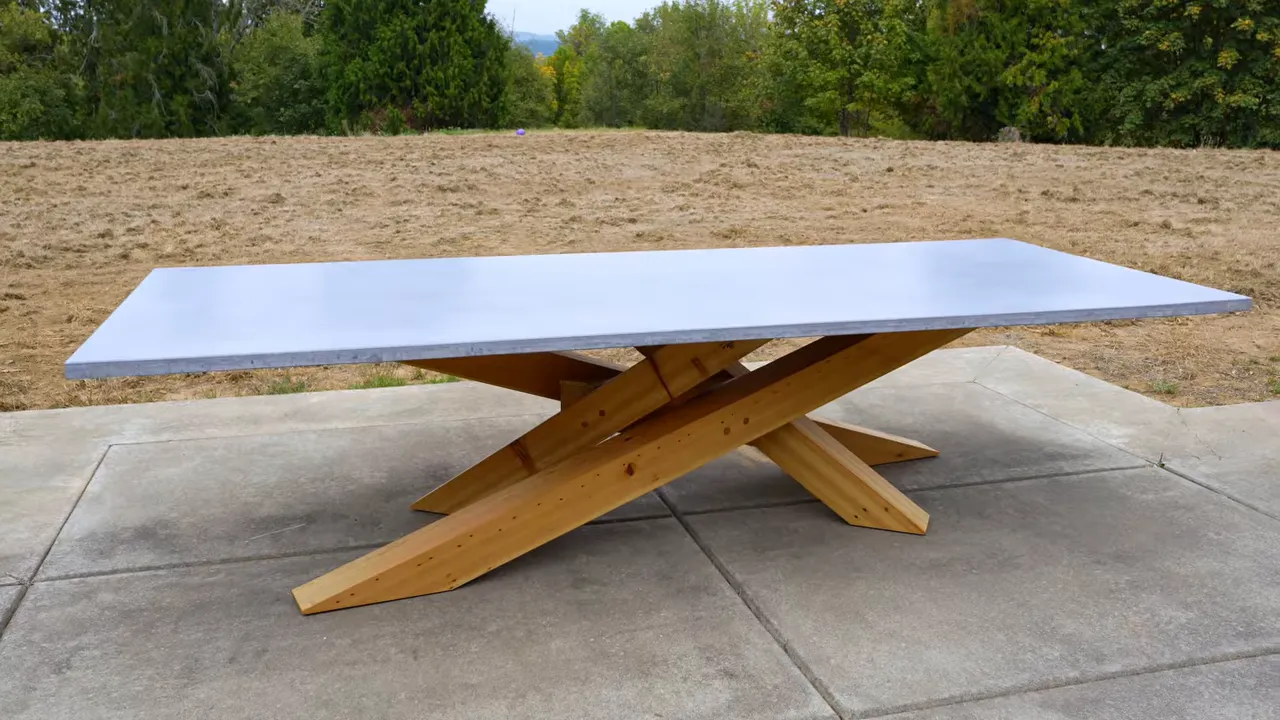
The finished table has the contrast I wanted: a clean, smooth concrete surface over a substantial, angular old-growth fir base. The top looks heavy because it is heavy, but the recessed construction keeps it from being heavier than necessary.
The useful lesson was not that one magic material makes outdoor furniture last forever. It was that durability comes from a collection of decisions: an appropriate concrete mix, the specified reinforcement, allowance for wood movement, strong connections, clearance from standing water, maintainable finishes, and careful handling.
There were other things happening around the build, too. Scott had previously chosen a share of the proceeds from his own table project instead of roughly $2,400 in free materials. When that project underperformed, I offered him the chance to take the free table and give up the potential upside. He took it. Between that and about $1,000 in coffee-fund contributions, he did all right.
I also announced a large woodworking giveaway alongside this project. The first prize included a $2,000 Goby Walnut gift card, up to $500 in shipping, a Shelter Institute timber slick, a Wagner pinless moisture meter, an N3 Wood Pro Kit, my Damascus marking knife, and the epoxy table workshop. There were additional second- and third-place prizes, plus an epoxy table guidebook for entrants. That was a separate thank-you, not part of the construction process.
The more important part of finishing this table was personal. About a year earlier, I had gone through a sudden, painful divorce. A giant piece of furniture does not fix that, but being able to make something ambitious, share the experience, and feel genuinely excited about the future meant a lot. The support I received along the way meant even more.
Of course, there is still the question of why an unmarried 44-year-old with no kids, who does not particularly enjoy entertaining, needs an outdoor table with the footprint of a small apartment.
I am working on a few of those things. Entertaining remains questionable.
Tory loved the table and said the size was perfect. That was a pretty good ending for a project I spent several weeks worrying I would split in half.
Will it last 100 years? I cannot prove that. I built it with the intention that it would outlast me, and for now, I am very happy with that.


