I paid about $1,275 for a giant, rotten walnut cookie without knowing exactly what I was going to do with it. That probably tells you something about my decision-making process.
A cookie is a cross section of a tree, and this one was incredible. It had cracks, voids, rot, and just about every defect you could ask for. Unfortunately, it also had a problem I should have found before spending months turning it into my largest round epoxy table.
This wasn’t a case of walnut being bad furniture wood. It was a case of a spectacular piece of wood being a terrible candidate for the job, and me getting excited enough to skip the most important check.
A Rotten Walnut Cookie and a Collaborative Plan
I found the slab at Goby Walnut while picking up wood for another commission. I bought it, brought it home, and set it aside until a plan came together.
Eventually, Nick from Sawyer Design and I decided to collaborate. I would build the top, he would make a custom bent lamination wood base, and we would auction the finished table and split the proceeds. Simple enough, at least when you say it quickly.
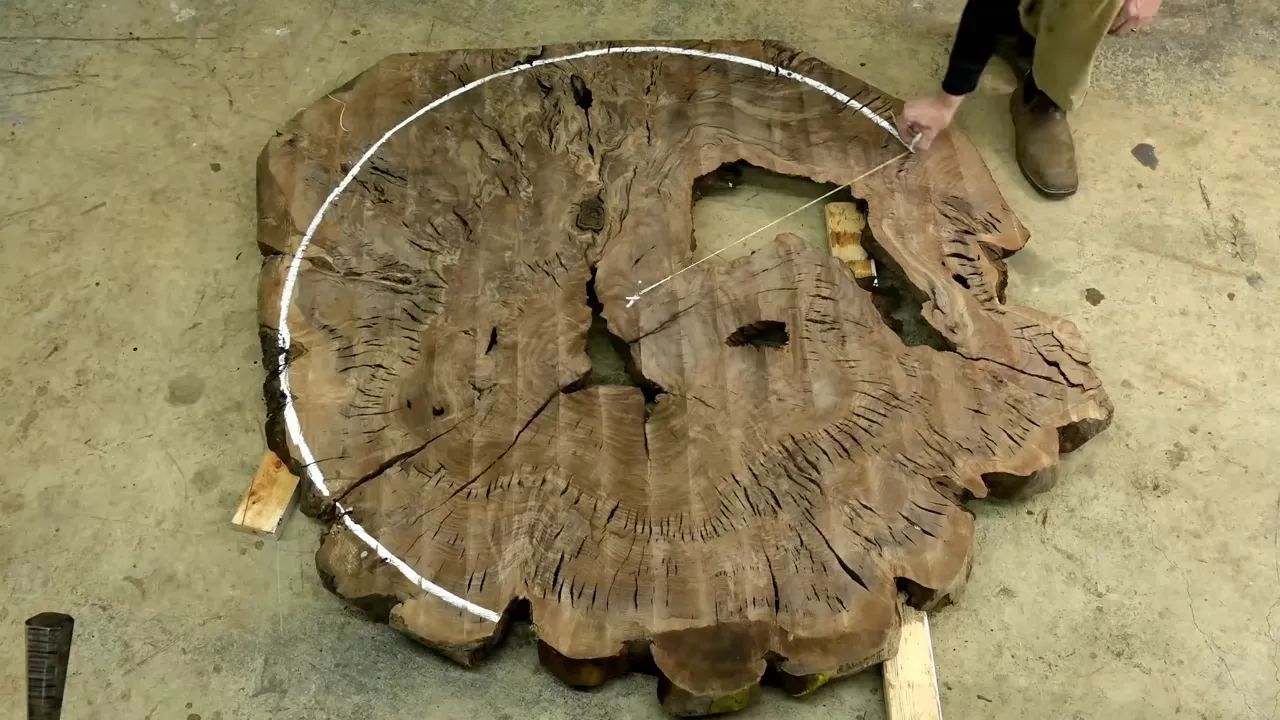
My original choice for the top was the rougher face, with more cracks and voids. Then I started second-guessing myself and considered using the cleaner side. An Instagram poll overwhelmingly favored the gnarlier face, which turned out to be the right call aesthetically.
I also decided to cut away the natural perimeter and make a true circle. Some woodworkers consider removing a live edge practically criminal. I’m not in that camp. A cut edge can suit the design, and it is certainly easier to clean.
How Not to Cut a Circle
I rough-cut the perimeter with a jigsaw, using an extra-long blade that was far too dull. Then I compensated by pushing harder, which is a fantastic way to make the cut worse.
The blade wandered rather than staying square through the thick slab. I kept checking the edge, trying to understand why it wasn’t behaving, when the answer was right there in my hands.
A dull blade and more pressure do not add up to a better cut. This was only the rough shape, so I could correct it later, but it wasn’t my finest work.
Cleaning Cracks With Dry Ice Blasting
The larger voids weren’t the real cleanup problem. I could get into those with an angle grinder and nylon wheels. The trouble was the enormous number of tiny splits and checks that no wheel could reach.
I honestly didn’t know how I was going to clean them all. While I was sharing the process on Instagram, Pure Space Dry Ice Blasting reached out and offered to help.
Dry ice blasting propels small pellets of solid carbon dioxide into the surface. They can reach narrow spaces, and the dry ice sublimates, turning directly into gas rather than leaving blasting media behind. That is a useful distinction from sandblasting, although the material removed from the wood still has to go somewhere.
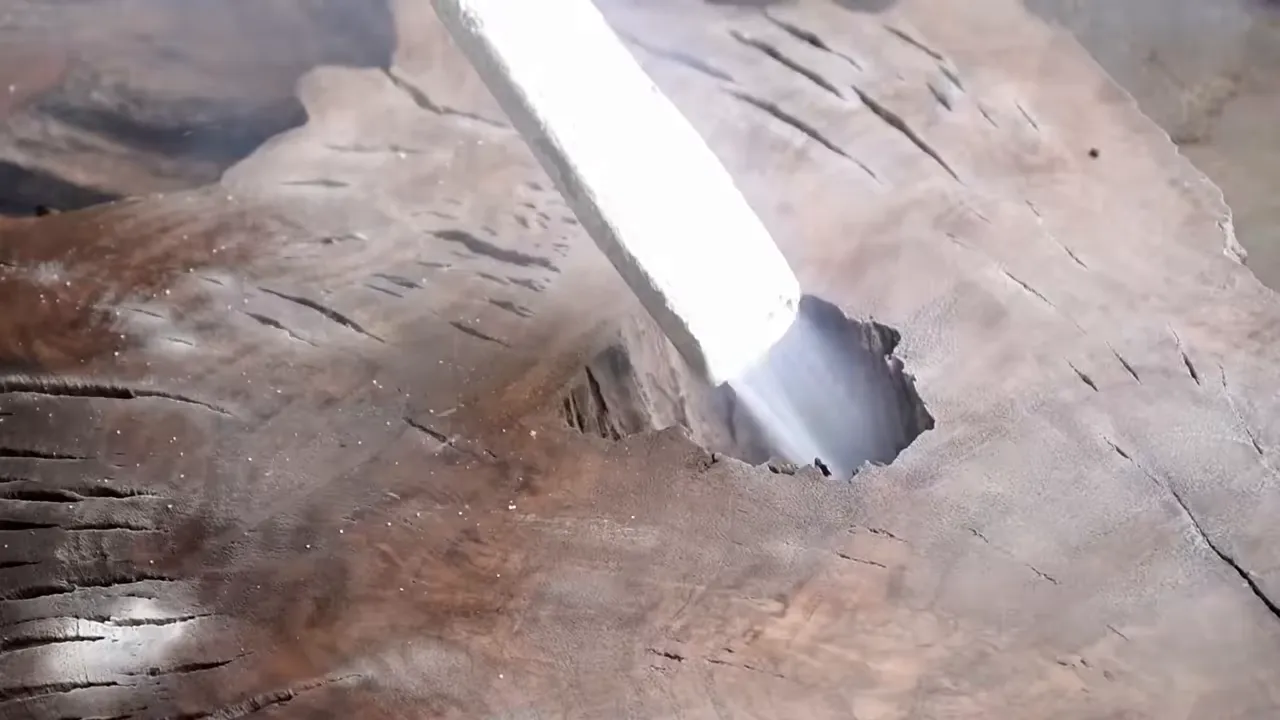
The company normally handled industrial cleaning, including equipment used in food-related facilities. Cleaning rotten walnut wasn’t their regular business, and they weren’t looking to make it one.
When I pressed them about pricing, they described a minimum charge of roughly $1,500 for four hours. It worked well for this unusual slab, but that minimum makes it hard to justify for an average woodworking project.
Why End Grain Needs Sealing Before Black Epoxy
Because a cookie is cut across the trunk, its broad faces are essentially end grain. Think of the wood’s structure as a bundle of tiny straws. Those open ends are ready to absorb whatever touches them.
That becomes a serious problem when the thing touching them is black epoxy.
Without a clear seal coat, the pigmented resin can soak into the wood and create dark stains that go much deeper than you can reasonably sand away. I learned that lesson more than once, apparently because learning it once wasn’t expensive enough.
For this slab, I used Liquid Glass deep pour epoxy to seal the wood before adding the black fill. It was so porous that one application wasn’t enough. I kept brushing on more until the surface was thoroughly saturated, then sealed the other face as well.
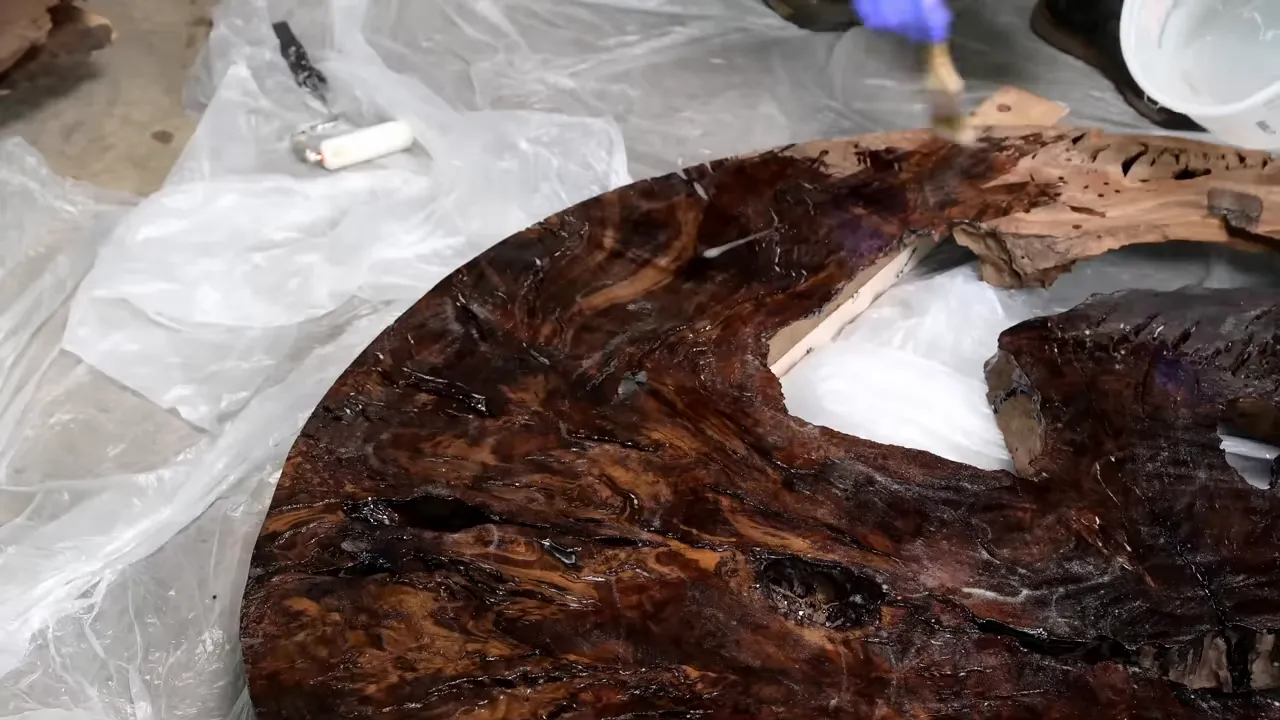
Once the seal coats had cured, I scuffed the surfaces before the main pour. Sealing the wood was essential for controlling pigment absorption, but it did not prove the wood was dry. Those are two separate problems, and I had only dealt with one.
The small details in epoxy work matter enormously. That is why I put together my chapter-based epoxy workshop, with about three and a half hours devoted to the complete process rather than just the interesting-looking parts. It doesn’t guarantee success, as this project rather convincingly demonstrates, but it covers the expensive lessons I wish I had known when I started.
|
Building a Round Epoxy Mold for an Oversized Slab
Before I could pour anything, I had to get the cookie onto the mold base. At roughly 56 inches across at this stage, it was too awkward and heavy for me to lift into place.
My electric stacker seemed like the obvious answer until it hit the ceiling. After a fair amount of staring at the problem, I remembered that the cart I had been using to hold firewood was actually a lifting cart.
The slab barely fit, but the cart got it to the right height. It immediately earned its way back into regular shop use.
I often tell clients that wide furniture is harder to build than long furniture. A four-foot-square top creates handling and machine-capacity problems that an eight-foot-by-two-foot top does not. Round adds another layer of difficulty.
This project was both very wide and very round. Naturally, I had selected the convenient option.
Composite Landscape Edging as a Mold Wall
For rectangular epoxy tables, I like a rigid melamine form screwed together. A large circle calls for a different approach.
I used flexible composite landscape edging around the mold base. I had used this material before because epoxy generally releases from it reasonably well, and it bends into a circle without needing a complicated assembly.
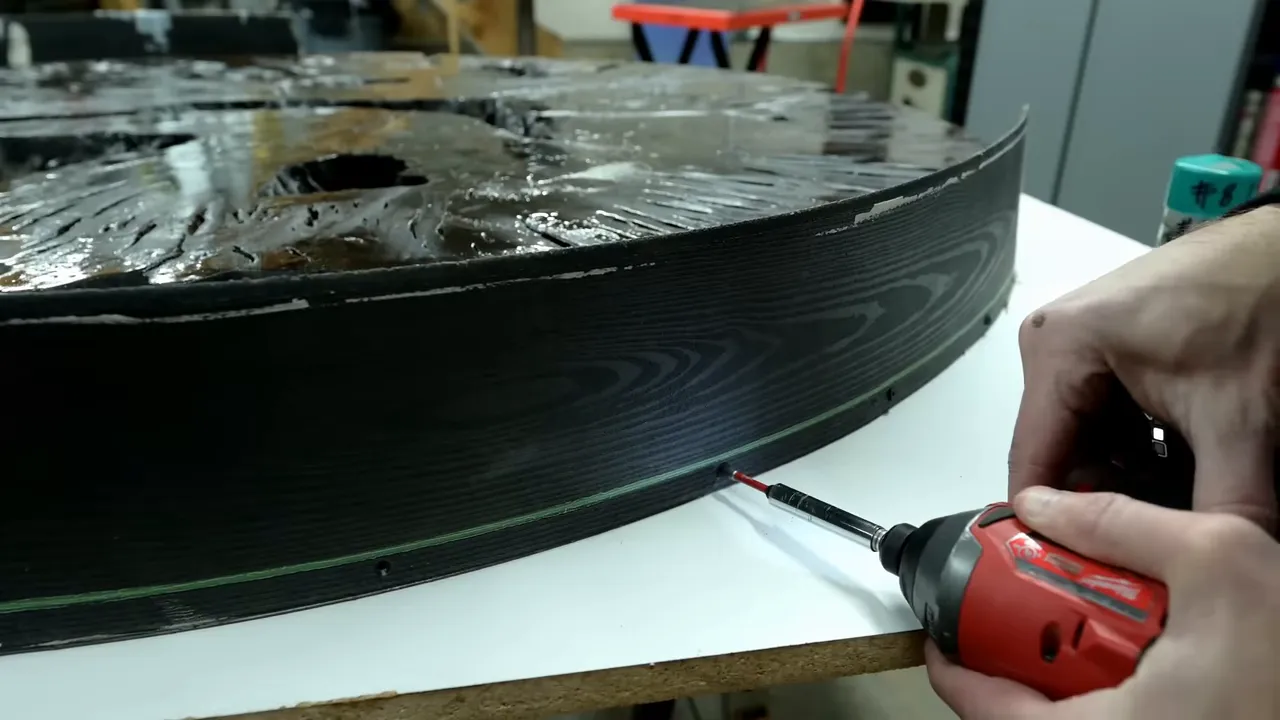
The tradeoff is that it is not as dependable as a rigid form. I fastened and sealed the perimeter, but the pour was about to make it very clear that there were weaknesses.
The Deep Pour, the Leaks, and the Second Layer
The shop was cold, and so was the epoxy. I warmed the containers in a warm-water bath before mixing to lower the resin’s viscosity. In plain English, that made it thinner.
Thinner resin mixed more easily and had a better chance of finding the tiny cracks throughout this slab. Anything the main pour could fill was something I wouldn’t have to repair by hand later.
After pouring somewhere around six to nine gallons, I found a leak. Not a little drip. Seams in the mold were opening up.
I worked around the perimeter trying to stop one leak after another. It was a game of whack-a-mole, except the moles were expensive and heading for my floor.
I eventually got the situation under enough control to continue. The first layer took close to 48 hours to reach a gelled, tacky state in those conditions. That was when I added the second layer of the Superclear deep pour epoxy I was using.
That timing describes this particular pour, not a universal epoxy schedule. Temperature, product, and pour conditions matter, so follow the instructions for the resin you choose.
I also intermixed the pigmented batches to keep the black consistent across the top. A slow-curing deep pour resin gave bubbles introduced during mixing time to escape, but it couldn’t stop air from coming out of the wood itself. I used a torch to pop those surface bubbles while the resin was still workable.
Demolding wasn’t graceful either. The edging broke apart as I pried it off, and I was using chisels against the side of the piece just to make progress. At that point, I thought the release problem was simply another messy part of a messy pour. Later, I found a more embarrassing explanation.
Flattening a 54-Inch Tabletop With a CNC
I knew from the beginning that keeping this table under 48 inches would make my life easier. At that size, it could go through the industrial planer I had access to and come out flat in minutes.
Instead, I wanted to preserve as much of the slab as possible. The target finished diameter was about 54 inches, which meant taking it to Goby for CNC surfacing.
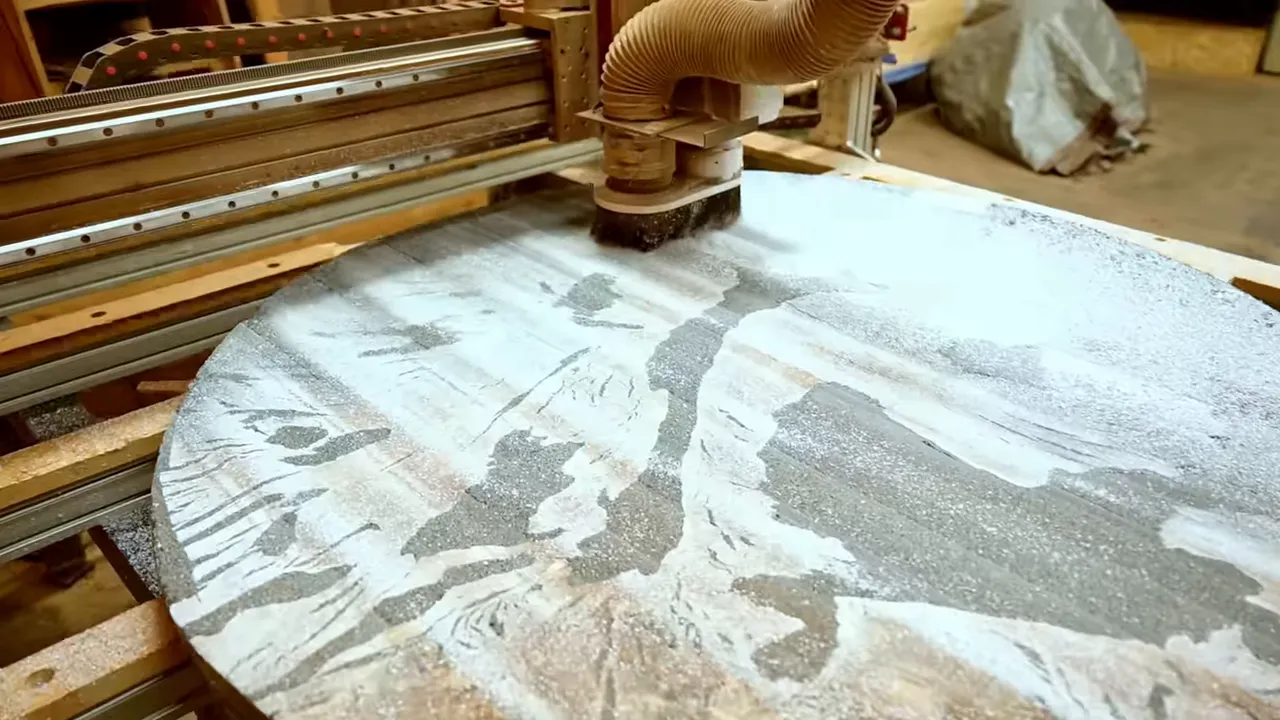
As the excess epoxy came off, the wood finally started looking like the piece I had imagined. The figure was incredible.
Then the CNC found a screw.
I had left several screws in the perimeter while removing the mold. One damaged the cutter’s replaceable inserts. The replacement parts weren’t terribly expensive, and the shop was gracious about it, but it was entirely my mistake.
Before machining a casting, account for every fastener used in the mold. Hoping you got them all is not much of an inspection process.
There was another complication. Without a vacuum hold-down setup for this operation, Goby left about 1/16 inch of material at the bottom of the perimeter cut so the top wouldn’t shift when it broke free.
I hadn’t expected that. Back at my shop, I cut through the remaining material with a jigsaw and later cleaned up the edge with a flush trim router bit.
The CNC also machined a recess underneath for Nick’s base mounting plate, allowing it to sit flush with the underside of the top.
Two Days of Epoxy Touch-Ups
I had overfilled the slab and tried to let the deep pour handle every crack. It still left an extraordinary number of small defects.
For repairs, I switched to Superclear tabletop epoxy. When it was cold, it was thick enough that mixing whipped in a huge amount of air. A small warm-water bath made those little batches much easier to work with.
Initially, I planned to spot-fill only the areas that needed it. Then I remembered previous projects where isolated clear epoxy applications had slightly discolored the wood, creating a leopard-like pattern.
Rather than risk that, I coated the entire top with clear tabletop epoxy before continuing the repairs.
After that coat cured, I used a belt sander to knock it down and expose the remaining pits. There were a lot. Then there were more.

The process became a fairly miserable loop:
- Brush a small amount of black tabletop epoxy into a pit.
- Wait as it sinks below the surface, then add more.
- Let the repair begin curing, then scrape or sand it level when appropriate.
- Find another defect and start again.
I spent about two days on these touch-ups while also removing CNC machining lines. The belt sander was useful for that heavier leveling work, provided I kept it flat and changed sanding direction rather than digging into one spot.
Where I Would Spend Money on Tools
A belt sander isn’t the fanciest tool in my shop, but it is versatile. If you’re starting out, a router with a flattening sled and a belt sander can handle a lot of the rough work on a tabletop. An orbital sander is still important for finish sanding.
Router bits are another place where quality matters. The flush trim bit I used cost more than my first Bosch router. I prefer carbide cutting edges, spiral bits, and cutters with replaceable indexable blades where appropriate.
An expensive router isn’t automatically the best use of your money. Good cutting tools deserve a serious part of the budget.
A Custom Edge Profile and a Very Large Router Bit
Nick contributed something beyond the base: he could make 3D designs, which I can’t. Having a visual made it much easier to discuss the edge profile, and he also put the options to a poll.
We settled on a substantial 22-degree chamfer beneath the edge. The problem was that every bit I owned, and every standard bit I could find, was too small to create the look on this thick top.
Eventually, I realized I could have one made. Orbit Tool Works made a custom cutter that was dramatically larger than my existing chamfer bit.
It was also not a tool I took lightly.
Normally, with a large workpiece, I prefer bringing the tool to the work. This time I used the router table, partly because my most powerful router lived there: a 3 1/4-horsepower Milwaukee. I also preferred that setup to holding this enormous cutter in a handheld router.
I ran the router at its lowest speed, around 10,000 rpm, and took shallow passes. It worked, but this was a specialized operation, not a recommendation to put an oversized cutter into whatever router happens to be available. Cutter and router compatibility, rated speed, and safe workholding all matter. The OSHA woodworking safety resources are a useful broader reference for machine hazards.
For the upper edge, I used a much more ordinary 1/8-inch roundover. That gave the top a clean appearance and a softer edge for forearms.
Finishing the Top and Questioning the Base
Sanding is one of my least favorite parts of woodworking. Unfortunately, it is also one of the most important.
The reward is getting to apply an oil or hardwax oil finish afterward. Days of dusty preparation turn into a few minutes of seeing the color and figure come alive.
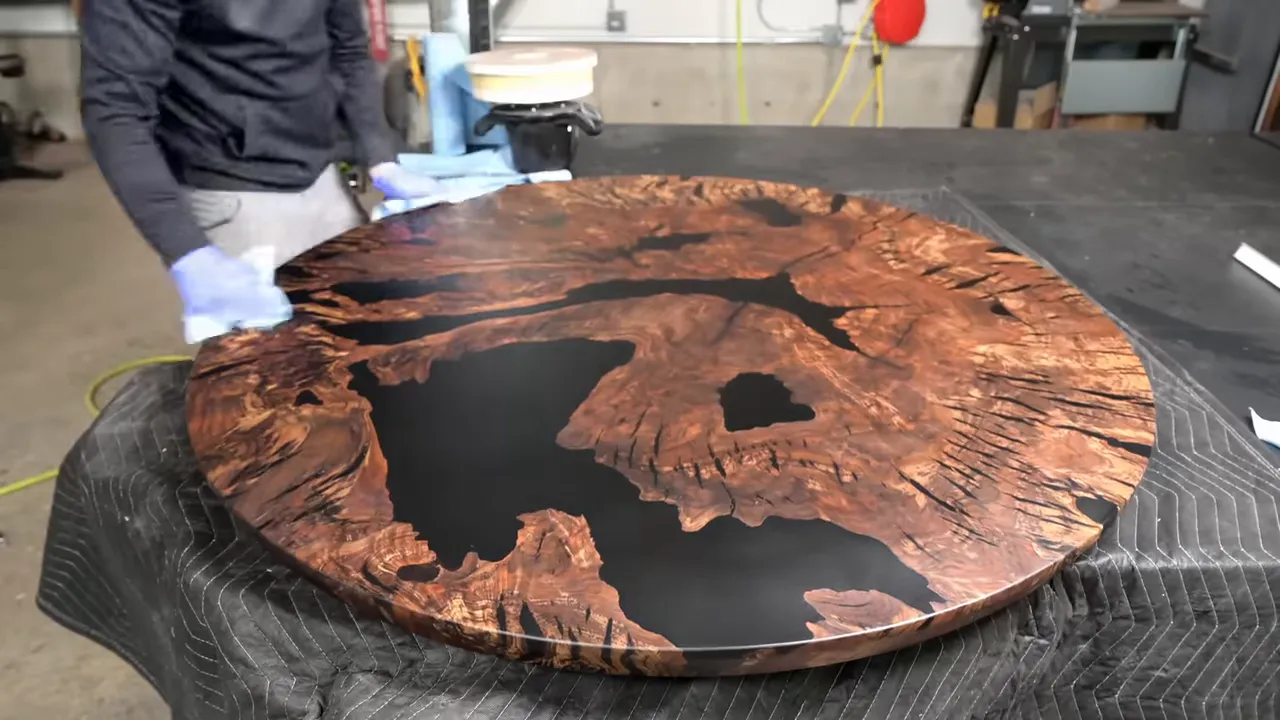
I used Rubio on this top, and at first everything looked good. The walnut had depth, the black epoxy emphasized the voids, and the edge profile helped the thick slab look more refined.
I often use metal bases, but I love a good wood base. The desk my wife and I designed has a bookmatched wood base, built-in brass switches, and a brass light. I eventually had an architect draw up plans for that executive desk because so many people asked about it.
For this table, though, I was getting nervous. Nick’s bent lamination design was visually light, while my top was thick, heavy, and wide. A large diameter also gives any force at the edge plenty of leverage.
Collaborating brought its own challenges. We were both used to working independently, and now we were coordinating fabrication, schedules, filming, and sponsor commitments. The design work was exciting, but the practical coordination was more involved than I had anticipated.
The First Base Wobbled. The Second Was a Tank.
For the first test fit, we marked the mounting holes, installed threaded inserts, and bolted the base into the recessed underside.
Then we turned it upright and found the wobble.
This wasn’t a subtle movement you had to go looking for. A normal bump against the table was enough to make it shake. The base looked beautiful, but the combination wasn’t ready to become somebody’s dining table.
Nick decided not to patch the original base. He rebuilt it.
The second version was roughly 30 percent larger. He worked with an engineer friend, added a substantial steel tube through the center, and switched to Rubio so the finish would coordinate more closely with the top. If the first version was minimalist, the replacement was a tank by comparison.
Meanwhile, I lightly abraded the top with a maroon pad, applied a second coat of Rubio, and brought the top into the house for several weeks.
That time indoors mattered more than I realized.
When Nick returned, the rebuilt base was much sturdier. It still wasn’t completely motionless, but we considered it usable. You can see the work behind that design in Sawyer Design’s table base build.
We had solved the base problem. Unfortunately, I had just noticed something wrong with the top.
The Moisture Problem I Should Have Found First
While handling the tabletop, I felt a slight depression that shouldn’t have been there. My gut immediately went to trapped moisture.
I got my Wagner Orion moisture meter and started checking different areas. Some parts of the slab were dry. Other parts contained pockets of much higher moisture.

For the conditions I was discussing during the checks, roughly 8 to 11 percent was the range I wanted. The important finding wasn’t a slightly elevated reading in one spot. It was the variation across the slab and the wet pockets that made me unwilling to sell it as a finished table.
I should have checked before I bought the wood. Not after cleaning it, sealing it, pouring gallons of epoxy, machining it, repairing it, sanding it, finishing it, and having another craftsman build two bases.
The lesson is not simply to own a moisture meter. It is to use it.
I used a Wagner moisture meter, but the larger point is to check the wood before committing to the build and to take readings across the piece rather than trusting one apparently dry area.
Beautiful grain does not tell you whether a slab is ready for furniture. Neither does a dry-feeling surface. And all the epoxy and finishing work in the world doesn’t excuse skipping that initial check.
A Failed Table, With the Problems Disclosed
The hardest part wasn’t admitting that the top had failed. It was feeling that I had let Nick down after he put so much work into the collaboration.
I offered to pay him for the base. He declined and said he had another project in mind for it. Goby refunded the slab purchase, which helped, but it didn’t undo the work either of us had invested.
My plan changed from auctioning a finished table to offering the top as a wall piece, with its issues disclosed. I wasn’t going to pretend it was a successful dining table just because it photographed well.
Nick and I joked that at least we had gained friendship. Unfortunately, my mortgage lender has shown very little interest in accepting friendship as payment.
I still think this was an extraordinary piece of walnut. That was the problem: I saw what it could look like and got ahead of the basic checks that determine whether it should become furniture at all.
The biggest mistake happened before the first cut. Everything after that just made it more expensive.


