I had a very straightforward goal: get a date with Tori.
She works at the Humane Society, so obviously the sensible approach was to spend weeks building a dining table, auction it off for the animals, and occasionally need her very important input on furniture design. Some people ask someone out. I apparently need a slab of maple and a fundraising strategy.
The charity part, however, was completely serious. One hundred percent of the auction proceeds would go to the Oregon Humane Society. Nothing deducted for wood, epoxy, shipping, or my increasingly questionable use of time.
What started as one new maple resin dining table eventually became four pieces of furniture, including three tables rescued from a $30,000 mistake. Along the way, we had a mold that did not fit, cracks that would not stop drinking epoxy, a sanding lesson nobody wanted, and an experimental repair that actually worked.
And yes, there was a date. But first, there was a lot of furniture to build.
A $2,700 Maple Slab Is a Reasonable Starting Point
I went to Goby Walnut with a quick template and explained the project to Aaron, the owner. Specifically, I explained that I was building a table and donating the proceeds to the Humane Society. I may have left out some of the romantic business plan.
Aaron volunteered to donate the slab: a 10-foot-long piece of maple with a retail value of $2,700. It was an outstanding starting point, and a pretty generous contribution before I had accomplished anything beyond making a flimsy rectangle.
About that template: mine took roughly 30 seconds to build. I have seen people spend an hour making a perfectly square, reusable layout template, and I think that is usually effort spent in the wrong place. You need something that helps you visualize the table, not an heirloom template.
That said, mine could have benefited from another 30 seconds.
Keep the river looking natural
There are plenty of good ways to arrange slabs for an epoxy river table. Everybody has an opinion, and there is no single correct layout. My personal rule is that an obvious straight, sawn edge does not belong inside the river if you can avoid it. That straight line interrupts the organic shape that makes these tables interesting.
I worked through two possible arrangements, including a layout that preserved a long accent piece along one side. Naturally, this required consulting Tori, who had already demonstrated the essential furniture-design qualification of being very put together.
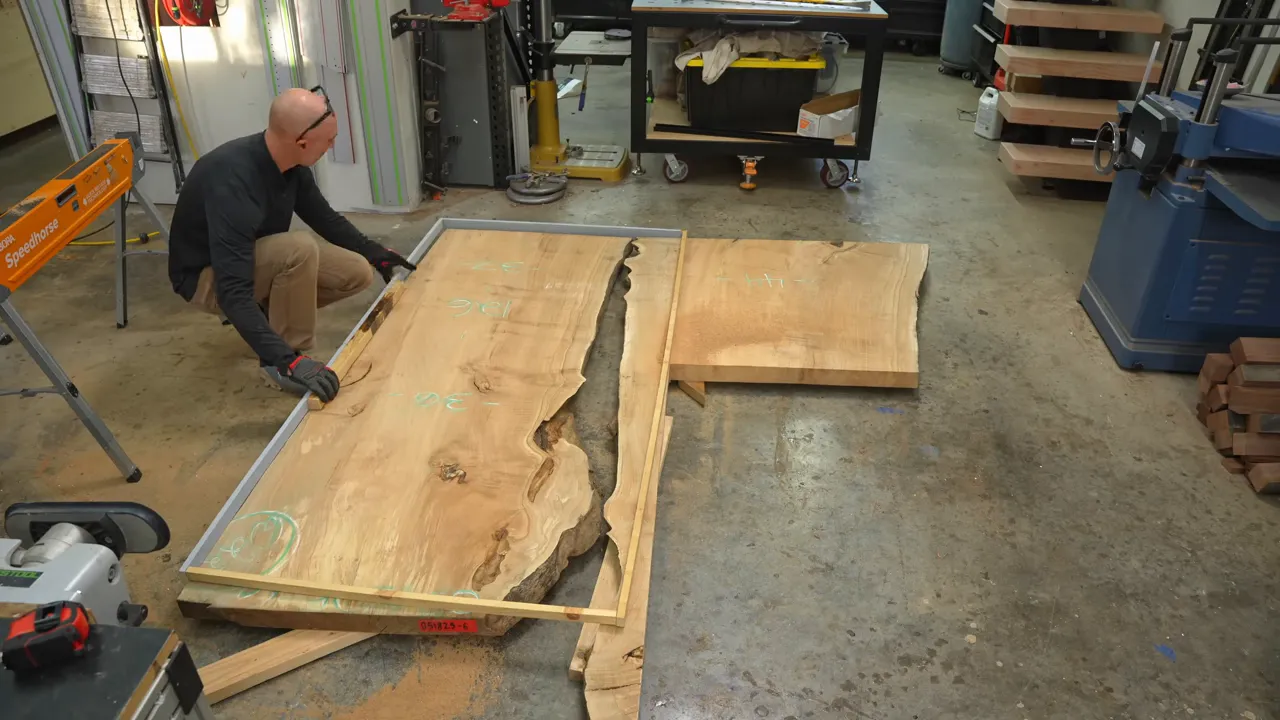
Once the layout was settled, I used a Mafell jigsaw for the cutout. A circular saw would have made it difficult to stop the cut cleanly without cutting into material I needed to preserve. The jigsaw let me remove the main section while retaining that full-length accent piece.
Why the Auction Was Going on MakerBook
Before I was giving away furniture for entirely noble reasons, I was trying to sell it out of my garage. Back then, posting a handmade piece on Etsy felt like it gave you a reasonable chance of finding a customer.
I even tested that idea with a weekend project: build two end tables and try to make $1,000 in profit. I used an alias Etsy shop, did not promote the pieces through my social accounts, and kept the process private until they sold. The pair sold for $1,200 within roughly a week.
I do not think independent makers have that same experience as reliably now. My frustration is with mass-produced items presented as handmade, borrowed photographs, and AI-generated furniture images that promise things a real shop could not actually build. A legitimate maker has a hard enough job without competing against imaginary furniture.
That is why I had been working with a development team on MakerBook, a marketplace intended to connect real makers with real customers.
The important difference is vetting. Makers are checked to help establish that the work they offer is work they personally make, rather than factory products, AI images, or someone else’s portfolio. Not every application is accepted. At launch, the focus was woodworking, with the possibility of expanding later.
For this project, it also gave us a place to run the charity auctions.
One Charity Table Becomes Four
There were three other tables sitting in a rack in my shop, quietly reminding me of one of my more expensive mistakes.
They had originally been part of a $30,000 commission. I got almost to the finish line before discovering that the wood was not completely dry. Not slightly questionable. Some areas had been around 30 percent moisture content.
I replaced the customer’s tables rather than deliver furniture that would continue drying, shrinking, and developing low spots or cracks in someone’s house. The original pieces went back to Goby for a long, slow drying process that took roughly a year and a half to two years.
By this point, they were dry, but I still felt uncomfortable selling them as ordinary new work without addressing their history. So they sat.
Scott suggested adding them to the charity auction. I loved the idea, except for the part where I had to finish three more tables. He then offered to finish them on his own time, including weekends.
That was incredibly generous. It was also the moment this stopped being a manageable one-table project.
The auction now included:
- A new big leaf maple resin dining table.
- A walnut dining table from the original commission.
- A walnut desk from that same project.
- A matching console table.
There is no such thing as a free puppy, and it turns out there is no such thing as three free extra tables either.
Build Oversized, Because Something Will Happen
Before taking the maple pieces over to pour the epoxy, I did a test fit in the mold.
They did not fit.
I apparently forgot to account for the thickness of the form sides. We were off by about an inch and a half in width, and Scott helpfully pointed out that it was too long as well. Excellent teamwork.
This mattered because the wood was already sealed and the mold was already built and sealed. Any meaningful correction meant losing time.
Fortunately, I build these tabletops oversized before the pour. That extra material is insurance against mistakes, movement, and whatever new problem I have not thought of yet. We trimmed the maple pieces to fit and still had enough material to reach the intended finished dimensions. I just had less insurance left.
Later, on a table that had not suffered that particular mistake, I still trimmed away two or three extra inches to reach the final width and shortened the ends as well. The allowance is part of the process, not an explanation I invented after measuring badly.
Sealing Light Maple Before a Black Epoxy Pour
Walnut with black epoxy is a combination I use constantly. Maple is much lighter, and this slab had some softer, punky areas that could absorb pigment and develop staining.
To reduce that risk, I applied roughly three coats of TotalBoat High Performance epoxy to the edges, top, and bottom.
If you let those sealing coats cure, scuff the surfaces that will bond to the river pour. The goal is to give the new epoxy a properly prepared bonding surface, not leave it trying to grab onto a slick coating.
Another approach I have used is to brush on the same deep-pour epoxy intended for the river, allow it to start setting up, then make the main pour. In this build, I described about 12 hours, but that is not a universal recoat schedule. The resin’s instructions and actual curing conditions need to govern the timing.
Clamp the wood instead of trusting weights
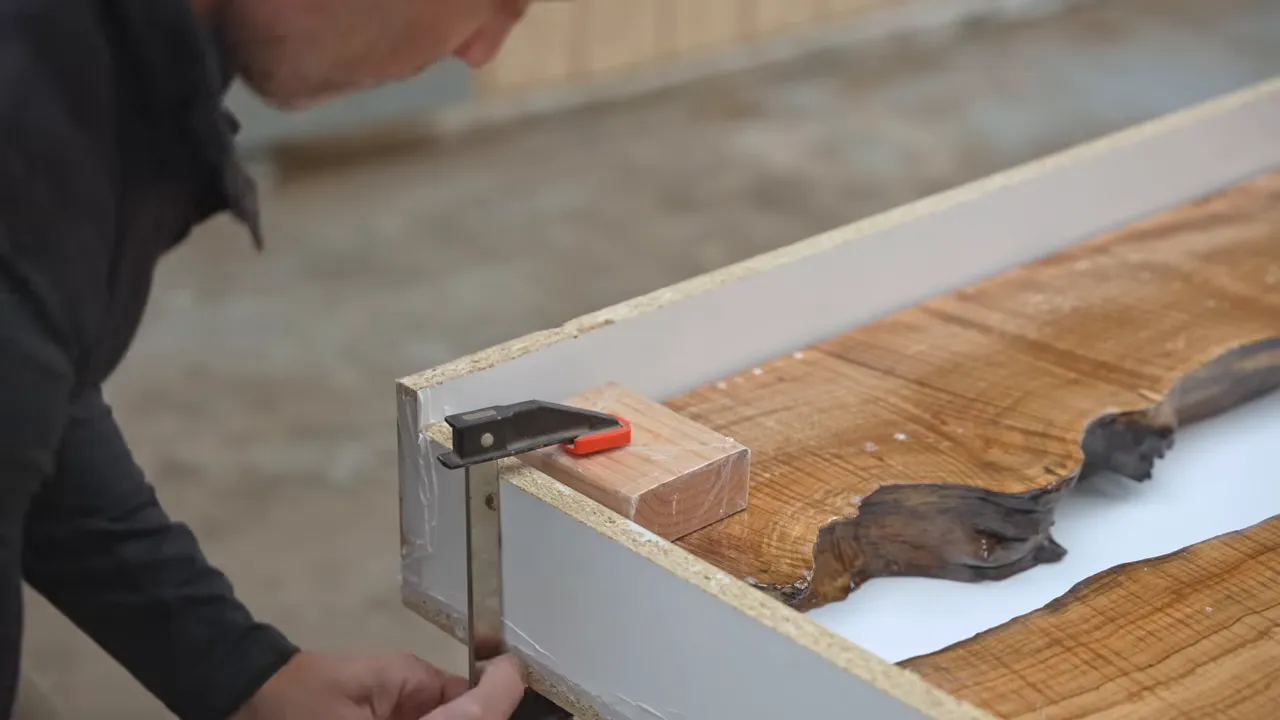
I have tried weighing slabs down in an epoxy mold. Somehow, they still seem to float. Now I clamp them.
The crosspieces here were ordinary 2x4s wrapped in packing tape so the epoxy would not bond them permanently to the project.
Warm resin gently in a cold shop
The shop was freezing and did not have heat yet. Wrapping the resin containers in heated blankets made the epoxy easier to mix by warming it gently. My target was no more than about 85°F.
That is very different from aggressively heating a mixed batch, which would come back to embarrass me later. Follow the resin manufacturer’s temperature guidance, because warmth also affects working time.
I stayed with black resin after giving the color choice plenty of thought and consulting my newly appointed design expert. Whether black was actually Tori’s favorite or I had successfully argued that it was best for the animals remains unclear.
Remember the mold release
I also applied mold release to the melamine form before pouring. Some people say melamine releases epoxy on its own. That has not been my experience, and this is not a step I would skip.
After demolding, I scuffed the surface before taking the top to the planer and wide belt sander. Residue from the release treatment can make the slab difficult to feed through the machine; that preliminary sanding helped it move through more easily.
The Moisture Check That Should Have Happened Years Earlier
Before investing more work in the three older tables, I checked their moisture content again.
Goby had already tested them extensively. The undersides had plenty of small pin marks from those checks, which I referred to as vampire bites. For my own inspection, I used a Wagner Orion pinless moisture meter, checking the species setting first and then taking readings across multiple locations on each slab.
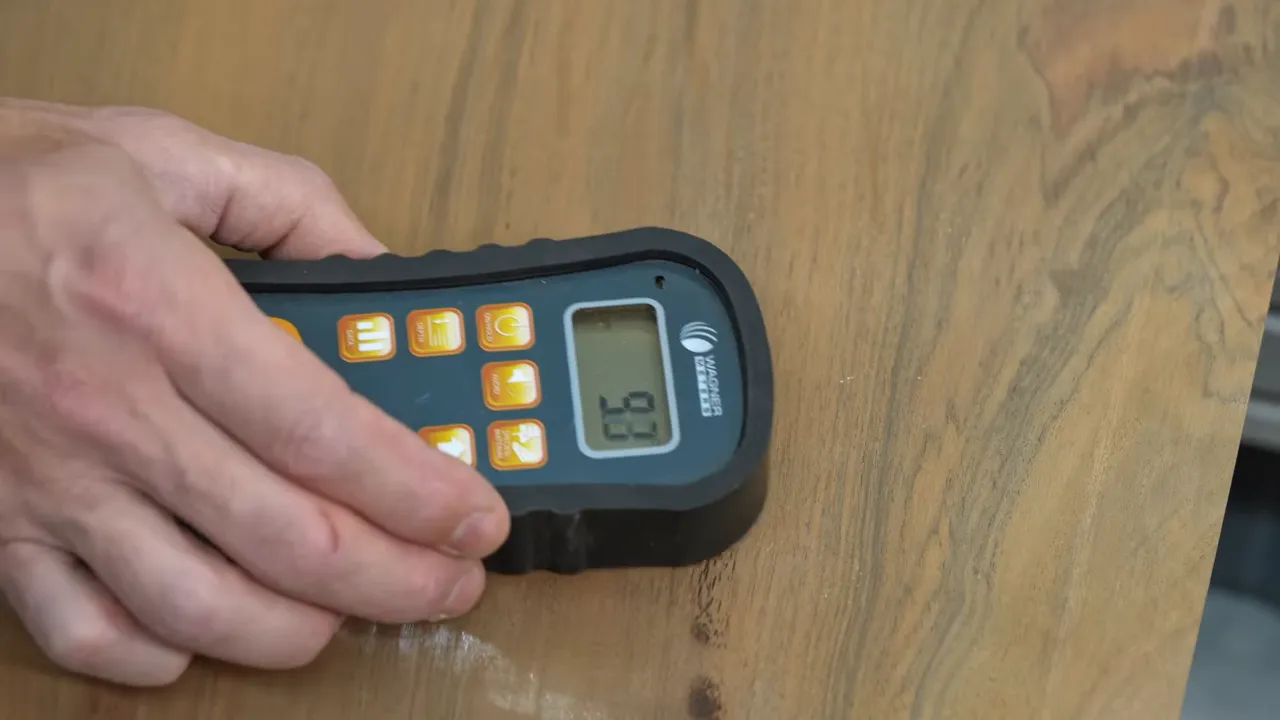
The readings were around 9.0 to 9.1 percent. For my conditions in western Oregon, I am generally comfortable around 8 to 12 percent. That is a local working range, not a universal target for furniture in every climate.
The important distinction was that these pieces were no longer hiding the extremely wet pockets that caused the original failure. Wood exchanges moisture with its surroundings, so the conditions where furniture will live matter too. The USDA Wood Handbook’s chapter on wood and moisture provides useful background on that relationship.
A good pinless meter is an investment. The one I used was in the $500-plus range, but it could have prevented multiple disasters in my shop. If you do not own one, ask your wood supplier to test the material. A good supplier should have the equipment.
Be especially cautious with slabs from informal listings. A bargain stops being a bargain pretty quickly when you discover the moisture problem after pouring the river.
If your goal is a successful woodworking project, check the wood. If your goal is maximum drama, apparently my old method works beautifully.
Why the Older Epoxy Tables Had Cracked
The older pieces had developed small hairline cracks in their epoxy. That is not something I consider normal or acceptable to ignore on a properly built resin table.
In this case, the explanation was fairly clear:
- The wood had been too wet when the tables were built.
- As it dried, it shrank and placed excessive stress on the adjoining epoxy.
- The subsequent kiln drying, with temperatures reaching roughly 180°F, added more stress.
Epoxy can accommodate some normal seasonal movement, but this was far beyond the movement I had intended the material to handle.
I wanted to repair the cracks and disclose them, not pretend they had never existed. Charity or not, these pieces would still become somebody’s furniture.
Hot epoxy gets thin, then gets away from you
For the hairline repairs, I heated a small batch of epoxy to reduce its viscosity and help it flow into the cracks. It did become thinner. It also reacted so quickly in the cup that I had only about two minutes to work before it became clumpy and unusable.
The lesson is not that hotter epoxy is always better. Heating mixed epoxy can dramatically shorten its working time and accelerate the reaction. The gently warmed containers for the main pour and this overheated repair batch were two very different situations.
Flattening Reveals the Next Few Days of Work
We took the tabletops to a planer and wide belt sander in Portland. That trip is roughly a half-day operation once we load up, drive, surface everything, and return.
Eventually, I would love to have a machine like that in my own shop. My current 1,200-square-foot space is what I have started calling the mini shop, with a roughly 7,000-square-foot shop planned for the farm property. Being able to flatten a top in minutes rather than organize an expedition sounds pretty good.
The new maple table surfaced normally. The desk and console had already been flattened during their original build, but I ran them again and recut their edges to check that everything was square after the long drying process.
The older walnut dining table had never been fully surfaced. Several passes exposed a lot of cracks and voids inside the slab.
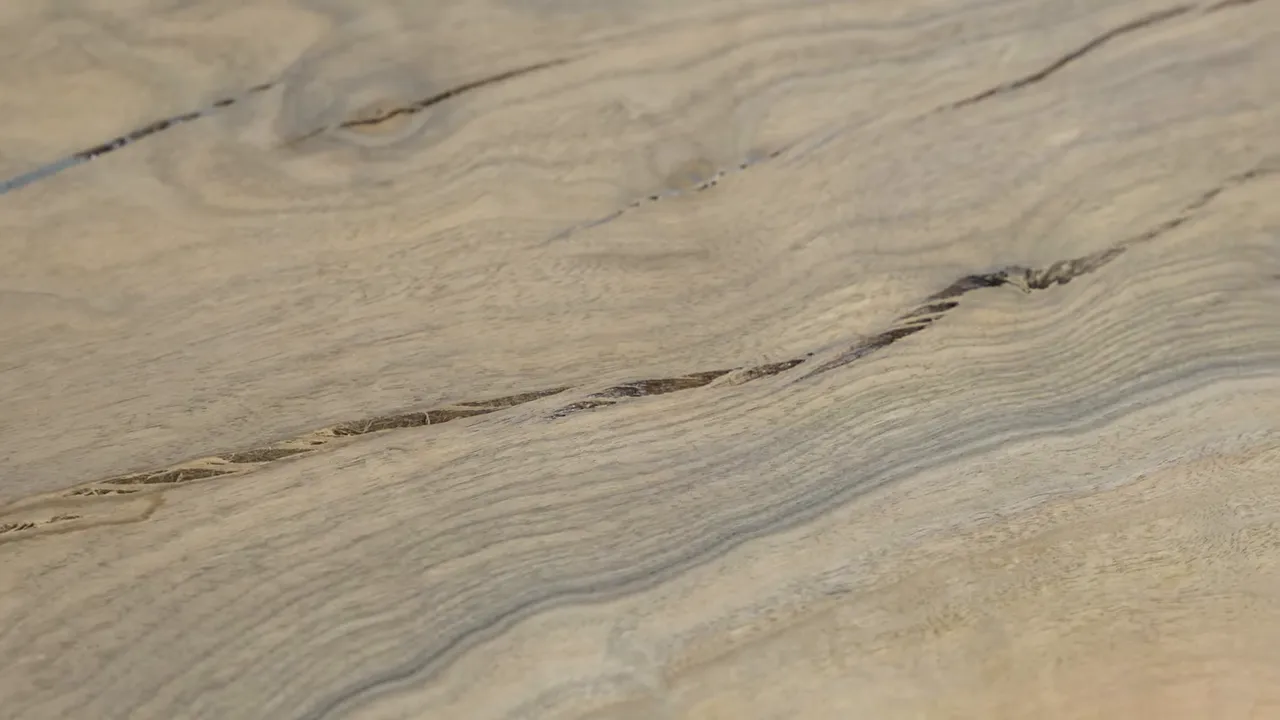
Experience told me exactly what that meant: another two or three days of filling.
Not two or three days of uninterrupted labor, but repeated applications, sometimes two or three per day, while the cracks kept absorbing resin. You fill them, come back, and discover that the epoxy has disappeared farther into the wood.
The upside was character. Once filled and finished, those details would make the slab more interesting. We just had to survive the part where it behaved like an epoxy subscription service.
Clear epoxy can still leave dark patches
One problem became obvious while treating the softer areas: even unpigmented epoxy darkened the light maple.
If I only treated individual spots, I risked leaving dark rings wherever I had made a repair. So I spread epoxy across the table surfaces rather than continuing with isolated patches.
This helped harden some of the moderately soft areas and made the treatment more consistent. It could also bring out some contrast in the figure. Most importantly, it reduced the risk of finishing the table and discovering a collection of obvious repair halos.
Fresh cuts and routed edges exposed more punky wood, so those areas needed additional treatment too. None of it was especially complicated. All of it added time.
Scrape the Repair, Do Not Sand a Hole Around It
A carbide scraper is one of the best tools for leveling proud epoxy repairs. It is also capable of producing a sound that makes you question your career.
I asked Scott to replace the screech with something pleasant, like a bird. His interpretation was not especially relaxing, but it was excellent editing.
The scraper matters because it preferentially removes the material sticking above the surface. A sander is much less selective.
Scott learned that while repeatedly filling and sanding an imperfect edge. He ended up with a slight dip where too much material had been sanded away. His theory was that the thicker repair epoxy had not penetrated all the small holes, so each round of leveling revealed more gaps and prompted another round of filling.
The fix was to trim a little off the edge and start again.
I have made much worse versions of that mistake, including sanding an eighth or a quarter inch into a tabletop. So this was not a disaster. It was a good reminder:
- Use a scraper or rasp to remove the bulk of a raised repair.
- Bring the patch close to flush before reaching for the sander.
- Use sanding to refine the surface and match the surrounding scratch pattern.
In this kind of repair, the sander is not the tool I want doing the heavy material removal.
A New Edge Profile, a Dent, and Some Actual Progress
One benefit of building without a predetermined customer is getting to experiment.
I had owned an edge-profile router bit for two or three years without being brave enough to use it on a full table. After testing it on a small sample, I finally committed to it on the maple dining table.
I finished the top with a quarter-inch roundover, and the combination became one of my favorite edge profiles I have ever done.
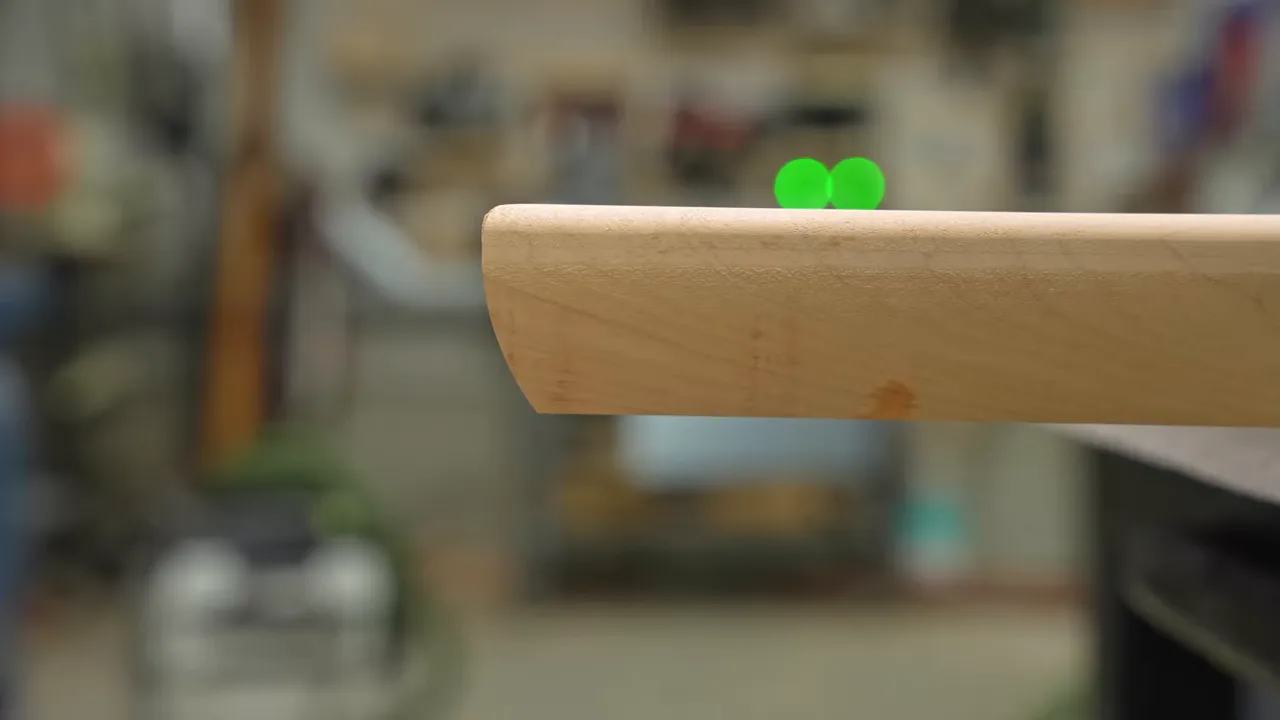
For a thinner walnut table, I chose a 22-degree chamfer instead. The different thickness called for a different treatment rather than automatically repeating the maple profile.
Somewhere along the way, the maple also acquired a fairly substantial dent. We dampened the area, put a towel over it, and applied an iron to raise the compressed wood fibers. That brought the dent up enough that light sanding took care of what remained.
That technique was useful for this dent in unfinished wood. It was not a replacement for filling a chip where material was actually missing, which, unfortunately, was a distinction I would get to demonstrate shortly.
The date happened before the tables were finished
I had planned to maintain suspense until after the auction. Then Tori agreed to go out that weekend, which was very inconsiderate of my narrative structure.
Scott pointed out that if I wanted additional dates, we should probably still finish the charity furniture. Fair.
The first date went really well, and we arranged a second. My original objective was progressing considerably faster than the epoxy repairs.
Donated Bases and a Small Hardware Detail Worth Catching
All four table bases came from Flowyline Design. I have used their metal bases on a lot of projects, including this same stable, clean-lined dining-table design a few years earlier. It makes a nice alternative to the spider bases I also use frequently.
When I explained the auction to Alex, the owner, he volunteered to donate all the bases.
The support for this project was pretty remarkable:
- Goby Walnut donated the maple slab.
- TotalBoat supplied the epoxy and covered shipping for the tables within the lower 48 states.
- Flowyline supplied the bases for all four pieces.
- Scott contributed a substantial amount of his personal time.
During base installation, I caught another detail that can spoil an otherwise finished resin tabletop: shiny threaded inserts installed into epoxy.
Depending on the resin and depth, a bright insert can become visible just below the top surface after finish is applied. You may not notice it while sanding. Then suddenly there is a little metallic flash under your beautiful river.
To prevent that, I covered the inward-facing end of the insert with black tape or very heavily pigmented black epoxy before installation. The point was to conceal the reflective metal from the top, rather than discover it after finishing.
The Activated Charcoal Patch That Saved Another Round of Repairs
Just when the remaining tables seemed ready, I found a substantial chip.
There had been a similar surprise on the desk. Naturally, I considered whether Scott was sabotaging the furniture. It certainly could not have been me recklessly flipping a large tabletop by myself.
For the record, Scott was not sabotaging the tables.
The practical problem was filling a defect on a vertical edge without standing the whole top on end again. Ordinary liquid epoxy would run out. I had used silica thickener before, but I was unhappy with the small bubbles it left in these repairs.
This time, I tried activated charcoal.
- I mixed a very small batch of epoxy.
- I added activated charcoal until it reached a thick, syrupy, tree-pitch consistency.
- I applied it to the missing area, building up just over an eighth of an inch.
- I let it cure for about 24 hours.
- I removed most of the excess with a rasp, then lightly sanded to match the rest of the table.
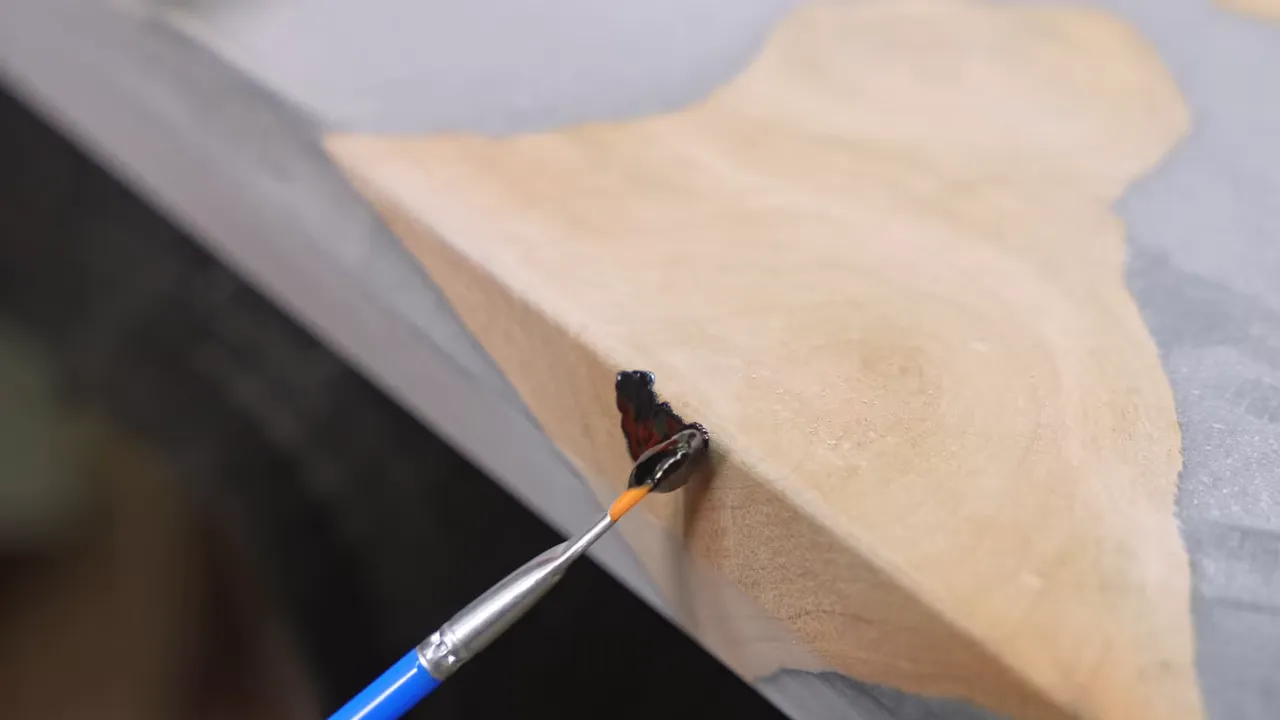
For this patch, the mixture stayed where I put it and did not leave the microbubbles I had experienced with the silica filler. Once cured, the shaping and sanding took only about five minutes.
This was an experimental black repair, not a clear filler or a general-purpose replacement for every epoxy application. But for these thicker edge defects, I was extremely happy with it.
Finishing Four Tables Takes More Than Four Times the Patience
We decided to finish the maple table completely and move it out of the way before tackling the others. Four large pieces in a small working area get old pretty quickly.
After sanding, I applied the Vesting LED oil I use on most of my tables. It is a hardwax oil finish that cures under the appropriate UV light, which still feels a little like woodworking from the future.
The same basic finishing process followed on the remaining pieces once the final patches were done. Each table also received two coats of N3 Nano.
The part that is hard to convey is how much time lives between “basically done” and actually finished. A newly exposed crack. A soft section along an edge. A chip. A repair that needs another day to cure.
Sometimes the difference between ordinary work and excellent work is simply being willing to do the tedious thing the next person would skip. In this case, that meant repeatedly filling tiny defects until there was nothing left to reasonably improve.
Think about cleaning after the finish is on
Furniture care matters too. I am not a fan of cleaners that leave waxy buildup or contain solvents that are incompatible with the existing finish. A product can make furniture look better initially without being the right choice for its long-term care.
That concern was behind my N-Zero wood cleaner, a probiotic formulation developed without the damaging solvents and harmful VOCs I wanted to avoid. The goal was everyday cleaning without compromising the finish. Regardless of the cleaner, compatibility with the actual finish should be the starting point, not just how shiny the surface looks afterward.
Four Finished Tables, Full Disclosure, and One Very Good Cause
Once we moved all four pieces into the new shop, I could finally appreciate them as furniture instead of a rotating schedule of repairs.
The maple dining table was beautiful. The new edge profile, figured wood, and black resin worked together even better than I had hoped.
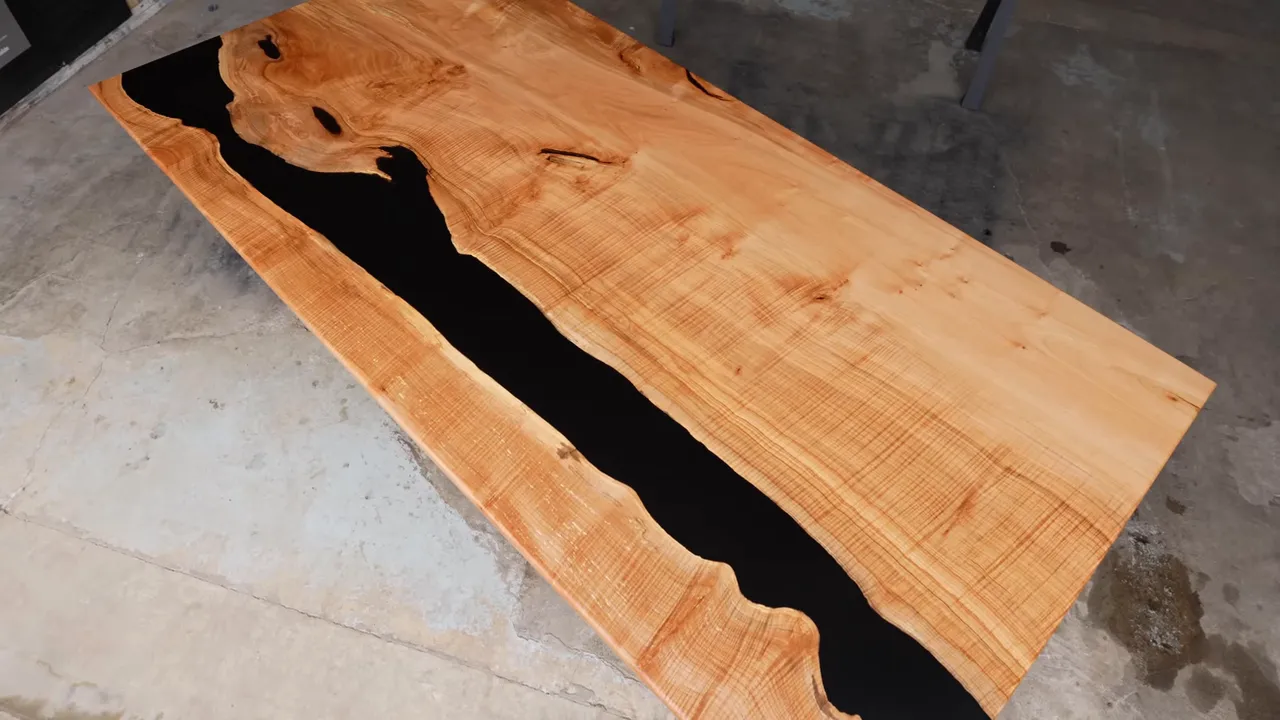
The big walnut dining table might still have been my favorite. Even with its history, the figure and overall composition were outstanding.
The repaired hairline cracks were no longer open, but traces of their locations could still be visible. I wanted that disclosed clearly. These were repaired pieces with a known history, not furniture I intended to pass off as having never had a problem.
The auction plan was to start with the maple dining table to make sure the new platform worked properly, then follow with the other three pieces. The proceeds were committed to the Oregon Humane Society, with no money kept back for me.
|
We ended up with four beautiful pieces, generous help from several companies, and furniture intended to raise money for a great cause.
I also got a second date.
I would like to claim the tables were the goal all along, but I think we have established that my commitment to honesty is inconveniently strong.


