This project had everything I could want in a woodworking build: a giant slab, complicated joinery, fire, clear epoxy, and a genuinely exciting design. It also had failure, rejection, and about six weeks of opportunities to recognize a problem that I kept pretending was not a problem.
Meanwhile, I was getting divorced. Really.
Somewhere between carving cracks into a 500-pound piece of white oak and sanding around those same cracks with a modified pencil, this became a fairly accurate representation of my life. Things looked promising. I got attached. I ignored some warning signs. And eventually, I had to admit that looking good on the surface was not enough.
A 500-Pound Slab With Plenty of Personality
Starting a woodworking project can feel a lot like starting a relationship. You can stick with what is familiar, or you can try something exciting that might be terrible for you.
For me, familiar is a nice walnut slab. I know how walnut behaves. I like walnut. There is absolutely nothing wrong with walnut.
This time, though, I had an approximately 8-foot-long, 4-foot-wide, 500-pound slab of white oak. That was pretty freaking exciting.
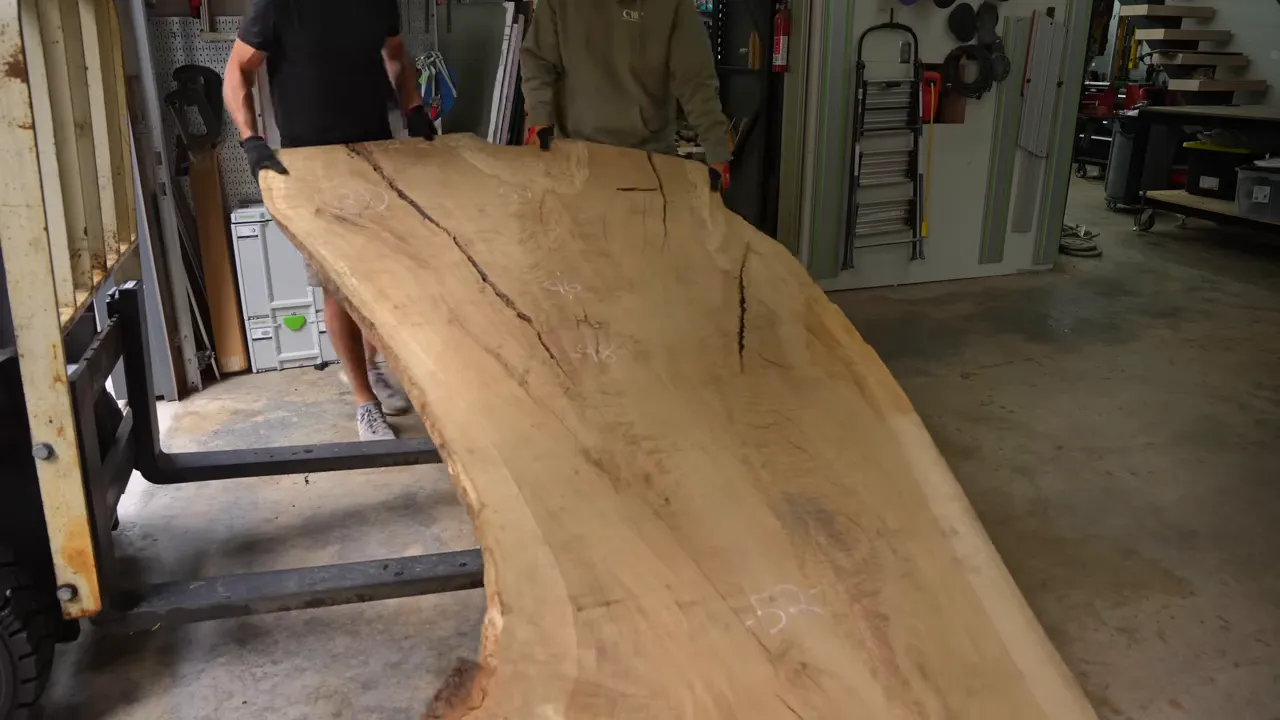
White oak is considerably harder than the black walnut I normally work with, which becomes very apparent when you start cutting it. For those long cuts with the grain, I used a proper rip blade with a low tooth count. More teeth are not automatically better. A blade intended for ripping is the right choice for that particular job.
The slab also had a chainsaw scar and a whole network of cracks. Those were not things I wanted to hide. The chainsaw mark was part of its history, and the smaller cracks followed patterns I could never convincingly invent with a carving tool.
My plan was to emphasize all of them: open the cracks, burn the exposed wood, fill the cavities with clear epoxy, and polish the resin until it looked like glass.
Carving the Cracks Before Adding Fire
The first step was making those natural defects accessible. I used a die grinder with different bits to open the larger cracks and remove bark trapped inside them. I wanted solid wood, not flaky material buried underneath a beautiful clear pour.
For the tiny cracks, I switched to a Dremel. They already had the right shape, but they were too narrow to burn effectively. I spent roughly four to six hours widening them while trying to preserve their natural paths.
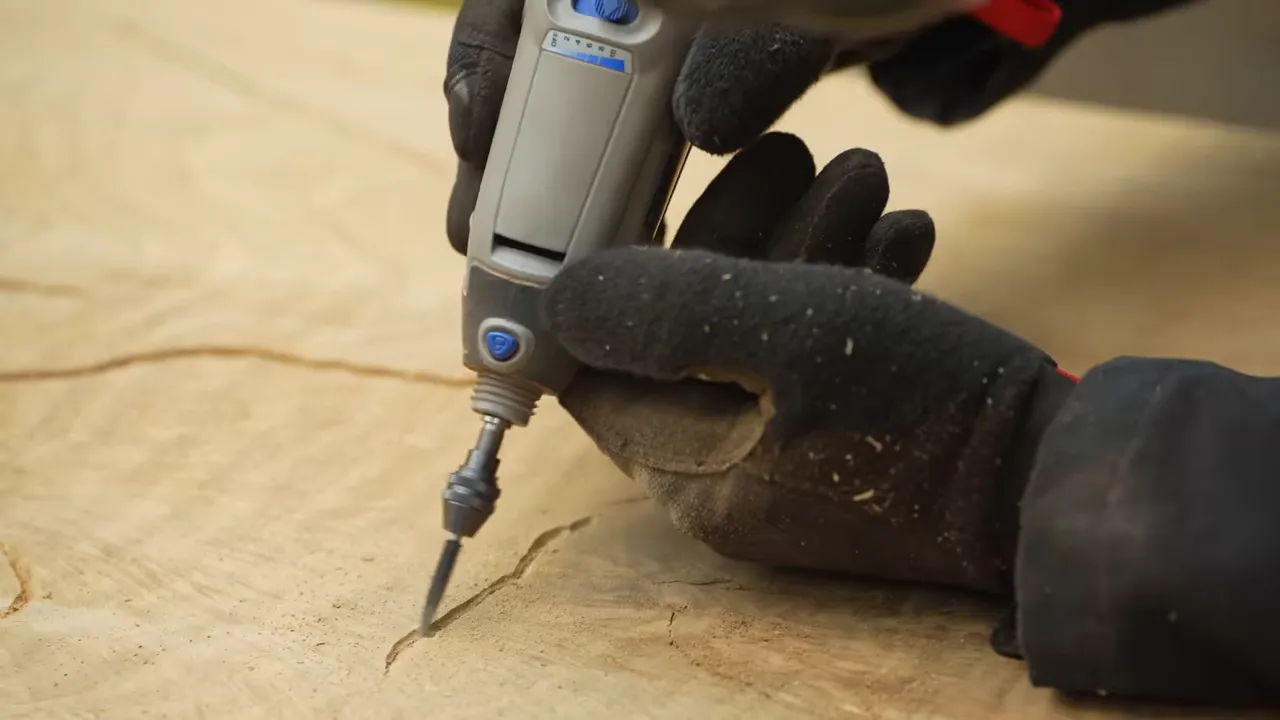
That distinction matters. Following an existing crack gives you something organic. Drawing a bunch of random black lines across a slab generally gives you a slab that looks like somebody drew random black lines across it.
The chainsaw scar needed more shaping than the smaller defects. It was always going to be the least natural-looking charred area, but I followed the grain as much as possible. I also liked the idea of one broad black feature surrounded by much smaller branching cracks.
Then came the fun part.
A Small, Hot Flame for a Targeted Burn
I used an oxy-acetylene torch for two reasons: it gets extremely hot, and its small flame lets me target the inside of a crack without unnecessarily burning the surrounding surface.
On previous burnt wood epoxy projects, the char had spread beyond the cavities and left fuzzy-looking borders after surfacing. This time, I aggressively wetted the surrounding wood and concentrated the heat down inside the openings.
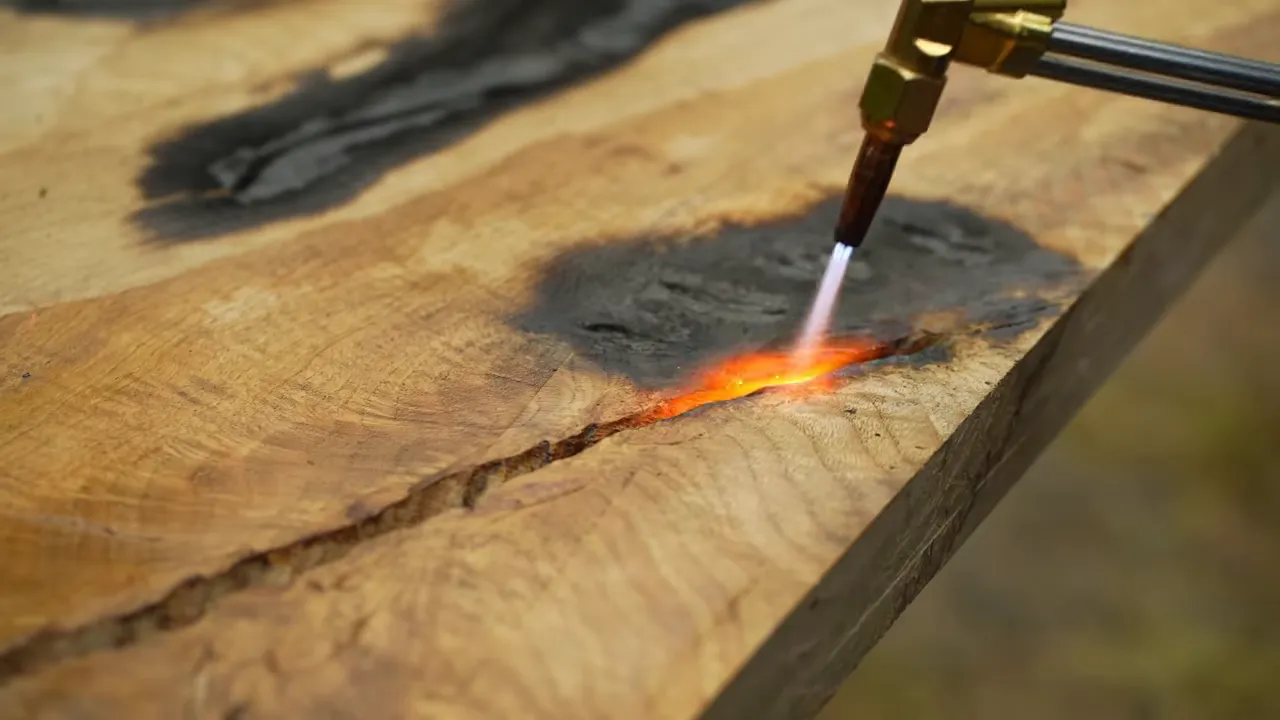
I also wore my old helicopter flight suit because it happened to be the most fire-resistant clothing I owned. Any opportunity to remind people I used to be a helicopter pilot was purely coincidental.
And if my former boss is wondering about the flight suit I apparently had not returned, discovering it was as much a surprise to me as anyone.
The Actual Divorce Part
My wife had been part of Blacktail from the beginning, so disappearing her from everything without an explanation felt a little like replacing Aunt Viv on The Fresh Prince of Bel-Air and hoping nobody noticed.
After nearly ten years of marriage, we were getting divorced. There was no new woman to introduce, and I was not going to make the reasons public. The jokes were a coping mechanism, not an indication that it did not matter.
It also changed the plans for Blacktail Ranch. What had originally been a shop build with perhaps a little home renovation was becoming the place I would live. The house needed a lot of work.
I was probably not going to emerge with a revenge body. A revenge house seemed more achievable.
Unfortunately, the woodworking project running alongside all of this was about to develop its own relationship issues.
The Sealer Experiment That Looked Like a Breakthrough
On previous burnt wood epoxy tables, I had sealed the charred areas with penetrating epoxy before doing the main pour. It worked, but I often ended up with tiny bubbles trapped down against the char.
The bulk of the resin could be perfectly clear, yet those little reflective dots would still glint up from the bottom. It was incredibly frustrating.
So I tried thin CA glue instead.
My reasoning sounded pretty good at the time:
- Lower viscosity: The thin glue could penetrate the char more easily.
- Fast cure: It hardened in seconds rather than requiring a long wait.
- Potentially fewer bubbles: Better penetration seemed like a way to eliminate the little air pockets.
I brushed it into the burnt areas, and initially it appeared to work beautifully. The fumes, however, were nasty enough to irritate my eyes even with goggles on. That alone made it clear this was not some casual, consequence-free shortcut.
More importantly, this was an experiment, not a proven sealing system. I would eventually get the clarity I wanted and discover that clarity was not the only thing I needed.
The Caulk Was Not Interested in My Schedule
We built caulk dams around the cavities to hold the epoxy. I wanted to pour before leaving for an almost two-week trip so the resin could cure while I was away.
Unfortunately, the quick drying time on the caulk packaging applied to a thin application, not the roughly half-inch-tall barriers we were making. A skin formed on the outside, but the inside remained soft.
By the end of the day, it still felt squishy. I decided not to risk it. We would pour when I got back.
That was the responsible decision. Scott then made a different decision.
Scott Takes Initiative and Meets Several Leaks
Scott normally handles the filming and editing, but he had also done two smaller epoxy pours himself and had spent an enormous amount of time reviewing our builds. He knew the process, and he knew delaying this pour would delay everything after it.
He texted to ask whether he should do it while I was gone. When I did not immediately respond, he interpreted the absence of a no with considerable optimism.
I eventually gave him the okay. By then, things were already underway.
The first lesson was that pouring from a big bucket is much less manageable than it looks. Switching to a smaller cup gave him better control. The second lesson was that this job is much easier with two people.
The third lesson arrived as epoxy started gushing out of the slab.
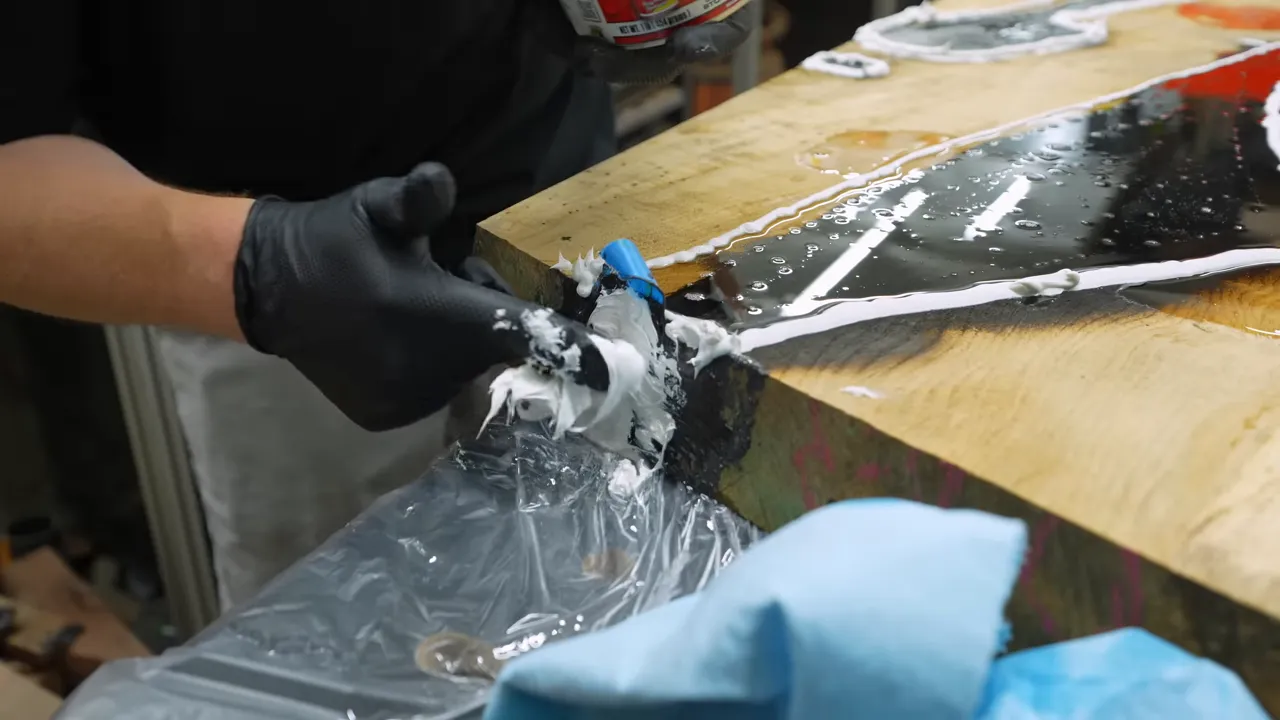
Scott tried to stop the biggest leak with Flex Paste, but the escaping resin kept pushing through it. Some of the paste had also hardened in the containers, which was not especially helpful during an emergency.
Eventually, enough wiping, pressing, patching, and deeply sincere profanity got the major leak under control. Then he dealt with several smaller ones around the slab.
The next day, the pour looked surprisingly good. One section was a little low because the slab had not been completely level. Scott adjusted the support and mixed a small amount of deep-pour epoxy to top it off.
When I returned, I found a clean, impressively clear pour. The CA sealer seemed to have eliminated almost all the bubbles I had been worried about. Scott had saved us roughly a week.
His reward was the satisfaction of a job well done and a request for vacation time that remained under consideration.
Surfacing the Slab and Revealing the Real Design
We took the slab to Creative Woodworking Northwest in Portland for surfacing. Their 50-inch-wide sander/planer struggled a little and left some burning, so we moved to their newer machine.
That machine cost around $300,000, which should answer any questions about when I am buying one for my own shop.
After surfacing, the burnt areas looked cleaner than my previous attempts. The focused flame and wet surrounding wood had kept the char where I wanted it.
There were still routine repairs: a crack I had intentionally left for later, a few light-colored areas of slightly rotted oak that needed epoxy stabilization, and one resin section that had unexpectedly popped out.
I treated that last one as a simple repair. In hindsight, it deserved a little more curiosity.
After the touch-ups cured, I used my usual combination of a Rotex sander, generally with 120-grit paper at this stage, and a carbide scraper to bring everything flush.
Not a Dining Table
The actual plan was a waterfall console table with the miter running along its entire length.
Most waterfall joints I make are across the width of a desk or end table, perhaps 20 inches or so. This one was about 84 inches long, or 7 feet. The broad front would show approximately 32 inches of the oak slab, with the natural live edge forming its bottom profile.
The effect would be a continuous sweep of grain from the top down the front, rather than a conventional tabletop sitting on separate legs.
Getting there required cutting the slab lengthwise, roughly a third of the way across, and preparing the matching 45-degree miters.
A Seven-Foot Waterfall Joint That Actually Worked
The difficult part of a joint this large is not just cutting it. It is handling, aligning, testing, and clamping two enormous pieces accurately enough that the seam disappears.
With a smaller waterfall, I can tilt the pieces together, inspect the fit, and make a tiny adjustment if the angle is off. These pieces were too cumbersome for that kind of casual test fitting.
We cut the Domino mortises using matching settings and trusted that the alignment would work. Once those mortises were established, changing the miter angle would become more complicated.
That was either confidence or recklessness. The first fit was shockingly good.
Using the Offcuts to Make 45-Degree Clamping Jigs
The best improvement came from a clamping idea I had seen at Creative Woodworking Northwest.
Previously, I had used clamps in two perpendicular directions and hoped their combined pressure would close the miter correctly. It rarely worked as neatly as I wanted.
This time, I made dedicated jigs:
- Save the 45-degree offcuts from the slab.
- Glue and screw those angled pieces to a plywood base.
- Add sandpaper to the contact surfaces for grip.
- Use the angled surfaces to direct clamp pressure across the miter.
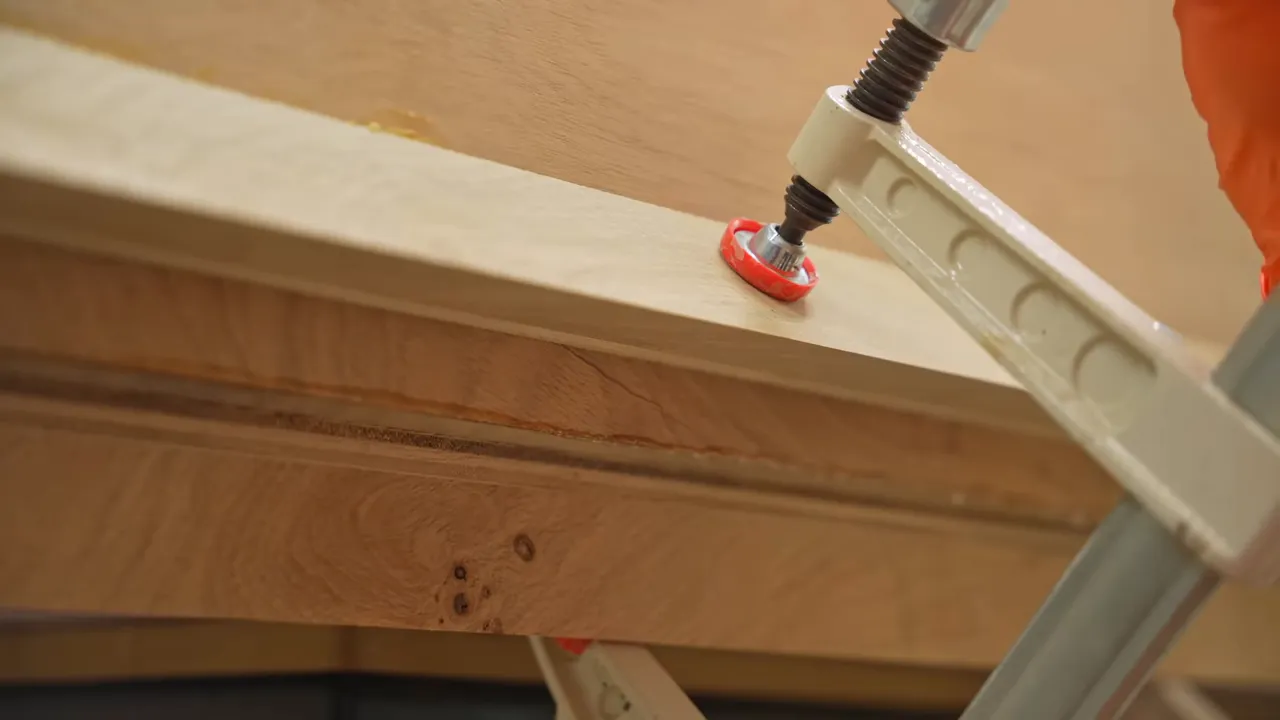
We did a complete dry fit before adding epoxy. The seam closed beautifully, and both ends checked square. Naturally, I assumed the real glue-up would be a disaster.
It was not.
During clamping, I found a small error with the square. Adjusting the assembly brought it back to 90 degrees and closed a slight gap at the back of the miter at the same time.
After curing, it was the best waterfall joint I had ever made, on the most difficult waterfall joint I had ever attempted.
There were still a few tiny gaps. I filled those with oak sanding dust and CA glue, sometimes blending dust from different species when I need to better match the grain. That is a very different application from coating every charred surface before a large resin pour.
I kept the waterfall corner visually crisp and lightly eased it by hand. The other edges received a small 1/8-inch roundover, enough to feel finished without looking heavily rounded.
Glossy Epoxy, Matte Oak, and an Unreasonable Amount of Work
The finish I wanted was simple to describe and terrible to execute: keep the wood matte and make the clear epoxy as glossy as possible.
At this point, I had also injured my back while exercising too much to distract myself, developed what turned out to be COVID, and had a root canal that became infected. It was an impressive collection of emotional and physical discomfort.
The remaining work consisted of sanding, masking, polishing, more sanding, and finishing. Other than that, we were almost done.
Polishing the Resin Without Polishing the Wood
I worked through the sanding sequence on the epoxy, eventually wet sanding with 1500- and 3000-grit abrasives. Then I needed to buff it without packing compound into the surrounding oak.
Before committing to masking the entire piece, I completed one smaller section. That let me verify the process before spending a day carefully taping something I might need to redo.
I used narrow pinstriping tape to follow the irregular resin boundaries and broader masking tape to protect the neighboring wood.
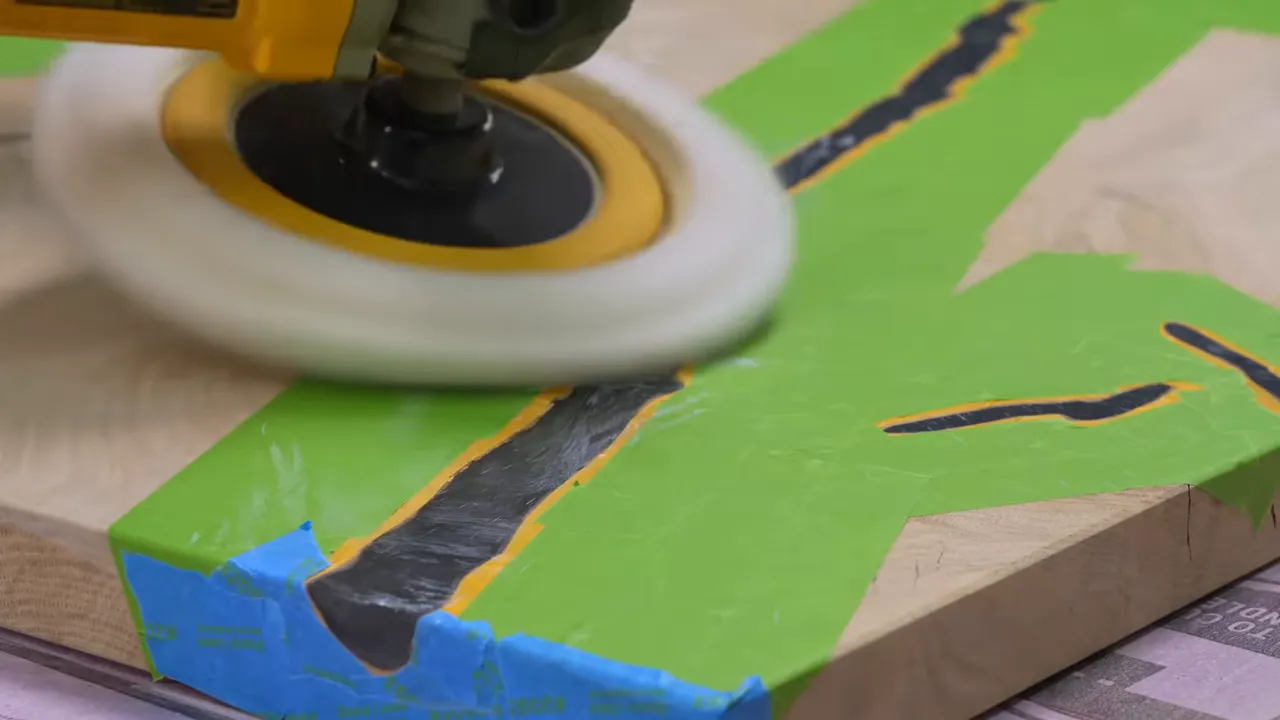
Modern Habitats Hawaii had recommended trying Meguiar's buffing compound instead of the 3M Perfect-It system I had used before. In this application, the Meguiar's seemed to leave less troublesome white buildup around the wood.
The polishing system had three stages. The first made the epoxy shiny but left some haze and swirl marks. The later stages refined that toward a glasslike surface.
I am not offering myself as a comprehensive automotive buffing instructor. Someone who does this professionally could probably identify several things I was doing wrong. But the result looked good to me.
It was also the clearest epoxy pour I had ever produced. Scott deserved credit for the pour. The CA sealer appeared to deserve credit too, which made the eventual discovery particularly irritating.
The Pencil Sanding Method
After all that polishing, I still had to finish sanding the wood to 240 grit without touching the polished epoxy.
For the tight boundaries, I used pencils cut at approximately 30 degrees with small pieces of sandpaper attached to the angled ends. They became tiny sanding blocks that could follow the curves around each resin-filled crack.
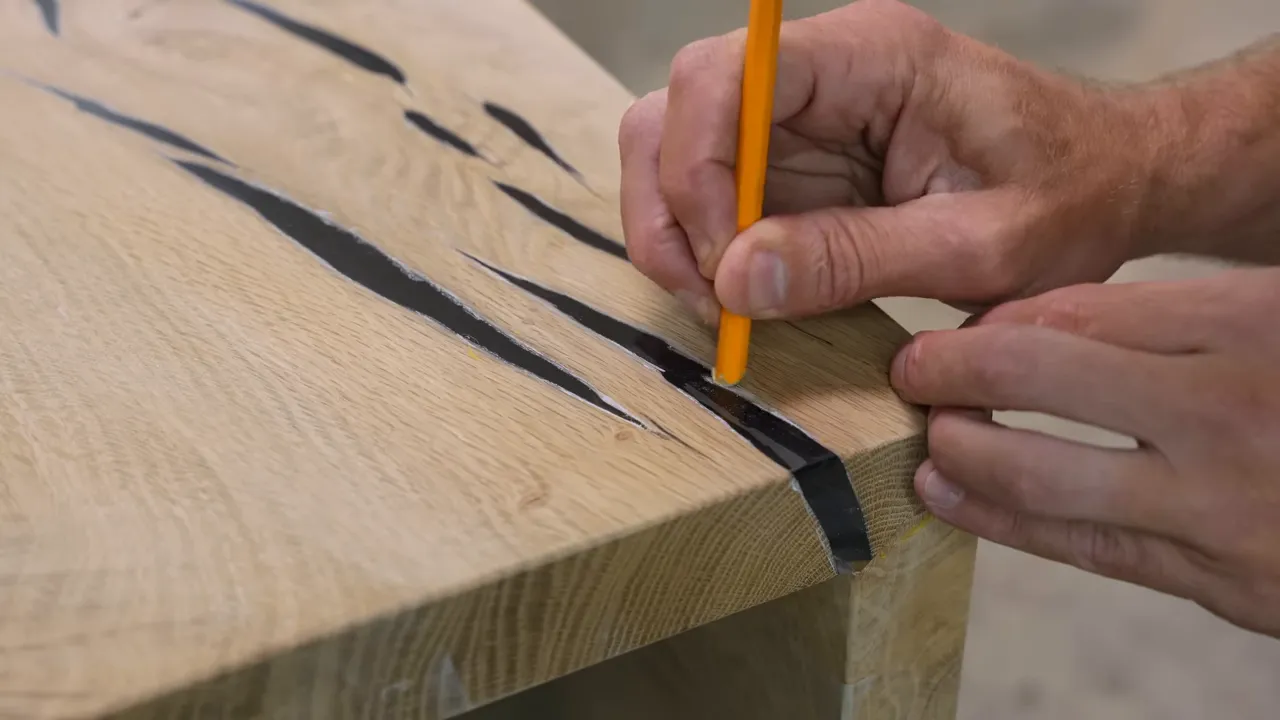
This was painfully slow. An hour of work could produce an amount of visible progress that felt personally insulting.
The issue was not the total area of epoxy. It was the length of its perimeter. One large resin feature has a relatively simple border. A whole network of branching cracks creates countless turns, narrow channels, and little islands that all need individual attention.
Think of a deeply indented shoreline. The overall footprint might be small, but tracing every inlet takes forever.
That was this console table. A fairly modest amount of epoxy with an absolutely unreasonable amount of edge.
Testing the Finish Before Committing
On my previous hybrid polished-epoxy and matte-wood piece, I had carefully brushed finish around every resin section because I worried it would dull the polish.
This time, I tested that assumption. I applied finish to half of a polished epoxy sample, wiped it off, and compared the two sides.
I could not see a difference.
That suggested I could apply the finish across the smaller resin features instead of individually painting around every tiny branch. I still did not have the guts to do that on the biggest, most conspicuous polished area, so I brushed around that section.
The compromise added perhaps 45 minutes to an hour, but it was far better than brushing around everything.
One detail mattered: the white application pad was mildly abrasive. I did not want to drag it across polished epoxy and undo the work I had just finished. I used the pad on the wood and my gloved hand where I needed to spread finish over the resin, then wiped away the excess.
The finish brought out the oak beautifully. Unfortunately, getting that close to the surface also made the little oddities harder to ignore.
The Clear Pour Had a Bonding Problem
There had been warning signs throughout the build: shiny areas that resembled bubbles, small resin sections chipping free, and pieces behaving in ways I did not normally encounter.
Eventually, I connected them to the one major change in my process: sealing the charred wood with CA glue instead of penetrating epoxy.
In this build, the epoxy had not formed the reliable bond I needed over the CA-sealed surfaces. The resin looked exceptionally clear, but I believed some of it was being retained more by the shape of the cavities than by dependable adhesion.
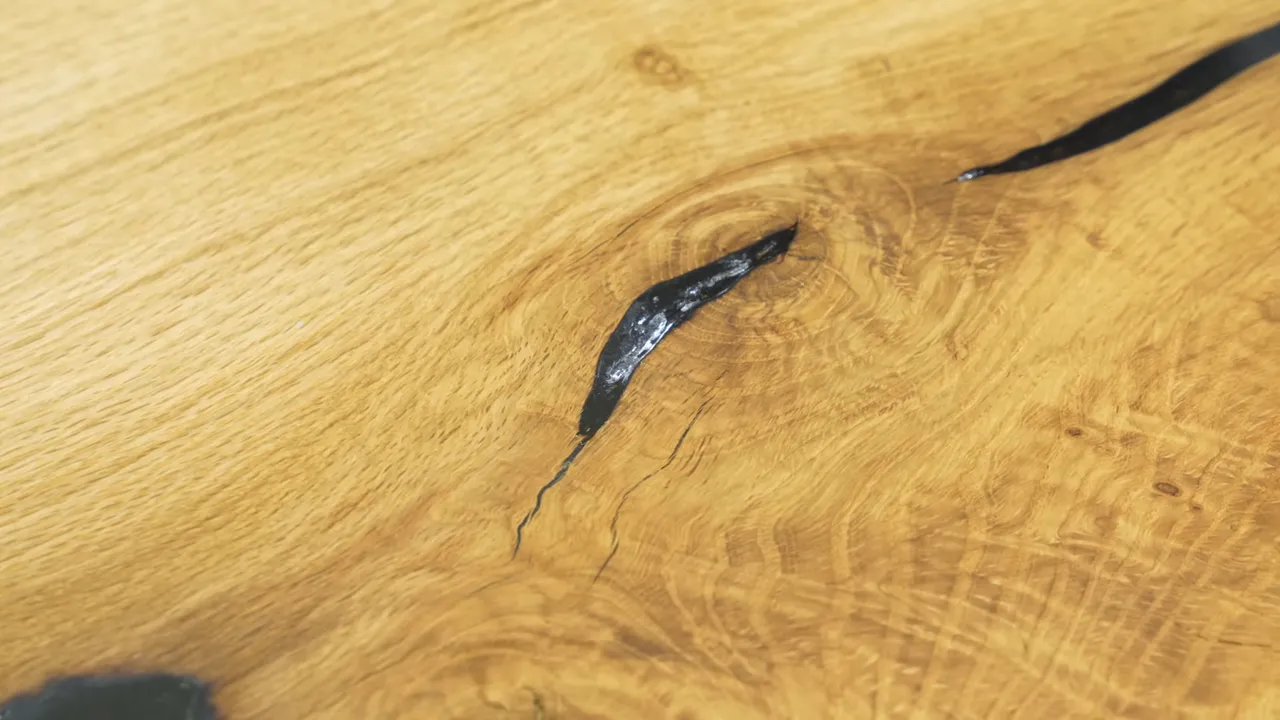
That does not establish a universal rule about every possible epoxy and CA combination. It does establish that this particular experiment failed my standard for furniture I would sell.
The larger resin sections might remain physically captured in the slab. The smaller pieces could loosen or fall out. As the oak moved over time, I expected additional separation and reflective edges could develop.
Wood movement is not something a clear pour makes disappear. For the underlying material behavior, the USDA Forest Products Laboratory's Wood Handbook is a useful reference. In my case, the uncertainty at that bond line was already enough to make the decision.
I did not know exactly how the defects would progress. I did know I would not feel comfortable taking somebody's money for the table.
And no, it was not Scott's pour. He had done a good job with the system I had prepared.
A Beautiful Console Table I Would Not Sell
The finished piece still looked pretty freaking cool. The grain flowed across that long waterfall joint, the matte oak contrasted with the polished resin, and the natural bottom edge gave the front an unusual silhouette.
We also made a wall-mount arrangement so it could sit flush against the wall without rear legs.
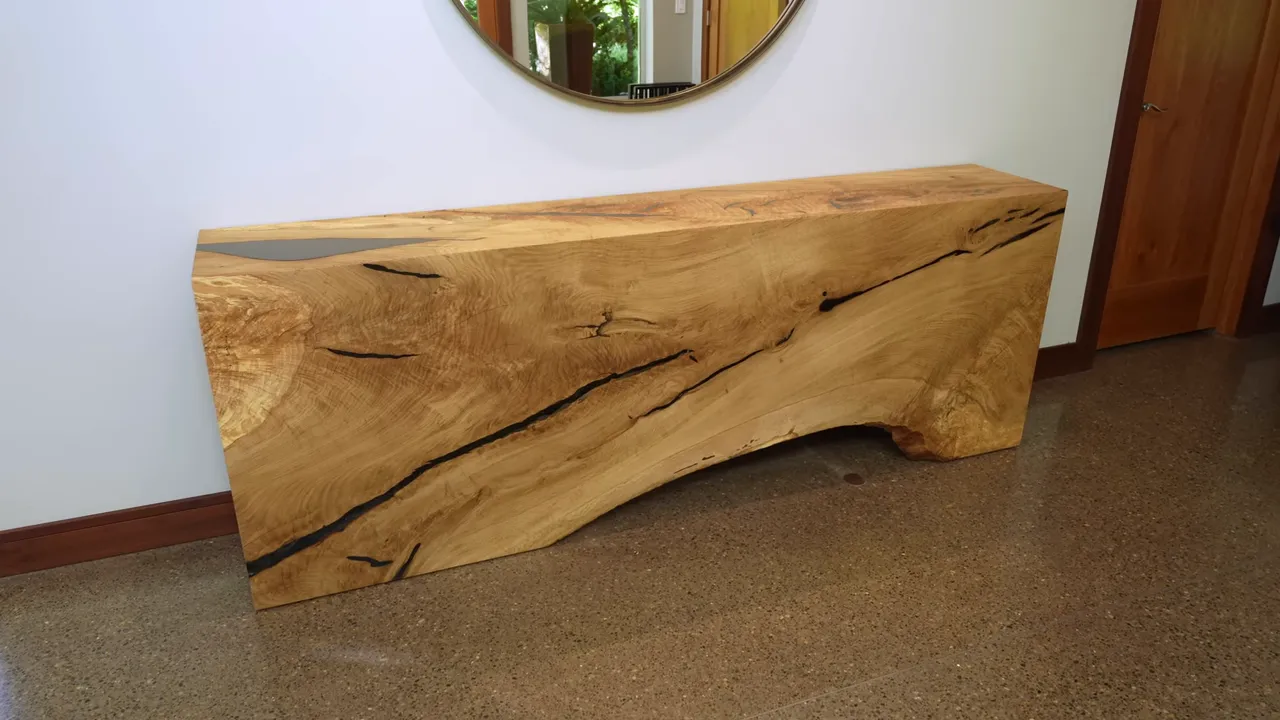
But a beautiful reveal does not cancel a material problem.
Instead of selling it for the approximately $12,000 I had envisioned, I decided to include it in the giveaway as a disclosed, imperfect piece. A scratch-and-dent version of one of my tables, except the potential issues were not limited to a scratch or a dent.
The giveaway announced with the build also included three prize packages worth more than $6,000, with Wagner pinless moisture meters, Japanese timber slicks from Shelter Institute, TotalBoat epoxy, N3 Nano, N0 cleaner, and my Damascus marking knives. I offered worldwide shipping for the table and prizes.
The promotion was also a way to introduce N0 wood furniture cleaner, my probiotic cleaner formulated without harmful solvents. It is intended to clean without changing the furniture's appearance, with a 50:1 water-to-cleaner dilution option for wood floors. N3 Nano serves a different purpose: surface protection and helping reduce the appearance of fine wear scratches. One is for cleaning; the other is for protection.
As for the console, the lesson was expensive but straightforward: test the bond, not just the appearance. I had spent weeks improving a piece whose underlying compatibility problem had been there almost from the beginning.
I am proud of the joinery. I like the design. I am grateful Scott took on that pour, and I am disappointed that the whole thing did not meet the standard I wanted.
The personal part was not neatly resolved by finishing a table, either. Making things and making occasional inappropriate jokes were simply the tools I had available. Working through this was cathartic, even when the work itself was fairly terrible.
Sometimes you can do your best work on a joint and still discover that the overall relationship is not going to last.
|


