Building things is my favorite thing to do. Moving houses, moving shops, renovating a temporary shop in five weeks, and trying to build a forever shop at the same time are apparently some other things I do now. None of them are particularly good for getting furniture finished.
Somewhere in that mess, I also needed a dining table.
I loved my old one. It was a bookmatched walnut table with extensions that took it from 9 to 11 feet without losing the look of the grain. When I finished it, it was the best thing I had ever made. But I no longer have that table, and my new dining room is roughly square, so it would not have been the right fit anyway.
I have always loved giant round tables. This seemed like a good opportunity to build one, give it a curved walnut base, and see whether I could make something that rivaled the old table. The client was me, which meant there would be absolutely no hiding any mistakes from him.
Starting With Walnut That Deserves a Very Good Table
I am fortunate to live in Oregon, about half an hour from Goby Walnut. In my completely unbiased opinion, this part of the world has the best walnut anywhere. Other places have beautiful walnut, too. It just has the unfortunate disadvantage of being compared with ours.
These slabs were Bastogne walnut, a hybrid of English walnut and Claro walnut. Goby told me it accounts for only about 1% of the walnut they harvest. More importantly for this project, the two slabs were cut sequentially, right next to each other in the tree.
That gives you the opportunity to bookmatch them. Open adjacent slabs like the pages of a book, and the grain on one roughly mirrors the grain on the other.
Rather than make a traditional mirrored bookmatch, I reversed the arrangement into more of a yin-yang layout. The natural voids would sit at opposing ends and help emphasize that rotating pattern inside the circle. I had seen other people do this, but I had never tried it myself.
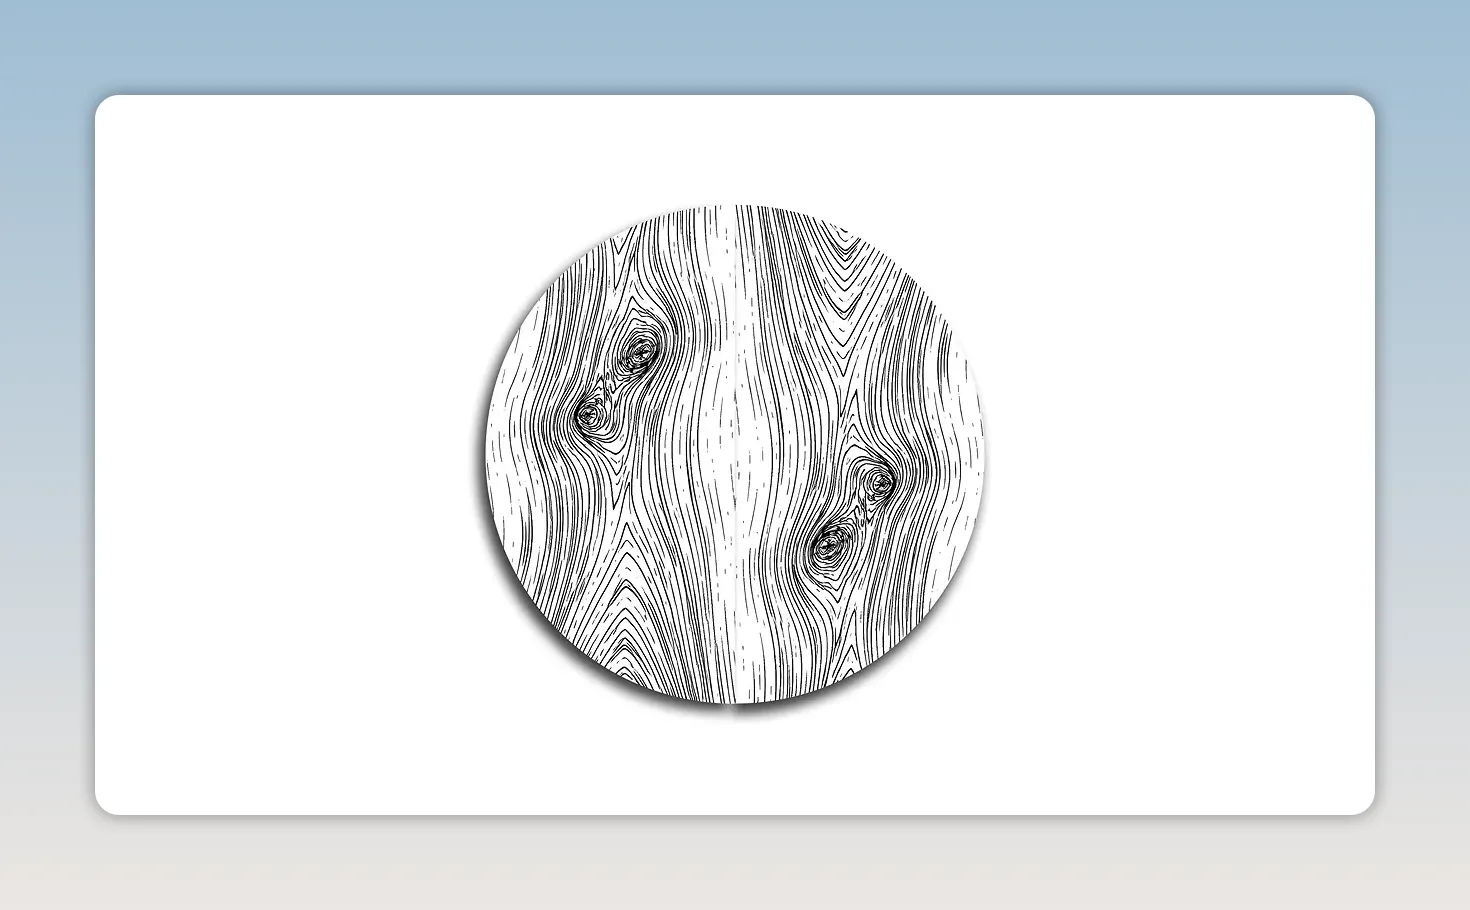
Making a glue-ready edge
The slabs were thick enough that rough cutting became its own little adventure. I brought out a massive circular saw I had used exactly once before. It had plenty of power, very little useful dust collection in my setup, and did not actually make the job easier than using my track saw. But at least the giant saw finally got another outing.
For the glue line, the important cut was not the rough one. After removing the bulk of the waste, I shifted the track about 1/16 inch and made one continuous, very light pass.
A final cleanup pass gives the joint a much better chance of closing cleanly. Several rough passes can leave tiny inconsistencies that are difficult to see until you try to bring two enormous slabs together.
I eventually repeated that tiny cleanup cut immediately before glue-up because more than a week had passed while I worked on the cracks and the base. After all that work, one more pass seemed like cheap insurance.
Curved Legs Are Less Mysterious Than They Look
Along with the new shop, I had acquired a khaki vest. I decided this was my Gandalf transformation. The old version of me built things with straight lines. Cam the Khaki was apparently going to learn curves.
The reassuring thing about these legs is that they are not bent wood. They are straight pieces of walnut shaped with a curved template. Make one good template, copy it four times, and suddenly the complicated-looking base becomes a much more approachable project.
Steam bending still seems like wizardry to me. Cutting around a template, I can handle.
A straight cut that stops at a curve
The template had one awkward feature: a long straight section that transitioned into a curve. A track saw would not reach the transition cleanly, and a table saw was not the right solution.
I used a bandsaw jig that rides in the saw’s miter slot. Align the layout line with the jig’s reference line, and it carries the work through a straight cut. Since I could not see through the template board to line everything up, I drilled a couple of small index holes.
This was a jig I had built for an earlier project and insisted on keeping, despite Scott suggesting that moving it to the new shop was pointless. First project in the new shop, and there it was, being incredibly useful. I would like that noted somewhere permanent.
After cutting and smoothing the template, I used it to reproduce the curved walnut parts. The work was in getting that first shape right. The copies could then follow the same reference.
Building Joinery Worth Hiding Under the Table
A lot of my most successful projects have involved making a nice tabletop and attaching it to a base somebody else built. Sometimes I do not even have to attach the base. Apparently, there is a strong market for me doing less work.
But building the base is satisfying in a different way. I wanted this table to feel like a complete piece of furniture, not just a spectacular slab sitting on whatever happened to be available.
The curved components became two intersecting leg assemblies. Their center joint needed to fit cleanly and sit flat, so I laid out the notches carefully and approached the final fit a little at a time.
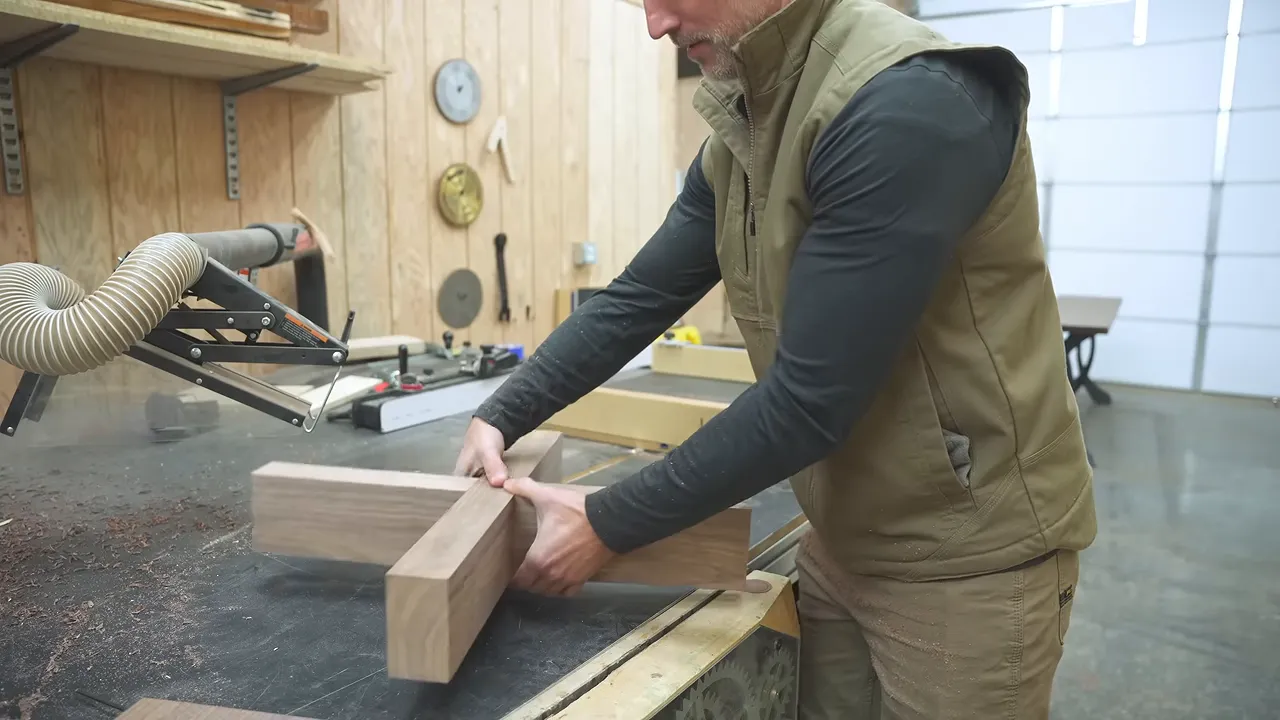
Why I used a rip blade for a crosscut
Normally, I use a rip blade along the grain and a crosscut blade across it. For these notches, I deliberately used a rip blade across the grain because it was the only blade I had with flat-top teeth.
That tooth shape left a flat bottom in the notch rather than the little ridges produced by the angled tooth profiles on my other blades. My dado stack was another possibility, but it could not cut deeply enough for this joint.
The tradeoff was tear-out risk across the grain. I used painter’s tape to help limit that, then made the cuts with the work supported on a sled.
Sneak up on the fit, even when the layout is precise. I cut just shy of the line, tested the joint, and removed a little more until the two assemblies came together properly. A beautiful marking-knife line does not make an oversized notch any smaller.
Making the base come apart
My original plan was to glue the two intersecting assemblies together permanently. Then Scott casually asked whether I was going to use a threaded insert and a single bolt through the center so the base could come apart.
Yes, Scott. Obviously. That was my plan the entire time.
It was a much better solution. The fitted joint established the relationship between the two halves, while the bolt held them together without turning the whole base into one awkward object forever.
Filling the Slab Cracks Before Glue-Up
I initially intended to glue the slabs together as soon as the edges were ready. At the last minute, I realized it would be much easier to fill their cracks while I could still handle each slab separately.
There were two main natural cracks, one toward each opposing end of the finished top. I cleaned out the loose material and filled the voids with epoxy, keeping the pour relatively subdued. This was not going to be a giant river table. The walnut was doing most of the work here.
The difficult part was sealing the irregular openings. The easiest approach was to tape the eventual top face and pour from the underside.
That solved the sealing problem but introduced a different concern: the visible tabletop would be against the bottom of the pour. Any bubbles trapped there would be inaccessible while the epoxy cured.
I let the mixed epoxy stand as long as I could within its working time to give bubbles a chance to rise out before pouring. Then I had to wait until the tape came off to find out whether my plan had worked.
Fortunately, these fills came out well. Not every part of this project needed to become a rescue operation.
Rounding, Sanding, and Leveling the Base
Before routing the base, I did enough sanding to make the reference faces reasonably flat and the straight-to-curved transitions continuous. There was no point doing all the final sanding before removing a substantial amount of wood with a router.
I used a 7/8-inch roundover on the base, reaching the full profile in about three passes.
For once, I also thought ahead. Certain areas at the intersection had to remain untouched until the two halves were assembled. Rounding straight through those areas separately would have damaged the fit. Chalk marks reminded me where to stop, and I completed those transitions with the base together.
Hidden levelers, because floors are not always perfect
I wanted adjustable feet, but I did not want the entire base visibly hovering above the floor just because the levelers were mounted underneath it.
Recessing them let the feet sit mostly inside the wood until adjustment was necessary. Unfortunately, I did not center the threaded-insert holes accurately enough within the recesses. Everything looked fine until I tried installing the actual levelers.
Enlarging an existing recess is considerably more annoying than drilling it correctly in the first place. I got there, but this is one of those details worth checking with the complete hardware before moving on.
Sanding sweeping curves
The best sanding approach for this base was a combination of hand sanding and a very soft sanding pad.
- Hand sanding at the lower grits let me follow the broad curves and refine the shape.
- A soft pad at the higher grits helped clean up the remaining sanding scratches.
- The transitions needed extra attention so they felt like one continuous form rather than separate operations.
There really is not a machine-only shortcut for every surface on a base like this. Some of it is just you, sandpaper, and a growing appreciation for straight furniture.
Wood Mounting Plates and Room for Seasonal Movement
I have increasingly been making wooden mounting plates instead of ordering steel or aluminum ones. For this application, with the plates recessed into the tabletop, I like the cleaner appearance and the fact that I can make them myself.
I drilled the plates consistently using a depth stop at the drill press. They were going to disappear underneath the table, but that did not seem like a good reason to make them look terrible.
The main limitation is thickness. Wooden plates are thicker than metal ones. Recessing them into a 1-inch or even 1 1/2-inch top could leave less material than I would want. This tabletop was more than 2 1/2 inches thick, so I had considerably more room.
The mounting system still needs to accommodate seasonal wood movement. Recessing a plate does not mean the top should be locked rigidly to the base. For more background on why that matters, the USDA Forest Products Laboratory’s Wood Handbook is a useful technical reference.
I made an oversized routing template from scrap melamine-faced MDF, aiming for about 1/8 inch of clearance around each mounting plate. Double-sided tape held the template in position, and a guide bushing with a 1/2-inch spiral bit let me route the pockets in progressively deeper passes.
The base only fit those pockets in one orientation. I discovered that through the highly scientific method of trying several wrong orientations and briefly wondering whether I had ruined everything. Marking the matching legs and pockets would have been a better system.
A Very Large Glue-Up and Not Enough Very Large Clamps
For slab alignment, I used a Domino joiner with one snug-fitting location and the remaining locations set wider.
The tight mortise established the precise lengthwise alignment, keeping the grain where I wanted it. The wider mortises gave the other tenons some side-to-side tolerance while still helping align the two slabs vertically.
If every mortise is extremely tight, a layout error of even a millimeter can make a large assembly refuse to close. One precise reference and some deliberate forgiveness elsewhere made more sense.
Then came the glue.
These glue-ups are stressful no matter how many I have done. You have a limited amount of time, a huge amount of wood, and an excellent opportunity to discover something you should have checked earlier.
In this case, that something was clamp length. I thought I had enough 60-inch clamps. The assembly was about 65 inches across. Only two clamps were actually long enough, so the rest required some creativity I would not present as an ideal clamping method.
The shop was around 48°F, which slowed things down, but that was a circumstance, not a recommendation for glue-up temperature. Adhesives have their own application requirements. The useful lesson here is much simpler: dry-fit the assembly and check every clamp before opening the glue.
Matching Walnut That Changes Color When You Move
The base had a lighter section that looked reasonably close to the surrounding walnut in some lighting and noticeably different in others. Being color-blind did not make evaluating it easier.
A hardwood-flooring expert friend had shown me a blending technique:
- Mask off the lighter section.
- Apply a darker color to that area first.
- Feather the correction into the surrounding wood.
- Apply the darker color across the whole assembly to bring everything closer together.
I had tried this before with moderate success. This time, I was happy with the improvement. It was not an absolutely perfect match, but it looked considerably more cohesive.
One complication is that wood does not look the same from every angle. A correction or a patch can nearly disappear from one side and become obvious from another. That came up again later when I repaired small holes in the tabletop.
Color matching is one of those skills that looks effortless when somebody very good does it. When I do it, there is a lot more hoping involved.
Cutting and Flattening the Round Tabletop
Once the top was glued, I rough-cut the circle with a jigsaw and saved the offcuts. They were some of the nicest scraps I have ever had, and I always keep project offcuts until the piece is finished in case I need matching material for a repair.
That policy was about to become useful.
The round top also had one unexpected transportation advantage: I could roll it along its edge. A square slab that size would have been much harder for me to move. Apparently, round things roll. Somebody should do something with that idea.
I took the top back to Goby to have both faces flattened on their CNC. The assembled piece was too wide for the wide-belt sanders available to me, but their CNC could accommodate it.
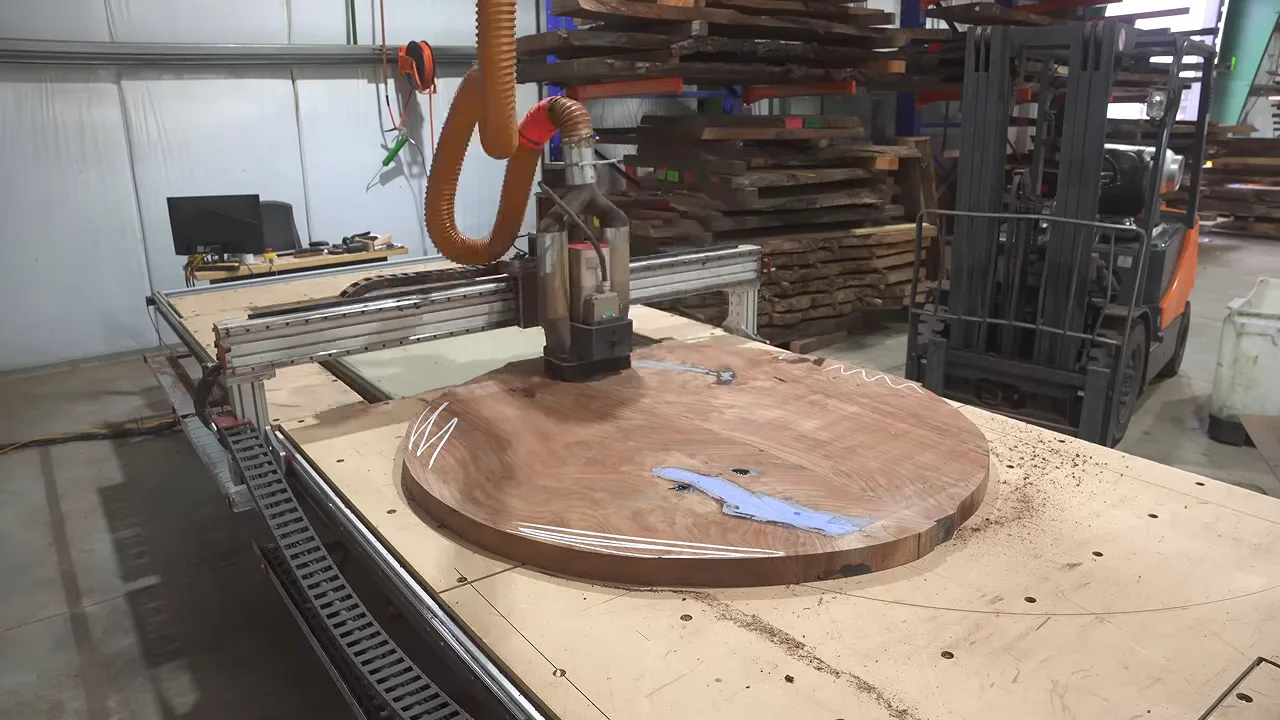
Back in my shop, I used a router circle-cutting jig to establish the finished perimeter.
And there was the obligatory screw-up.
The circle got slightly smaller
During routing, I changed direction and tore a chunk out near the underside of the edge. It was not the end of the table, but it was also not something I could sand away and pretend never happened.
I corrected it by reducing the overall diameter by about 1/2 inch. That left the table roughly 62 to 62 1/2 inches across.
This is not a routing-direction tutorial. My uncertainty was part of what went wrong. Check the appropriate feed direction and setup for your router operation rather than treating my experiment as a technique to copy.
What I would do for an actual client
My customer invoices specify that a table will be within 1/4 inch of its agreed dimensions. A 1/2-inch reduction would exceed that tolerance.
Had this been somebody else’s table, my first step would have been to call and explain what happened. Not quietly change the size and hope nobody owned a tape measure.
The options would depend on the customer:
- Accept the slightly smaller table, with me finding an appropriate way to make up for the change.
- Keep the original size and use matching offcut material to patch the damaged underside.
- If neither solution was acceptable, discuss starting again with new wood.
I have occasionally included a small piece of furniture or a cutting board, or covered shipping, to acknowledge an accepted change. People have generally been very reasonable. The important part is giving them the decision.
In this case, the client already knew exactly what had happened. He was standing there holding the router.
Reinforcing the Top With C-Channel
The underside received three recessed C-channels: one 48-inch channel and two 36-inch channels.
I ordered the long one from my friend Rob at Concept 13. He told me he could supply channels up to 60 inches, but that seemed excessive for a tabletop only a little over 62 inches across.
After routing the channels and the mounting-plate pockets, I test-fitted the base and installed the necessary threaded hardware.
Building both the top and base meant I could move between them while glue or finish was drying. This made me feel productive. Buying a base would have allowed me to spend some of that time relaxing, but apparently I am not interested in making sensible choices.
Putting Bow Tie Inlays Into a Curved Edge
A small gap remained near the underside of the center glue joint. I had already tried filling it with epoxy, because that is generally my first response to a problem.
But the gap continued an inch or two along the underside, and I wanted some additional reinforcement as well as a deliberate-looking detail. Bow tie inlays would do both.
The problem was that I had never installed a bow tie into a curved table edge.
Shape the bow tie before tracing it
A flat bow tie held against the round perimeter would only contact the table near its middle. It would rock while I tried to trace it, and a rocking template is not the beginning of precision joinery.
I considered making it thick enough to bridge the curve, but that still did not solve the layout problem. Instead, I made a thick blank and transferred the table’s curve onto it.
- Hold the bow tie blank against the edge in its intended position.
- Scribe the tabletop’s contour onto the blank.
- Sand the matching curve into the bow tie using a holding clamp.
- Check that it sits steadily against the table.
- Trace the fitted bow tie’s outline onto the edge.
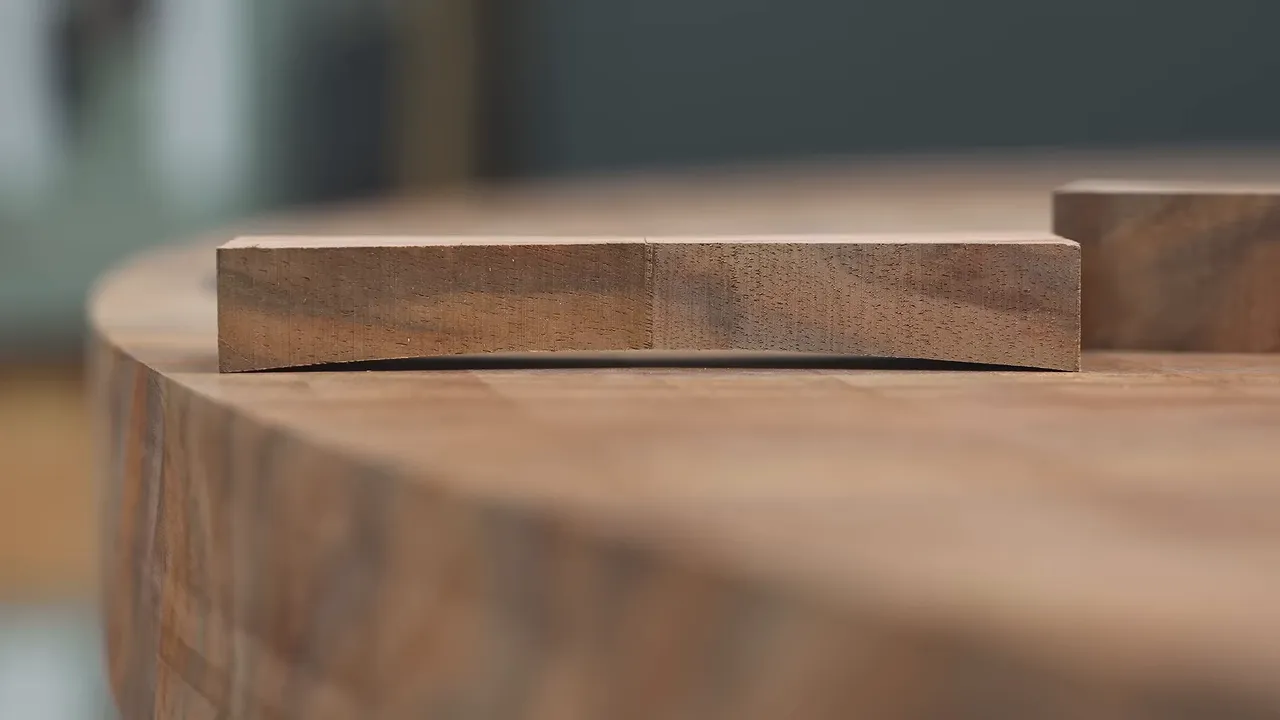
I shaped the curve on my Oliver oscillating edge sander, remembering just in time that a clamp was a much better way to hold this little part than my fingers.
The resulting contour was subtle, but it made a huge difference. The bow tie sat solidly enough to mark a clean outline with my marking knife.
The router portion did not go beautifully
Routing the recess sideways into the edge was awkward. Worse, the cutting started producing smoke and what appeared to be glowing bits of overheated wood.
That was not a clever technique. It was a reason to stop and change approaches. I switched to hand tools to finish fitting the recesses rather than continuing an operation that was clearly not going well.
Working on the edge of a large tabletop is uncomfortable even when the tools behave. This table was an especially inconvenient size for finding a good working position, but eventually the inlays fit and could be glued in.
The roundover I expected to ruin everything
Scott suggested using a flush-trim bit to remove the excess after the glue cured. Naturally, I explained that this was exactly what I had intended to do.
The bigger concern was the heavy underside roundover. The visible fit looked acceptable, but the router would expose material farther inside the joint. I was convinced it would reveal terrible gaps.
Instead, it looked better.
I would love to explain this through some profound understanding of curved joinery, but my immediate conclusion was simply that I must be an excellent woodworker.
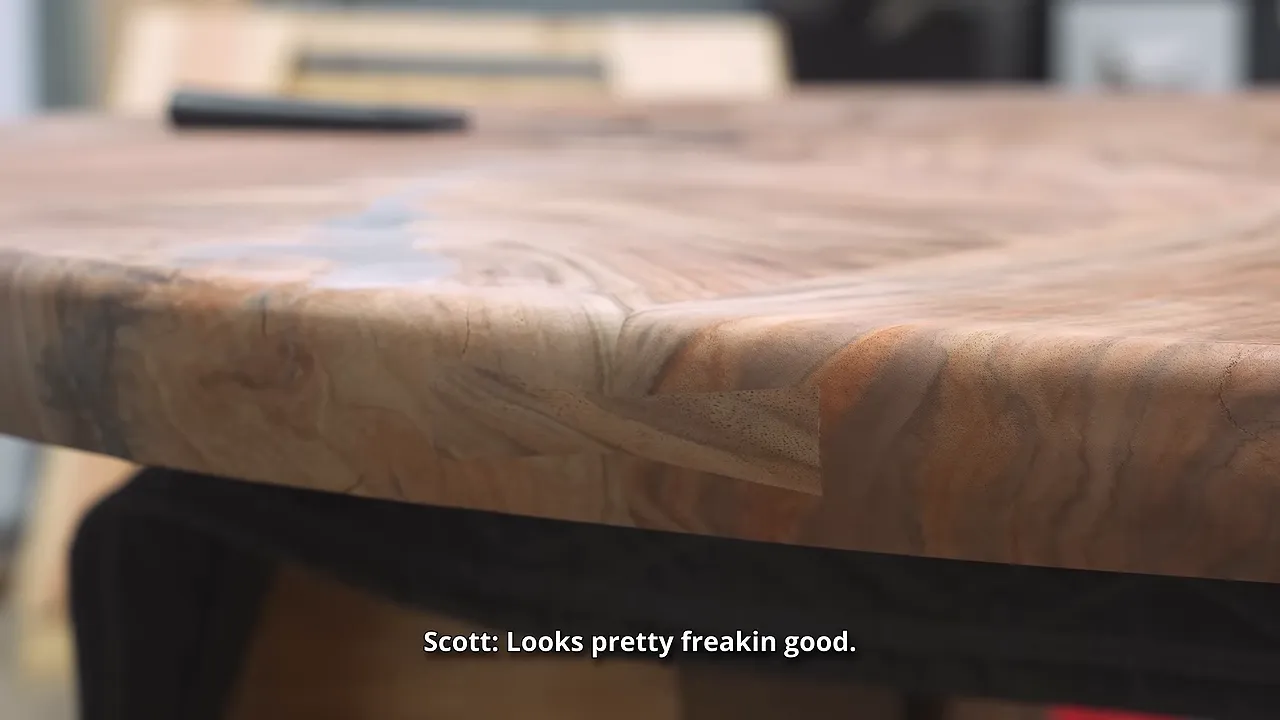
There were still small gaps. I would not have accepted the same fit on the top face, but for these difficult edge inlays, I was pleased. I filled the remaining imperfections with wood glue and sawdust, choosing a slightly lighter mixture because it tends to dry darker and can be toned down later if necessary.
The tabletop also received an edge-profile router bit I had bought quite a while earlier and only recently started using. It turned out to come from a small maker rather than one of the large suppliers I had assumed made it. That was a nice discovery behind a tool I already liked.
Small Repairs That Make a Big Difference
The top had a few holes left from moisture checks. Rather than treating every hole as a dark fill, I made small matching wood plugs from the saved walnut, shaped them to fit, and oriented their grain to blend with the surrounding surface.
After gluing them in, I trimmed the excess and sanded them flush. These repairs are something I keep trying to improve, and their success depends partly on the angle of the light.
Scott could identify one repair from one side of the table, then had trouble finding it from the other. I chose to focus on the second angle.
The remaining tiny pits and cracks got CA glue. With the particular products I was using, the clear glue was thick and the black glue was thinner. The black could stain the surrounding wood, so I generally preferred clear, blending the two when I wanted a darker fill with more body.
Dental tools let me place that mixture into very small defects without spreading it everywhere.
Some slabs can consume most of a day with this kind of filling. These were comparatively clean. Beyond the two epoxy-filled cracks, there were only a handful of little imperfections to address before final sanding.
Sanding for Feel, Then Finishing for Everyday Use
My usual final sanding grit is 240. For this table, I took the top to 400 grit and the edges to 500 grit.
The extra work on the edge was intentional. People naturally rest their hands on a dining table and run their fingers along the perimeter. Sanding that edge a little finer is one of those details they may appreciate without knowing why it feels so nice.
This grit sequence was also a departure from the guidance for the oil finishes I discussed. Hardwax oils such as Rubio Monocoat, and the Vesting LED-cured oil I used, have sanding recommendations that are coarser than my preference for furniture. Sanding too fine can reduce finish uptake.
I am not suggesting that everybody ignore their finish manufacturer. This was my tested finishing system, not a universal rule for applying oil.
After applying and curing the Vesting oil, I added N3 Nano. In my own testing, I have been happy with the protection at sanding grits up to 400, along with the additional sheen and contrast it gives the wood.
My goal is a dining table I can actually use. I do not want to spend dinner telling people where they can put a glass or lunging across the room every time somebody spills wine. I still clean up spills promptly, because I am me, but I want the furniture to support ordinary life rather than make everyone nervous.
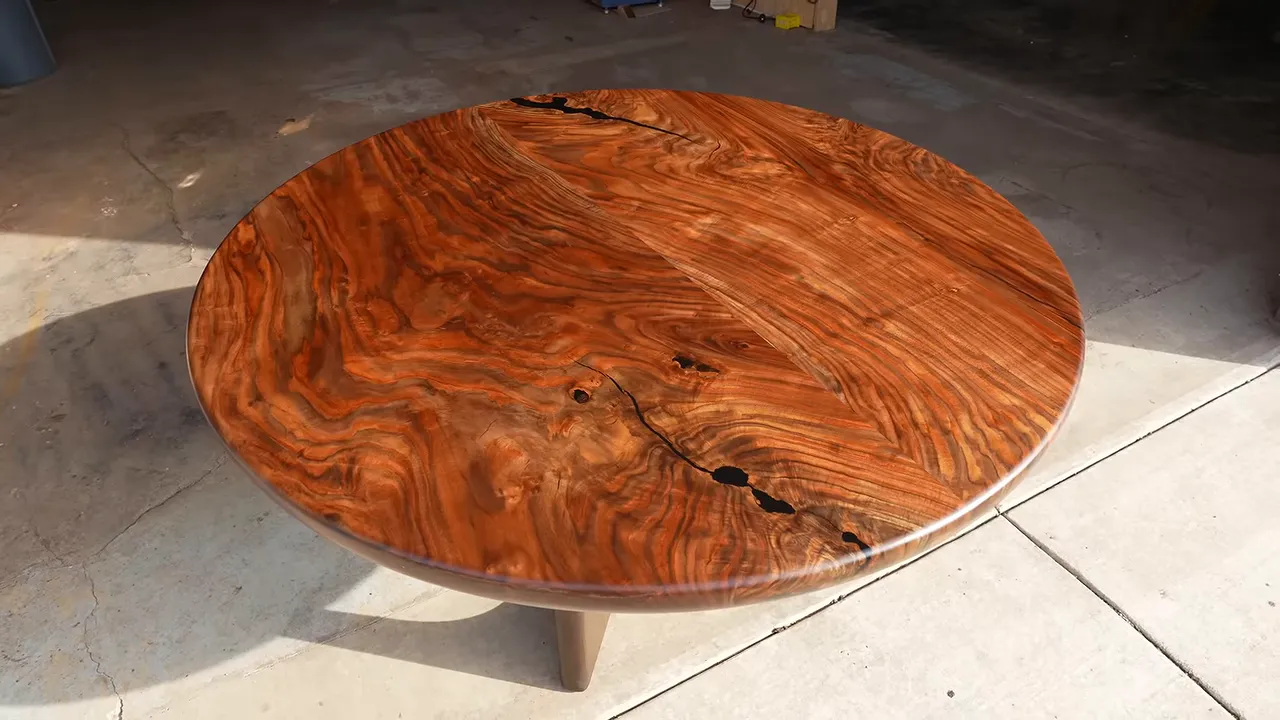
Final assembly took a few attempts because I had not labeled which leg belonged in which mounting pocket. We eventually sorted it out while lying underneath the table. Another very small planning step that would have saved a fairly undignified amount of effort.
A New Table, and an Official Verdict
Scott has spent years comparing our projects with his favorite single-slab dining table, which, somewhat insultingly, sits on a metal base. Several builds have almost displaced it. This one finally did.
Officially.
For me, the satisfying part is that the base, edge, and top all belong to the same piece. The reversed bookmatch gives the walnut movement, the epoxy keeps the natural voids part of the design, and the curved base makes the whole table feel more considered than a top I simply bolted to something.
There were mistakes, but none required pretending they had not happened. The circle became slightly smaller. The glue line gained curved bow ties. The scraps supplied repairs. That is a pretty fair description of building furniture: make a plan, encounter the thing you did not plan for, and figure out the next good decision.
And one update from the project that came before this: the four tables auctioned through MakerBook raised $26,600, with 100% going to the Oregon Humane Society. I was very happy with that result. The date that grew out of that fundraiser was also going well, so there had been a few bright spots in the middle of all the moving and construction.
Now I have a dining table again. The dining-room light is still a work in progress. Apparently, finishing the furniture does not automatically finish the house.
The Professional Habits Behind the Work
A contractor working on my house reminded me how differently professionals approach familiar problems. I was complaining that my stud finder kept giving false readings. He explained that he locates a stud and works from the framing spacing rather than relying on the gadget the way I was.
I immediately decided that this sounded like too much effort just to hang a picture. Then I realized I happily spend hours making a jig so a furniture joint fits correctly. We all choose where we are willing to become meticulous.
That same idea is why four colleagues and I created The Creator Course: to help individuals and businesses approach social media more deliberately instead of guessing at every step. It is intended for businesses such as contractors, bakers, and chiropractors as well as people building a creator business. A business owner does not necessarily have to manage every post personally; an employee can learn the process, too.
The course promotion also included a business-building question-and-answer event with my business developer, covering topics such as websites, SEO, and email lists, with a recording planned for later access. Those are areas where I am happy to let an actual professional do the explaining.
|


