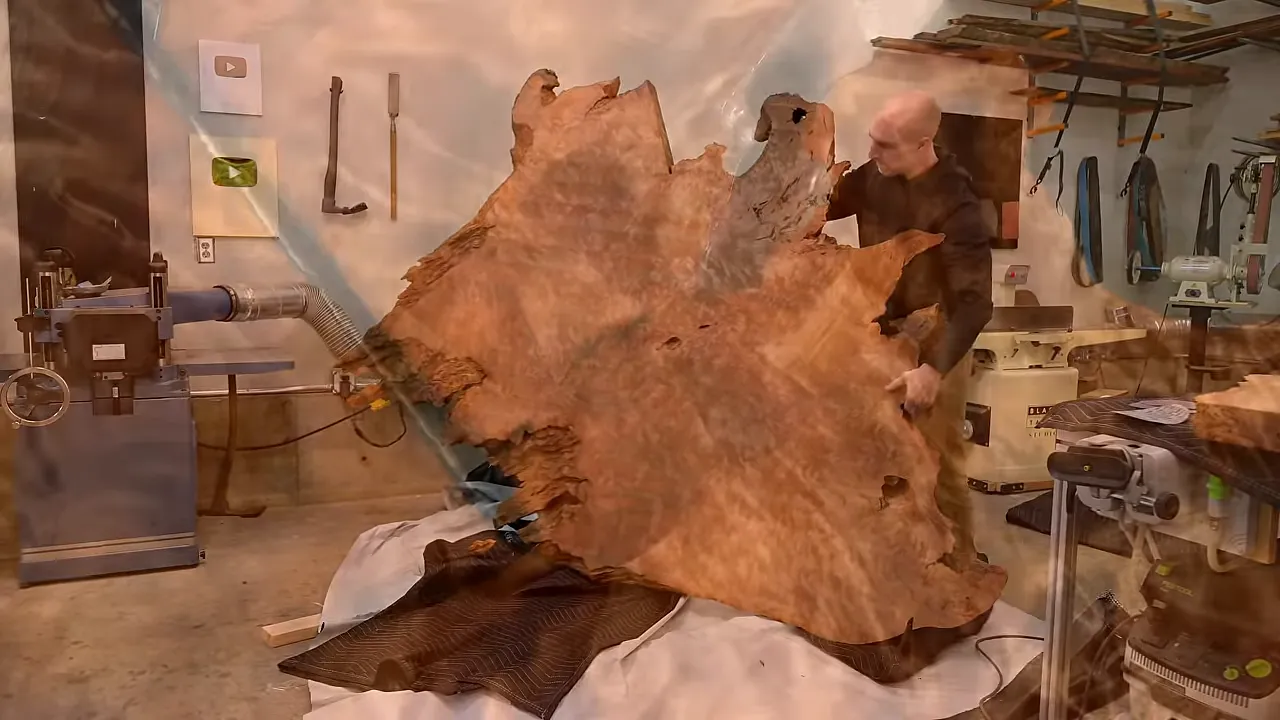
This was the oldest piece of wood I had ever worked with, roughly seven feet wide by seven feet tall, and soft enough to make almost everything harder than it needed to be. It also happened to be for my favorite client ever.
The plan was to turn a massive, figured old growth redwood slab into wall art. That meant cleaning a fragile live edge, flattening something too large for the biggest CNC I could find, reattaching a broken tip, and figuring out a finish without ruining a piece I might never get my hands on again.
Cutting redwood is easy. Moving it is surprisingly manageable for its size. Getting it flat, repaired, and evenly finished is where it starts collecting payment for those favors.
Key Takeaways
- Soft, figured redwood sands quickly but requires careful control to keep the surface flat.
- Straight-grained bow ties provide reinforcement, while highly figured inserts are better reserved for decoration.
- An epoxy base sanded back before hardwax oil added depth and color in my finish tests.
- Preserving thickness and visible history mattered more than making every surface and defect disappear.
Where This Old Growth Redwood Slab Came From
The slab arrived in a crate so big I had it delivered to my wife's workplace instead of my shop. That same crate also held the mappa burl for another project. Both pieces came from GL Veneer in Southern California, which carries slabs from all over the world rather than mostly the local species I normally buy.
This redwood, however, was Californian. More importantly, it was salvaged material, not a living old growth tree cut down for my wall.
The history I was given was that the stump had been sitting for roughly 50 to 100 years, left over from the old logging days. Loggers wanted relatively straight, predictable lumber for building houses. The wild grain that makes this piece so beautiful was not what they were after, so material like this was left behind.
I genuinely think the destruction of those old forests was shameful. Salvaging an old stump is a different proposition to me. It gives an extraordinary piece of material a second life instead of leaving it unused. For broader historical context, the National Park Service has a useful overview of redwood history and culture.
I understand that not everyone will agree about using it. But the distinction between salvaged wood and freshly harvested wood matters, and it mattered to me on this project.
Cleaning a Live Edge Without Destroying It
I usually work with hardwoods such as walnut and maple. With those, I have a pretty good sense of how aggressive I can be when removing bark and loose material. This redwood was a different animal.
The edge was extremely soft, and I was concerned that my usual cleanup tools would remove more than I intended. So I brought in Pure Space Dry Ice Blasting.
They use tiny dry ice pellets to blast material away. One application is fire damage cleanup, where the goal is to remove charred material while leaving sound wood behind. I wanted a similar result here: remove the loose, fragile material without flattening all the character out of the live edge.
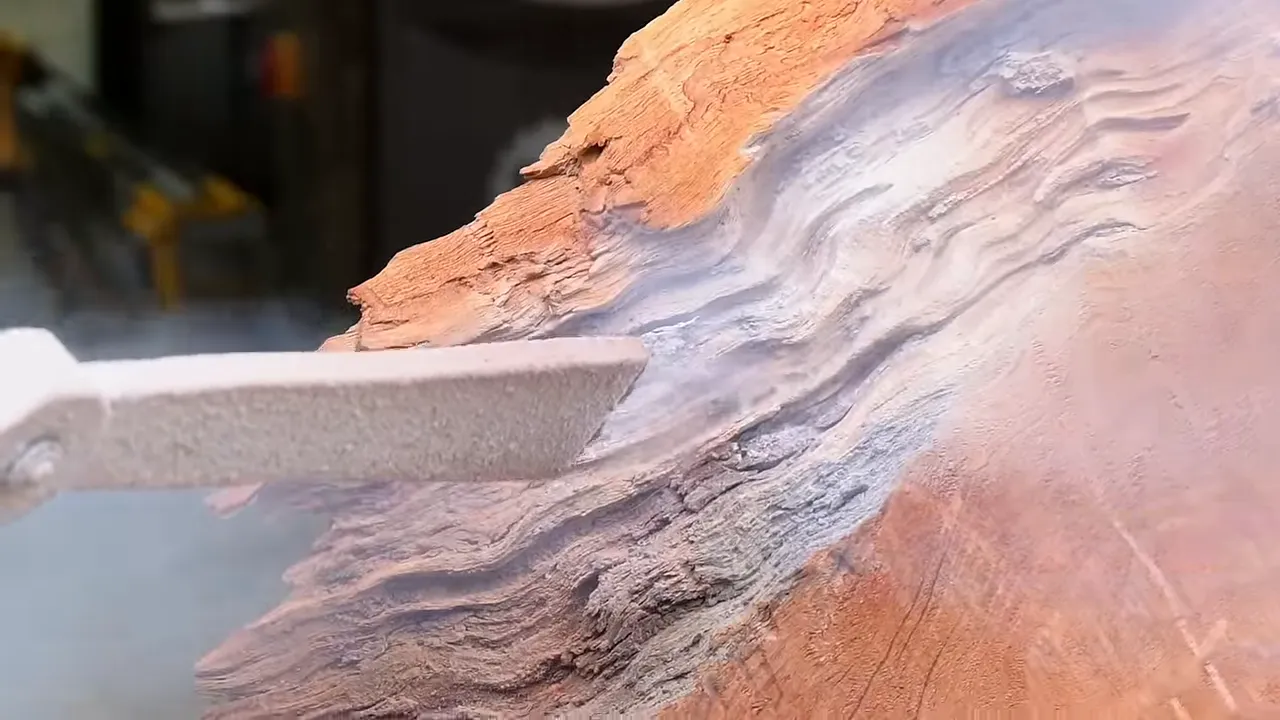
The blasting helped, but it did not eliminate every bit of handwork. I followed up with a wire wheel where I wanted additional cleanup, working carefully around the narrow projections and textured areas.
Making a Cut Edge Look More Natural
Some sections had already been cut straight, which looked out of place next to the rest of the slab. Rather than leave an obviously sawn outline, I reshaped those portions to blend into the natural perimeter.
I marked a less regular profile, cut away the excess with the bandsaw or jigsaw as appropriate, and used an angle grinder with a carving disc to shape the edge. Then I worked the texture so the new contour did not look like a freshly cut board attached to an ancient stump.
The goal was not to make a perfectly smooth edge. It was to make the repaired outline belong with the irregular wood around it. That is a very different target, and one that requires restraint with a grinder on wood this soft.
Flattening a Seven-Foot Slab on a Six-Foot CNC
The biggest CNC I could find locally only had about six feet of capacity in the dimension we needed. The slab was about seven feet across. Usually that is a fairly conclusive disagreement.
Fortunately, or at least conveniently, the upper tip had already broken off. With that piece removed, the main slab measured just under 72 inches and fit the machine.
My friend Jordan handled the CNC work. We took light flattening passes on one face, flipped the slab, worked the back, and then returned to finish the front. The loose tip was also positioned for machining so we could get its thickness close to the rest of the piece.
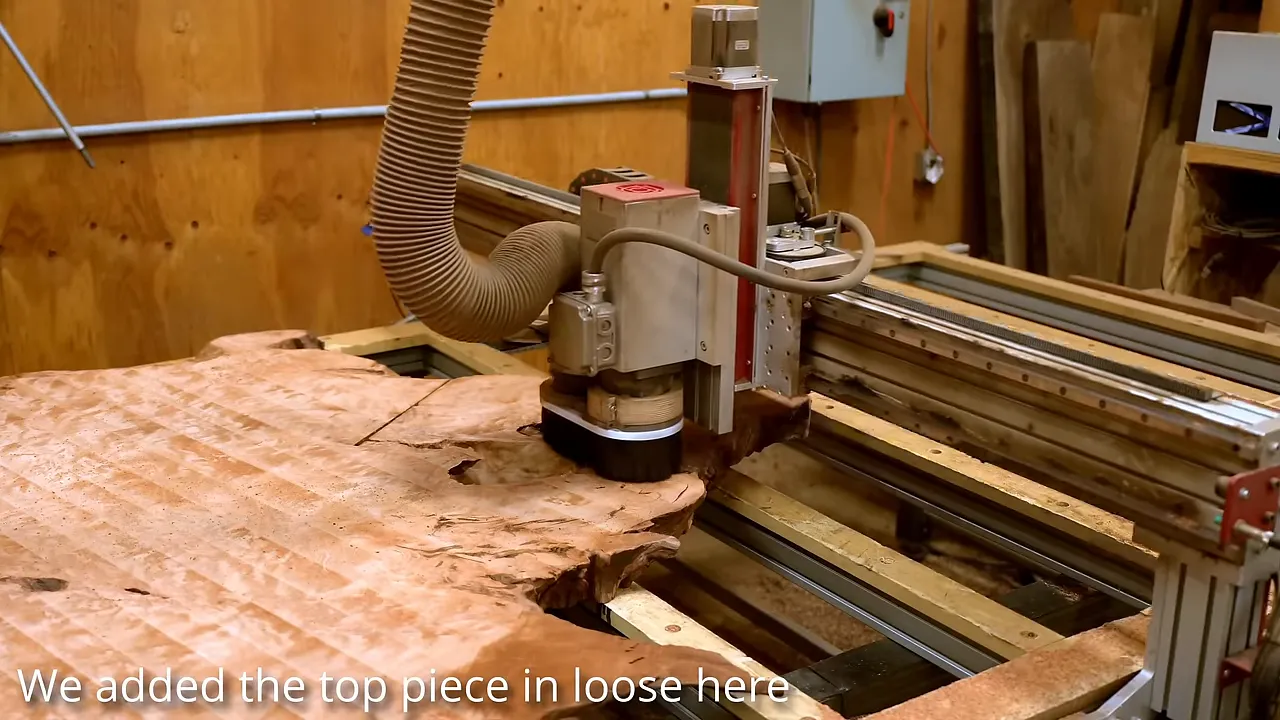
There was another decision to make: flatten the back completely, or preserve as much thickness as possible.
Making the back as clean and flat as the front would have cost roughly another half inch of thickness. The client preferred the thicker slab, which I thought was an excellent decision. The back was going against a wall anyway.
I left the remaining low areas and rough-sanded the backside with 80 grit. This was one part of the job where redwood's softness was actually helpful. It sanded much more easily than something like white oak.
Repairing the Broken Tip Without Hiding Its History
The broken tip was not just a random failure. An old chainsaw miscut had left a straight kerf in the slab and contributed to the break.
I could have tried to disguise it with matching wood or fill it with epoxy. Instead, I decided to leave it visible. It was not the prettiest feature, but it was part of the slab's history. I did not think every sign of that history needed to disappear.
First, I used a small amount of epoxy to attach the tip and hold it in position for the more substantial repair. Once it was back on, the surfaces were close, but not perfectly level despite our efforts on the CNC.
That meant getting out my old Makita power planer, a tool I do not particularly enjoy using. It removes a lot of material quickly, makes a mess, and does not magically compensate for my limited proficiency with it.
I used it to remove the bulk of the height difference, then switched to the belt sander to bring the area level. A straightedge helped me check the transition before moving on to the reinforcement.
Bow Tie Inlays: Hidden Strength and Visible Detail
This repair gave me a good opportunity to use my first Blacktail product: a bow tie jig.
I had been asked plenty of times why I did not speed up my bow ties with a CNC. The short answer was that I did not own one, did not have room for one, and would not know how to operate one if it appeared in my shop.
Router templates made more sense, but I did not love the blocky shapes of many existing bow tie jigs. A round router bit inevitably leaves a radius. Instead of pretending that radius was not there, I designed a bow tie with a rounded back that made it part of the shape.
The same template can cut both the bow tie and its matching recess. Changing the guide bushings also changes the size and appearance of the resulting inlay.
The Basic Router Inlay Setup
For the larger, rounded bow ties on the back, I used:
- A router that accepts guide bushings, with an adapter if needed.
- A Whiteside-style router inlay kit with a 1/8-inch bit.
- The bow tie template.
You do not need an expensive Festool router to do this. The important part is a compatible, properly set up router and bushing system.
I routed the bow tie profiles in a separate board, freed the pieces, then used the corresponding inlay setup to route the recesses across the damaged area. The large bow ties on the backside were structural. Their job was to reinforce the reattached tip, not win a beauty contest.
During testing, I found I could make small changes to the fit with cleanup passes around the recess. A single perimeter pass tended to leave a snugger fit; repeated passes could loosen it slightly. That is something to test on scrap with your own setup, rather than discover on your irreplaceable slab.
After gluing the inlays, I worked a little matching redwood dust into the glue around the perimeter to help fill any tiny gaps. With a good template fit, there was not much to hide.
A Smaller Bow Tie With Sharper Corners
For the visible face, I wanted a sleeker shape and more interesting wood. Matt's Woodworks supplied offcuts from a redwood root described as approximately 1,500 years old, left over from a $60,000 table build.
That root wood was astonishingly hard compared with the slab. The main piece felt softer than Douglas fir; the root offcuts felt closer to ebony. Same general material, very different experience at the tool.
For these smaller bow ties, I used a 3/8-inch brass guide bushing to cut the inserts and a 5/8-inch bushing to cut their recesses.
With the 1/8-inch bit used in this setup, the recess bushing was 1/4 inch larger in diameter than the insert bushing. That relationship is what made the matching parts work. It is not a universal rule independent of bit size.
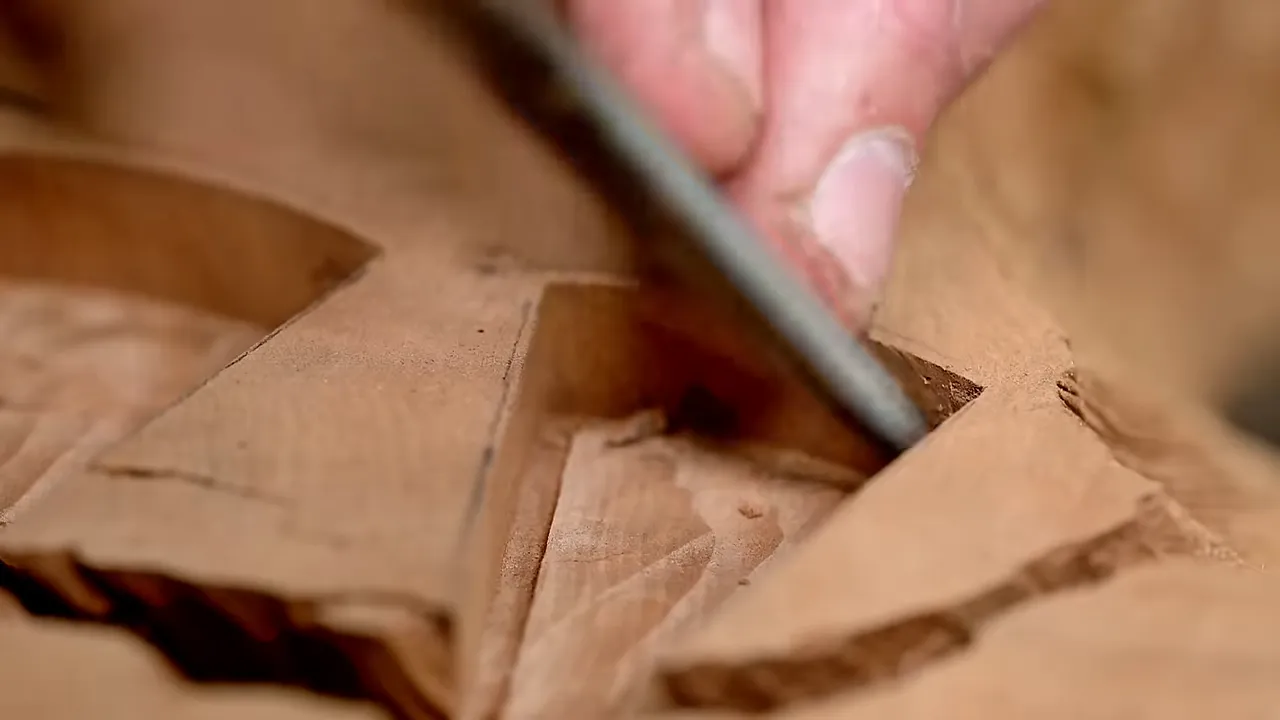
The smaller bushing produced the sharper-looking design I preferred, but the router still left a slight radius in the pocket corners. A little chisel work brought those corners to a point so the inserts would seat.
Pretty Grain Is Not Necessarily Strong Grain
Here is the catch: swirling burl grain is a poor choice for a structural bow tie.
It can chip during machining, and more importantly, the irregular grain makes it more prone to breaking. For reinforcement, I want straight grain running along the length of the bow tie.
The figured bow ties on the front were primarily decorative. The ones on the back were providing the strength.
I got a reminder of the machining issue when a hand plane chipped one of the decorative inserts. Thankfully, the damage remained above the slab's surface, so I could switch to the belt sander and bring it flush without losing the inlay.
I still like hand-cut bow ties, and this jig was never intended to replace them in every situation. It was another option, particularly useful for rounded shapes and for inlays in soft wood that is difficult to cut cleanly by hand.
|
Testing a Redwood Finish Before Committing
I had very little experience finishing redwood, and this did not seem like the ideal piece for a confident guess.
Over several months, I tried different finishes on samples. Some shellac samples looked good. Others looked surprisingly bland, and shellac did not feel like the right fit for my shop and process on this project.
The combination I eventually liked best was:
- Apply an epoxy base coat.
- Sand the surface coating back off.
- Apply a hardwax oil finish.
On my samples, the epoxy treatment added substantially more depth and color, even after sanding the coating back. The same finishing approach without that base looked muted by comparison.
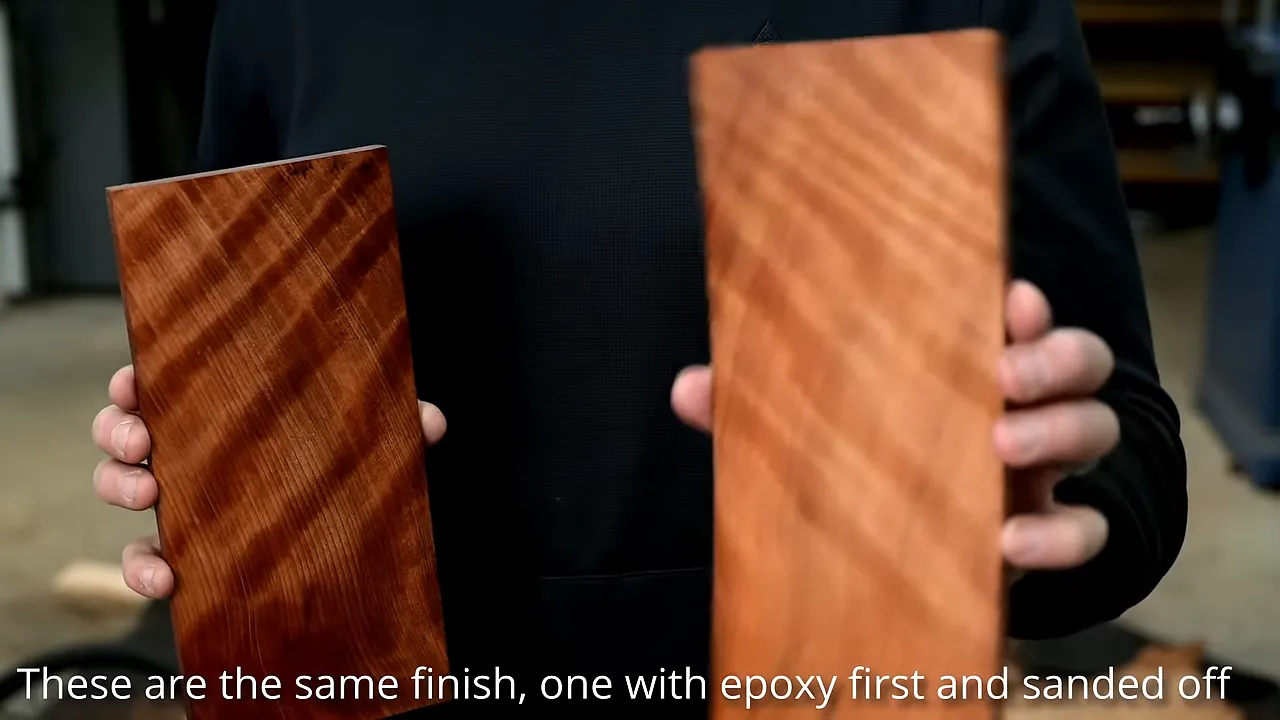
This was not an epoxy flood-coat project. I wanted the visual benefit of the base treatment without leaving a thick, glossy epoxy layer as the final surface.
Sealing the Back and Live Edge
The backside got a much simpler treatment with Seal-A-Cell. I saturated the wood and let it absorb the finish. The application took about 15 minutes, compared with the weeks I would spend working on the front.
I also used Seal-A-Cell on the live edge. At that stage, I did not want epoxy building a glossy coating across all that texture. I wanted the edge sealed while keeping its more natural appearance.
Later, I brushed a restrained coat of Osmo onto the textured edge as well, using a brush with shortened bristles to work into the irregular areas.
Why Sanding Redwood Was the Hardest Part
Removing material was easy. Keeping the surface flat was not.
This slab had dramatic figure and varying wood densities. The softer areas sanded away faster than the harder areas. Pausing in one place could create little valleys while leaving harder sections standing proud.
That unevenness becomes especially obvious when you are trying to build a reflective finish.
Easy sanding does not mean easy surface preparation. On this piece, controlling material removal was far more important than removing material quickly.
I worked through the sanding progression to 500 grit, much higher than I normally go. I used pencil marks to track progress and water-popped the surface twice between grits. The goal was a sheen that felt closer to polished stone than a typical wood finish.
I would not call myself a redwood expert after one project. I would, however, be slightly less terrified at the start of the next one.
Building an Even Sheen With Osmo 3043
I used Osmo 3043, which is labeled satin, but I was able to build a sheen well beyond what I would normally call satin.
It may be one of the prettiest finishes I have used. My opinion of its protection is considerably less enthusiastic.
In my experience, this is not the finish I would choose for a working tabletop. It looked fantastic on a decorative wall piece, which was exactly the application I had here. Beauty and durability are separate decisions, and I was deliberately prioritizing beauty.
Applying and Leveling the Coats
I buffed the finish in with a white pad, leaving a small amount on the surface. This differs from the way I normally apply Rubio, where I remove all the excess.
The next day, the sheen was uneven because different areas had absorbed different amounts. That was not especially surprising after everything else this slab had taught me about consistency.
I used 600-grit Mirka Abranet to lightly sand the finish and continued building coats. In total, I applied roughly five or six coats, sanding between most of them, though not every one.
The number of coats was not a magic recipe. It was what this particular surface needed to get the sheen as even as I could.
About 24 hours after the final coat, I buffed the surface with Osmo Liquid Wax Cleaner. That made a surprisingly effective final adjustment to the remaining unevenness.
Hanging the Slab With a TV Mount
I spent an unreasonable amount of time thinking about the wall mount. My main concern was glare from the ceiling lights. I wanted the option to tilt the slab forward instead of being stuck with whatever reflection a fixed mount produced.
The best idea I came up with was a large TV mount.
Was I completely certain it would work? No. But it gave me the adjustment I wanted, so I attached the mounting hardware to the back and installed the wall-side bracket.
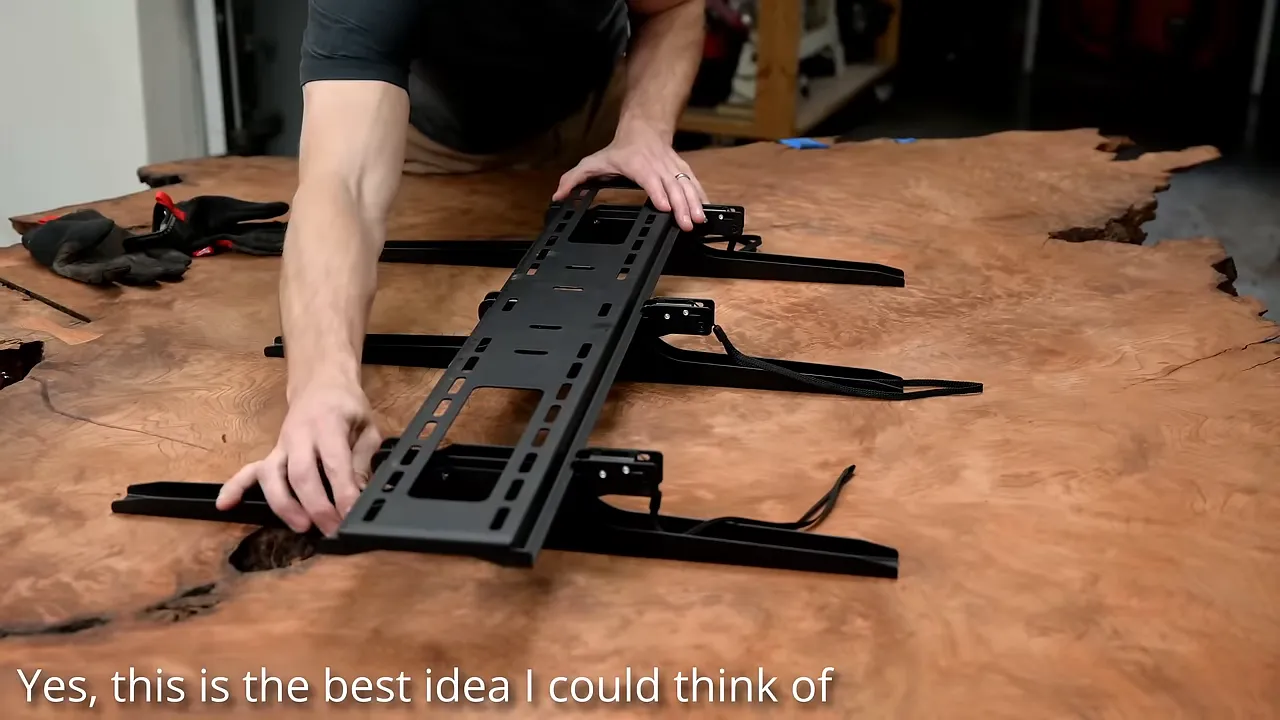
With help lifting the slab into position, it went onto the wall much more easily than I expected.
That was a successful solution for this piece, not a universal mounting specification for giant slabs. The mount, fasteners, wall attachment, and condition of the wood all need to suit the actual load.
The Final Ceramic Coating
Once the slab was hanging, I added a Black Forest ceramic coating. I was not planning to put cold drinks on vertical wall art, but I still wanted some additional protection against an accidental splash.
The ceramic also increased the sheen, which was an obvious benefit on this piece. I applied the initial coat and then the top coat in the two-part coating process. The application across the whole slab took roughly 15 minutes.
It was a relatively quick final step after a very slow finishing process, and it pushed the appearance closer to the polished look I had been chasing.
Why This Was My Favorite Customer
The client was me.
We agreed on every design decision, shared the same opinions about preserving thickness, and had no disagreements about the mounting experiment. An unusually pleasant working relationship.
The slab retailed for $4,500, although GL Veneer supplied it to me at no charge for this project. That made the opportunity possible, but it did not make me any less nervous about getting it right.
What I ended up with was not a flawless piece of wood. It still had its chainsaw cut, its natural openings, its irregular edge, and the evidence of a substantial repair. Those were part of what made it worth keeping.
The biggest lesson was that soft wood is not necessarily forgiving wood. Redwood gave me easy cuts and fast sanding, then demanded patience everywhere that mattered. For a piece with this much character, I think that was a fair trade.


