I had tried to make a table like this twice before. Both attempts failed badly enough that I never published them. Apparently, that was not enough to convince me to find a less frustrating project.
The idea was a live edge mappa burl desk with the deep black figuring of a high-end guitar, a mirror-polished epoxy finish, and legs that looked like they belonged on a Terminator. Getting there meant solving some very stubborn burl pits, avoiding the bubbles that ruined an earlier attempt, and then sanding a nearly finished top all over again.
The finished desk eventually sold for $15,699. But this was not a commission with a guaranteed buyer. I built it because I wanted to see whether I could finally get it right.
Key Takeaways
- Soft mappa burl needs gentle edge cleanup to preserve its natural details.
- A dark dye coat, sanding, and lighter dye create contrast in figured wood.
- Separate seal coats helped address the microbubbles that ruined an earlier epoxy finish.
- Inspecting between sanding grits prevents deeper scratches from surviving into the polished surface.
Choosing Mappa Burl, a Hardwood That Is Surprisingly Soft
This build started with a conversation with GL Veneer, a large California wood supplier. I can get some incredible wood locally, but most of it is domestic. Their inventory opened up a much bigger selection, and I landed on mappa burl.
Mappa burl comes from poplar found largely in France and Germany. The pale wood and scattered burl clusters were a great starting point for the black, highly figured finish I had in mind.
The delivery was less convenient. The crate also contained a huge redwood slab for another project, so it had to go to my wife’s office instead of my little shop. No, I had not secretly acquired the warehouse of my dreams.
One important thing about mappa burl: being a hardwood does not mean the wood is hard. Hardwood and softwood are botanical categories, not a ranking of dent resistance. Broadleaf trees such as maple, walnut, and poplar fall into the hardwood group, while conifers such as pine, redwood, and Douglas fir are softwoods. The Wood Database’s explanation of hardwoods and softwoods is useful if those names have always seemed a little misleading.
This mappa was softer than Douglas fir. It was also particularly eager to warp and twist, which made reinforcement an early priority.
Recessing C-Channels Into a Thin Slab
Once the slab was flat, I wanted to install the C-channels before it had much opportunity to move. The thinner portion was only about 1.4 inches thick. That was plenty for this desk, but not enough for my usual heavy-duty channels.
I bought low-profile steel channels, approximately half an inch deep, from Home Depot. I am fairly sure I paid more than I would have at a steel supplier, but convenience occasionally wins.
Instead of installing them in my usual orientation, I routed pockets deep enough to recess the full channel profile and flipped the channels over. That let the steel and mounting hardware sit completely below the underside of the slab.
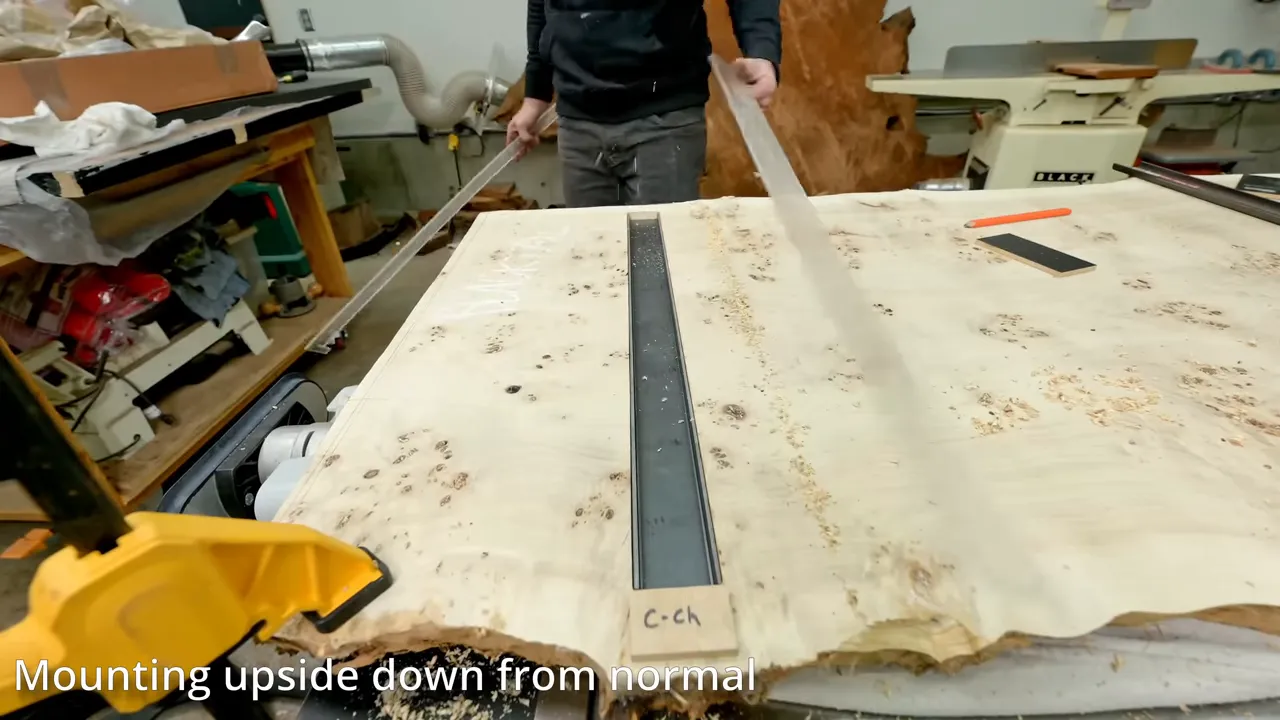
The basic process was to lay out the recesses with a routing jig, route the pockets, drill the steel, and install the threaded inserts for the mounting bolts. For the jig and channel fabrication details, I have a separate DIY C-channel walkthrough.
Cleaning the Live Edge Without Erasing It
The softness did not stop at the top surface. The live edge was just as delicate. An angle grinder and wire wheel, which I might use on walnut, could have destroyed the little burl projections that made this slab interesting.
I used nylon abrasive wheels instead:
- A non-marring nylon wheel on my old Porter-Cable Restorer, which has since been discontinued.
- Smaller nylon wheels that fit into an impact driver for tighter areas.
- Small hand tools to pick loose material out of the deeper pockets.
The nylon wheels were slower and left some faint lines, but they preserved the natural edge far better than a more aggressive tool would have.
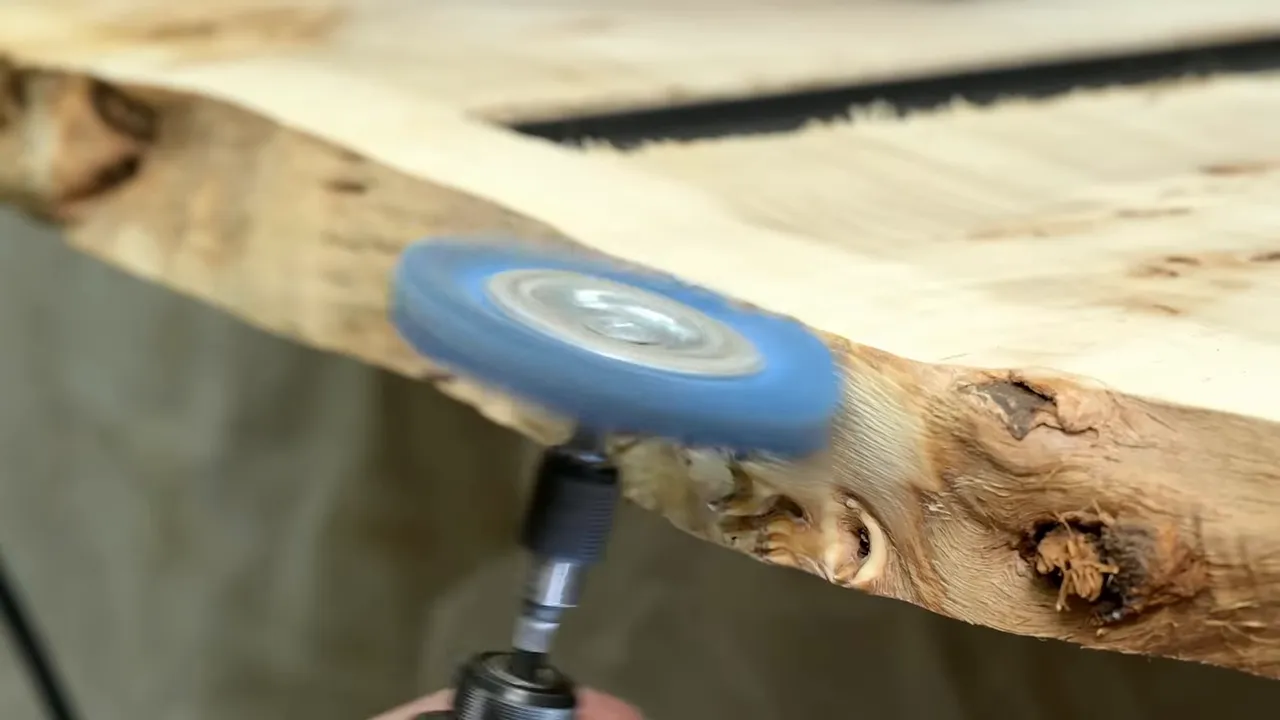
I am probably better suited to operating an excavator on a parking lot than carefully uncovering an extinct shrew’s jawbone. Unfortunately, cleaning soft burl requires a little of that archaeologist’s patience. Taking the time here was absolutely worth it.
Keeping the Character, Removing the Hazards
Preserving a live edge does not mean leaving every sharp point intact. Some of those burl nubs were sharp enough to snag clothing or make the desk a fairly unpleasant thing to bump into.
I worked over them with small rasps and sandpaper, rounding only what needed attention. The goal was to keep the natural shape without keeping the hazards.
This was also a good reminder that I overlook my Dremel far too often. I will reach for a violin maker’s rasp because it has a cool name and probably cost too much, then struggle with something the Dremel could finish in seconds. Its little sanding drum did an excellent job smoothing the tight contours.
On the ends, I added a shallow bevel with a roughly 22-degree chamfer bit. I had liked that detail on an earlier myrtle desk. It is not structurally necessary; I simply find a beveled undercut more interesting than a straight 90-degree end, even on a live edge piece.
Filling the Burl Pits That Defeated an Earlier Desk
The tiny pits around the burl clusters were a major reason one previous attempt failed. I had tried epoxy, CA glue, and various wood fillers, but could not get a surface I was comfortable selling.
This time I tried a rubbery hot-melt wood repair filler from Knottec. I had owned it for years without becoming much of a fan.
My problem with it is the surface texture. It sands, but not especially nicely, and I can still feel the repair with a fingernail. For the kind of exposed wood finish I normally use, that is not what I want.
Under an epoxy topcoat, though, the calculation changes. The filler could occupy the voids, while the epoxy above it would provide the final continuous surface.
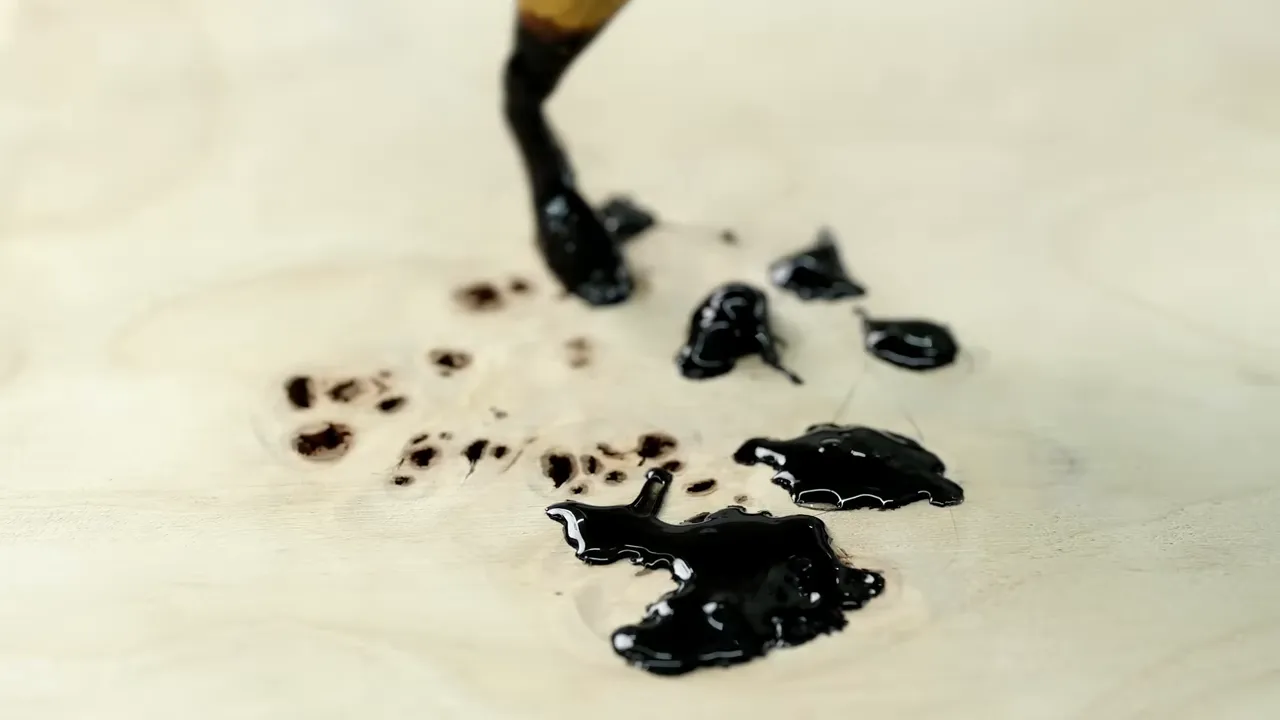
I applied the black filler, pressed it down with a metal cooling block, and removed the excess with scraping and cutting tools. It took quite a bit of work to get the surface cleaned up.
Even then, plenty of tiny holes remained. For those, I used black wax fill sticks left over from installing wood baseboards.
This was a repair strategy for a top that would be encapsulated in epoxy, not a recommendation for an exposed hardwax oil finish. The wax sticks were useful for the smallest pits, but they were not something I would leave as the working surface under my usual Rubio Monocoat finish.
The more completely I could fill the slab now, the less I would have to ask the flood coats to fix later. So I spent a lot of time hunting down individual pits. Not glamorous work, but considerably better than another abandoned desk.
Getting a Guitar-Style Black Dye Finish
The inspiration was the black finish on highly figured Paul Reed Smith guitars. I wanted dark areas with depth and contrast, not a uniform black surface that hid the wood.
Since I did not expect Paul Reed Smith to answer my Instagram messages, I contacted Koca Guitars. He makes beautiful instruments and gave me a particularly helpful recommendation: use water as the carrier for the dye.
On my previous attempt, I had used alcohol and ended up with blotching and horrible lap marks. This time I mixed TransTint black dye with ordinary tap water, preparing both a dark mixture and a lighter mixture.
The process had three main stages:
- Apply the dark dye first. This establishes the deepest black areas in the figuring.
- Sand the surface back. I used 180-grit abrasive, removing raised grain and some of the surface color while leaving darker areas in the figure.
- Apply the lighter black dye. This brings the lighter areas back toward black without eliminating the contrast established by the first coat.
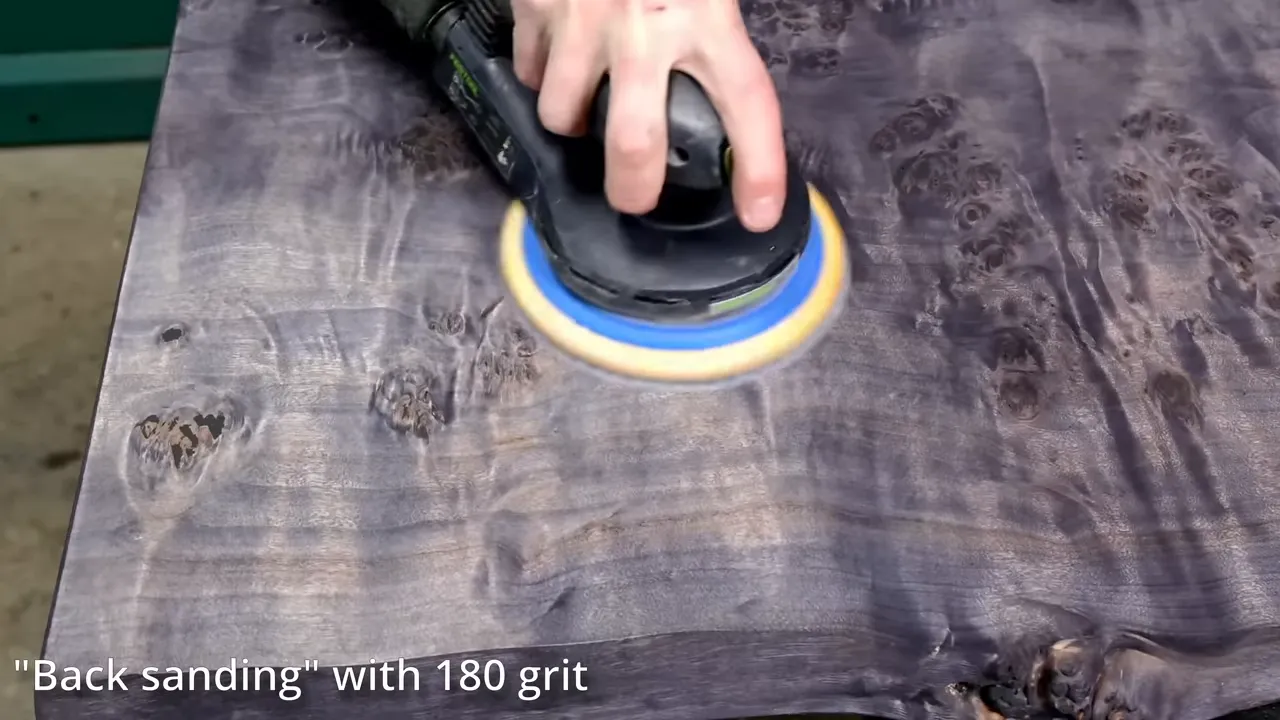
I had expected water-raised grain to create more trouble than it did. The sanding step handled it, and the water-based application avoided the lap-mark problem I had fought before.
The result was a layered black and gray appearance. It was already much closer to the guitar finish I had been chasing.
Sealing the Wood Before the Epoxy Flood Coats
Another earlier black table had failed at the clear-coat stage. I applied one epoxy topcoat and got a horrible concentration of tiny bubbles. From a distance it looked acceptable. Up close, it was almost a fog.
This time, I treated sealing as a separate part of the finish rather than expecting one thick coat to do everything.
I experimented with thinned tabletop epoxy as a penetrating seal coat, applying two coats and squeegeeing off the excess. The purpose was to seal the wood before adding the thicker clear layers, reducing the paths through which air could escape into the finish.
This was an experiment, not a universal mixing recipe. For a similar project, follow the epoxy manufacturer’s instructions on seal coats and whether any thinning is permitted.
After sealing, I knocked down dust nibs with a sanding sponge and tried to turn my woodworking shop into something resembling a clean finishing room. That is an ambitious description of this particular space.
I removed the stove’s circulating fan to reduce dust movement, misted the surrounding area with water to help settle dust, and wiped the piece with a tack cloth. The aim was to reduce contamination around the wet finish while still observing the product’s ventilation requirements.
Applying Tabletop Epoxy With the Pizza Sauce Method
Every time I apply an epoxy topcoat, I tell my wife I am never doing another one. A few months later, I explain that I am struggling with an epoxy topcoat, and she reminds me of that conversation.
This time, I asked Superclear Epoxy for advice first. One of the most useful suggestions was simple: pour some epoxy near the center and spread it with a gloved hand, like spreading pizza sauce.
That gave me good control over coverage, including the irregular live edge. It did not magically make the first flood coat perfect. There were still pits and uneven areas, so I continued building and preparing the surface between coats.
Temperature Made a Big Difference
My shop was barely above 60°F, even with the stove running. The epoxy did not want to self-level particularly well at that temperature.
I had better results on an earlier burnt-wood table when the sun warmed the actual tabletop before coating. Here, I used brief torch passes to help release bubbles and encourage leveling, but working over wet epoxy also created more opportunities to drop dust or hair into it.
For the final flood coat, I warmed the epoxy in a warm water bath to approximately 85 to 90°F. I mixed it carefully by hand rather than using a paddle that could whip in more bubbles, then spread it with the same gloved-hand method.
Those were the temperatures I used for this build, not a substitute for the working limits of another resin. Warming and heat treatment need to stay within the manufacturer’s directions.
Sanding and Cleaning Between Coats
Before the final coat, I leveled the cured surface with 320-grit 3M Xtract abrasive. Ordinary sandpaper can clog quickly on epoxy and leave pigtail scratches. The mesh abrasive worked much better for me.
At the ends, I switched to a sanding block. I generally do not enjoy block sanding, but I wanted the extra control. Sanding through the clear epoxy and into the black dye would have created a much bigger repair.
I also asked Superclear what to use for the final wipe-down. Their recommendation for this system was isopropyl alcohol above 90% concentration, rather than the random denatured alcohol I had been about to grab from a shelf. I was very glad I asked.
Polished Cast Aluminum Legs to Match the Top
Before the final sanding and buffing, I installed the legs. That way I would not have to flip a perfectly polished top upside down and risk scuffing it during assembly.
The legs came from a maker in New Zealand and were custom-cast solid aluminum with highly polished outer surfaces. They looked like something from Westworld, which was exactly the sort of departure I wanted.
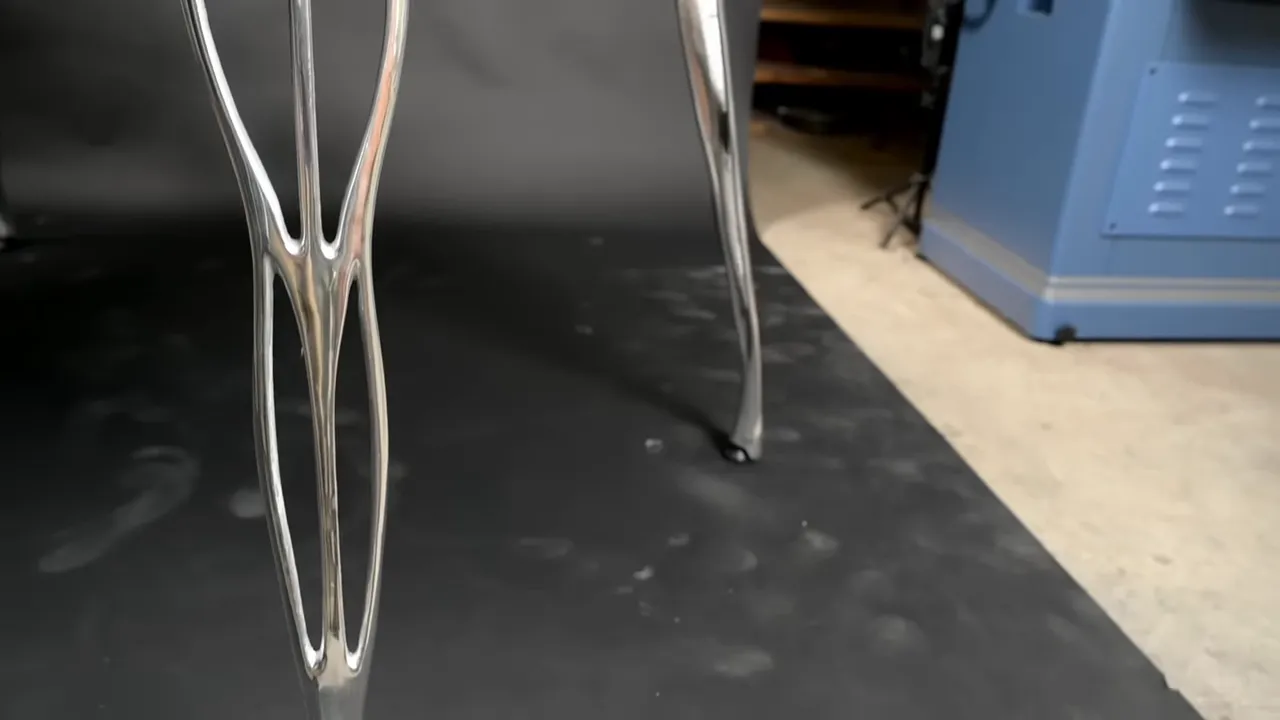
I laid out the mounting positions, drilled the holes, and installed threaded inserts for the bolts. The top was already wildly different from my usual work, so it made sense to pair it with legs that carried the same modern feel.
Two Hairs and One Expensive Sanding Shortcut
The final flood coat went fairly well, except for two little hairs that landed in different places. For a bald guy, I manage to get a surprising amount of hair in my projects.
I had hoped to begin finish sanding at 1500 grit. Removing those hairs required going all the way down to 600 grit, which meant a much longer path back to gloss.
My first sanding sequence was:
- 600 grit to remove the defects.
- 800 grit to refine the surface.
- 1500-grit 3M Trizact.
- 3000-grit 3M Trizact.
- Automotive buffing compounds.
The Trizact abrasives worked extremely well. The problem was not the system. The problem was the guy using it.
I suspected the jump from 800 to 1500 might be too large, and I went ahead anyway. Once I started polishing, deeper sanding scratches became visible beneath the shine.
It was the finishing equivalent of finding a door ding on a brand-new car. I could see the problem, but still felt compelled to put my face about two millimeters from it to confirm that, yes, it really was there.
The Fix Was Going Back, Not Buffing Harder
I returned to 800 grit and worked back through a more gradual progression, adding intermediate sanding rather than repeating the same leap. The bigger improvement was getting out an inspection light and checking the surface carefully between grits.
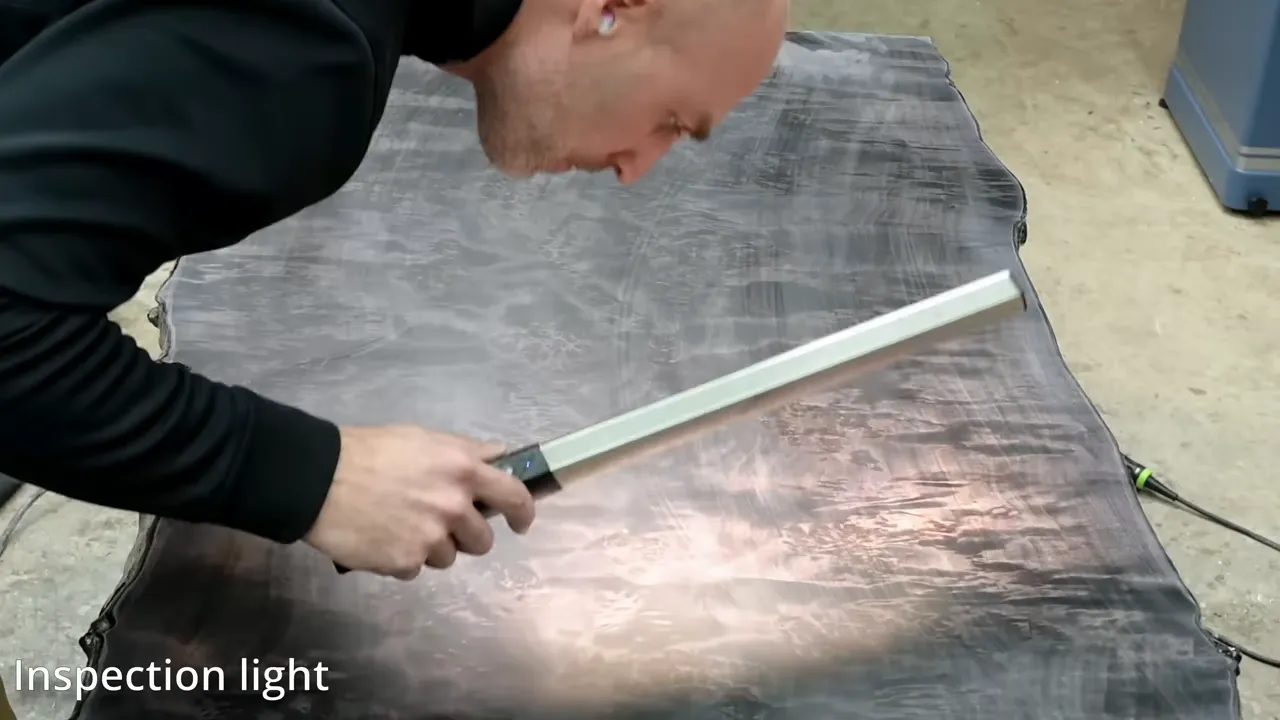
The next grit needs to remove the scratches from the previous grit before moving on. A surface can look evenly dull while still holding scratches that become painfully obvious under a glossy finish.
After correcting the sanding, I used the 3M Perfect-It compound system through its polishing stages. The first stage produced a strong shine, and the following stages refined it further.
Automotive finishing specialists had recommended this approach after an earlier build. Their advice was good. It worked considerably better once I actually followed the process.
Adding Ceramic Protection to the Polished Epoxy
By this point, the desk had an obscene amount of shine. I added Black Forest ceramic coating for a little more luster and contrast, but mainly for an additional protective layer.
A polished clear coat can still scratch. Think about sliding a dinner plate repeatedly across the hood of a car. A glossy desktop faces the same basic issue with cups, cans, and other objects.
I had used this ceramic system on hardwax-finished tables for about a year, but it was developed for automotive clear coats. A polished epoxy surface was a particularly natural application.
The system used a base coat followed by a topcoat. As it was explained to me, the base layer was harder, while the upper layer was slightly more flexible and intended to help resist fine scratching. I would treat that as added protection, not permission to drag anything I wanted across the desk.
The finish now had the combination I had been after: deep black figure, lighter details that still read as wood, and a highly reflective clear surface above it.
The Finished Desk and the $15,699 Result
I built this desk without a client because I wanted to make something I had not really seen before. That gave me room to experiment, although it also meant there was nobody waiting with a check if the experiment worked.
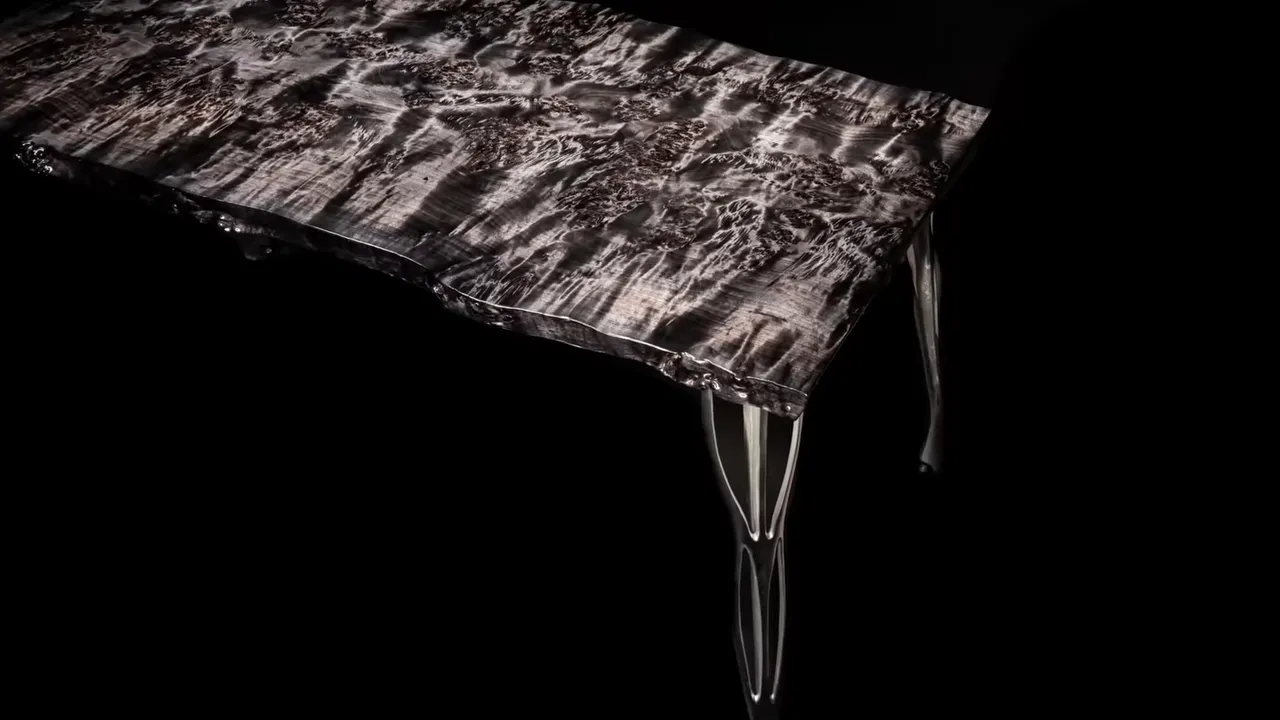
I offered it at a no-reserve auction, including crating and shipping within the lower 48 United States. Unlike an earlier auction that benefited Make-A-Wish, this one was simply a sale of my work. The listing has since expired, and the final sale price was $15,699.
I am thrilled with how it came out, but the useful part was not discovering one magic product. It was solving several different problems separately: reinforcing the slab, preserving the soft edge, filling the pits, layering the dye, sealing before flood coating, and inspecting the sanding before polishing.
The third attempt finally worked. I would like to say that means I have learned not to take shortcuts. More accurately, I have learned exactly how much extra sanding this particular shortcut costs.


