Charging $25,000 to cut two rectangles out of wood sounds a little ridiculous. My truck isn’t worth $25,000, so I’m not entirely unsympathetic to that argument.
But these two walnut slab tables turned into a pretty good demonstration of everything hiding behind those rectangles: careful layout, epoxy work, damaged wood, a corner repair that went badly enough to cut off and start over, and a finishing process that gives the bottom nearly as much attention as the top.
They also gave me a chance to finally put some very expensive wood to work. About two years earlier, I had bought ten slabs from one exceptional walnut tree. I expected to recover that investment fairly quickly. Two years and one sold project later, that plan was not looking particularly brilliant.
Table of Contents
- Key Takeaways
- How One Walnut Slab Became an Entire Tree
- The Right Client, With One Unexpected Corner
- Seal Cracks Before Adding Colored Epoxy
- Flattening Wide Slabs in Stages
- What C-Channels Actually Do for a Slab Table
- The Corner Repair That Looked Easy Until It Didn’t
- Custom Spider Bases and Tiny Repairs
- A Subtle End-Grain Bow Tie
- Finish the Bottom Like Someone Might Look Underneath
- Keeping the Live Edge Natural, Without Keeping the Sharp Bits
- The Finish, the Final Corner Touch-Up, and the Finished Pair
Key Takeaways
- Seal cracks with clear epoxy before adding pigment to reduce bubbles and staining.
- Match replacement wood in three dimensions, not just by its surface color.
- C-channels can help resist cupping, but they do not guarantee a flat tabletop.
- Careful sanding, safe live edges, and finished undersides matter as much as dramatic walnut figure.
How One Walnut Slab Became an Entire Tree
Most of my big slabs come from Goby Walnut, a supplier not far from my house. Despite what people sometimes assume, I generally buy wood there like a normal customer. The owner, Aaron, once suggested that sending so much business his way might actually have raised my own prices. That is an impressive way to negotiate against yourself.
Still, getting the best possible material matters more to me than finding the cheapest slab.
Aaron approached me about some wood his dad had been keeping in his private reserve. They were tired of storing it, and he described this particular tree as possibly the most beautiful walnut they had ever encountered. When walnut is in the name of your business, that carries some weight.
I had bought from his dad’s reserve before. He definitely kept the good stuff.
The price seemed roughly half what these high-end slabs might bring individually at retail. Naturally, I made a sensible decision and agreed to buy one. Then two. Then four. About a week later, I called back and bought all ten.
The problem wasn’t the wood’s appearance. The slabs were unusually wide relative to their length, which meant they needed a fairly specific project and a fairly specific room. Beautiful inventory sitting against the wall is still inventory sitting against the wall.
The Right Client, With One Unexpected Corner
When Tom contacted me about two tables, his requirements sounded like an excellent match for these slabs. We worked through several layouts before settling on three straight edges and a small section of live edge on each top.
The goal was not a wildly irregular slab. It was a clean shape with just enough natural edge to remind you where the wood came from.
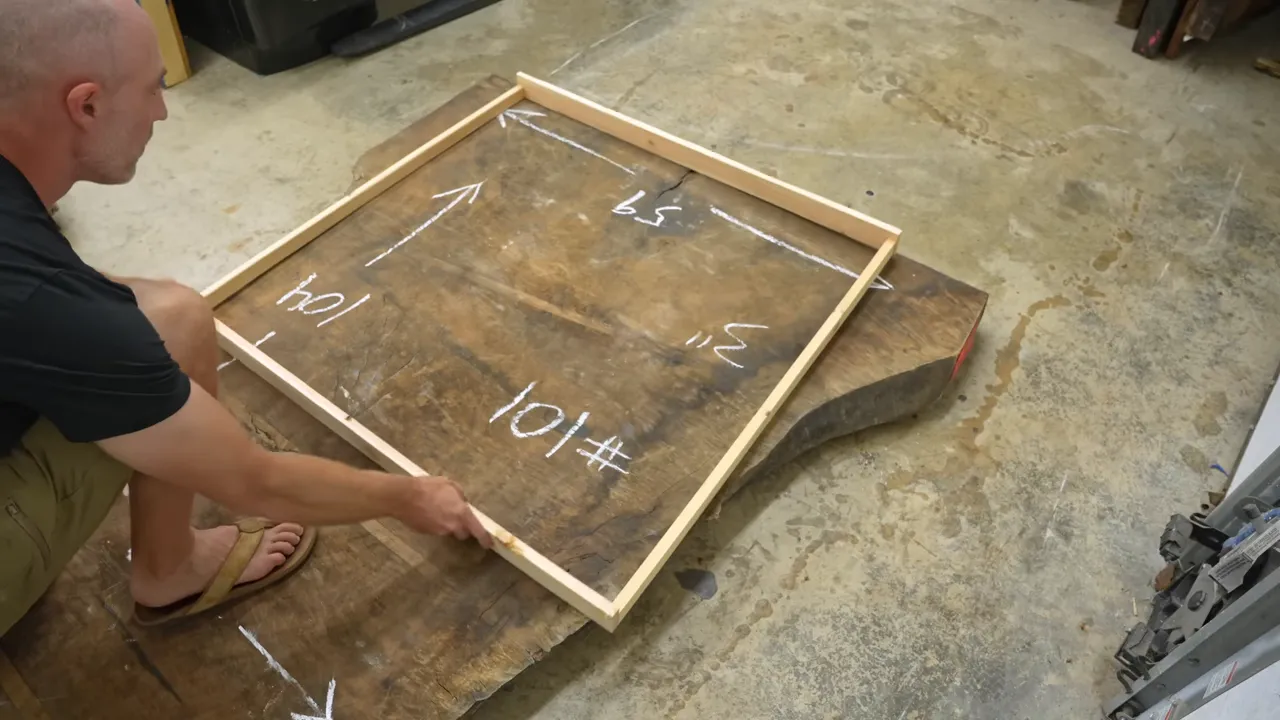
I used wooden layout frames to explore the placement, then cut the slabs slightly oversized before surfacing. That left room to refine the final shape once I could see what I actually had.
Unfortunately, one corner had considerably more live edge underneath than I expected. From above, it looked like a modest repair. From the side, it looked like a conversation I didn’t want to have.
One problem corner eventually disappeared completely when I trimmed the top to its final outline. The other would need replacement wood.
The design challenge was to remove the awkward parts without cutting away the little bit of live edge the client actually wanted. Simply making everything smaller would have solved one problem by creating another.
The total price for the pair was $25,000, including custom steel bases and everything except shipping. At that price, “close enough” needed to mean something better than “you probably won’t notice.”
Seal Cracks Before Adding Colored Epoxy
One of my most frequently broken rules is also one of the easiest to explain: seal cracks with clear epoxy before pouring pigmented epoxy. This time, I actually followed my own advice.
The clear seal coat does two important things:
- It helps produce a cleaner fill with fewer tiny bubbles and a more even surface.
- It reduces the chance of pigment or dye bleeding into the surrounding wood.
For these fills, I used activated charcoal as a powdered pigment. In my experience, it is less prone to staining than a liquid dye, but that does not make sealing pointless.
Liquid dye can travel surprisingly far into the wood. Planning to remove another 1/4 to 3/8 inch during surfacing is not a reliable escape route. A stain may go deeper than the material you can afford to remove.
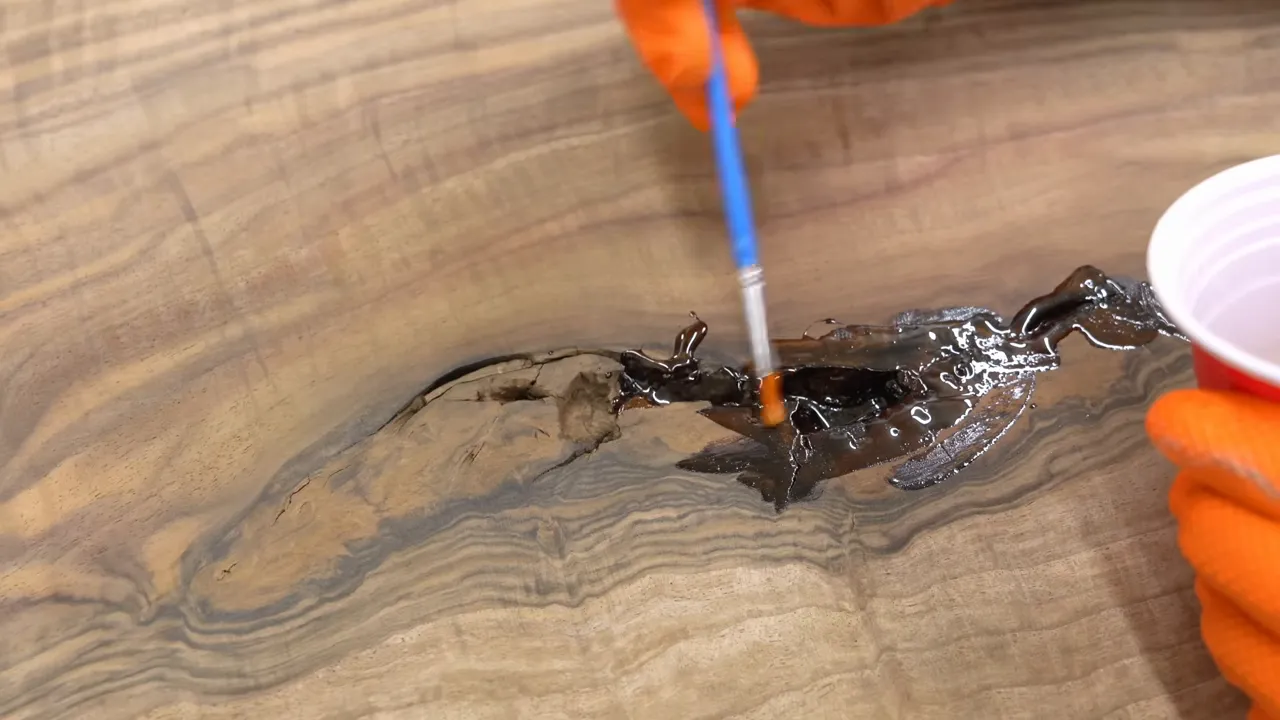
It is a small preparatory step compared with sanding away a stain, losing thickness, and discovering the stain is still there.
Repairing a chunk torn out during planing
The smaller slab developed a separate problem during surfacing. The planer caught some difficult cross grain and broke out a section roughly 3 inches by 2 inches.
This wasn’t a clean break that could be closed neatly with ordinary wood glue and a strong clamp. The piece fit back into place, but there were going to be gaps.
I used epoxy mixed with a thickening filler, the sort of gap-filling mixture used in boatbuilding. I brought it to a peanut-butter consistency, applied it to the damaged area, and seated the broken piece.
For this repair, the adhesive needed to bridge imperfect contact. Heavy clamping was not the solution. I added just enough weight to keep the piece snug while the epoxy cured.
The important distinction is choosing an adhesive approach that suits the joint you actually have, rather than treating every repair like a perfectly fitted glue-up.
Flattening Wide Slabs in Stages
These slabs had substantial dips, and getting them flat required removing about an inch of wood overall. I did not want to remove all of that in a single surfacing session.
I have done that before. In my experience, removing too much material at once can be followed by more warping or twisting as the slab responds.
My preference is to divide substantial flattening across two or even three sessions. These tops went through two sessions at the industrial shop and appeared very stable afterward.
That does mean extra handling and another trip with heavy slabs. My brother helped load them. I described him as my twin, although he has apparently aged much less gracefully than I have. He is also my older brother, so that probably explains it.
Once the surfacing was complete, I returned to the layout frames and made the final cuts. This was the point to prioritize the overall shape, preserve the attractive live edge, and minimize the corners that would need rebuilding.
What C-Channels Actually Do for a Slab Table
Before tackling the remaining corner, I recessed steel C-channels into the underside of the tops.
I do not think of C-channels as structural reinforcement that makes a slab table, or an epoxy table, inherently stronger. Their purpose here is to help resist a limited amount of cupping or other movement.
Paul from Canadian Woodworks has a useful way of describing it: the steel negotiates with the wood. It does not get to issue orders.
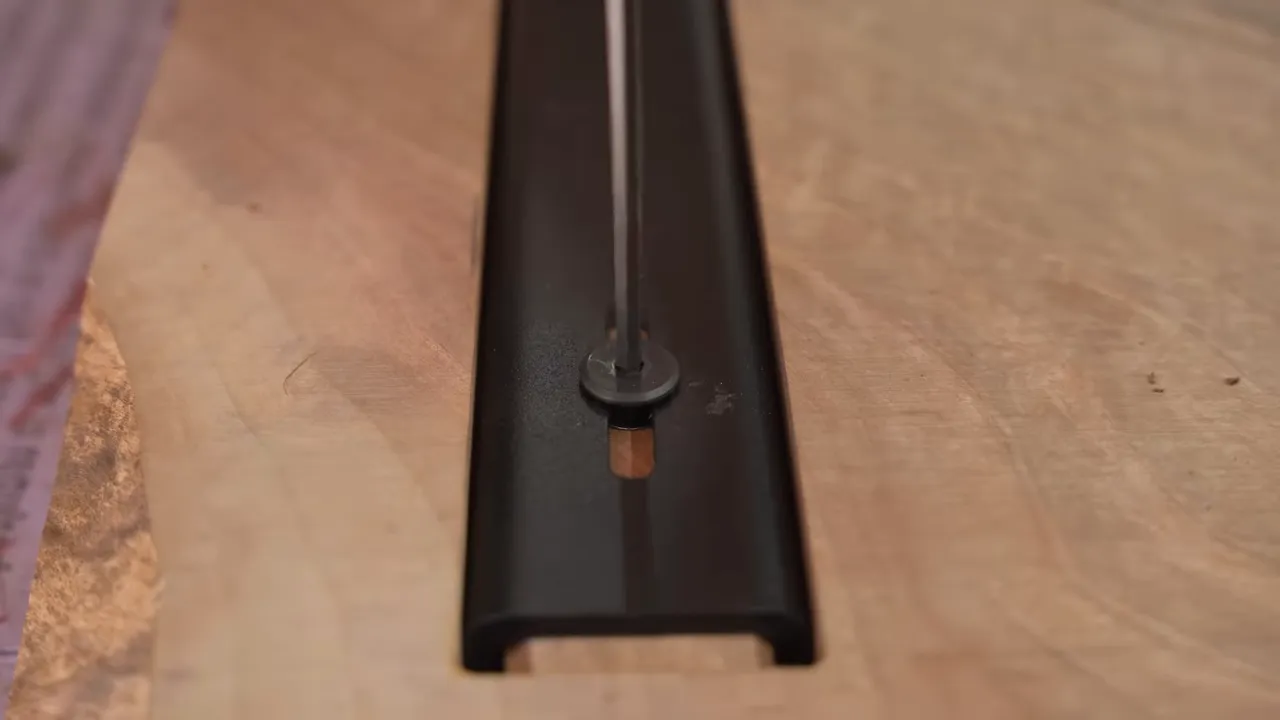
I am not aware of controlled studies that settle how effective this particular treatment is on slab tables. What I do have is an experience that convinced me it can be worthwhile.
Years ago, I bought two wide slabs from a tree that had been cut and milled decades earlier. They had recently been surfaced, but both had developed a noticeable cup by the time I saw them. They were about 48 inches wide.
I had both resurfaced and finished both. One received small C-channels, roughly 1/2 inch deep, from Home Depot. The other received none.
Within two or three weeks, the untreated slab had cupped badly again. The one with the small channels stayed flat.
That is anecdotal evidence, not a scientific trial. It is also enough to explain why I still use them. For the broader reasons wood changes dimension as moisture conditions change, the USDA Wood Handbook is a useful technical reference.
The Corner Repair That Looked Easy Until It Didn’t
Have you ever tried something once, had it work perfectly, and immediately assumed you were an expert?
That was my entire qualification for repairing this corner.
I had previously rebuilt a similar corner by finding matching wood and gluing it onto the slab. It worked beautifully. Tom had seen that repair and liked it, so we agreed to use the same approach here.
The first replacement looked promising while I was fitting and clamping it. Once it was trimmed, the problem became obvious.
The color was not the biggest issue. The grain was going the wrong way.
I had concentrated too much on the piece as a flat surface and not enough on how the grain would appear across the top, side, and end after cutting. A thick slab repair is a three-dimensional matching problem. My brain had apparently budgeted for one dimension.
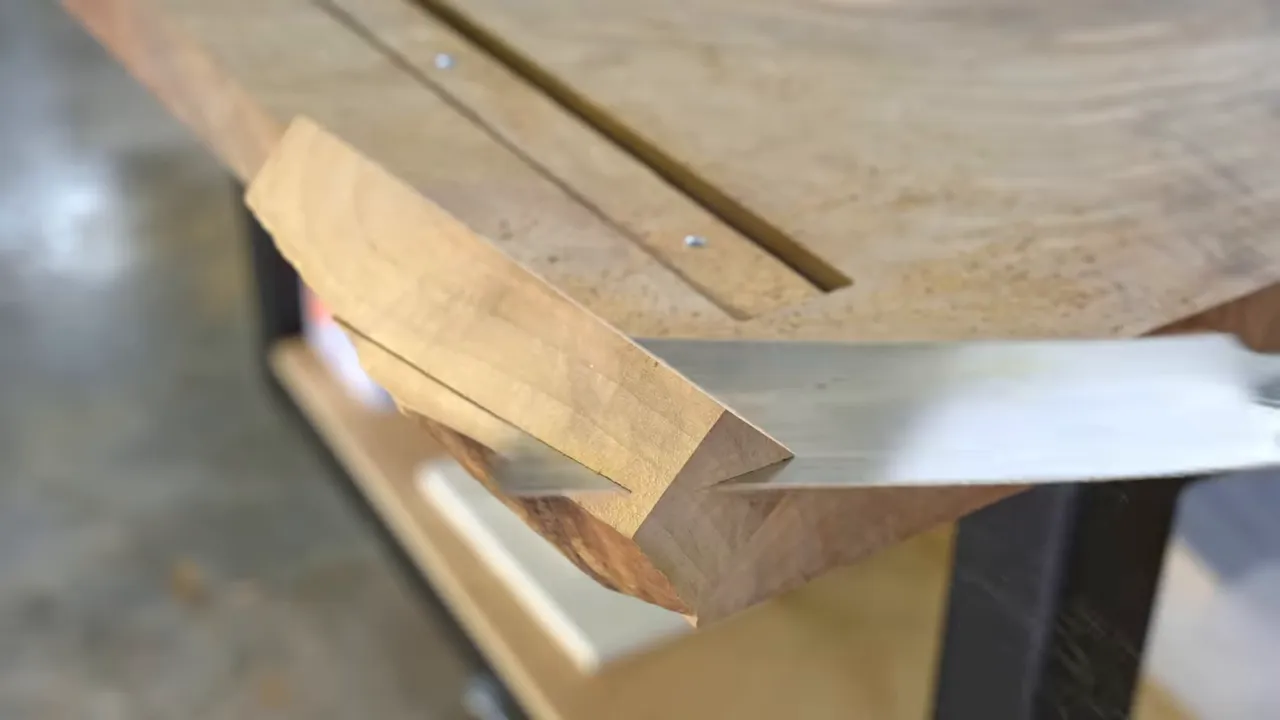
We cut it off.
Another candidate still had a similar problem. Finding a piece with the right color, figure, and grain orientation was much harder than I had allowed for.
Cutting into an expensive donor slab
The eventual solution was another large slab from the same tree. It had a light sapwood area that limited some possible layouts, but it also had the material I needed for a much better corner replacement.
Cutting into an approximately $1,800 slab to obtain about 6 inches of repair material sounds excessive. It would have been excessive if the rest went into the firewood pile.
It didn’t. A substantial portion remained available for another project, and the offcuts could provide matching repair stock for other slabs from the tree.
More importantly, this was part of the obligation that came with the price. If I am charging for a high-end result, I need to be willing to absorb a high-end correction when the first attempt is not good enough.
I think of it like an expensive restaurant replacing a piece of beef that gets dropped in the kitchen. The customer shouldn’t have to discover the mistake before the restaurant decides to fix it.
The replacement from the donor slab was much better. It still needed a little color adjustment, which I saved for later.
Custom Spider Bases and Tiny Repairs
The steel spider base is probably the most popular base I offer, judging by client feedback. These are custom-made by Bryson Steel in Roseburg. The base cost I discussed was about $3,000 with powder coating and delivery.
Not cheap. Also not an unreasonable place to spend money under a slab like this.
I positioned the bases, marked the mounting locations, drilled for the threaded inserts, and prepared the attachment points before the final finishing work.
I would still love to build this style of base from wood. The obstacle is turning all those intersecting angles into a workable design and cut list. I had proposed a collaboration with Chris at Foureyes, who is much better equipped to develop that kind of plan. For now, the steel version looks pretty good.
Chris also makes the Brass Chunky pencil. A cheap pencil will mark a line. A roughly $100 brass pencil will also mark a line, but with considerably more brass involved.
Why the smallest holes can be the most annoying
The little holes left by slab suppliers are some of my least favorite repairs. Sometimes a matching wood plug almost disappears. Other times, it looks exactly like I pushed a toothpick into the table and snapped it off.
When that happens, the answer is to drill it out and try again, not pretend it has become a design feature.
It is a lot like golf: one good shot makes you wonder why every shot cannot look that easy.
For the record, my golf credentials include completely missing a ball on the first tee at a fancy course with a required caddy. My softball credentials are worse. At a company game, I struck out twice in slow-pitch softball while my friend TJ laughed hard enough to shake the fence.
People sometimes assume I was naturally comfortable putting myself out there. I wasn’t. I had just already accumulated enough public humiliation to make a woodworking mistake seem manageable.
A Subtle End-Grain Bow Tie
There was one crack I was sufficiently concerned about to add a visible bow tie. Rather than put it on the broad top surface, I placed it in the end grain.
I chose a figured piece that closely matched the surrounding walnut. I wanted a subtle detail, not a contrasting bow tie announcing itself from across the room. There was also a hidden bow tie underneath.
The visible one served two purposes: it helped restrain the suspicious crack, and the client liked the appearance.
The crack already contained epoxy, and I did not expect it to separate. This was additional insurance and a small decorative detail, not a claim that every filled crack needs a bow tie.
I used a marking knife to establish the outline, removed the waste, and refined the recess with chisels before gluing in the inlay.
One part of my process deserves a warning rather than imitation: tipping a fixed-base trim router into the cut was awkward and dangerous, especially with a dull bit. Use the appropriate plunge base and a sharp bit instead of copying that maneuver. Owning fifty chisels does not excuse refusing to buy the router accessory you actually need.
Chiseling the end grain was surprisingly pleasant because the cuts followed the fibers rather than slicing across them. The working position was less pleasant. Sometimes I stand a table on end and work from a ladder, but this time I accepted the awkward position instead.
All told, the visible bow tie added roughly an hour of work. For a restrained detail that the client wanted, that felt reasonable.
Finish the Bottom Like Someone Might Look Underneath
At car shows, I always liked the cars displayed over mirrors so you could see that the underside was finished as carefully as the body.
That idea stuck with me. A table bottom is going to have mounting hardware, threaded inserts, and steel channels, but it doesn’t need to have neglected cracks and rough sanding too.
If I would fill a crack on top, I try to fill the same crack underneath.
For both faces of these tables, my sanding sequence was:
- 120 grit.
- 150 grit.
- 180 grit.
- 240 grit.
Between grits, I water-popped the surface at least once, and sometimes twice. Wetting the wood raises the grain so the next sanding pass can remove those raised fibers and leave a smoother surface.
It also creates a perfectly legitimate drying interval for ping-pong. My wife calls it playing ping-pong. Scott and I prefer “management team building.”
Water-popping stubborn sanding marks
The industrial wide-belt sander left some deep marks that needed attention. I have found that water-popping can help make those marks easier to remove after the wood dries.
I have had similar results with faint circular-saw marks along a slab edge. Sometimes repeated dry sanding seems to accomplish very little. Raising the grain and sanding again makes the remaining imperfections much easier to deal with.
It is not permission to rush the earlier sanding. It is another useful step when a surface refuses to clean up.
Keeping the Live Edge Natural, Without Keeping the Sharp Bits
One of these live edges was unusually good. It was solid, beautifully textured, and needed only a little debris removed rather than extensive filling and reconstruction.
That is rarer than it sounds. Live edges often have cracks, deteriorated areas, or other defects that demand more intervention.
I cleaned the small recesses with inexpensive dental picks and smoothed the surface with a nylon abrasive wheel. This particular wheel was approximately a 240-grit equivalent, although I treat that as a rough guide rather than a direct comparison with sandpaper.
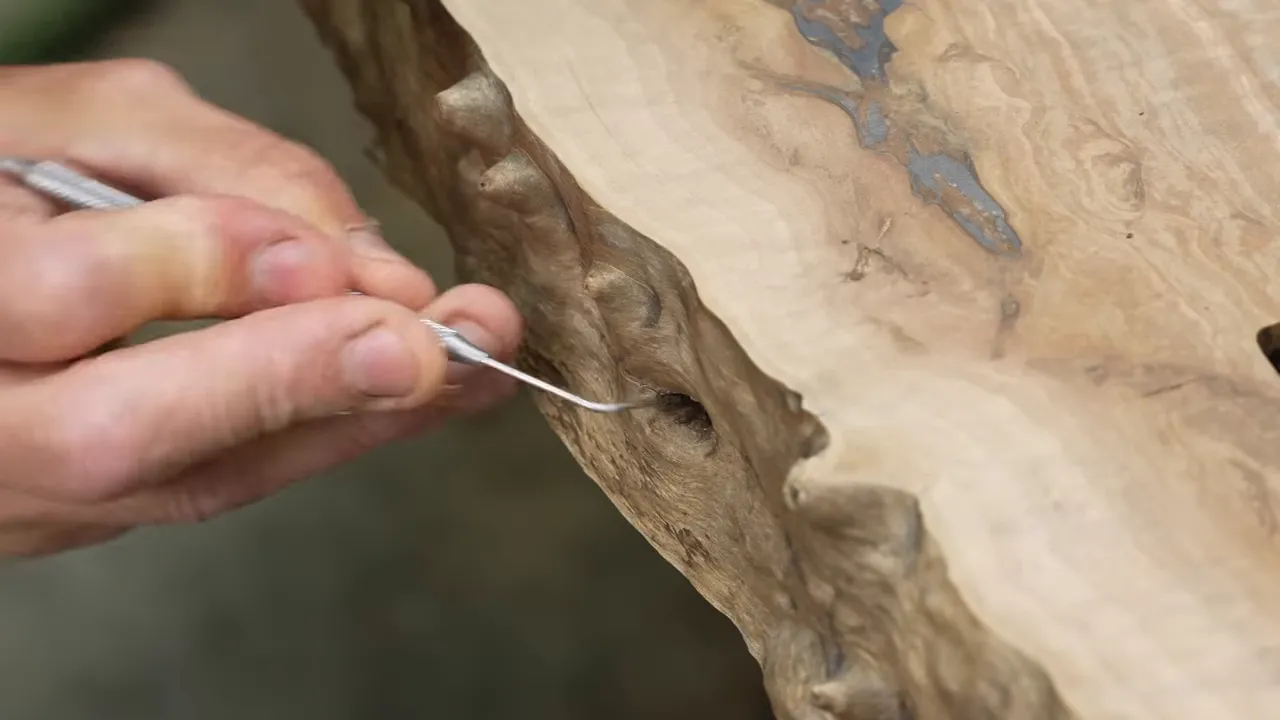
The result retained the natural bumps and texture but felt almost like polished stone.
The other slab had some protruding points. I liked their appearance, but this was furniture for daily use. A natural edge should not snag a sweater or put a child, or a Great Dane, at risk.
I used a small rotary sanding tool to remove the sharp tips while keeping the surrounding contours as natural as possible.
Two inexpensive non-woodworking tools earn their place in this work: dental picks for cleaning small pockets and battery-powered photography lights for inspecting surfaces. I find the lights more convenient, and often better in color, than bulky corded work lights.
A simple edge profile lets the walnut do the talking
I sometimes use deep roundovers, combinations of different radii, or a deep 22-degree chamfer like the one on my own table.
Tom initially considered that chamfer, but the final choice was a simple 1/8-inch roundover. It is one of my favorite restrained profiles and probably the most common request from clients.
With wood this dramatic, the edge does not need to compete for attention.
The Finish, the Final Corner Touch-Up, and the Finished Pair
Applying finish is usually my favorite part. It can also be the moment a hidden scratch or epoxy stain announces that I will be sanding everything off and starting again.
Fortunately, these tops behaved. The preparation paid off, and the walnut looked incredible.
The finishing system used here included LED-cured hardwax oil, followed by N3 Nano treatment. In keeping with the car-show approach, I treated the undersides as well as the tops.
Each face of each table received two coats of N3 hard coat and three coats of top coat.
My finishing process is not especially difficult, but it is detailed. I have a free workshop of about an hour and a half that covers the full process for a home shop or garage. It requires an email address, not a credit card.
|
For the repaired corner, I used a light touch-up with a medium-toned stain to bring the replacement closer to the surrounding wood. It wasn’t literally invisible, but it was a substantial improvement, and I don’t think I could have done much better with that corner.
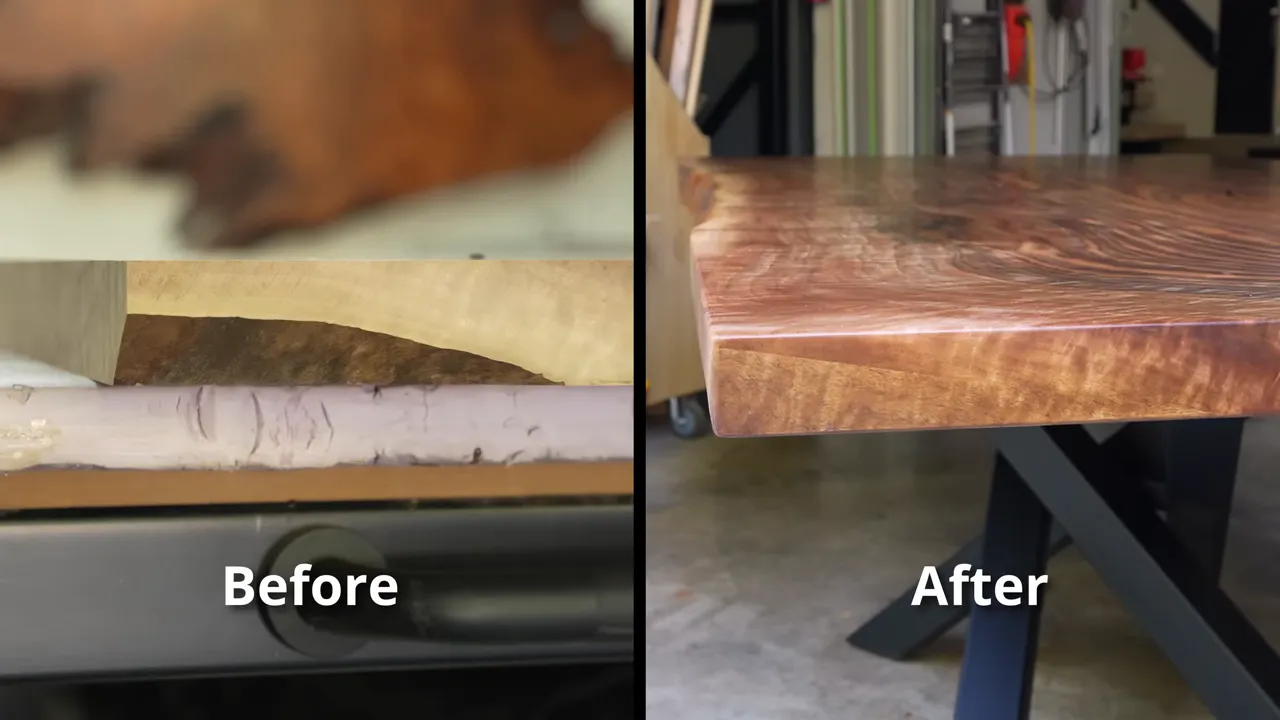
The pair ended up with clean outlines, restrained natural edges, matching steel bases, and the kind of figure that made me buy far too much wood in the first place.
Tom also made a smart decision early in the design: both tables have the same dimensions. They can function separately or be pushed together into one massive table.
His house was still being renovated when the tables were completed, so installation and his final response were still ahead. I wasn’t going to invent a happy-client ending before the furniture had even arrived.
What I could say was that I had done my best to make the hidden work match the visible wood. If the result looks like two simple rectangles, I’m fine with that. Getting there was considerably less simple.


