A nearly nine-foot, roughly 500-pound walnut slab is a pretty bold choice for a 1,200-square-foot house. Especially when one of the people living there has already said the table is too big.
The husband, Charlie, wanted me to build it anyway. His wife was not convinced. So I got to work on a piece of wood valued at $6,700 and hoped that making the best table I could would somehow resolve a disagreement about square footage.
Charlie is an arborist who goes by Chainsaw Charlie. He traded tree work for the slab, although he did not actually cut down the tree it came from. That would have made a better story, but apparently we are sticking with the truth.
The goal was simple: preserve this incredible piece of black walnut, repair what needed repairing, and let the wood do most of the talking.
Before Making Sawdust, Make Sure the Slab Is Dry
The first thing I should have done was check the moisture content before the supplier left. This was not a supplier I normally used, and since Charlie had arranged the trade, I was responsible for determining whether the wood was actually ready to become furniture.
A beautiful slab is not automatically a usable slab.
I used a Wagner pinless moisture meter to check multiple locations across the wood. Unlike a shallow pin reading, this type of meter lets me assess moisture beneath the surface without putting holes in the slab.
This one was reading around 7 to 8 percent. For my work in Oregon, I am normally looking for roughly 9 to 11 percent, so this was unusually dry. A little drier was fine for this project. The important part was checking across the slab rather than getting one encouraging number and deciding that was enough.
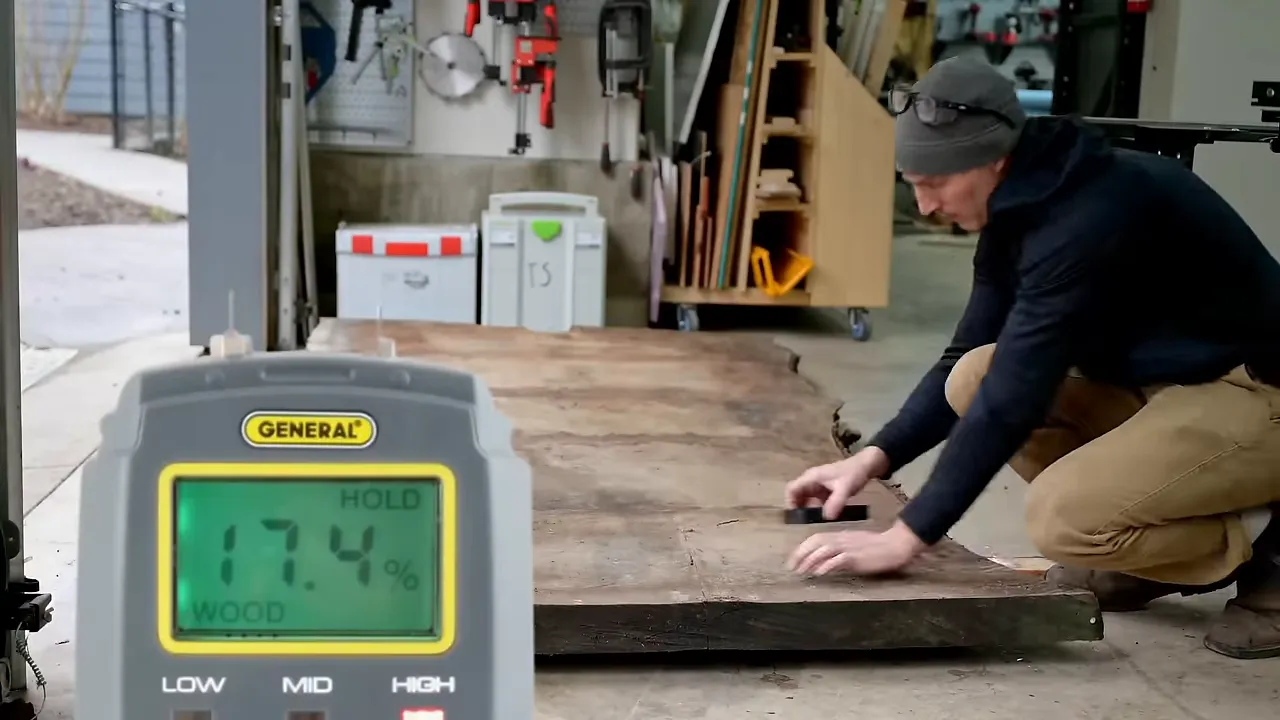
The next problem was size. The slab started out more than 60 inches wide, which was too wide for the industrial surfacing machine we normally use. We cut it down to about 48 inches to get it under the machine's 50-inch limit.
That was not the final width. Charlie still had some negotiating to do at home.
They eventually settled on 44 inches at the widest points, with a narrower waist where the live edge curves inward. Forty-four inches is still a substantial dining table, especially in a house the same size as my shop. But at least we were moving in the right direction.
Keep the Walnut, Repair the Defects
Once surfaced, the slab was remarkably clean. There were small knot holes, bark inclusions, and a few voids, but only one genuinely ugly area: a rotted-out limb.
This was not a slab that needed to be cut in half, flipped around, and filled with 20 gallons of epoxy. Despite what people might reasonably assume about me, I do occasionally make tables that are mostly wood.
The plan was to use epoxy only where the wood actually needed it. The grain, figure, and natural shape were already doing everything I wanted.
I spent about three hours picking out loose material and cleaning the defects. For a slab this size, that was not bad at all. Small tools let me remove the material that did not belong without unnecessarily enlarging every imperfection.
Unfortunately, the final sizing cut exposed something I had not been able to see: that rotted limb continued through the side of the slab. Now the repair had to look acceptable from above and from the edge.
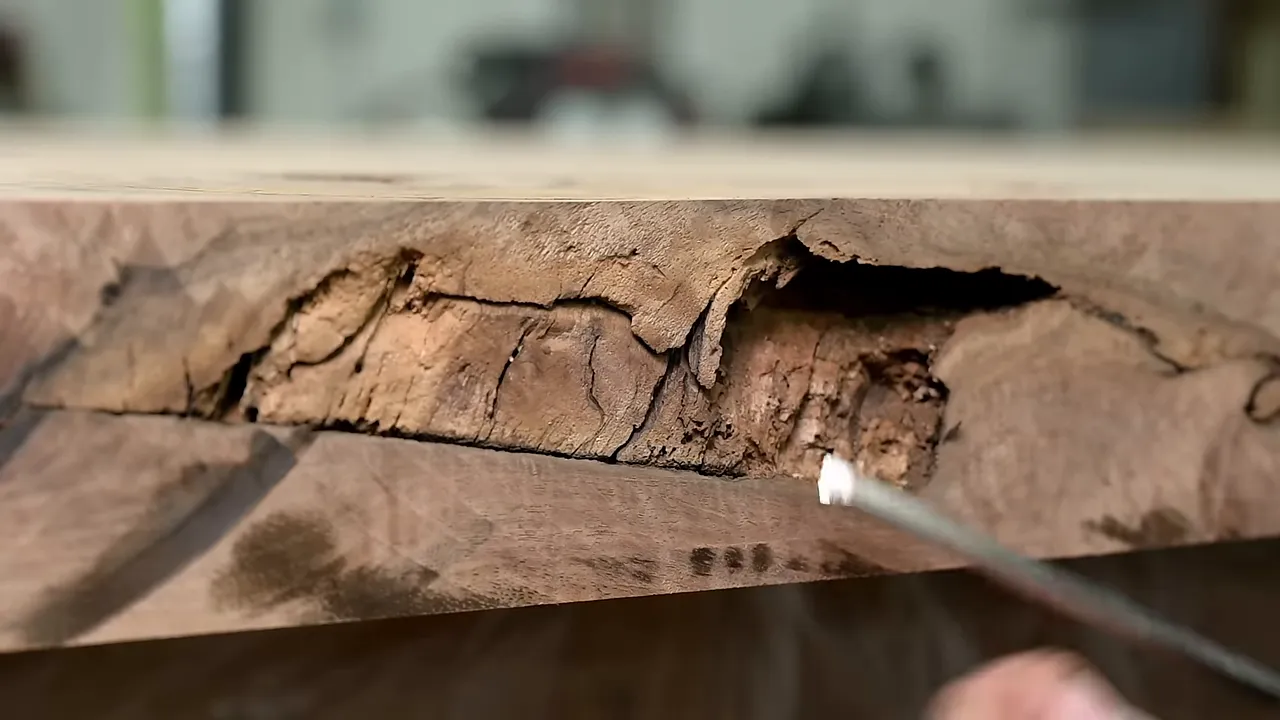
Stabilizing the soft wood
Before filling the void, I needed to consolidate the softer material around it. On this build, I experimented with marine epoxy thinned with a little acetone, along with some warmth to lower its viscosity.
I would not present that mixture as a proven recipe. I was not certain it was the best approach, and modifying epoxy is something to check against the manufacturer's technical guidance rather than treating a shop experiment as universal advice. WEST SYSTEM's epoxy resources are a useful place to start for product-specific handling and application information.
The important part of this repair was how absorbent the damaged wood was. The end grain kept taking in resin for almost an hour. A quick brush over the surface would not have accomplished the same thing.
This was never going to make the limb disappear. The alternatives were to carve it out and replace it with wood or create a much larger epoxy repair. I preferred to retain the natural feature and make it usable.
Different repairs need different epoxy consistencies
I treated the underside and visible edge separately:
- Underneath: I added 404 thickening filler to the epoxy so it would stay where I wanted it rather than readily soaking through to the top.
- Along the visible side: I used tabletop epoxy colored with black TransTint, without the thickener that would change its appearance.
- In the deeper side cavity: I worked in multiple layers and dealt with bubbles as the repair progressed.
The thickened mixture is a little like making a roux. The epoxy is the butter, and the filler is the flour. Apparently Louisiana cooking references are part of my woodworking process now.
The side repair took about a day of attention. Fortunately, Charlie stopped by when I needed to get the slab back onto the bench. He visited throughout the project, and I was absolutely not going to discourage the owner of this enormous table from being a useful second set of hands.
What C-Channels Actually Do in a Slab Table
Live edge furniture has been popular long enough that I am not sure when we are supposed to stop calling it a trend and start calling it a style. George Nakashima was making extraordinary slab furniture decades ago, and he certainly was not the first person to realize a slice of tree could make a table.
There is, however, a reason traditional furniture makers do not build everything from one giant board: slabs like to move.
They can cup, twist, and warp. A tabletop assembled from narrower boards gives the builder more control over grain selection and arrangement. A single slab gives you spectacular uninterrupted figure, but you inherit its behavior along with its beauty.
For this table, I recessed steel C-channels into the underside. I learned this approach from Paul at Canadian Woodworks, and I like his description of it: you are negotiating with the wood.
C-channels help resist warping. They do not prevent the slab from cracking. Their role is closer to the stiffening function of an apron in a traditional table than some magical promise that wood will stop acting like wood.
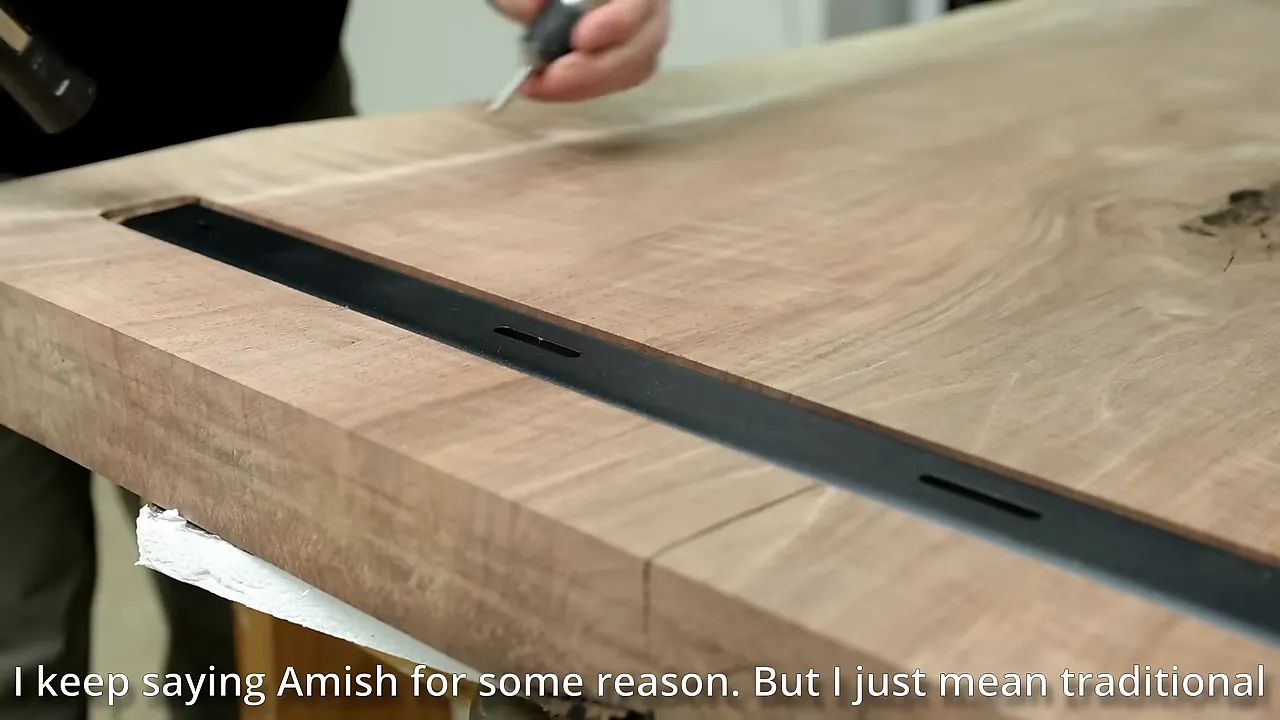
My other strong preference is to use threaded inserts and furniture bolts rather than lag bolts for this hardware. And if you are choosing inserts, I prefer steel over zinc or brass.
For more background on slab preparation and material selection, I have a separate guide to live edge wood for beginners.
Clean the Live Edge Without Sanding Away Its Character
One of the easiest ways to make a nice live edge look less nice is to attack it with an orbital sander.
Yes, that removes bark. It also removes the high spots, texture, and little contours that made the edge interesting in the first place. Even sandpaper held in your hand can flatten those details faster than you expect.
My preferred approach is gentler:
- Remove larger pieces of bark with a dull chisel.
- Use nylon abrasive wheels to clean the remaining material while following the contours.
- Keep checking the surface so cleanup does not turn into reshaping.
A dull chisel is useful here because I am trying to lift bark, not carve away good wood. For the nylon wheels, I used both a Porter-Cable Restorer and smaller wheels that fit an impact driver.
The objective is a clean, durable edge that still looks like it came from a tree, not an edge that looks like I carefully manufactured a tree shape.
A Loose Router Bit and a Surprisingly Simple Fix
This was the thickest tabletop I had built, at about 2.75 inches. The legs were a fairly standard 28 inches tall, while the overall dining table height I was aiming toward was about 30 inches.
Normally, I recess the leg mounting plates because I think it looks cleaner. On this table, recessing them also helped lower the finished height.
While routing the second pocket, the router started bogging down on one side. I made another pass. It bogged down again. Rather than immediately investigating, I kept going.
Eventually, the little light bulb came on: the bit had loosened in the collet and was slipping downward.
That left part of the recess too deep and made a complete mess of the pocket. More importantly, I was lucky the bit did not come all the way out while spinning at around 20,000 rpm. A router suddenly behaving differently is a reason to stop and inspect the setup, not keep persuading it.
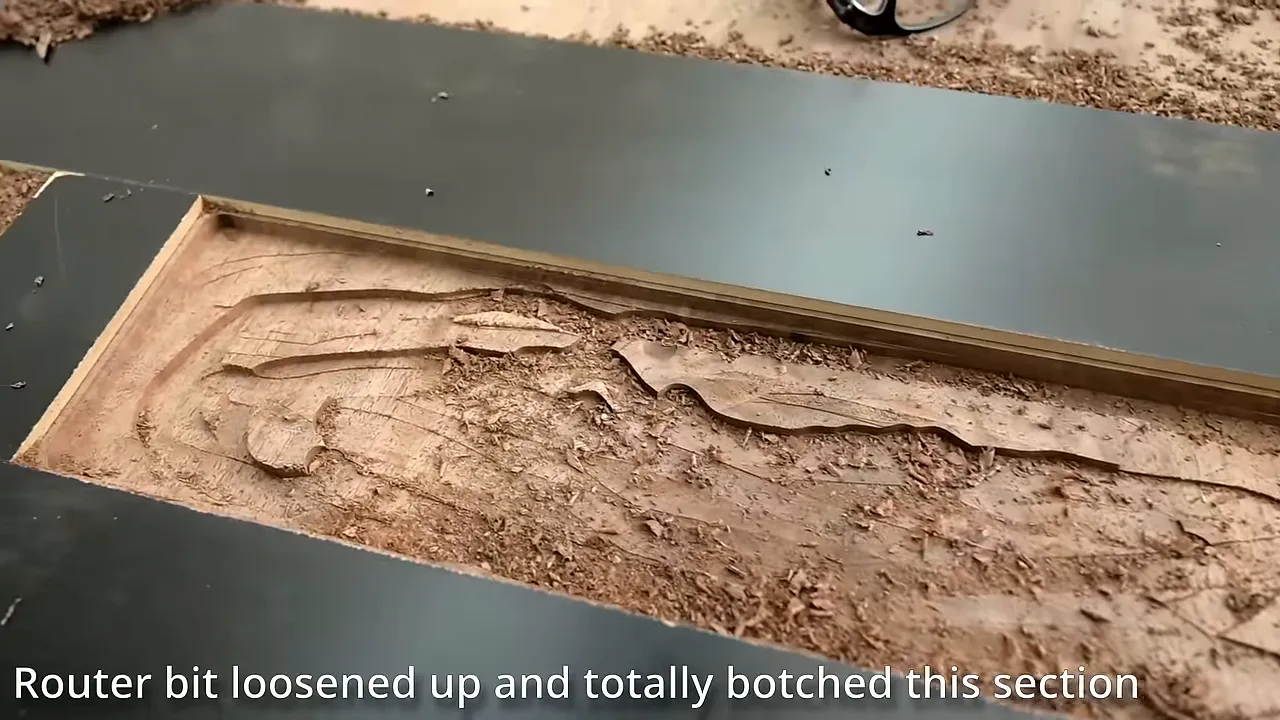
My first repair ideas were unnecessarily complicated. I considered filling the pocket with resin and machining it back down. Then I considered planing thin wood pieces and building the surface back up.
The actual difference was only about 0.15 inch.
With a slab this thick, the sensible fix was to clean up the deeper recess and route the other mounting pocket to match. That also brought the finished table a little closer to the height I wanted.
Sometimes the best repair starts with taking a break. Have lunch. Walk around. Stop staring at the mistake for a minute. I could easily have spent hours creating a worse solution because I was too focused on undoing what had happened.
Once the hardware work was complete, I finish-sanded the underside before flipping the slab again. With something this large, organizing the work to minimize flips is worth the effort. It was not the heaviest table I had ever made, since wood and epoxy combinations can be heavier, but it was still plenty of table to handle.
Bow Tie Inlays That Belong in the Slab
Bow ties are one of those details people tend to have opinions about. I like them, but I do not want them to look like unrelated pieces of walnut dropped into an otherwise beautiful surface.
For this build, I used offcuts from the same slab. Walnut varies enough in color that a piece from another tree can clash surprisingly badly. If I cannot get a good match, I would almost rather use an intentionally contrasting wood, such as maple, than a walnut that is almost right.
I started with cardboard shapes to work out the arrangement. Then I milled the matching walnut into flat, square stock, cut rectangular blanks, and shaped the individual bow ties.
It is a ridiculous number of operations when you describe the result as “a handful of little rectangles.” But accurate stock makes the later work much more predictable.
Fitting the inlays
The basic sequence was:
- Arrange the bow ties across the area being reinforced.
- Mark their outlines with a knife.
- Remove most of the waste with a router.
- Refine the edges and corners with sharp chisels.
- Glue in the bow ties, leaving them proud of the surface.
- Plane away the excess, then sand everything flush.
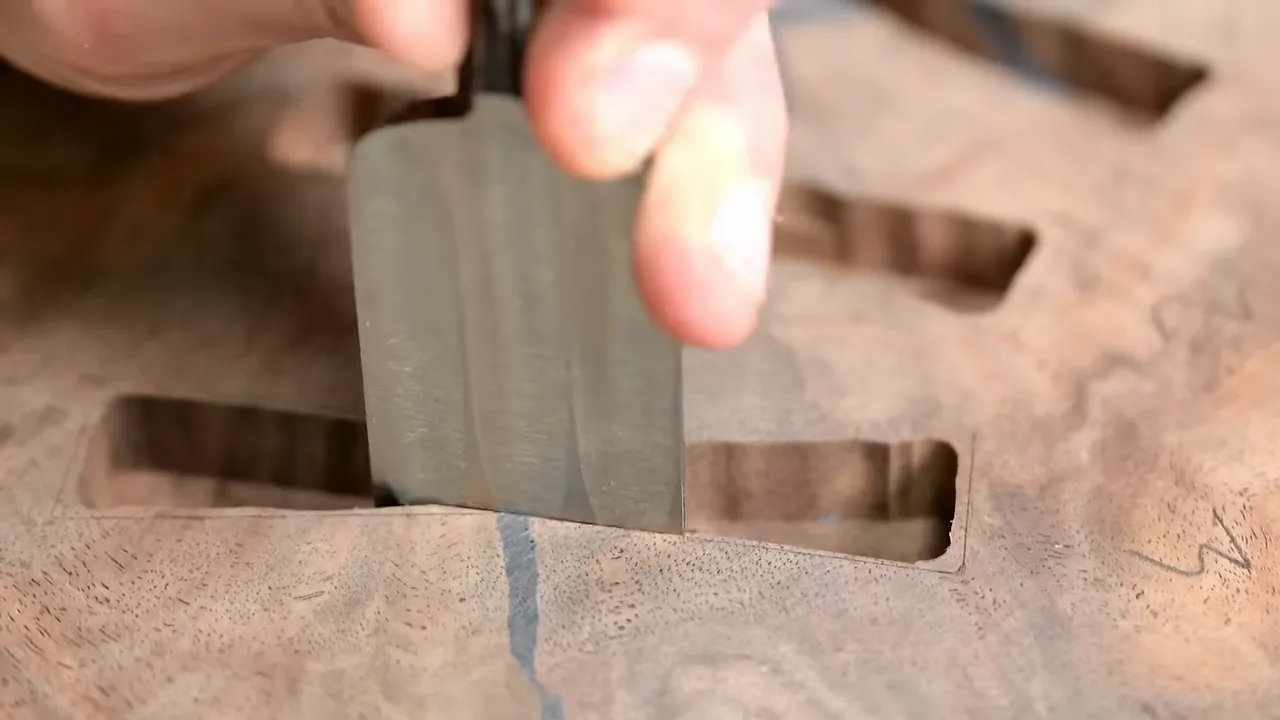
I leave the inlays high because the alternative can be much worse. If I tried to seat one perfectly flush and ended up even half a millimeter below the tabletop, I would have a low spot that could require a larger replacement inlay.
Removing a little extra wood with a hand plane is easy compared with fixing an inlay that went too deep.
A conversation with my wife's uncle, who is a hobbyist woodworker, reminded me that this technique requires more than willingness to learn. Between milling, cutting, sharpening, routing, and chiseling, there can be a fairly substantial tool investment.
That conversation had me working on a router-based bow tie jig with shapes closer to the hand-cut designs I like. At the time of this build, it was still in development, not a finished solution.
Hand-fitting an inlay is worth trying, though. My first bow ties were in a magnetic bottle opener that is still on my refrigerator. You do not need to make your first attempt on a $6,700 slab. I would strongly recommend that you do not.
For a more focused explanation, my bow tie joint guide covers the technique separately.
The side inlay needed a different adhesive
I also installed a horizontal bow tie in the end of the slab to help hold the pith area together. Working on a vertical face was considerably more awkward than working on the top.
The routing method I used, bringing a fixed-base router into the side as though it were a plunge router, was not a setup I would recommend copying. It was difficult and unnecessarily risky.
Normally, I prefer wood glue for an inlay because epoxy can leave a dark outline even around a tight fit. On this side repair, getting useful clamping pressure was difficult, so I chose epoxy for the bond and accepted the cosmetic compromise.
The Small Details Before Finish
After leveling the inlays, I dampened the surface mostly because I wanted an early look at the figure. Sometimes there is no more technical explanation than being impatient to see the pretty wood.
Then I went back through the slab for the little things:
- A small chisel mishap near an inlay.
- Micro pits in the epoxy repairs.
- Fine cracks that were easy to overlook.
- Sanding marks revealed by a low-angle inspection light.
I used CA glue and activator for small touch-ups, guiding it into fine defects with a little awl. This slab needed less of that work than most, but a clean slab still benefits from a careful final inspection.
There is also a business lesson tucked into this stage. When a detail looks interesting, take a picture of it. A close-up of a well-fitted inlay or beautiful grain can be useful social media material without requiring a finished project or an elaborate production.
Every bit of business success I had up to this point came through social media. My advice to a new maker is to start by posting your own work, notice what connects, and build from there rather than immediately paying for advertising or hiring someone to manage it.
Finishing the Walnut Without Rushing the Calendar
I finished the underside first, then had Charlie help flip the slab so I could finish the top soon afterward. My aim was to treat both faces close together rather than leave one finished and the other bare for an extended period.
The finish was Rubio Monocoat. It is straightforward to apply, although making it look really good takes more patience than the application itself might suggest.
Once the finish hit the top, the center figure came alive. That pattern is called crotch feathering, and yes, that really is the woodworking term. Combined with all the curl in this slab, it made a pretty strong argument for leaving the walnut alone.
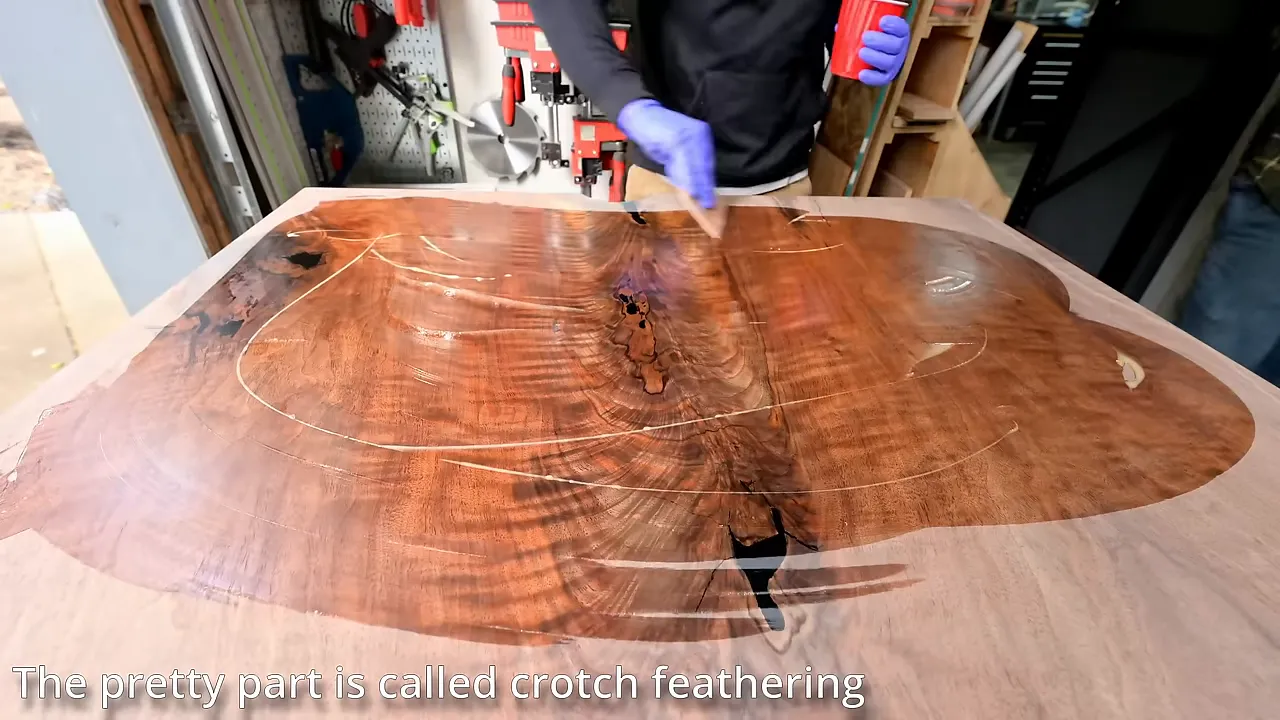
Charlie was comfortable climbing an enormous tree and cutting the top off, but wiping finish on his own table made him nervous. He described himself as too ham-handed. I still made him do a little work so he could honestly tell the family he helped build it.
One coat left a very matte appearance. Some people love that. I wanted a little more sheen and depth, so my schedule for this table was:
- Apply the initial finish.
- Wait about two days.
- Lightly abrade with a maroon pad and apply a second coat.
- Wait about three days, then apply maintenance oil.
- Wait another week before moving to the ceramic coating.
That is my process for this build, not a replacement for the current instructions for whichever products you use. Finishing did not require an enormous number of working hours, but it did occupy a lot of calendar days.
I have a separate table finishing guide for a closer look at that part of the process.
What the ceramic coating added
I used a two-part ceramic coating system from Black Forest over the cured finish. Before putting it on customer furniture, I had tested it on my own dining table for close to a year.
That mattered because many of my clients live out of state. “Hopefully this works” is not much of a service plan.
In my experience, the coating added protection while increasing sheen and contrast. My own table survived a family Passover dinner with a row of ice-water glasses and no coasters, without leaving water marks.
That was encouraging. It was not proof that the table had become indestructible.
A ceramic coating is not a sheet of glass over the wood. Charlie has children, and I wanted to be clear that extra protection did not mean bulletproof furniture.
I applied the coating to the top, sides, and live edge so the sheen would be consistent across the visible surfaces. I did not put it underneath, where the Rubio finish was already in place and a slight difference in sheen did not concern me.
The system used a base coat followed by a top coat, with the top coat intended to be refreshed without redoing the base.
Delivery Day Settled the Size Argument
After all the careful work, we nearly dropped the table while unloading it outside the house. Apparently I was still capable of underestimating how much a giant walnut slab weighs.
Once it was inside, though, the conversation changed.
Charlie's wife cried because she was happy. Not because we had filled her entire house with a table, which was a possibility I had considered.
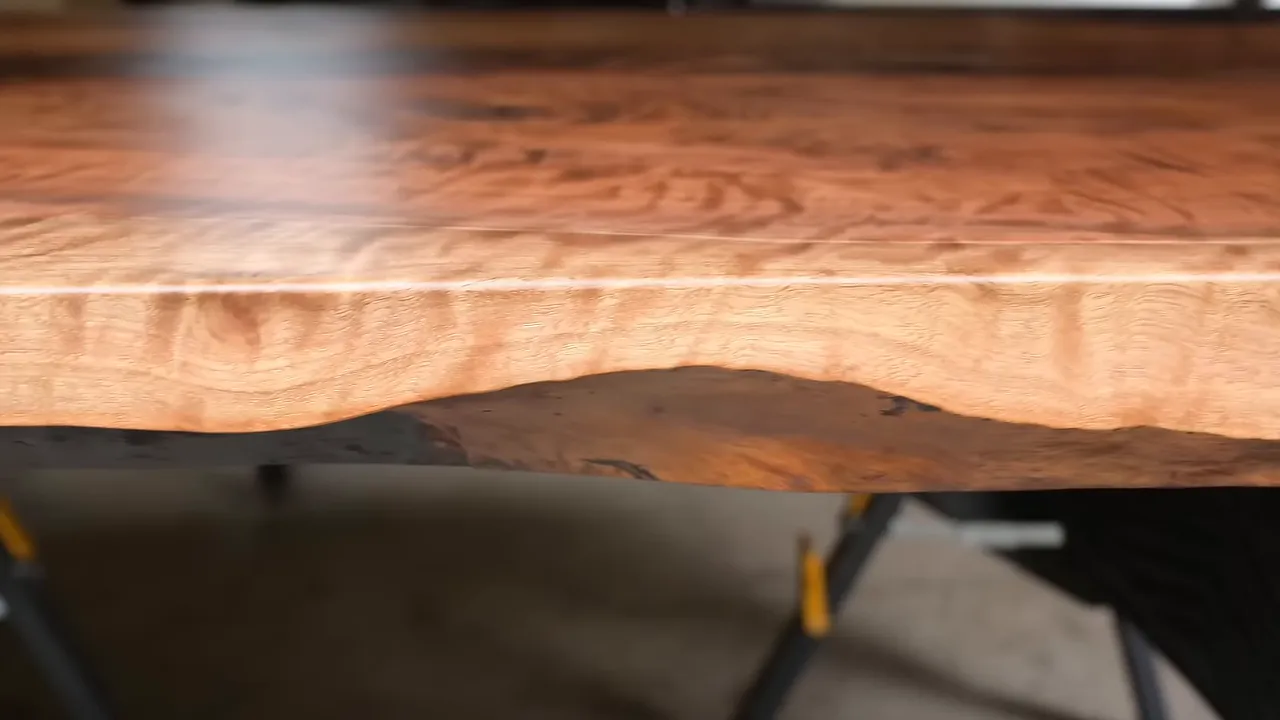
Her reaction answered the question I had carried through the whole build. The dimensions had been a concern, but the finished piece made her happy. Charlie was happy. The kids were happy. I was mostly happy that the table was safely in place.
Before I left, the kids gave me custom artwork featuring a beaver and what was supposedly my favorite tree. I had told them my favorite color was walnut wood, so I cannot really complain about their interpretation. The trees looked a little more like sequoias, but the commission was excellent.
This build was not about turning a slab into something unrecognizable. It was about making the repairs, hardware, inlays, and finish support what was already there. With wood this good, the best design decision was knowing when to stop.
A Note on My Bookmatched Table Base Plans
A previous single-slab walnut desk I built for my wife used a bookmatched base that generated a lot of questions about the design and hardware. I have since had professional plans drawn for that base. It is an advanced project, with more approachable plans available in a bundle for builders who want a different starting point.
|


