The interesting part of a burnt wood table is not necessarily the black char or the clean wood. For me, it is the transition between them. That little gradient is where the whole thing starts to look natural instead of like somebody attacked a perfectly good table with a torch.
For this desk, I wanted that burn to travel up a waterfall leg, turn the corner, and continue across the top. Then I wanted to polish the epoxy over the char to a grand piano shine while leaving the white oak matte.
I had made burnt wood tables before. I had attempted waterfall joints before, with varying degrees of emotional damage. Combining both with two completely different surface sheens was new territory. Naturally, I started with a slab that my wood supplier had decided was worth absolutely nothing.
A Free Slab Is a Lot Like a Free Puppy
This white oak came from Goby Walnut. It had cracks everywhere, deep low spots on both sides, and a dark streak running through a natural void. This was not a case of a professional spotting hidden value that an amateur would miss. The professionals had looked at it and given it to me for free.
Unfortunately, free wood does not mean free furniture.
Before I could do anything useful with it, I had to get it out of my slab rack. When I had that rack fabricated, I considered how many slabs it could hold. I gave considerably less thought to how I would remove any of them. A forklift, some help, and a little regrouping eventually solved that problem.
The oak also felt absurdly heavy. I initially wanted to claim it weighed twice as much as a similarly sized walnut slab, but checking that claim brought it down to roughly 25 percent heavier. If you enjoy checking wood claims before repeating them, the Wood Database’s white oak reference is a useful starting point. Either way, this was going to make a great desk, provided nobody ever wanted to relocate it.
The first real expense was surfacing at Creative Woodworking. The slab was too wavy to give me a reliable straight cut beforehand, so I had it flattened first. Back at the shop, I removed the live edges but kept as much width as possible.
I deliberately did not cut it to final dimensions yet. There was fire in its immediate future, and I wanted some room to recover if things got sporty.
Carving the Burn Before Lighting It
On my first burnt wood table, I burned the entire surface and warped the slab terribly. That experience taught me that a torch is not a particularly precise carving tool.
This time, I used an angle grinder to enlarge and shape the existing low area before burning it. The natural void looked as though it might already have been caused by fire, so building on that shape made sense.
The plan was to create a recessed burned area that would eventually run up the waterfall leg and wrap onto the desktop. Later, epoxy would fill that recess. Surfacing would remove the epoxy from the higher wood, leaving it only over the lower charred areas.
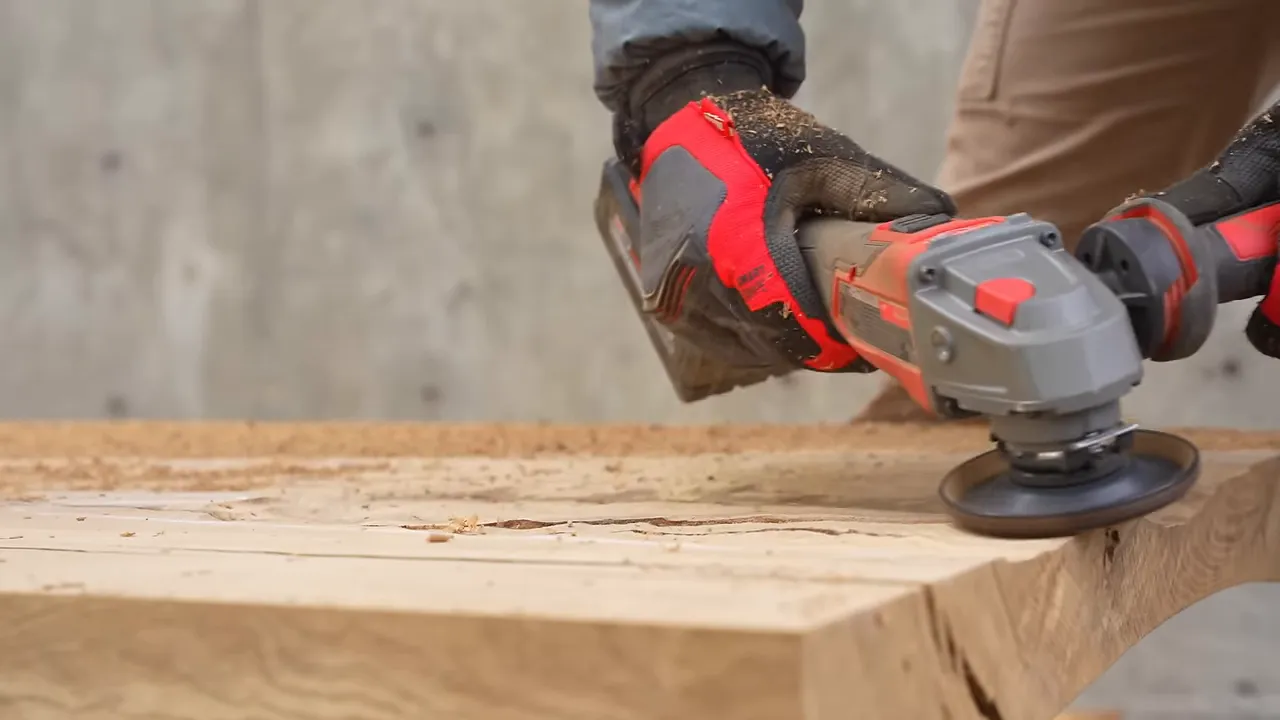
Originally, I intended to make one large burn patch. As I worked, that started to look a little unbalanced and not especially natural. I added a long streak across what would become the top, then decided to char the existing cracks as well.
Those smaller details helped tie the large burned section into the rest of the slab. Instead of one isolated black patch, the desk would have a related set of dark features.
After burning, I soaked the slab down with water and left it for about a week before moving on to epoxy. That was the timing on this build, not a universal drying schedule for every slab.
Sealing Charred Wood Before the Epoxy Pour
If there is one step I would not rush on a burnt wood and epoxy table, it is sealing the char.
Those burned sections can release a tremendous amount of air. A clear pour does not hide that problem. It preserves it for you to enjoy forever.
I brushed on a thin penetrating epoxy, working it into the charred areas, and sealed the rest of the slab while I was at it. The goal was to stabilize the burned surface and reduce the air escaping into the main pour.
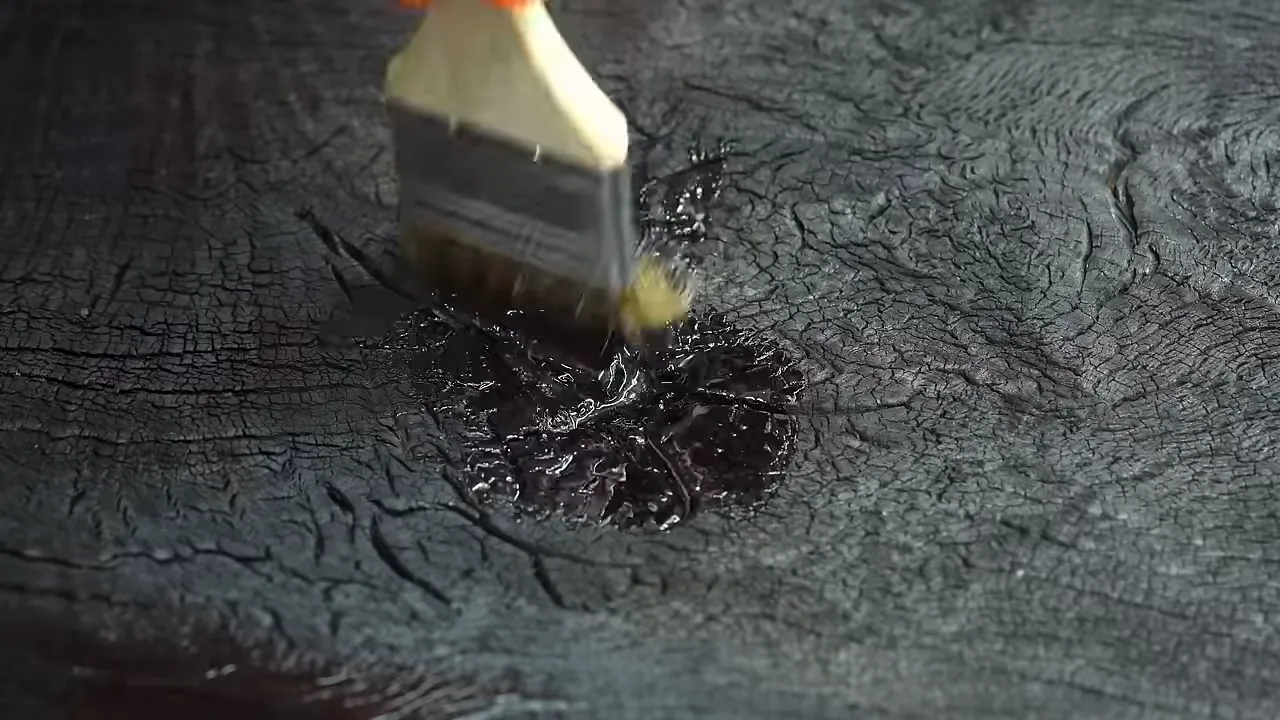
Next came the mold. I built it only about half an inch larger than the slab, which made lowering this very heavy piece of oak into position a fairly precise operation. Suction cup lifters gave us handles exactly where we needed them. I used them for perhaps half a second, but it was an extremely valuable half second.
Sealing the mold itself involved caulk, a material I have somehow used for miles without becoming particularly good at applying it. Fortunately, the important part here was containing the epoxy, not winning a caulking competition.
Why I Used Deep-Pour Epoxy for a Shallow Layer
The epoxy layer was only about half an inch thick, but I still used a slow-curing deep-pour formulation.
The reason was time. Even after sealing, air can keep escaping from the char over the next 24 to 48 hours. I wanted the resin to remain fluid long enough for those bubbles to reach the surface rather than become trapped beneath it.
When I returned the following day, a lot of air had escaped and the epoxy was still fluid enough to address the surface bubbles with a torch. A faster-curing product would have given me a much smaller window.
One section kept producing a steady stream of bubbles anyway. I had not sealed it well enough, and some of those bubbles remained in the finished piece. That is the less glamorous side of clear epoxy: it is very honest about your preparation.
I waited about three weeks before removing this slab from the mold. The form came apart nicely, helped by mold release. My recommendation on that is uncomplicated: use mold release. Making demolding harder does not earn you extra woodworking points.
Surfacing Back to Wood and Fixing What Still Looked Wrong
At this stage, the entire surface was covered in epoxy. The next trip to Creative Woodworking was intended to remove enough material to expose clean oak while retaining clear resin over the recessed char.
That distinction is important. I was not planning to leave a thick, glossy epoxy coating over the whole desk. The wood needed to become wood again, with the resin confined to the features I had carved and burned.
The second surfacing trip added another $150 to the supposedly free slab. At the time, Creative Woodworking’s rate for wood and epoxy was higher than its rate for wood alone.
Once the surface came back, a few charred areas were not fully infused. They had a slightly fuzzy quality, similar to something I had encountered on a layered denim project. I brushed regular marine epoxy onto those sections to saturate them again and bring them up to the hardness of the surrounding surface.
There was also a large defect that was technically smooth and filled with epoxy but still looked terrible.
This is where my favorite bad argument nearly won: think about it, nobody will notice.
Unfortunately, looking at it was much less convincing than thinking about it.
A Router Jig Instead of a CNC
I made a simple straight-sided jig, used it to establish the perimeter of a shallow recess, then reset the router depth and removed the remaining material one strip at a time. It took around 20 minutes of repeated passes.
A CNC might have been a sensible option. I did not own one, did not have room for one, and would not have known how to use it if one appeared in the shop. So the jig won.
The powered router handled the bulk removal, and a router plane cleaned up the areas near the edges. Jonathan Katz-Moses had sent me his router plane a few months earlier, and I had initially regarded it as a router that was missing its motor. This job finally explained the appeal.
After cleaning up and squaring the recess, I fitted and glued in a wood patch, filled small remaining defects, and brought the repair flush. It was considerably more work than leaving the original flaw alone. It also looked considerably better.
The Waterfall Joint That Took Several Attempts
A waterfall edge turns the slab 90 degrees toward the floor while making the grain appear to continue around the corner. It is a simple idea with an impressive ability to expose tiny cutting errors.
This was the largest waterfall joint I had attempted, and I was already notoriously bad at them. I trimmed the slab to its final dimensions, checked the setup repeatedly, and still managed to find a problem immediately.
My track saw’s cutting depth at 45 degrees was about 2⅛ inches. The slab was also about 2⅛ inches thick. That sounds promising until you remember the track takes away some of that depth.
I knew this. I had simply hoped that knowing it would not matter.
I finished separating the remaining material with a large hand saw. That gave me an excuse to use a new timber framing tool, although “an excuse” is probably the more accurate description of its role.
I also had a larger Mafell timber framing saw that could have made the cut in one pass. On my particular saw, with my particular ability to operate it, I did not trust its accuracy for this joint as much as the smaller Festool.
The Two Tips That Finally Helped
After two or three hours of fitting, better squares, clamping, and increasing discouragement, I had produced a miter that touched in only two spots. That is not easy to do, but apparently I am gifted.
I called John Malecki, who has built a lot of waterfall tables. Two pieces of advice made the difference:
- Set the bevel just past 45 degrees. Do not assume stopping exactly at the indicator produces the best-fitting joint.
- Make the square cut first, then cut the bevel. I should not have tried to establish the entire joint with one initial 45-degree cut.
It took a few more cuts, but the fit finally became excellent. These are the adjustments that helped this build, not a claim that I have suddenly become qualified to teach a masterclass in waterfall joinery.
I cut mortises for Domino loose tenons to help align and reinforce the joint. The dry fit was tight enough that assembly needed a mallet and a protective block of wood, but the difference from the earlier attempts was enormous.
Prepare the Entire Glue-Up Before Mixing Adhesive
For once, I thought through the complete assembly before committing to it. I would like to present that as my normal approach. It is not.
- I masked alongside the joint with painter’s tape to reduce cleanup.
- I laid the long pipe clamps underneath the work in advance.
- I organized the Domino tenons and attached the angled clamping blocks.
- I dry-fitted the assembly and checked that the corner came together at 90 degrees.
The epoxy adhesive I used gave me only about five minutes of working time, so getting organized mattered. That short window belonged to this adhesive, not to epoxy in general.
Once everything was assembled and clamped, it looked right. Instead of continuing to adjust it until I created a new problem, I left it alone.
Sometimes you need to take yes for an answer. That applies surprisingly well to woodworking.
Building the Other Leg and Answering the Stability Question
The opposite leg took inspiration from my own dining table, which has a base made from ⅜-inch steel plate. That table uses two legs connected by a stretcher. This desk would use one freestanding wooden leg assembly at the other end of the waterfall.
I milled and flattened the oak parts, then joined the two panels at a shallow angle of roughly 5 degrees. Exactness was not critical in the way it had been for the waterfall miter. A digital angle gauge was perfectly adequate for a design where a small variation would not affect the result.
I added Domino joinery, recessed adjustable levelers, gussets near the top, and oak mounting tabs. The gussets were intended to improve side-to-side stability. I had considered metal mounting tabs but felt oak would work and keep the underside looking clean.
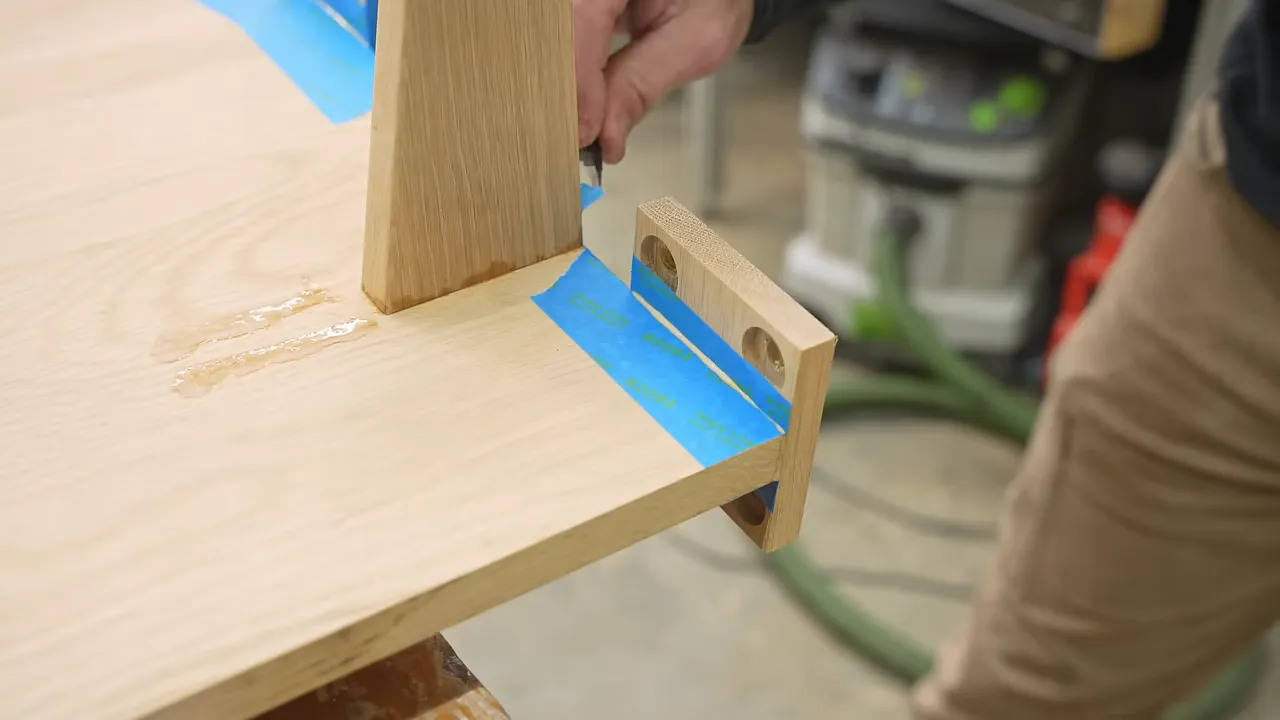
For the mounting recesses, I used an MDF template and router guide bushings. These are useful accessories that do not require an expensive router. Here, I wanted a slightly loose fit for the base hardware. The same general approach can also produce very precise inlay work.
I marked the threaded insert locations with a brad-point drill bit, drilled the holes, installed the inserts, and bolted the assembly together. Yes, I know a transfer punch exists. The drill bit continues to work for marking these locations in wood, so my commitment to annoying a small group of tool purists remains intact.
Scott, who helps film and edit these projects, liked the design but was not convinced it would support the desk confidently. Chris from Foureyes Furniture also questioned how much the high-mounted gussets would help.
Once assembled, the desk was much more solid than Scott expected. We gave it a fairly undignified stability test, and I considered it the most solid desk I had built. That was a shop observation, not a rated load capacity.
The whole discussion reminded me of the argument that furniture from centuries ago proves craftsmanship used to be universally better. The pieces still sitting in museums are the ones that survived. That does not tell us how much bad furniture was made alongside them. Modern tools and adhesives are not automatically a shortcut to bad work. Used well, they help people like me build better furniture.
Polishing the Epoxy Without Polishing the Oak
The finishing goal was clear: mirror-like black epoxy next to low-sheen oak. The execution was considerably less clear.
Modern Habitats Hawaii had shared his process with me, which gave me a starting point. I sanded the epoxy from 120 grit through 3,000 grit, including wet sanding at the finer stages.
I was not intentionally sanding the wood through that whole progression, but I was not avoiding every accidental contact either. The plan was to return the oak to its final sanding grit afterward.
The bigger problem was polishing compound. I was using a 3M compound that could stain the wood, so the surrounding oak needed protection before buffing.
Why the First Masking Attempt Looked Wrong
On a conventional epoxy table, there is often a fairly definite boundary between wood and resin. This desk had a gradient. The char faded into the oak through tiny, irregular contours.
I initially tried masking right up to what looked like the epoxy edge. After polishing, that produced a jagged, unnatural line. The shine looked good. The transition did not.
I changed the approach, using fine-line pinstriping tape to create a slightly wider opening, then repolished the area. I would remove the unwanted polished band from the wood afterward with sandpaper.
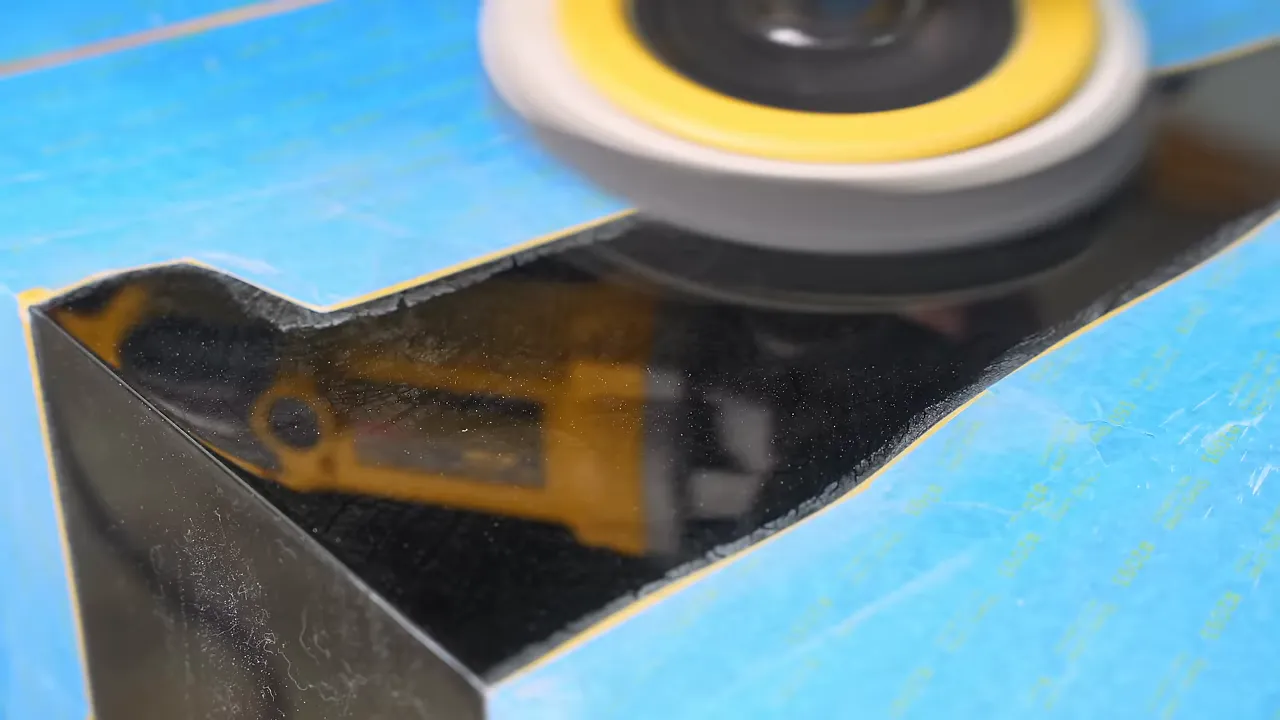
Masking every section took a tremendous amount of time. Some areas took at least an hour apiece before I even started polishing.
I had been told that a Meguiar’s compound might affect the wood less, but I had not used it and did not have it on hand. That remained a possible experiment, not a proven shortcut for this desk.
The Most Important Sander Was a Pencil
After the first section, I thought the result was probably acceptable. Scott looked closely and was clearly disappointed. He was not disappointed in me. He was disappointed that the piece was not quite there.
That distinction mattered. Having people around who challenge an almost-good result is useful, especially when you are very ready to be finished.
My solution was a pencil with a tiny piece of sandpaper attached to it.
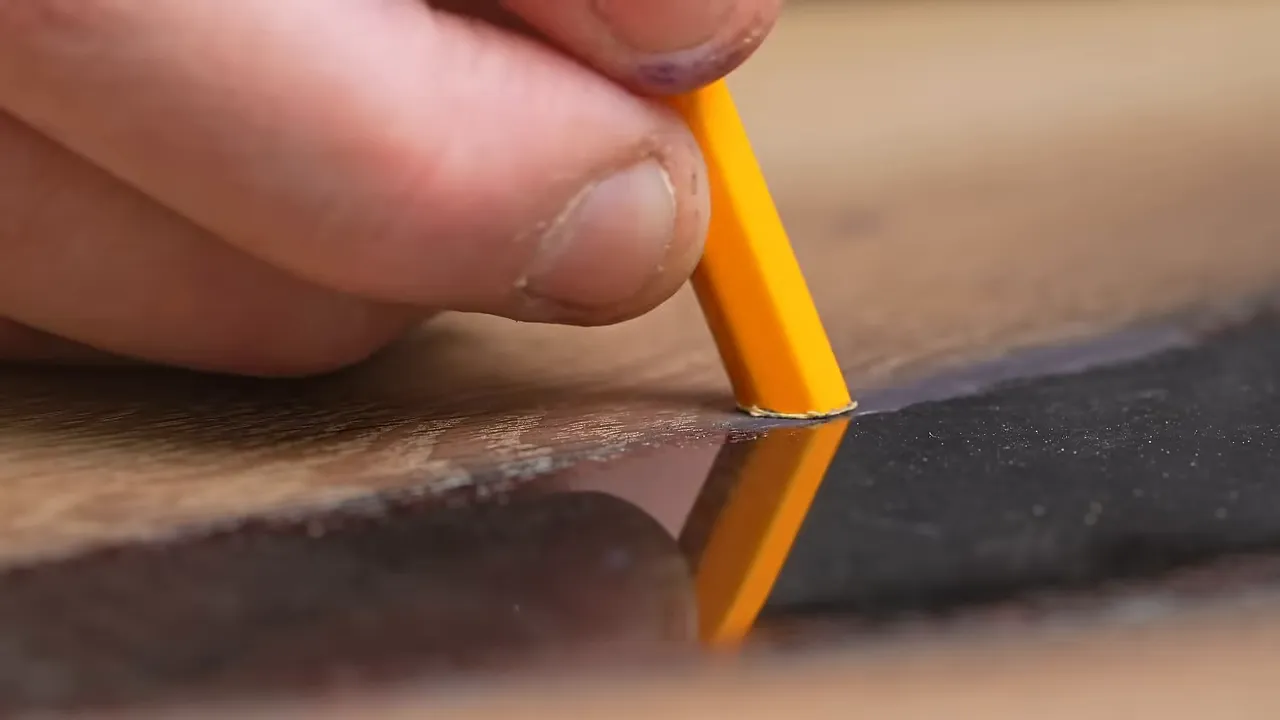
I used it to trace every little nook and contour between the polished resin and the wood. It was slow. Each tiny piece of abrasive lasted only about two or three inches before I had to cut another one.
If that sounds unreasonable, I assure you it was worse in person.
But it worked. It let me remove the unwanted sheen from the wood without destroying the polished epoxy beside it.
From there, I worked outward in stages:
- Pencil sander: Follow the exact boundary through the smallest contours.
- Small oscillating sander with a soft pad: Sand the nearby wood with more control than my random orbital offered.
- Regular orbital sander at 180 grit: Finish the remaining oak across the top, bottom, and sides.
The final division was simple even if getting there was not: the black areas were polished, and the exposed oak was sanded to 180 grit.
Applying Hardwax Oil Without Dulling the Gloss
A single finish across the whole surface would have undermined the contrast I had spent so long creating. The matte-to-satin oil belonged on the wood, not over the polished epoxy.
I used a small paintbrush to work right up to the edge, then wiped the excess with pieces of microfiber towel. The wiping direction mattered. By pulling away from the resin, I avoided dragging oil across the polished surface.
If a tiny amount reached the epoxy, I could clean it off with a little alcohol on microfiber. Still, keeping it off in the first place was the better plan.
Why Invisible Oil Failed the Test
I had recently used an invisible oil on another white oak base and loved its clean, pale appearance. Naturally, I tested it here.
Invisible oil is not literally invisible. The product I tested used white pigments to counteract the darkening effect of a finish on oak. Those pigments became embedded in the black char and looked terrible.
A finish that looks excellent on clean oak can look completely wrong beside charred wood. That small test saved me from a much larger mistake.
I used Vesting LED hardwax oil instead. LED oil is the product name, but it cures under suitable UV light, not just any LED lamp. I cured it with the UV equipment in my shop.
One Coat Looked Good but Did Not Feel Good
This finish generally takes two coats. I hoped I could get away with one because repeating all that detailed brushing sounded deeply unappealing.
After the first coat, the appearance was promising. The feel was not. Some areas had a raised-grain texture, so I needed to sand carefully and repeat the application.
That meant risking scratches near the polished epoxy and spending another couple of hours on a process I had hoped was finished.
I think about a friend’s uncle who once found a problem after installing a new engine in his Camaro. He calmly accepted that the engine needed to come back out. No drama, just the next necessary step.
I try to approach work like this the same way. A second coat was not an injustice. It was part of making the desk right.
Protecting a Desk That Needs to Be Used
However much time goes into the appearance, I still consider myself a furniture maker first. A desk leaving my shop needs to function in the real world, not merely look good under carefully arranged lighting.
After the oil finish, I applied N3 Nano: two coats of the hard coat followed by two coats of the top coat. The Wood Pro Kit also includes a prep spray for cleaning the surface before application and a maintenance spray for ongoing care.
This was the final protective step, not a substitute for the sealing, polishing, or wood finishing underneath it.
|
What the Free Slab Actually Became
By the end, the purchase price of the oak was almost irrelevant. Surfacing, epoxy, abrasives, adhesive, hardware, finish, consumables, and labor had all gone into turning it into a desk. The slab was free in exactly the same way a free puppy is free.
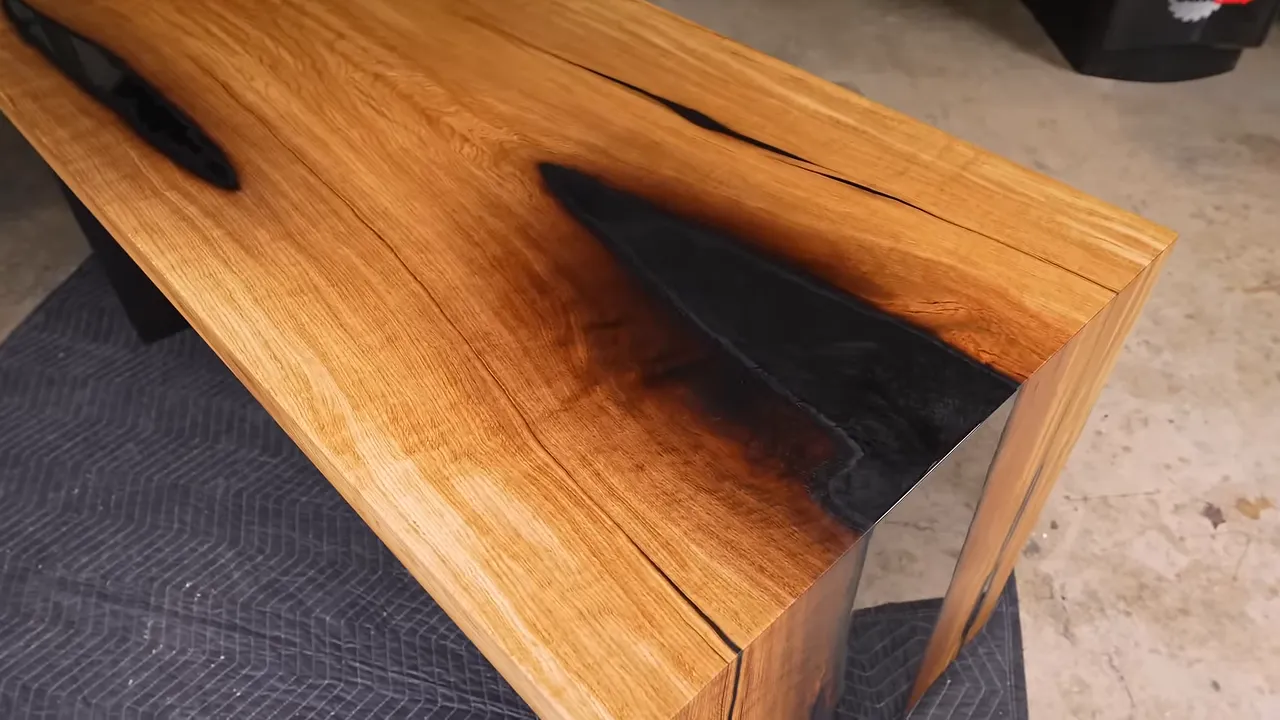
The finished piece combined the three things I had hoped to bring together: a clean waterfall joint, visible char beneath clear polished epoxy, and low-sheen oak around it. The burned texture changes with the light. From some angles it is subtle; from others, the detail becomes much easier to see.
The miters turned out beautifully after a very discouraging start. The opposite leg was far more stable than its skeptics expected. I even found metal exposed in the oak, another small reminder that a slab can keep surprising you long after you think you know what is in it.
The biggest lesson was not how to make epoxy shiny. Sanding and polishing can do that. The hard part was making two very different surfaces meet naturally, without a harsh taped line or a damaged edge.
In this case, that meant good advice, a willingness to redo work, and an absurd amount of sanding with a pencil. Not the most impressive tool in the shop, but possibly the most important one on this desk.


