I had a dream about a beautiful new woodworking style. When I woke up, I concentrated on remembering it because I needed to build it.
That sounds more inspiring than it probably should. Dreams get unfairly characterized as something good. Most of mine are just weird, and this project was guaranteed to be at least that.
The idea was a sculptural console table with organic openings, deeply textured black wood, and a waterfall edge. Somewhere along the way, I added several hundred dollars’ worth of bronze. I wanted to turn the whole thing into functional art, although my subconscious had apparently declined to provide construction drawings.
This became a fairly serious test of trusting the process. And, to spoil the ending a little, finishing a project does not necessarily mean falling in love with it.
Turning a Dream Into a Redwood Table
I suspect the idea started with an earlier denim and epoxy table. For that build, I had carved a wooden pattern inspired by giraffe markings. At the time, I remember thinking the carved wood might make a cool project all by itself. Then I put that thought away until my brain apparently decided to bring it back overnight.
For this version, I started with redwood. One of my favorite things about it is how ridiculously light it is. I could carry and maneuver this long piece around the shop in a way that would have been completely unreasonable with oak or walnut.
The downside was just as obvious: this redwood was incredibly soft. Moving it was easy. Making it into a surface that could survive actual use would require some extra work.
I sketched the giraffe-inspired pattern directly onto the wood, concentrating the openings toward one end and letting them gradually become smaller and more scattered. Part of that was purely visual. I thought it looked cool. But leaving more uninterrupted wood also made the top more useful as a table.
Before cutting, I drilled a lot of holes around the layout. Those holes gave the jigsaw room to negotiate the tight curves. The jigsaw’s job was only to remove the bulk of the waste, not produce finished sculptural edges.
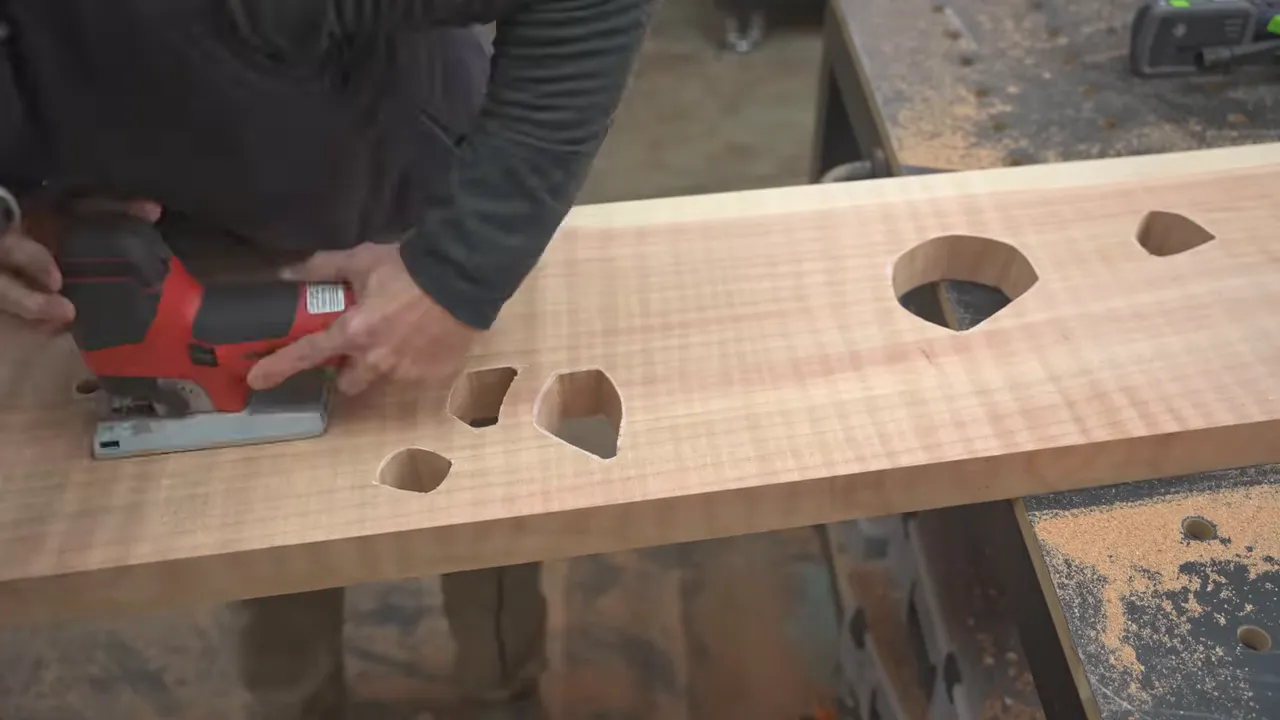
At this point, I could still picture something pretty impressive in my head. The wood in front of me was making a considerably weaker argument.
Why I Finished One Opening Before Carving the Rest
After the initial cutting and power carving, the shapes were there, but the carving itself was rough. Scott said he could see the vision. I had to clarify whether that meant the work already looked good, because those were very different statements.
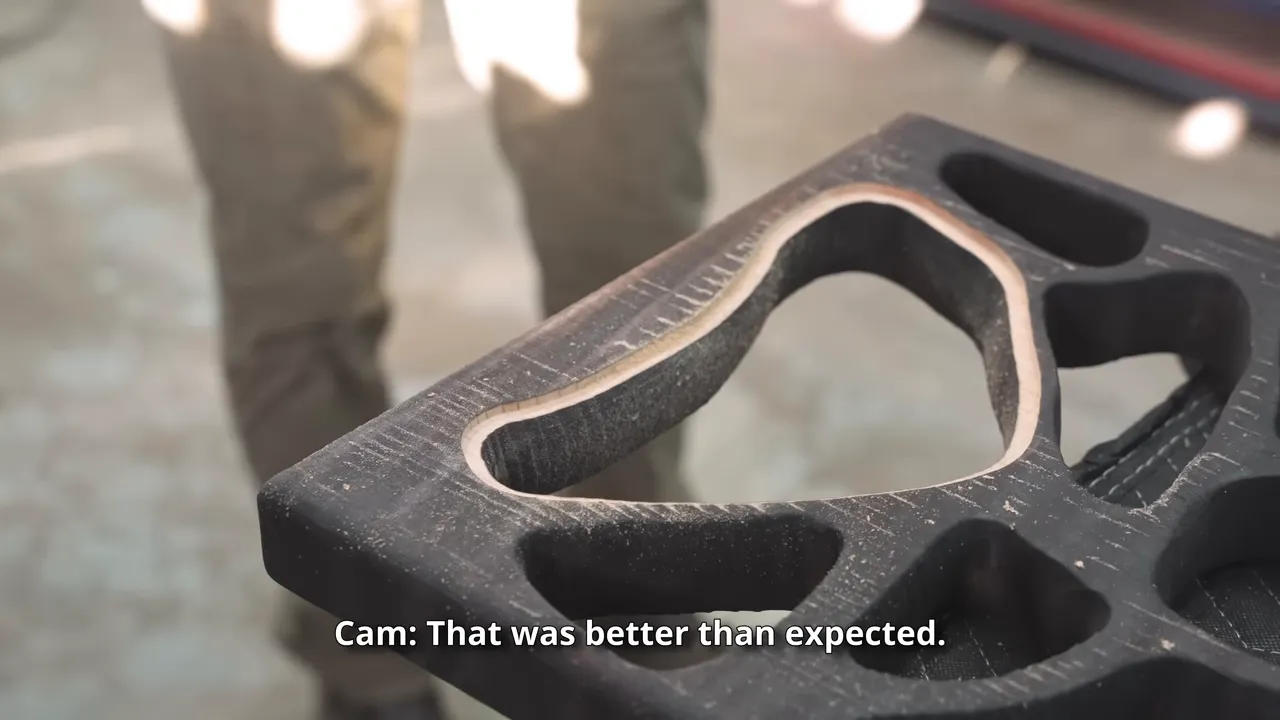
Rather than repeat an uncertain technique across the entire piece, I took one opening all the way through shaping, burning, and brushing. I wanted a finished result I could reproduce before committing to dozens more.
That little test saved me from doing a lot of the wrong work. I thought a wire wheel might sculpt the curves the way I wanted. I also tried a nylon wheel. Neither gave me the result I was after.
The sequence that finally worked was:
- Shape with a rasp. Manually refine each curve and soften the transitions around the openings.
- Char with a torch. Burn the shaped surface to develop the dark color and texture.
- Brush back with a wire brush. Remove the loose char and reveal the texture underneath.
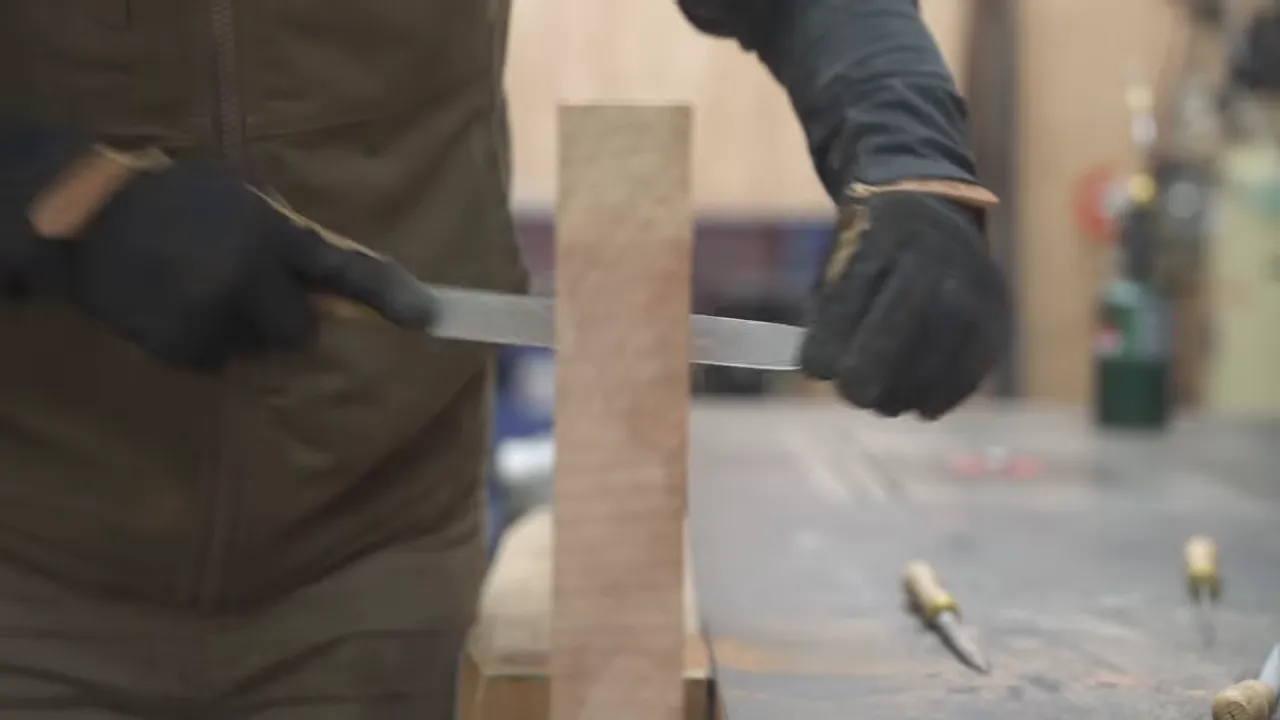
It was slower than finding one magical power-tool attachment, which was unfortunate because I would have preferred that option. But the rasp gave me control the wheels did not.
I also tested the later treatments on small pieces of wood, roughly 6 to 10 inches long. So this was not completely blind faith. It was faith supported by some samples, followed by regular periods of doubt.
A Small Flattening Job With an 80-Minute Commute
Once the openings were shaped, I discovered the board was wonky. Not artistically wonky. Table wonky. It had enough of an angle that I was not happy moving forward.
My larger shop was getting close to being ready, but close does not flatten a board. Creative Woodworking had the equipment I needed, so we strapped the piece down, drove about 40 minutes, used their big machinery for roughly five minutes, and drove 40 minutes back.
I was a little worried about sending a board with that much material missing through the machinery, but it came back flat.
There is a useful lesson buried in that very inefficient errand: knowing when to use someone else’s equipment is part of getting the job done properly. I have become much more comfortable admitting that a professional shop can solve a problem quickly that I cannot solve as well with the tools currently available to me.
Burning the Redwood Without Twisting It Again
With the board flat, I could burn the larger surfaces. For a while, the patchy black-and-brown result looked less like a new woodworking style and more like a Holstein cow.
The patchiness was intentional, though. On previous burnt-wood projects, I had learned that concentrating too much heat in one area could encourage the wood to warp and twist. Instead of completely burning one large section before moving on, I spread the heat around.
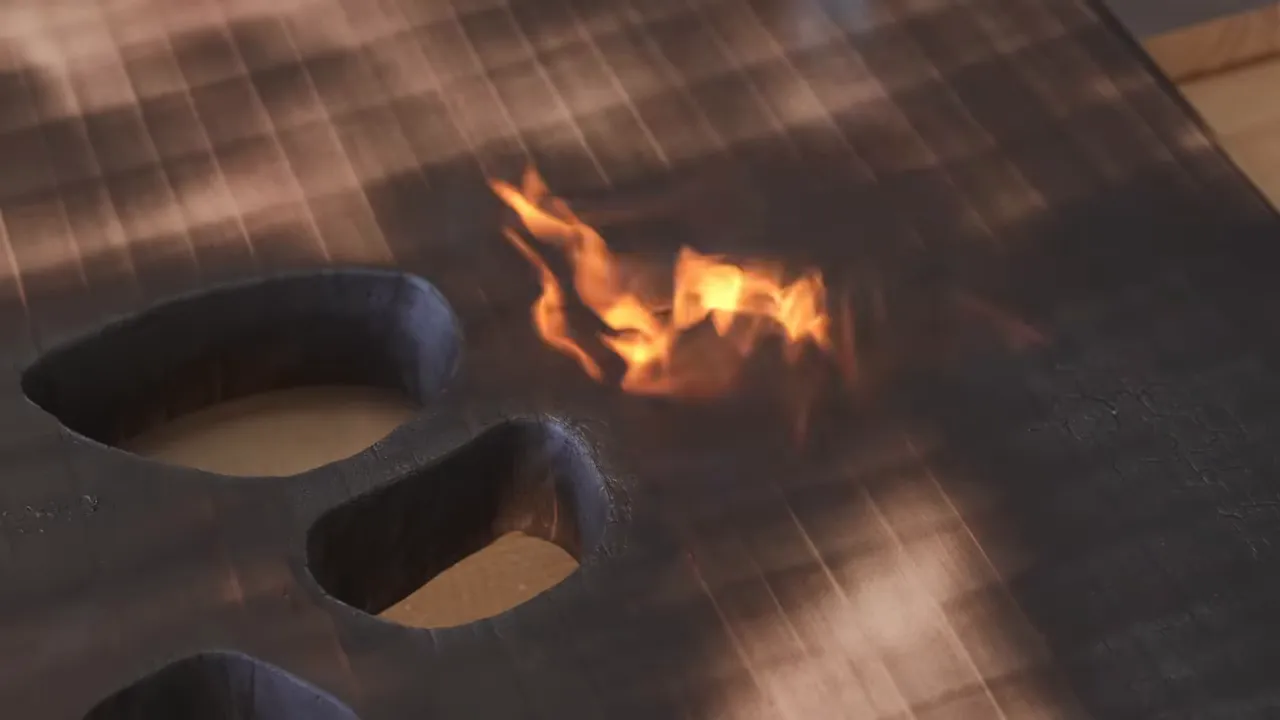
That approach seemed to work well here. The piece stayed essentially dead flat through the burning.
After charring, I brushed the surface back. Unlike several of my earlier burnt tables, this one was not going to disappear beneath a thick, high-gloss epoxy coating. I wanted the grain and carved texture to remain a major part of the finished piece.
And no, I was not trying to present this as traditional Japanese siding. The technique often called shou sugi ban in the United States is more accurately referred to as yakisugi. My goal here was simply a burnt and brushed redwood furniture surface, not a faithful reproduction of that process.
Adding firmness without a thick epoxy flood coat
The softness of the redwood still needed attention. I applied penetrating epoxy to help firm up the surface while keeping the texture exposed.
The distinction matters. I was not filling every opening or leveling the top beneath a glossy resin pour. I was trying to make the wood a little less vulnerable to ordinary use, including somebody setting down a coffee cup.
It was still redwood. The goal was to improve it, not convince it to become white oak.
The Bronze Was Not in the Original Dream
The more I looked at the blackened carving, the more I felt something was missing. Apparently, building from a dream has limitations. This is the same department responsible for dreams about teeth falling out and arriving unprepared for a test, so I probably should have expected incomplete plans.
I decided to recess bronze plates into selected openings. The material was 1/8 inch thick, and the first small sheet cost about $400. That was a fairly expensive way to find out whether the table needed a little contrast.
The bronze had two jobs. Visually, it would interrupt the black texture with warm, smooth shapes. Functionally, some of the larger horizontal plates would create usable places to set things.
I routed shallow ledges around the selected openings so the plates could sit flush, then made individual paper templates for the bronze shapes.
This was also the point where I had to explain the project to my dad. He asked why the console table had so many holes in it, which is a completely reasonable question and somehow very difficult for me to answer.
I am comfortable calling myself a woodworker or a craftsman. Saying, “This is my artistic vision,” makes me considerably less comfortable. I could explain how I was making the openings. Explaining why they needed to exist was mostly some version of, “I’m trying to make it look cool.”
Sometimes that really is the reason. I just wish I could say it with more confidence.
A woodworking shop doing occasional metalwork
When I first started woodworking, I thought I would eventually learn metalworking too. I would build all my own bases and become the complete package.
Then I realized metalworking was another specialized trade with its own tools, space requirements, and learning curve. I did not have the bandwidth to double the shop and double the skill set. I would rather become a very good woodworker who occasionally struggles with metal.
For the curved bronze pieces, I used the tools I had, including a portable bandsaw in an upright stand. Cutting the rough shapes was only the beginning. Getting every piece to fit its particular recess took the better part of a day at the oscillating edge sander.
I kept adjusting the work support to use fresh sections of the sanding belt as other areas wore out. It was a sneaky amount of work for something that would eventually look like I had simply dropped a few metal shapes into holes.
The Waterfall Joint Nearly Ended My Confidence
The table’s sculpted end would fold down into a waterfall leg. That meant cutting a pair of 45-degree miters after I had already carved, burned, and textured the wood.
I have made waterfall joints before, but I still tend to struggle with them. This one came with an extra complication: the openings had to make visual sense across the corner.
The first fit was bad. Not “a little glue will hide that” bad. Bad enough that I had to admit I had been acting more confident about the whole project than I actually felt.
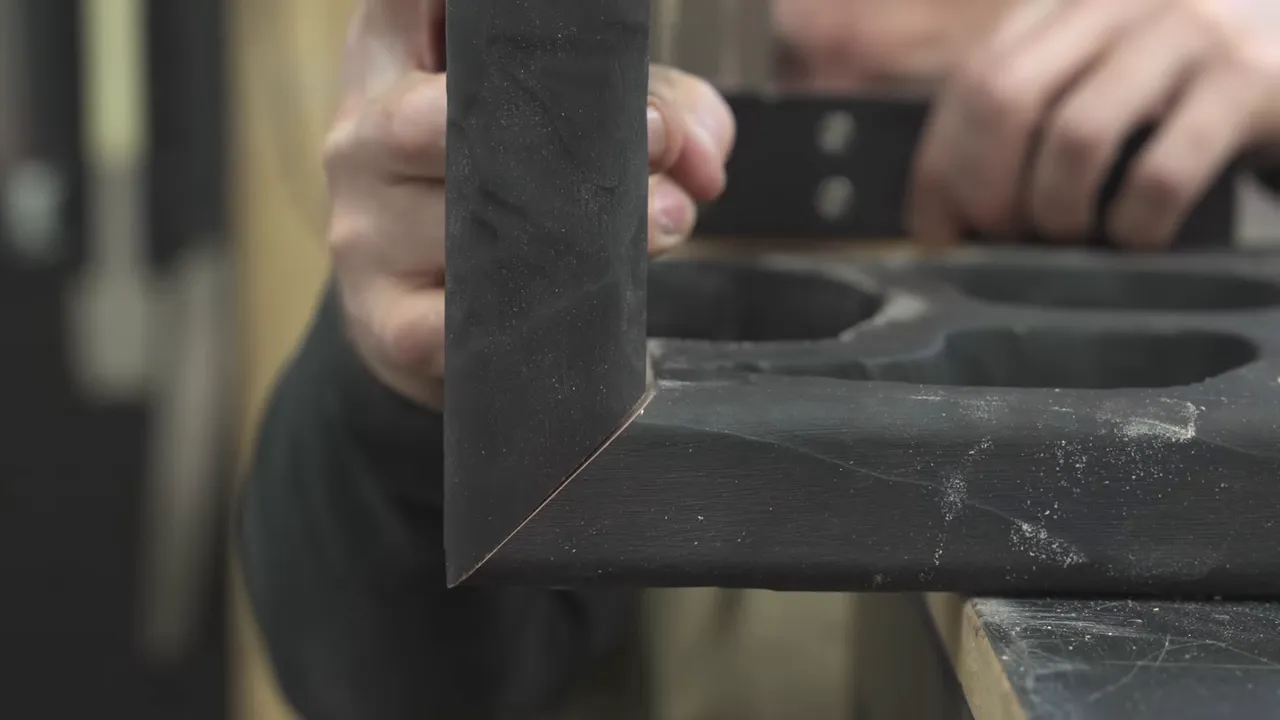
Normally, trimming a waterfall miter to improve the fit is not a huge problem. Here, every additional cut also changed the shapes I had already carved around it. I worried that correcting the joint would progressively ruin the pattern.
But leaving it alone was not an option. I reset the track saw and trimmed the miters again. In the end, it was the right decision. The joint came together much more tightly, even if the brushed, wavy surface made the fit harder to see.
I admire people who immediately move from a major mistake to calmly fixing it. I would like to be one of those people. Emotionally, I am not quite there yet.
Keeping enough epoxy in thirsty end grain
The glue-up presented another problem. Redwood end grain can absorb a surprising amount of epoxy. It behaves like a collection of tiny straws, drawing adhesive into the wood instead of leaving all of it at the joint.
I kept applying more as the surface drank it in. My concern was starving the actual bond line, so I wanted enough epoxy remaining to produce some squeeze-out when the joint closed.
Once it was clamped, I left it alone for 24 hours.
Removing the clamps was nerve-racking, but the joint held. There had been a good amount of squeeze-out, and I was satisfied that enough adhesive remained where it needed to be. The joint was sound within the limitations of the redwood itself.
I would not recommend dancing on this table. That is a material limitation, not a proposed quality-control test.
A Simple Second Leg and an Unnecessarily Fancy Mounting Plate
My original idea for the opposite end was another elaborate carved leg. Eventually, I decided the table already had enough going on. A straight block leg would give the sculptural end some breathing room.
To mount it, I bought another piece of bronze for about $189. This would be hidden underneath the tabletop unless someone crawled under there, but I liked the idea of carrying the material through to the hardware.
Whether an invisible bronze mounting plate adds more than $189 to a table’s value is an excellent question. I was hoping it did.
I cut that plate on the table saw, which made me more nervous than I let on. That was not a method I was comfortable recommending. My improvised metalworking should not be mistaken for an approved procedure for somebody else’s machine.
Recessing the plate into very soft wood
I laid out the plate with a marking knife, routed the recess, and refined the edges with my sharpest chisels.
Very soft wood can actually be harder to work cleanly than hardwood. If an edge is not sharp enough, it can compress the fibers rather than sever them. Even with sharp tools, I still managed one small damaged area, which I chose to blame on the wood.
Seasonal movement also matters whenever metal is recessed into solid wood. For a full-width dining-table base, perhaps 28 or 30 inches wide, I normally leave around 1/4 inch of clearance on each side of the recess. Otherwise, the wood can move against the metal and split.
This mounting plate was only about 5 inches wide, so I chose a close-fitting recess for this particular installation. That was a judgment about this small component, not a rule that wood movement stops mattering below a certain width. The USDA Wood Handbook is a useful reference for understanding moisture-related dimensional changes in wood.
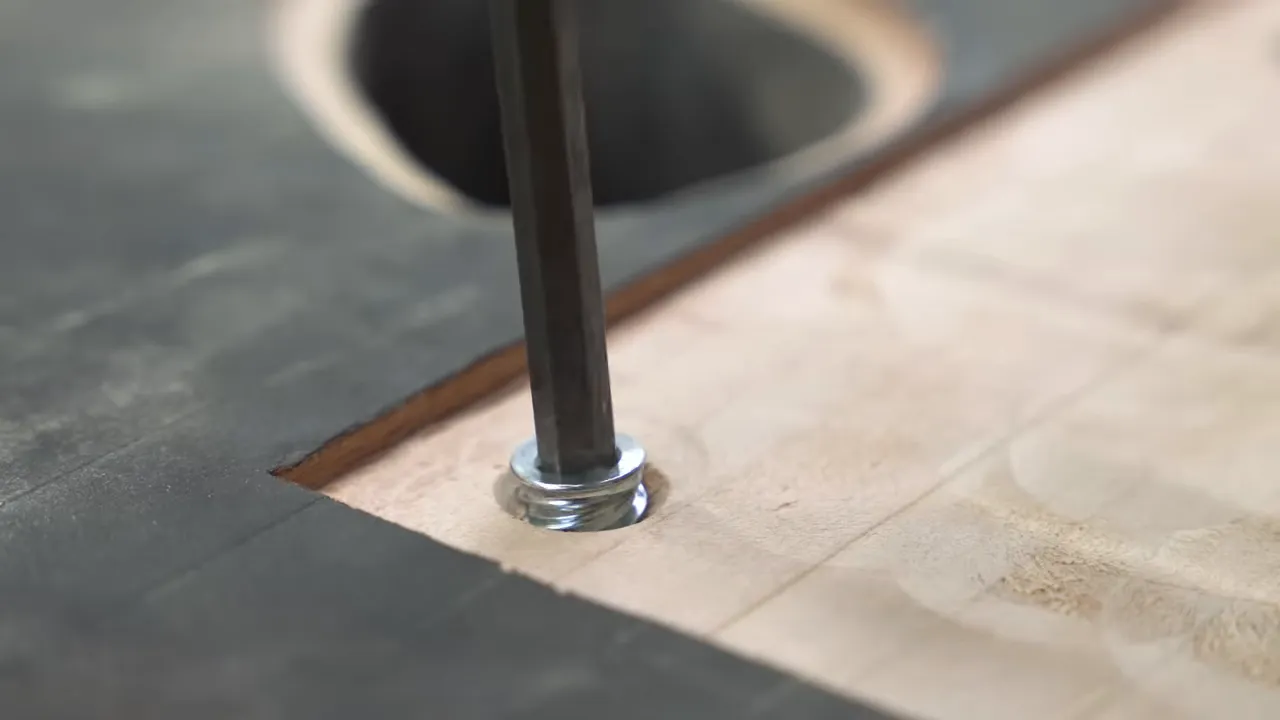
I drilled and countersunk the bronze, then installed multiple deep threaded inserts with epoxy. Compared with the parts of this project that gave me doubts, this mounting system felt like complete overkill.
Making Separate Bronze Pieces Look Like One Surface
The bronze arrived without a perfectly smooth, machined finish. I sanded the pieces from 120 grit through 400 grit before establishing their final directional scratch pattern.
The challenge was consistency. Each plate was a separate organic shape, but I wanted the sanding lines to look as if they had all come from one continuous sheet. If one piece was rotated noticeably off direction, it would interrupt the whole effect.
I used a level to establish a common reference line across the pieces. Then I made a simple sanding guide from an old framing square and hand-sanded each plate to that reference.
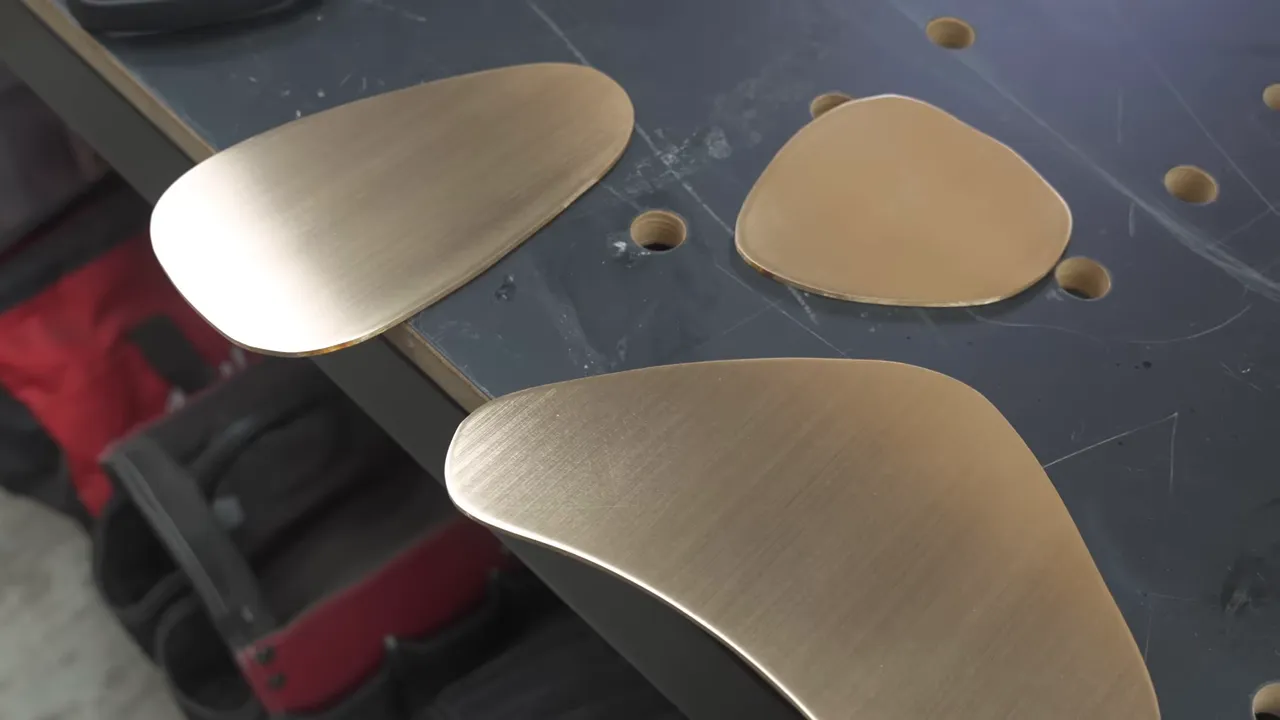
I also added screws to selected larger horizontal plates so they could support objects. The smaller inserts and those on the vertical leg did not need the same treatment.
Where routing had exposed pale wood around the recesses, I carefully brushed on black dye. Most of those areas would never be visible, but I wanted everything to look cohesive even underneath the metal.
Sealing the bronze against fingerprints and patina
Freshly sanded bronze looks great. Handle it with bare hands, though, and fingerprints can begin showing up as the surface develops patina.
I wanted these pieces to stay as close to their freshly finished appearance as possible, so I sealed them with N3 Nano. I normally use it on wood, but here I used it as a metal sealer.
Wearing gloves, I cleaned the bronze and applied one coat to the front and back of every piece. I wanted protection without adding the visible film build of a lacquer coating.
A 2K Acrylic Finish and the Final Epoxy Work
For the wood, I chose a water-based, two-part acrylic finish. It is not a finish I use very often, but I wanted a durable coating for this especially soft material.
One useful characteristic was its quick setup time, about 15 minutes under the conditions in my shop. That shortened the window during which airborne dust could settle into the wet surface.
I also tried a tip someone had shared with me: lightly misting the surrounding air with water before spraying to help settle dust. That was a dust-control attempt, not a substitute for the ventilation and protective equipment required by the finish manufacturer. Water-based does not mean a catalyzed finish should be treated casually.
After finishing the wood, I installed the remaining bronze inserts. I did not want visible screws scattered across the table, especially down the waterfall leg, so those plates were bonded with thickened marine epoxy.
I mixed black charcoal into the adhesive so any tiny amount visible around an edge would be dark instead of white. Even so, squeeze-out was the main concern. A little excess could make a carefully fitted bronze insert look messy very quickly.
When a small amount appeared, I cleaned it off immediately with isopropyl alcohol on a rag. The plates ultimately went in well, and the warm bronze against the blackened texture gave the table the contrast I had been looking for.
The Finished Table, and the Part I Did Not Expect
There was another kind of continuity involved in documenting this build. A few years ago, I started adding little transition shots between shop scenes so the finished story had room to breathe. Some happen naturally; others have to be recreated later.
That is one practical reason I wear essentially the same clothes in the shop every day. Matching a pickup shot is easier when the wardrobe decision is mostly whether I had a coat, vest, or gloves on. Manufacturing confidence in an experimental table turned out to be harder than matching a shirt.
Because here is the honest ending: I finished the table, but I do not love it.
I have built plenty of speculative projects that eventually found a buyer. A Damascus denim desk took roughly a year and a half to sell. A sculpted cabinet I priced at $29,000 did not sell, and I was comfortable keeping it because I loved that piece.
This one was different. I could appreciate the work, the fitted bronze, and the texture without feeling that same connection to the result. Putting a $7,000 price tag on it simply because I had invested a lot of effort would not have felt right to me.
Instead, I chose a no-reserve auction on Makerbook, the marketplace I started to give craftspeople a place to sell genuinely handmade work. At the time of this build, it had several hundred sellers and more than 3,000 members.
The table was offered with free shipping within the lower 48 states, which I estimated could cost me around $1,000. The listing remains the place to check its auction status or eventual result.
Maybe this is exactly the right table for someone else. I hope it is. Following an unusual idea all the way through was worthwhile, but I am not going to pretend every dream deserves a permanent place in my living room.
|


