This was supposed to be one of my biggest commissions: a dining table, a desk, and a sofa table, all made to the clients’ exact measurements and delivered to their home in Italy. The three-table package was $30,000. The walnut slabs alone cost about $4,500.
I wanted all three pieces to look like they belonged together, so I bought slabs from the same tree. Matching grain, matching color, one coordinated set. A pretty good plan, right up until it wasn’t.
What followed was a collection of mold mistakes, trapped bubbles, leaking epoxy, emergency black dye, and a few genuinely successful details. Then, just as two of the tables were approaching the finish line, I discovered a problem that made everything else look fairly insignificant.
Key Takeaways
- Check slabs thoroughly for trapped moisture before investing time and epoxy in the build.
- Preserve natural contours and clean live edges back to solid wood before pouring epoxy.
- Measure rough-cut slabs on both sides before sizing and building the mold.
- Test-fit recessed table bases before removing routing guides so adjustments remain easy.
Choosing Three Layouts That Actually Belong Together
Shipping custom furniture to another continent changes how you think about decisions. If the clients didn’t like the layout, having them send a table back from Italy was not going to be a particularly convenient solution.
Before cutting anything, I wheeled the slabs outside, where I had enough room to spread everything out. I made templates representing the finished table dimensions, then got on a video call with the clients so we could choose the layouts together. Once we agreed, I marked the selections with sidewalk chalk.
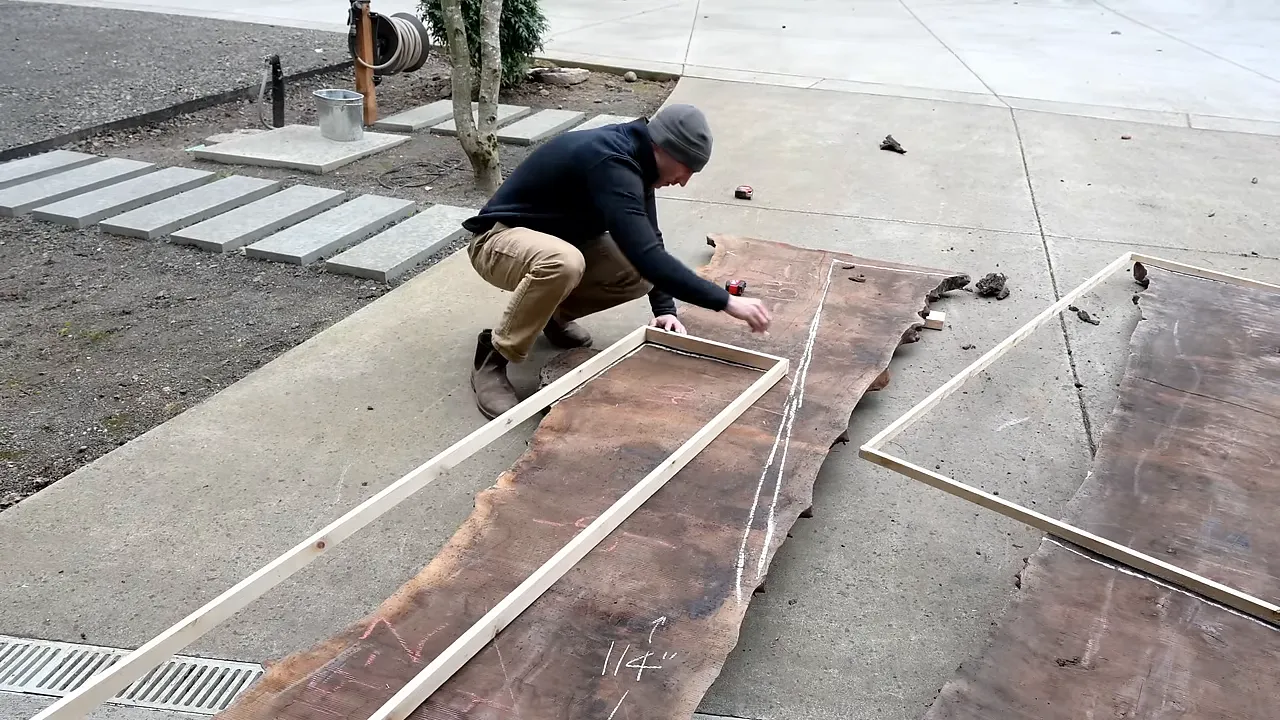
One of my strongest opinions about epoxy table design is that the edge touching the epoxy should look natural. Cutting a slab straight across and dropping that cut edge into the middle of a river usually looks exactly like what it is: a piece of wood someone cut off and dropped into a river.
The natural contours are a huge part of what makes these tables work. Preserving them can be the difference between a layout that feels intentional and one that feels like you were trying to use up scraps.
Some arrangements come together almost immediately. The console table had beautiful, light, linear grain running along the edge, which I knew would look incredible against black epoxy. Another layout needed considerably more persuasion.
That slab was a little too small, and I didn’t want an entire outside edge made of epoxy. I found an offcut and spent a ridiculous amount of time fitting a piece roughly 6 by 8 inches into the layout. I filed its edge and left it slightly oversized so I could trim it later. A tiny piece of wood can require a surprisingly large amount of attention.
Leave room for the final cut
When I rough-cut slabs, I normally add about 1 to 2 inches to the overall finished dimensions. That gives me room to square everything up and deliver the exact size the client ordered.
For these tables, I left about 2 inches. Then I immediately started worrying that it wasn’t enough. Mixing pieces from different slabs makes that buffer harder to judge, and there is no enjoyable way to tell a customer their custom table is smaller than the custom size they requested.
Rough-Cut First, Then Surface the Slabs
Whenever possible, I wait until the slabs are cut into smaller pieces before having them surfaced. That helps minimize how much material needs to come off and preserves more of the finished table thickness.
At this stage, I was only having them skip-planed: removing enough material to help them sit flat in the epoxy mold, rather than machining them all the way to their final condition.
That first pass also reveals the grain and color. These slabs had some amazing light streaks. They reminded me of a round walnut table I had recently built, which would have been a much nicer association if that table hadn’t ended in disaster.
Moving slabs this size is its own job. One of the best investments I had made was a forklift, by which I mean the nicest forklift I could afford: a 1994 Yale with no side shift and a surprisingly modest 3,000-pound capacity. It made handling these pieces much easier. It did not, unfortunately, make me better at measuring molds.
For anyone who doesn’t have access to a large planer or other industrial equipment, that doesn’t have to stop the project. I created Makerbook to help people find shops offering shop time, space, or tools for rent. At the time of this build, it was free to use and had no ads. You don’t necessarily need to own every machine required to make a large table.
Live Edge Cleanup Is Miserable. Do It Anyway.
Removing bark is one of my least favorite parts of making an epoxy table. I would rather sand, which should tell you how much I enjoy it.
Occasionally, a big piece comes off cleanly and gives you a few seconds of satisfaction. Then you spend the rest of the afternoon working through stubborn little pockets and remembering why you hate the process.
But this is not a step to rush.
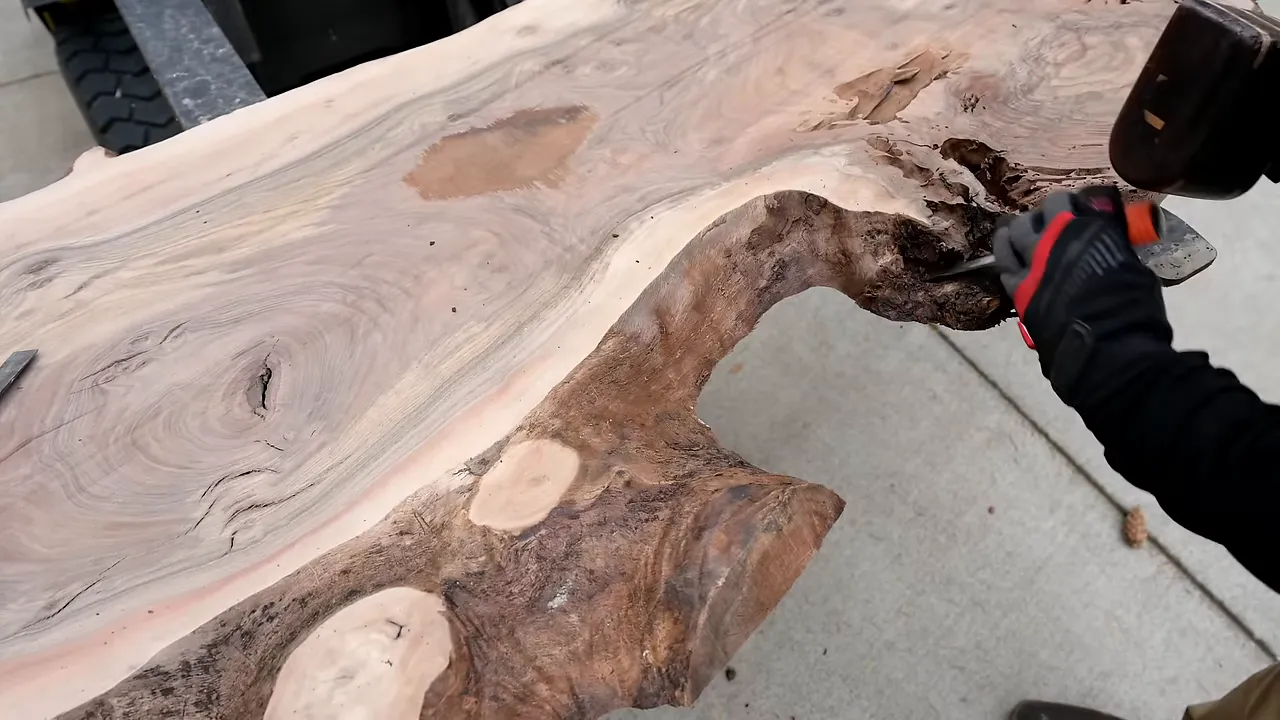
The epoxy needs a clean, solid wood edge to bond to. Leaving bark attached, or doing a poor job removing loose material, creates the possibility of that edge separating later. I know people who have had it happen.
Someone else leaving bark on and getting away with it does not make it a good bet. At this point, I had made somewhere around 50 to 80 epoxy tables without an edge delaminating. I would much rather keep doing the unpleasant prep work than discover which table finally proves the point.
The Mold Mistakes Started Before the Pour
The first problem was simple: I treated rough-cut slabs as though they were square.
I measured the length along only one side. Because the pieces had a slight taper, that measurement didn’t capture the space they actually needed. I built the form a little too small.
Normally, I attach the mold wall on top of the base. To make this one fit, I had to attach a wall to the side instead. That arrangement was inherently weaker, and I knew it increased the chance of a leak.
Then I realized I had forgotten mold release on one of the wall pieces.
The correct response would have been to remove it, apply release, and reinstall it. My response was to look at the caulk and nails already holding it in place and decide I really didn’t want to do that. This is not a chapter from the “excellent decision-making” portion of my career.
One small experiment that did make sense
The little corner offcut presented a different challenge. It wasn’t as thick as the neighboring slab, and its underside had a natural edge. Sitting directly on the mold floor would have left its top too low.
I used CA glue, or super glue, to attach a temporary wooden bridge that held the piece level with the surrounding wood. The idea was to suspend it at the right height until the epoxy locked it in place.
For repeatable work, a premade mold can remove some of the form-building anxiety. I used a Concept 13 form for the desk, sized slightly larger than the 30-by-60-inch desks I commonly make. Custom dimensions still require custom solutions, but repeating the same size is a good argument for a reusable form.
A Thick Seal Coat Created a White Edge Under the Epoxy
I’m always trying to find a better, faster, or cheaper way to get the result I want. Sometimes that improves the process. Sometimes it provides material for an article about expensive mistakes.
On this build, I sealed the live edges with tabletop epoxy. Normally, I used deep-pour epoxy for that step, or marine epoxy when I wanted additional protection against staining.
The tabletop epoxy was much thicker. I applied it too heavily and didn’t pay enough attention to the tiny bubbles trapped in the coating. Once the black epoxy went in, those bubbles made the wood edge look almost white just below the surface.
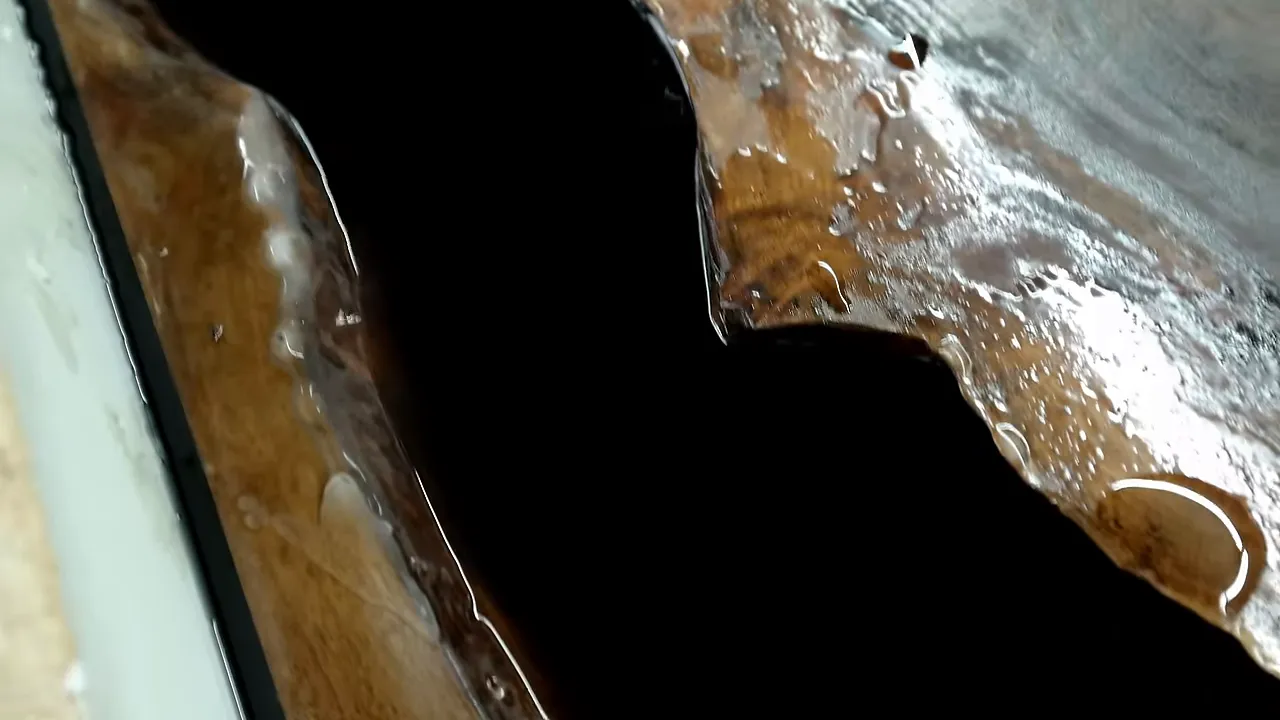
I needed to make a decision quickly. My attempted rescue was to mix a few quarts of extremely dark black epoxy, add it to the pour, and hope the extra opacity would hide the pale edge.
That introduced another risk: two batches of black epoxy do not automatically look identical. I had seen differences between separate black mixes under certain lighting before. If the darker addition didn’t blend thoroughly with the original pour, I could trade one visible defect for another.
Later, still second-guessing myself, I emptied my last container of highly concentrated black dye into the pour and mixed again. At that point, I felt better about hiding the white edge, but I still had two unanswered questions:
- Would the additional dye stain the wood?
- Would any unmixed areas or different shades of black become visible during finishing?
I couldn’t confidently answer either until the tables were much further along. This was an emergency salvage attempt, not a carefully tested improvement to the process.
Also, if you enjoy extreme sports, I can recommend attempting three epoxy pours at once. If, like me, you do not enjoy extreme sports, one pour at a time is probably plenty.
Then the Mold Leaked, Because Apparently We Needed That Too
The weaker wall arrangement did exactly what I was afraid it might do. Epoxy started leaking out.
I had previously had good luck stopping leaks with Flex Paste, so I reached for the container. Naturally, most of it had hardened.
I dug into the middle and found just enough usable material to attempt a repair. I dried the outside of the leaking area as well as I could and packed the paste over it. Then I found another leak lower down.
Eventually, I got the leaking under control. It was less like completing a woodworking step and more like putting a tourniquet on the project.
The useful lesson here isn’t that emergency paste makes mold construction unimportant. It’s that a small measuring mistake can become a structural compromise, which becomes an urgent problem during a pour. Fixing the measurement before building the form would have been considerably more relaxing.
Getting Back to Actual Woodworking
Once the epoxy had cured and the tops were out of their molds, I finally got back to work that didn’t involve staring at liquid and worrying.
I also tried to keep the workload manageable. Rather than surface all three tops and leave bare wood sitting around the shop for weeks, my plan was to have two surfaced, work toward getting their first coat of finish on, and then bring in the third.
I wanted to reduce the time freshly surfaced slabs sat exposed while I was busy with other tables, which can increase the opportunity for warping or cupping.
Cutting a deep chamfer with consistent corners
I used to cut the large chamfers on my table edges entirely with a track saw. The difficulty was getting the cuts to meet perfectly at the corners.
For this build, I used an oversized chamfer router bit to improve that consistency. It was messy, demanding, and, as I pointed out at the time, not a bit that should have been used in that handheld setup. It is not a setup I would recommend copying.
My later approach combined the two operations: remove most of the waste with the track saw, then make only one or two shallow cleanup passes with the router. That reduced how much material the router had to remove while giving me more consistent corners. The bit and router still need to be appropriate for the operation and used within their manufacturers’ limits.
Filling moisture-probe holes with matching wood
One of the details I was happiest with involved some very small holes left by moisture-testing probes. For core readings, holes had been drilled into the slab and probes driven into the wood. The holes weren’t particularly attractive.
I didn’t want to fill them with epoxy or a mixture of glue and sanding dust. I wanted the repair to disappear.
I cut thin pieces from a matching offcut, giving myself several colors to choose from, then made tiny plugs roughly the size of toothpicks.
The important difference was grain direction. A normal toothpick has grain running along its length, making it reasonably strong. These plugs were oriented so their exposed grain would more closely match the tabletop. That also made them extremely fragile.
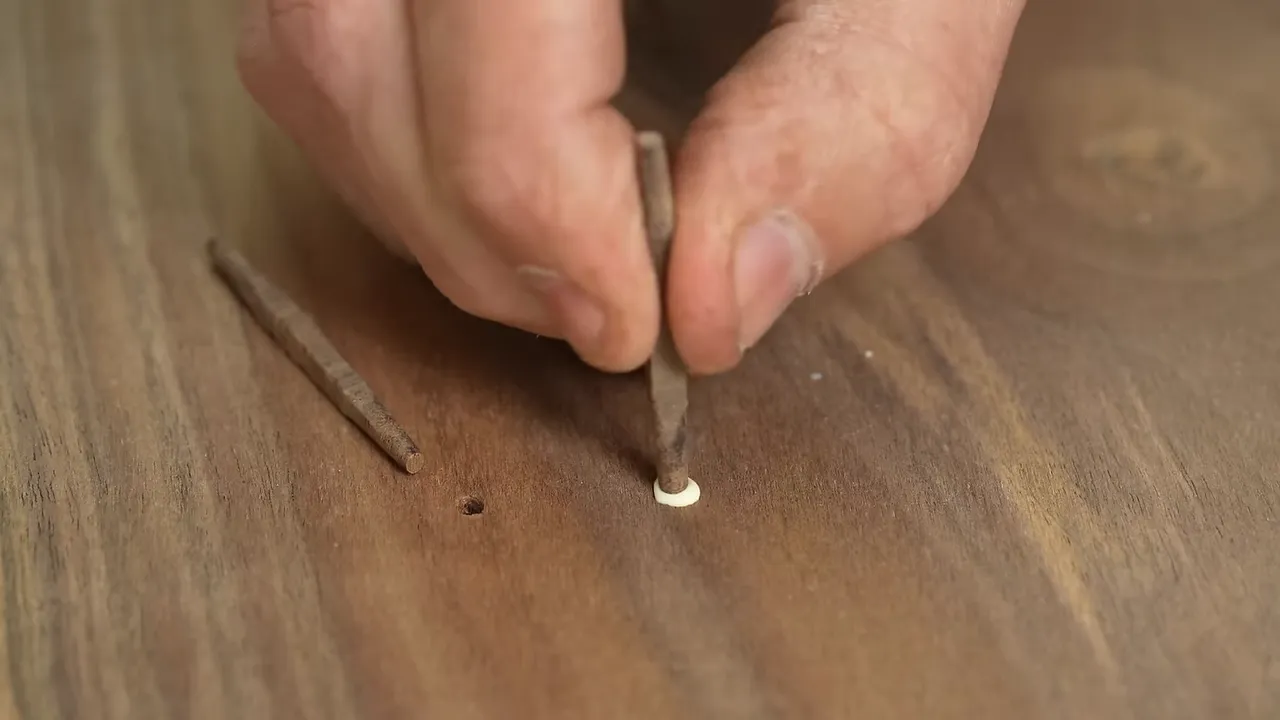
I carefully glued and tapped them into place, let the glue set, trimmed them flush, and cleaned up the surface. The result was better than I expected. At least one thing on this build had decided to cooperate.
Recessing the Bases and Installing Threaded Inserts
Almost nobody will notice whether a table base is recessed into the underside. I still think it’s worth doing. If an IT professional ever ends up under the desk, I want them to respect the craftsmanship.
To make the recesses, I positioned thin black melamine around the base to create a routing guide, leaving room for wood movement. A spiral router bit and brass guide bushing let me remove the material inside that outline.
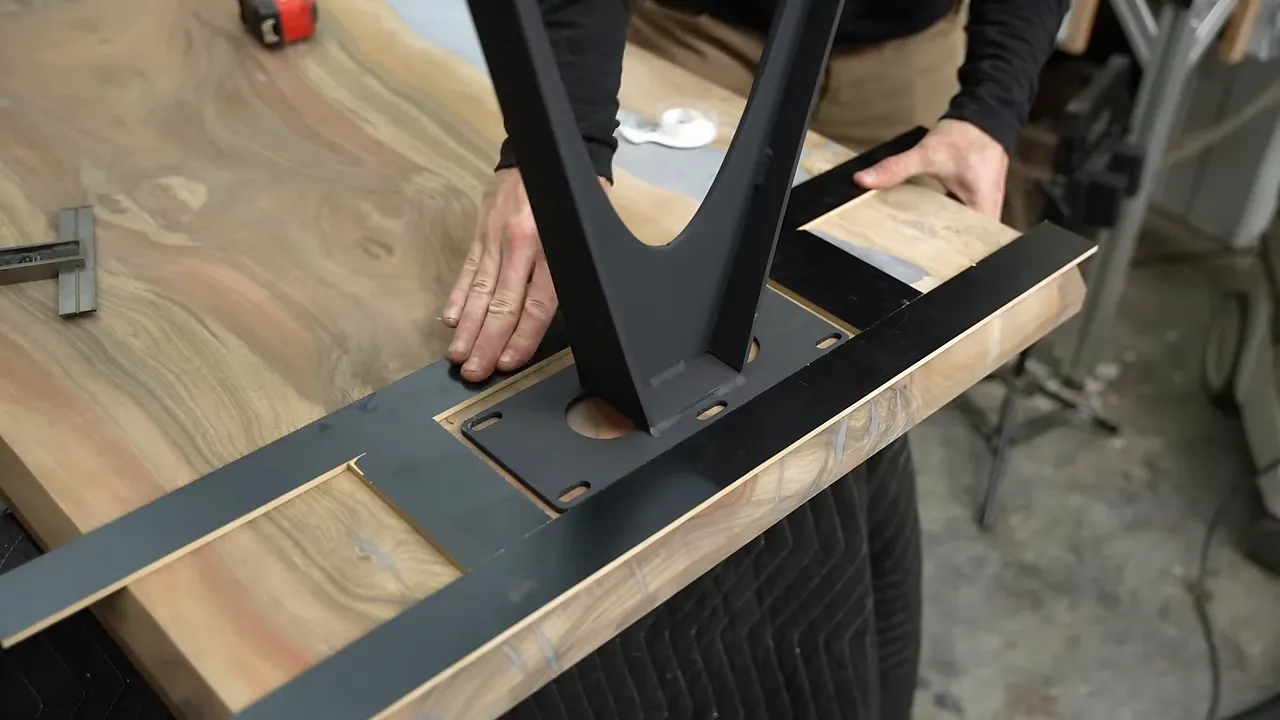
My most useful tip for this operation is simple: test-fit the base before removing the guides. If the recess needs a tiny adjustment, it is much easier to make while everything is still in place. Rebuilding the exact same guide arrangement is a job you do not need.
The console table required some threaded inserts to go into epoxy rather than wood. That always makes me nervous. My concern is that an undersized hole and an insert forced into place could crack the epoxy.
For those locations, I drilled the holes slightly larger and used a little CA glue to help secure the inserts. It worked on this build without cracking. The goal was to avoid forcing the insert into brittle material, not to see how much pressure the epoxy could take.
The Moisture Check That Stopped the Entire Project
By this point, I had been working with these clients for more than a year. My original timeline was one year, and we were already going past it. Still, two of the three tables were nearly done. The dining table remained, but I could finally see the finish line.
Even sanding felt less objectionable than usual. That should probably have made me suspicious.
Shortly before this project, I had built a round table as part of a collaboration. My friend made the base, and I made the top from an amazing 55-inch walnut slab. Both of us finished our work before I discovered trapped moisture in the wood, making the top unusable for the table.
As I worked on this three-table commission, I noticed yellow streaks that reminded me of that earlier slab. The resemblance wasn’t a diagnosis, but it was enough to make me get out the moisture meter.
I found pockets of trapped moisture.
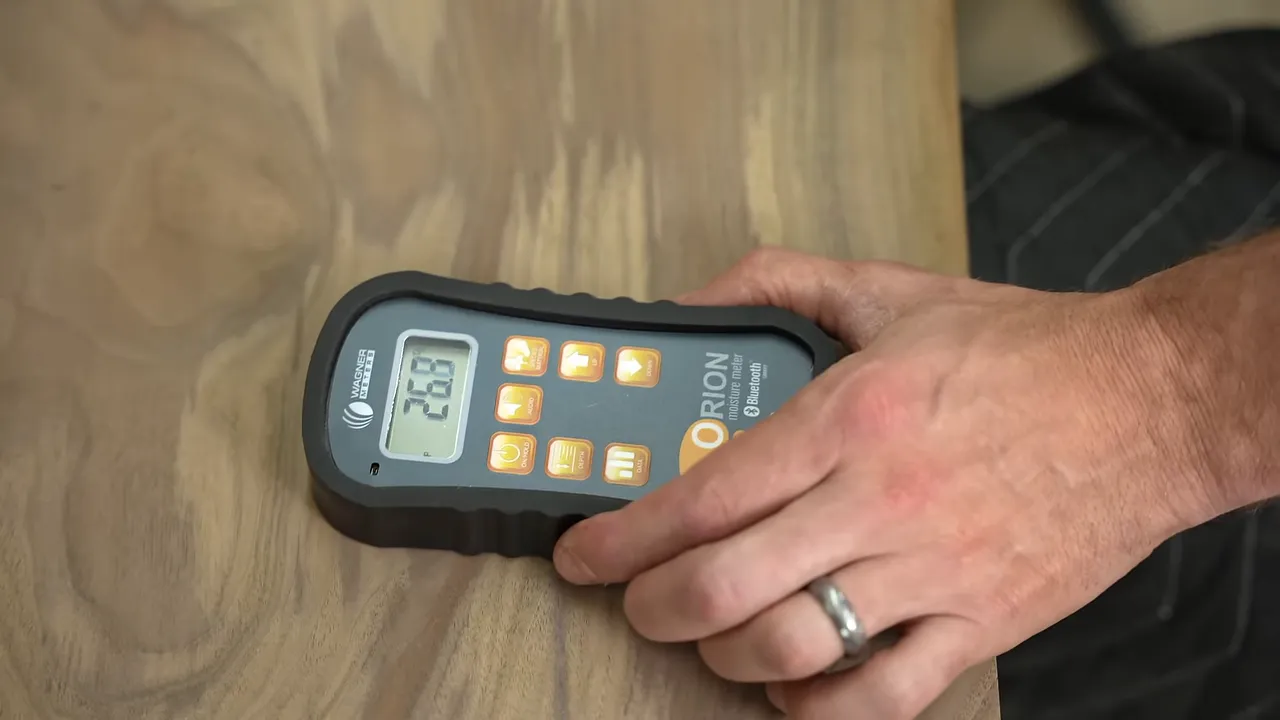
After the molds, the leaks, the dye, the chamfers, the repairs, and the base installation, the underlying wood was not suitable for delivering these tables as planned.
I felt sick. I was deeply invested in the project, the clients had already waited a long time, and there wasn’t a simple credit for the purchase price of the wood that could make all that work reappear.
There is a timing detail worth explaining: after the round-table failure, I said I would never buy slabs again without thoroughly checking them with a moisture meter. This three-table project had already started before I made that commitment. I was learning the same lesson across overlapping builds, which is a particularly efficient way to have a terrible month.
A beautiful surface is not proof that a slab is ready to become furniture. For broader technical background on wood and moisture, the USDA Forest Products Laboratory’s Wood Handbook is a useful reference. My practical conclusion was considerably shorter: thoroughly inspect the slabs myself before committing the project to them.
Calling the Supplier, Telling the Clients, and Starting Over
The first person I called was Aaron, the owner of Goby Walnut, where I bought the slabs. I explained what I had found. He asked what he could do.
I didn’t have a neat answer. I asked him to come to the shop so we could talk through it, and he came straight over.
I asked difficult questions: How could this material leave the shop? How common was the problem? Was there anything I should have done differently? Could these tables be salvaged? How had they handled similar situations?
That discussion is available in the wood supplier interview. I didn’t want to reduce a complicated material failure to a confident explanation I couldn’t support.
I also contacted the clients and told them what had happened. My recommendation was not to keep trying to use the wet slabs. I wanted to start fresh with new wood. Their perspective is included in a separate customer interview.
I found some exceptional replacement slabs, but they cost roughly three times as much as the originals. Goby agreed to supply them at no additional charge. That was a meaningful response, although the replacement wood still needed several months to dry.
At the latest update, those slabs were finally dry. Allegedly. Before beginning again, I planned to check them thoroughly myself.
That’s where this project stood: not three finished tables in Italy, but a do-over with new material and a much more serious approach to verifying it.
I started making epoxy tables around 2016, and the failures have taught me far more than the builds that went smoothly. They are also why I created my roughly three-and-a-half-hour virtual epoxy workshop, covering the process of making a wood and epoxy table in a home shop or garage. As my methods improve, I update that same workshop rather than saving the improvements for a separate version.
The lesson from this commission is not that every problem can be fixed with darker epoxy and more determination. Sometimes the right decision is to stop, tell the customer the truth, replace the material, and do the work again.
|


