I paid $7,500 for a woolly mammoth tusk without knowing the first thing about restoring one. That probably tells you most of what you need to know about this project.
I can buy another slab of walnut. We can even grow more walnut. But a roughly 20,000-year-old mammoth tusk pulled from an Alaskan gold mine? I figured this might be my only opportunity.
What followed was more than a year of slow drying, hundreds of tiny repairs, some very nervous drilling, a custom steel stand, and one adhesive mistake that nearly spoiled the finish line. I also carved a fake tusk out of a tree to convince my wife the real one was beautiful by comparison. That part was less scientifically rigorous.
This was my first fossil restoration, not a professional conservation procedure. I approached it with the skills I use in furniture making, asked for help where I needed it, and learned quite a bit about where those skills did and did not translate.
Buying a Mammoth Tusk Was the Easy Part
The tusk arrived by air freight from Alaska. Picking it up was exciting right until I discovered two things: it was extremely heavy, and it smelled absolutely terrible.
I once accidentally left a freezer open before going on vacation and returned to a substantial amount of rotting beef in a hot garage. This was worse. Twenty thousand years of history apparently does not arrive smelling like a museum.
Under the shipping blankets, though, was something incredible. The tusk had a huge sweeping curve, long cracks, and patches of blue mineral deposits. That blue was vivianite, a detail the seller had not even mentioned. Apparently, blue coloration is highly desirable among mammoth tusk collectors. Yes, there is a mammoth tusk community. I was learning all kinds of things.
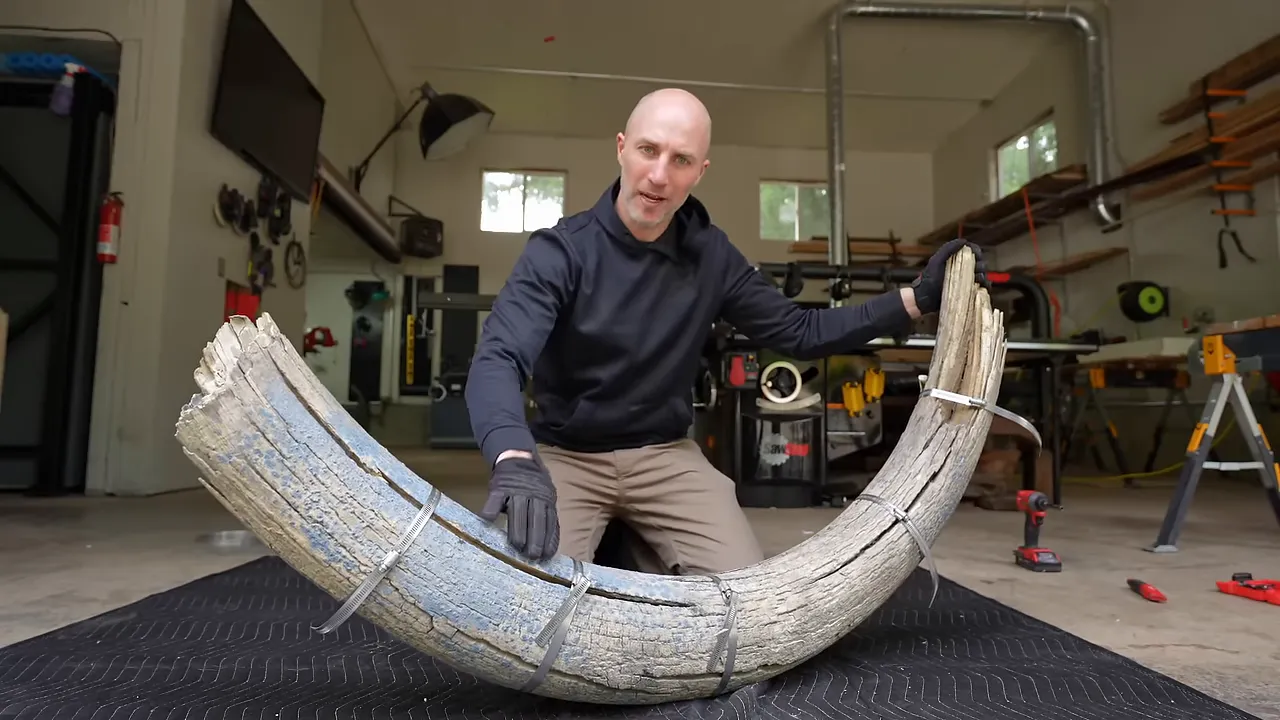
The cracks were actually less alarming than I had expected. The more immediate problem was moisture. Despite its age, the tusk was still wet, and I could not simply start sanding and polishing it.
The seller recommended adding hose clamps around its circumference and tightening them periodically as it dried. My first job was going to be waiting. For about a year.
Drying Mammoth Ivory Slowly
My original plan was to leave the tusk upstairs in the shop. The smell vetoed that plan almost immediately.
Instead, I moved it into a separate room where our furnace lives. We call it the wine cellar, despite the complete absence of wine. It stays around 55°F year-round, which gave me a cool place to let the tusk dry without trying to rush it.
Why the Hose Clamps Needed Constant Attention
After about a month, the clamps were noticeably loose. The tusk was shrinking as it lost moisture, which was exactly what I wanted, but it also meant my maintenance schedule was not frequent enough.
I started checking and tightening the clamps every week. Over time, something remarkable happened: many of the cracks became much smaller. Some nearly disappeared.
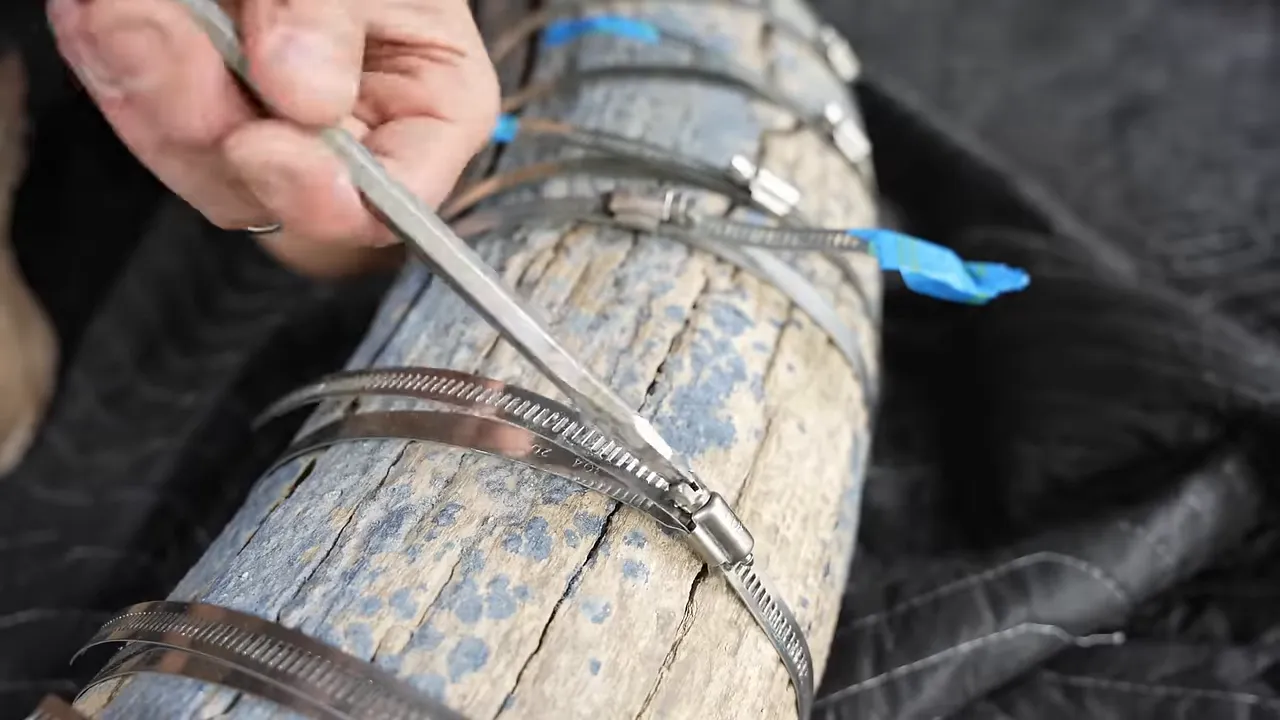
The process reminded me of drying very dense wood. Slow progress was still progress. Eventually, the clamps stopped needing much adjustment, and I began thinking about the next stage.
Finishing the Drying Process in a Kiln
I took the tusk to Aaron at Goby Walnut. He knows far more about drying difficult material than I do, which was reassuring, although he was very clear that this still involved a substantial risk.
He warned that a vacuum kiln could remove moisture too aggressively and potentially fracture the tusk. Instead, he chose one of his lower-temperature kilns.
After roughly a month, he called to say it was ready. His crew had even tightened the hose clamps every couple of days while it was in the kiln.
The tusk had gone from about 115 pounds when it arrived to 89 pounds after drying. That was a remarkable amount of water to lose, and the cracks were dramatically smaller than they had been at the beginning.
A Completely Unnecessary Side Project: The Fake Tusk
During all this waiting, I had another problem to solve: my wife did not share my enthusiasm for mammoth ivory.
For the record, I had told her I was spending the money. Somehow, she came away thinking this was a mammoth tusk sponsorship. About a year later, she discovered that the $7,500 had, in fact, come from us. This did not improve her relationship with the fossil.
Scott suggested showing her a terrible fake tusk first. Then the real one would look wonderful by comparison. It was an excellent idea, provided you define excellent as requiring unnecessary chainsaw work and having very little chance of success.
A maple tree had fallen in our backyard a couple of months earlier, so I cut a section from it and carved something loosely tusk-shaped. The goal was to make it bad, but not obviously fake. Also, it could not look so good that she preferred it to the actual tusk.
That is a surprisingly narrow design brief.
Stabilizing the Ivory Before Sanding
Once the real tusk was dry, I did what any furniture maker with no fossil-restoration experience would do: I mixed epoxy.
The first application was not about creating the final color or filling every crack. It was about consolidating loose, crumbly areas so I could begin working the surface without everything falling apart.
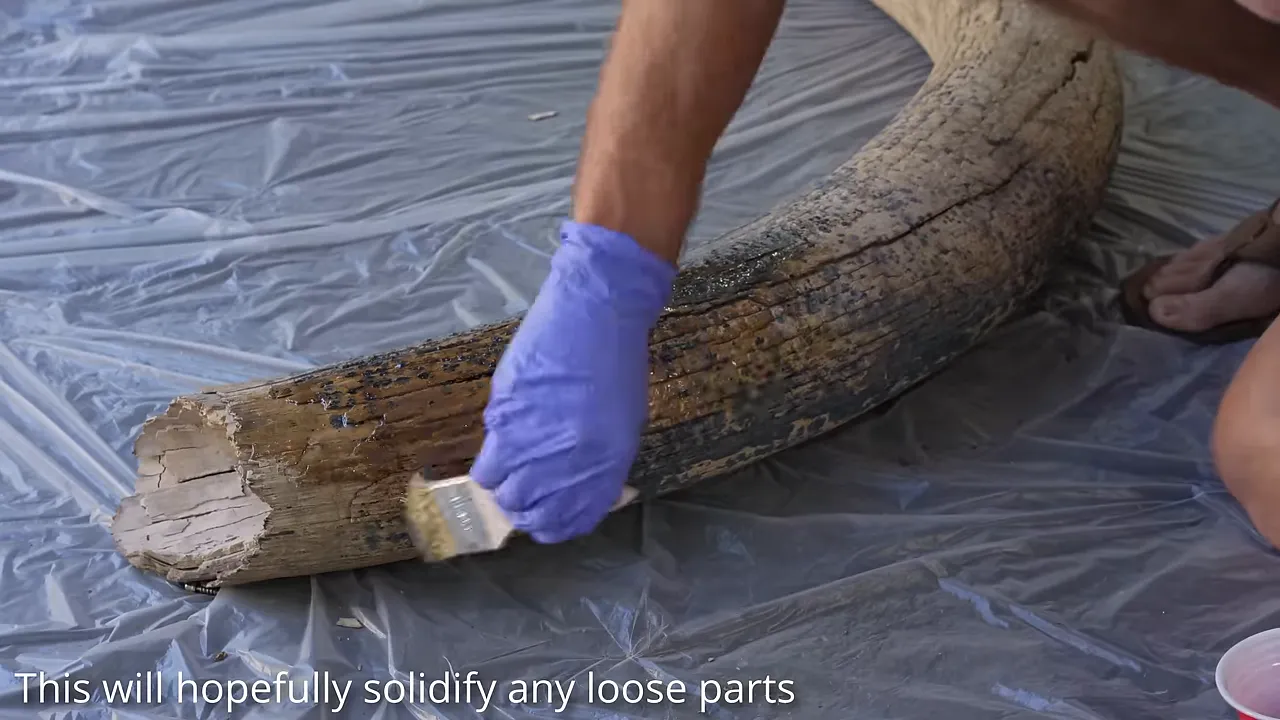
At this stage, I also had no idea what the final color would be. Mammoth ivory can reveal everything from pale cream to deep chocolate brown. The rough exterior did not tell the whole story.
And yes, I had considered the obvious ivory question. This was ancient mammoth ivory from an extinct animal, not a tusk taken from a living elephant. I still expected some confusion about that distinction. The internet once managed to get upset over a photograph of someone posing with a movie triceratops, so I was not assuming everyone would arrive with the same background information.
I also polished a small piece of the tusk and mounted it on a plaque for a project giveaway, alongside a brass hammer and marking knife. Even a little fragment looked pretty incredible once it was cleaned up.
Sanding Ivory Is Not Like Sanding Wood
The first clean patches of ivory were genuinely exciting. Beneath the rough exterior was a light-colored surface with all kinds of natural variation.
Getting there was another matter.
Mammoth ivory resisted sanding far more than the wood I normally work with. I went looking at hardness comparisons because it felt so different under the tools. Whatever the numbers, the practical lesson was obvious: this was not walnut, and it was not going to sand like walnut.
The smell also changed. The original rotten odor gave way to something closer to a dental office from your nightmares. Think of the smell of a tooth being drilled, then make it substantially worse.
It was slow, unpleasant work, even with a respirator on. But every clean section made it harder to stop.
The project also sent me down some fairly strange research rabbit holes. Historical accounts describe frozen mammoth remains in Siberia being fed to sled dogs. The famous story about mammoth meat being served at a banquet, on the other hand, turned out to be largely an urban legend. It did make me wonder whether I would try mammoth meat. The strangest thing I have actually eaten is nutria, which is probably enough culinary adventure for now.
Filling Cracks With Epoxy and Bone Ash
The long drying period gave me plenty of time to experiment with repair materials. Somewhere deep in my research, I found a reference to mixing bone ash with epoxy to make imitation ivory.
Bone ash is essentially what it sounds like: ash made from burned bones. I made a series of test samples using different combinations of epoxy, bone ash, and colorant.
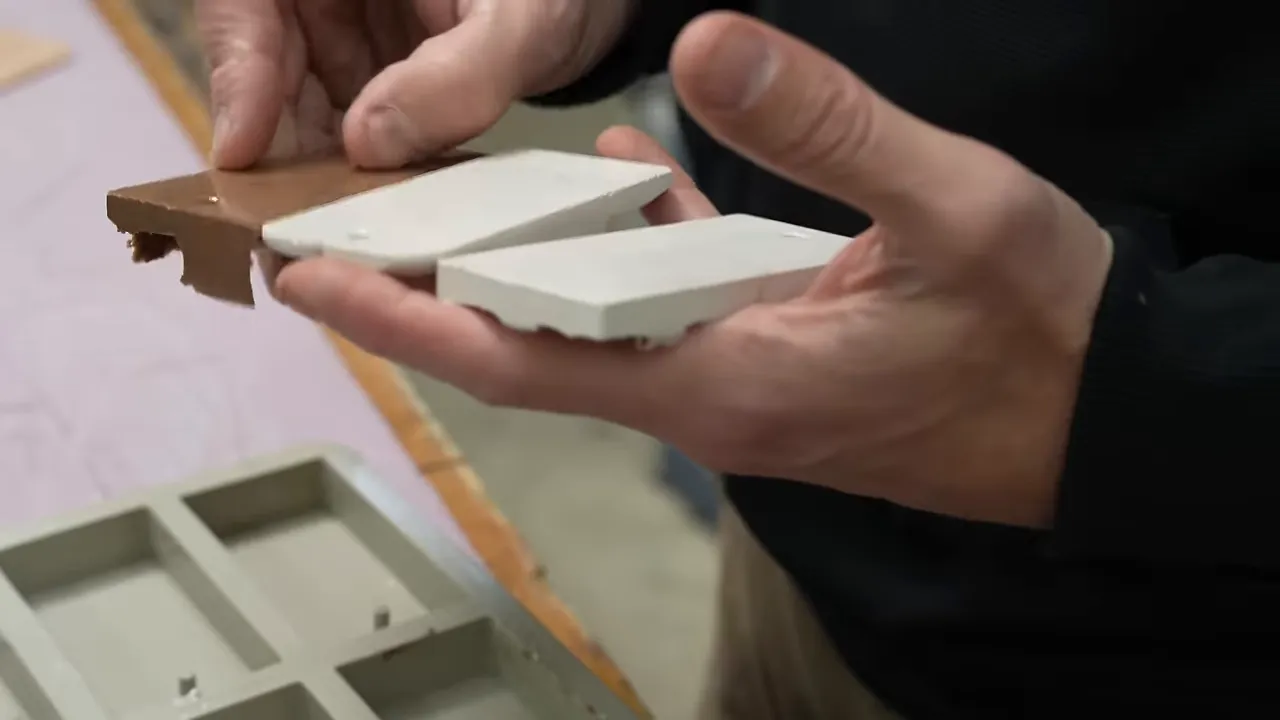
I decided against trying to match the light ivory perfectly. Instead, I used darker brown tones already present in the tusk, much like I often do when filling defects in walnut.
That gave me a clear approach:
- Use the existing darker colors as the reference for the repairs.
- Work in small sections rather than trying to fill the whole tusk at once.
- Fill the cracks and pits without erasing the character of the material.
- Sand the repairs back into the surrounding surface.
During my research, I found a few restoration shops doing truly exceptional work. I also found plenty of tusks that looked as though someone had packed the cracks with automotive filler, ground away the original shape, and buried everything under shiny lacquer.
That was exactly what I wanted to avoid. I did not expect to match the best professionals, but I wanted the result to look like an ancient tusk, not a plastic tusk-shaped object.
Hundreds of Pits, Many Small Batches
Filling a curved surface is tedious enough. Filling hundreds of tiny pits on a curved surface takes a special amount of patience and a completely unreasonable number of red mixing cups.
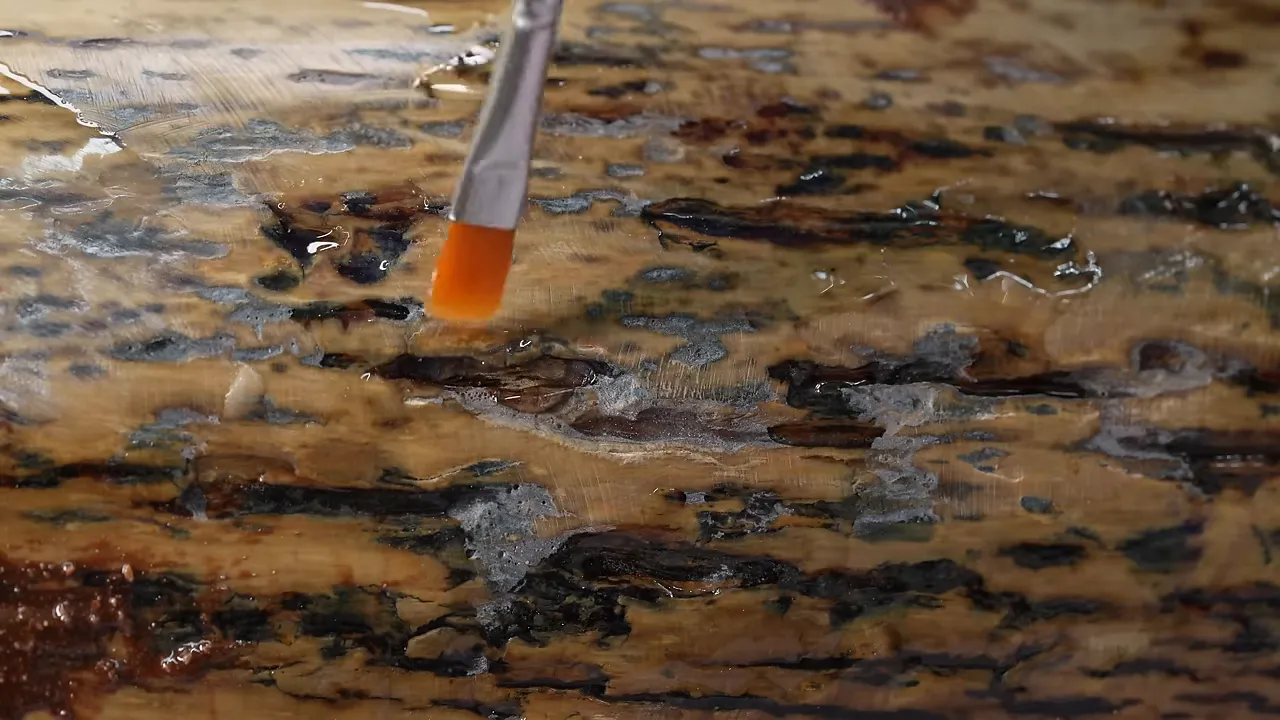
I also discovered that not all the bone ash I bought behaved the same. A later batch looked much cleaner than the first, which led to an entirely unnecessary suspicious-white-powder routine in the shop. More importantly, some of the earlier material eventually left visible white specks in the repairs. I would have to deal with those later.
As the filling and sanding progressed, the final colors started to emerge: cream, medium brown, and darker streaks. Conveniently, those were colors my wife already liked. They were also roughly the colors of our cat. I was prepared to use any decorating argument available.
The Blue Layer I Could Not Keep
One disappointment was how much of the blue vivianite disappeared during sanding.
I would have loved a bluer tusk, but the deposit was an extremely thin, flaky layer. I could not see a way to retain all of it while also getting down to a solid, stable surface.
Some blue remained, but far less than I had hoped. That was one of the harder compromises in the restoration.
Drilling a Giant Hole for a Floating Display
After looking at hundreds of mammoth tusk stands, I still had not found the exact look I wanted. Most visible supports distracted from the tusk.
I wanted it to appear to float above a minimal steel base. To do that, I needed a concealed support extending into the ivory.
Which meant drilling a 1.25-inch hole approximately 9 to 10 inches deep into the solid center.
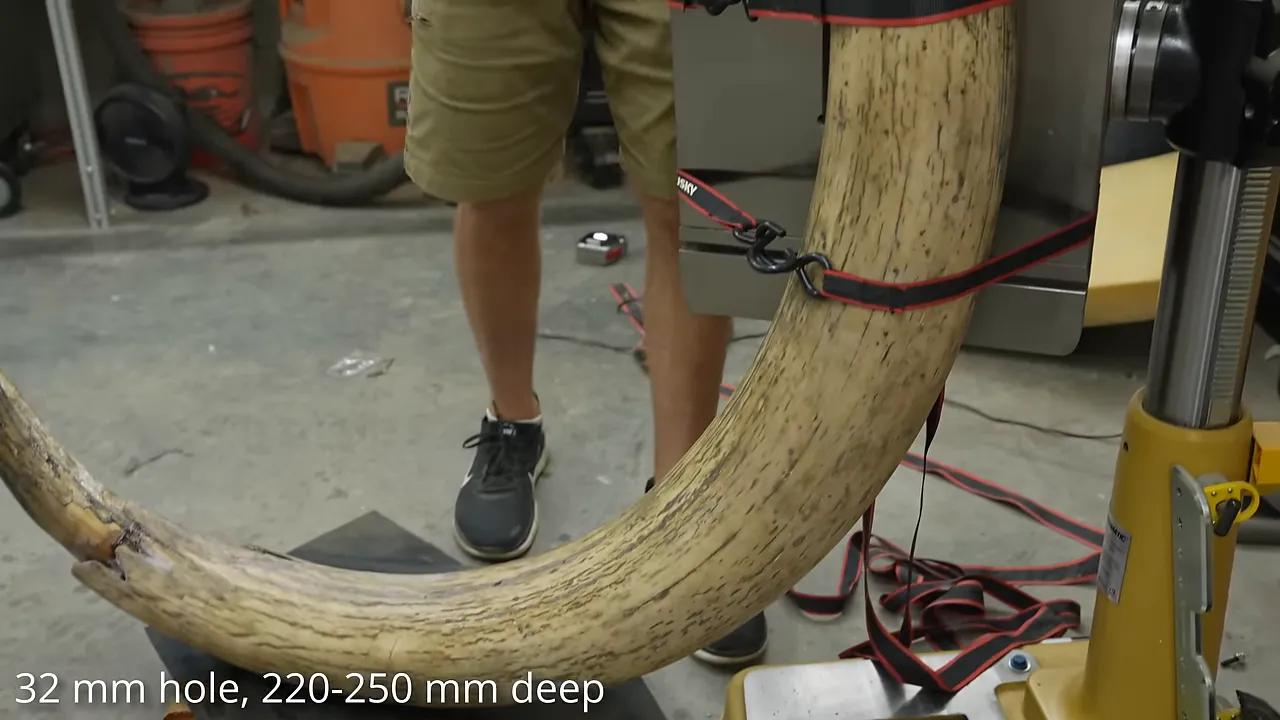
Getting everything positioned and secured took about an hour. Normally, I like to declare a 100 percent chance of success before starting something. This time, I offered about 20 percent, which still felt optimistic.
I started with the drill speed turned down and worked through the hole. It was one of those operations where the setup looked ridiculous, but the alternative was trying to control an enormous curved tusk by hand.
The hole worked. My blood pressure eventually returned to something closer to normal.
A Minimal Steel Stand Is Not a Simple Steel Stand
My original plan was to teach myself to weld while building the base. After seeing what the job actually required, I was extremely glad I abandoned that idea.
Ryan at Ace Metalworks cut the parts, and Joe at Otter’s Custom Fab handled the fabrication. Joe builds remarkable custom cars, and the precision he brought to this stand was well beyond anything I could have managed.
The tusk weighed about 90 pounds, but supporting 90 pounds was only part of the problem. We have small children visit the house. Small children touch things. A display like this needed to feel extremely solid, not merely survive sitting undisturbed in a corner.
Joe built the stand with no noticeable deflection. He also refused my suggestion that I could clean up the edge later with a flap disc. Instead, he hand-scribed and hand-chamfered the base. I have made worse chamfers with a router bit.
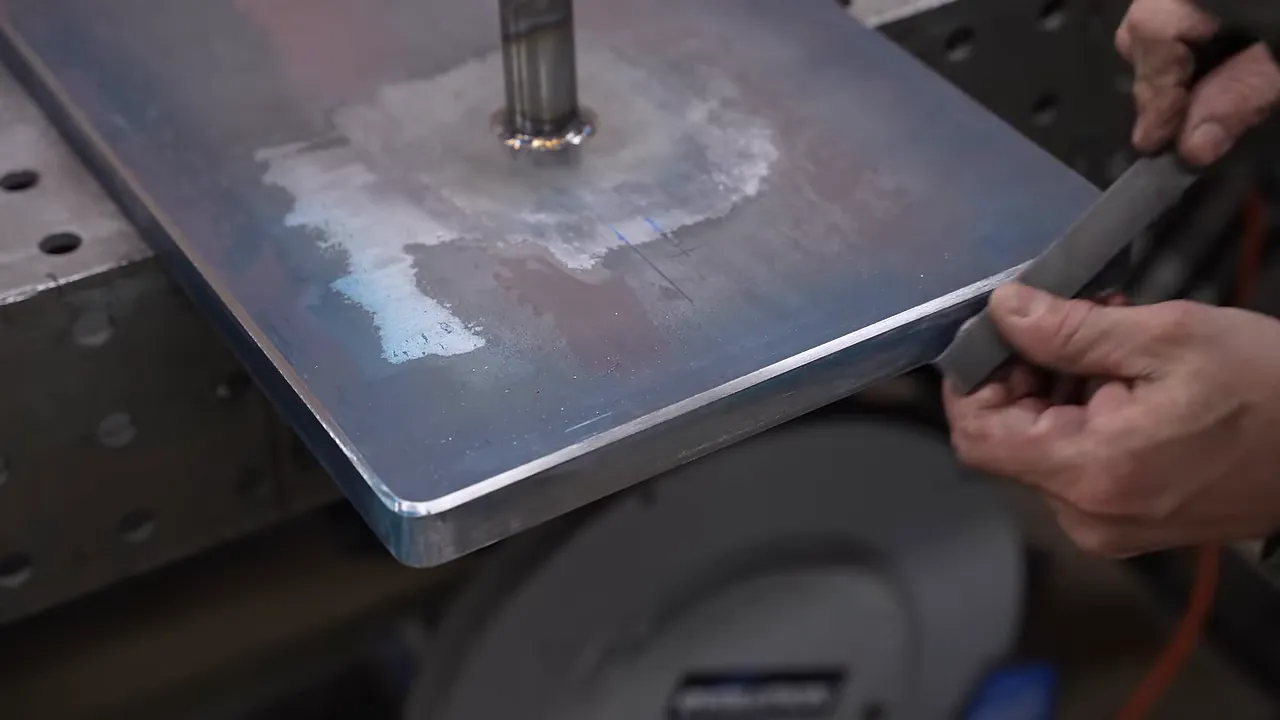
For an informal strength check, I stood on the support. I weigh about 190 pounds, more than twice the tusk’s weight, and could not feel it flex. That was reassuring, although it was not a substitute for the fabrication skill that made the stand work in the first place.
Making something substantial look minimal takes a surprising amount of work. Joe absolutely nailed that balance.
Polishing the Ivory From 400 to 2,000 Grit
Back in the shop, I was close enough to finished that I wanted to call it done. Instead, I forced myself to treat it like a table for a paying client.
I spent another day to a day and a half smoothing small irregularities and refining details most people would never notice. Unfortunately, I would notice them, and I was planning to keep this thing.
At 400 grit, the surface still looked relatively dull. Progressing to 2,000 grit brought out a much more reflective surface and made the natural color variation really come alive.
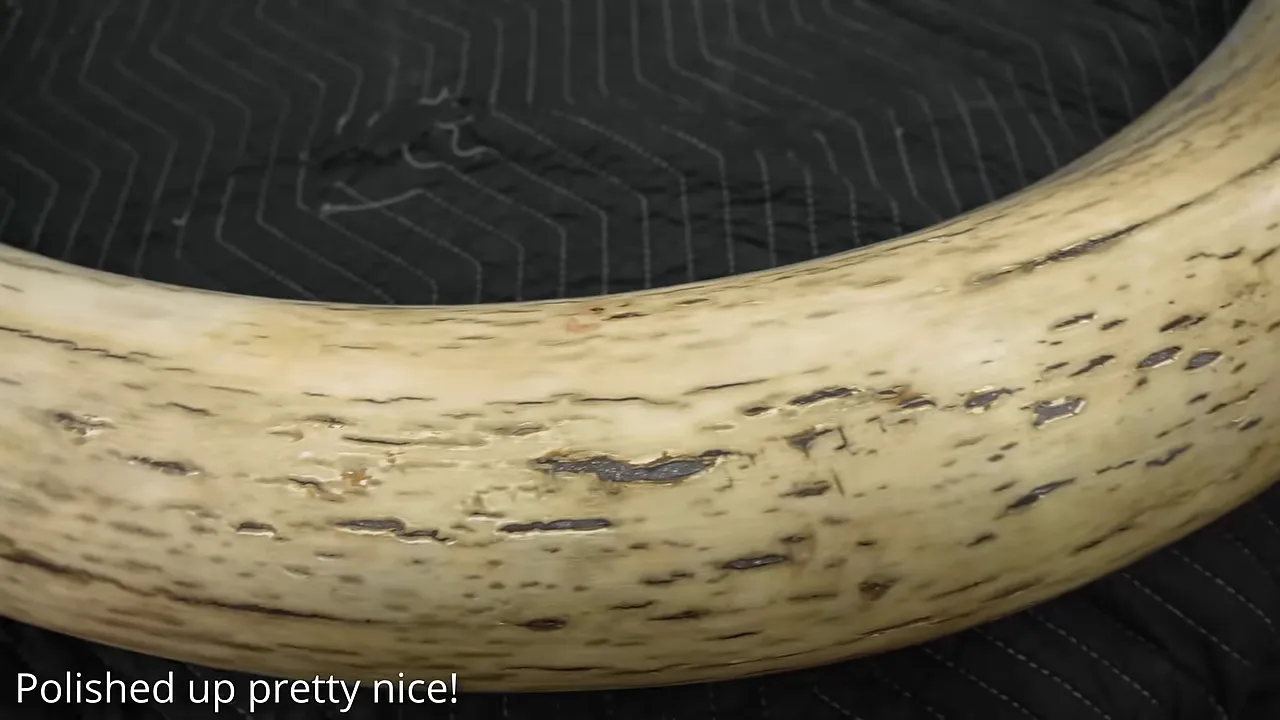
This was why I had resisted the heavy lacquer look from the beginning. The ivory itself polished beautifully. It took a tremendous amount of time, which probably explains why coating it is tempting, but I much preferred this result.
Yes, I Used Brown Sharpies
Remember those white particles left by the earlier bone ash? Polishing made them easier to see.
My solution was a collection of brown Sharpies.
Before that sounds completely unreasonable, I had already used dye to color the filler. The markers let me apply color very precisely to the small white spots instead of tinting everything around them.
I used several brown shades, blended the color with a tortillon, the little paper blending tool I remembered from art class, and lightly sanded the area afterward.
I am not going to claim it was perfect. I will say it looked really good, and I have no shame about the Sharpie.
The Mounting Adhesive Mistake
The first plan was to attach the tusk to its support with construction adhesive. I wanted something strong enough to hold it securely but potentially removable if I ever needed to take it apart.
After mounting and clamping it, I came back the next day to apply N3 hard coat for protection against fingerprints, spills, and smudges. That was when I noticed a little wobble.
The steel was not flexing. The adhesive joint was moving.
About 30 hours after assembly, it still did not feel secure enough for something I intended to keep forever. So I pulled the tusk off and started cleaning up my mistake.
Why That Adhesive Did Not Cure
The construction adhesive I used needed exposure to the surrounding conditions to cure. I had put it deep inside a nearly sealed hole around the support, effectively moving it from its caulking tube into another enclosed tube.
Inside, it was still gummy.
The lesson was not that construction adhesive is useless. It was that the curing requirements of that adhesive did not suit this enclosed joint.
I switched to a two-part marine epoxy thickened with silica filler. Unlike my first choice, it did not depend on air reaching the buried adhesive to cure.
The tradeoff was permanence. I was giving up my idea of easy future removal, but I cared much more about getting a rigid, secure connection.
This time, I was confident the tusk was staying on the stand. Getting it off someday would be somebody else’s problem. Probably mine, but a much older version of mine.
The Fake Reveal, Then the Real One
With the restoration complete, it was finally time to show my wife her dream fossil. She had never described having a dream fossil, but I did not let that slow me down.
I unveiled the carved maple version first.
She immediately identified it as a piece of wood decorated with spray paint and Sharpie. Apparently, my fake mammoth tusk was not going to fool a paleontologist. Or my wife.
For a brief moment, she was delighted by the possibility that I had not actually spent thousands of dollars on ivory.
Then I showed her the real one.
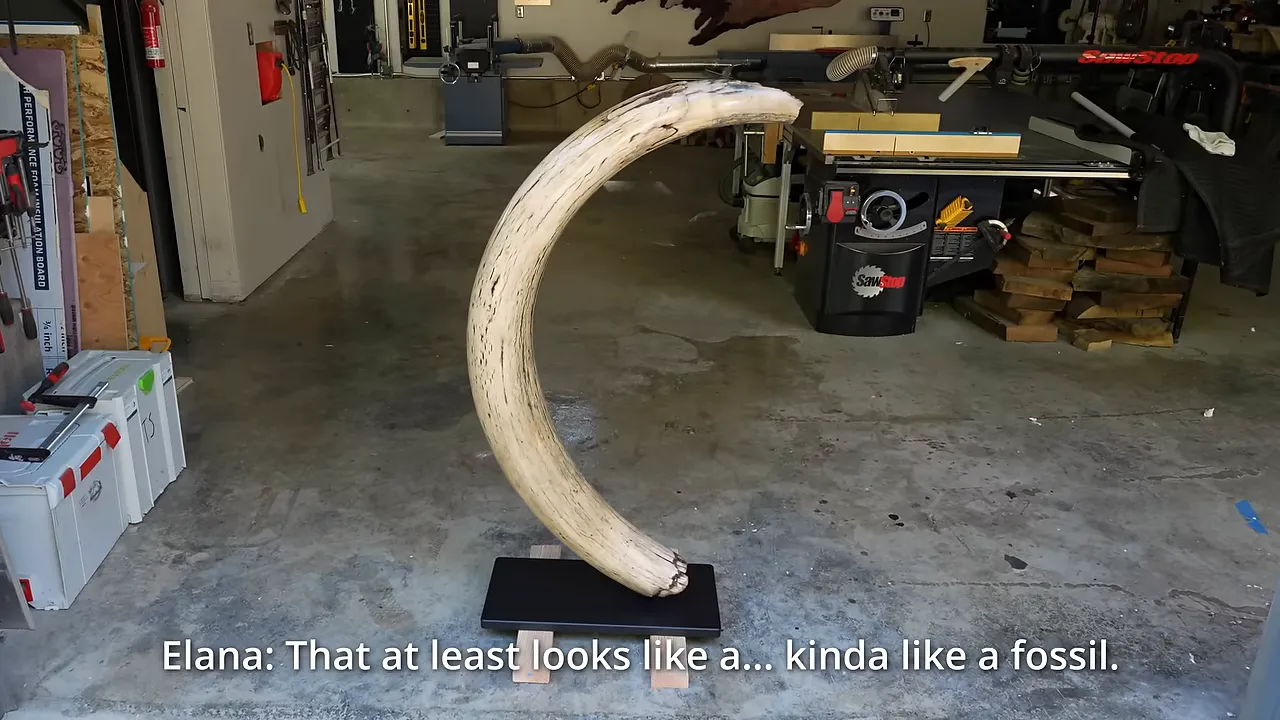
She conceded that it looked like a fossil, although still somewhat tree-like. Her other descriptions of its shape were substantially less suitable for a museum label.
When she asked whether I was happy with it, the answer was easy: extraordinarily happy. She was happy that I was happy. After more than a year of drying, filling, sanding, drilling, polishing, and remounting, I was willing to take that as a win.
I started with a wet, cracked, foul-smelling tusk and ended with a piece that still showed its age, its natural color, and its character. It was not flawless, and neither was my process. But I had never been this excited about a project, and the finished piece lived up to that excitement.
The fake wooden tusk, however, was definitely not coming into the house.
|


