People ask me what happens to all the wood left over from my tables. Do I burn it? Can they have it? Sometimes the answer is yes to both. But when the scraps are thick, beautiful walnut, I generally hang onto them until I figure out what they want to become.
Two leftovers from one slab became the starting point for my biggest sculpted table base yet. Add a spectacular walnut slab I had been saving for years, and this turned into my largest round table at the time: a hand-carved dining or breakfast table measuring about 43 inches in diameter and 30 inches tall.
This one also had a better purpose than filling another commission. I built it for a charity auction benefiting my local Make-A-Wish chapter, with every dollar of the auction proceeds going to the organization. Not the proceeds after materials. Not after shipping. I covered the table, the crate, and shipping within the lower 48 states.
Giving Good Walnut Scraps Another Job
The base started with two substantial offcuts from a previous slab project. One was long and relatively narrow, so I cut it into two shorter pieces and laminated them together to create the central stem. The other provided the round foot of the pedestal.
Using material from the same slab mattered. Walnut can vary enormously in color. I have worked with pieces ranging from light brown to deep brown, with others turning almost red under finish and carrying nearly black streaks.
I prefer highlighting those natural colors rather than staining everything into agreement. Stain can mute the variation that made the wood interesting in the first place. For the visible pieces of this base, especially the two halves of the stem, starting with the same tree gave me the best chance of a convincing match.
After preparing the mating faces, I spread wood glue on both pieces and clamped them together. There are strong opinions about whether glue belongs on one face or both. I am not particularly religious about it. Coating both makes me feel better about getting complete coverage, but I am not claiming that settles the argument.
I laid out the circular foot with a compass and cut it on the bandsaw. The thick stem blank presented a different problem: even my 12-inch miter saw could not quite cut through it. Apparently, no matter how big a tool you buy, the next project will require one slightly bigger. A flush-trim bit at the router table cleaned up the small section the saw could not reach.
Scaling Up a Sculpted Table Design
The basic shape grew out of a pair of hand-sculpted end tables I had made earlier. That project was an experiment in accessible woodworking: spend less than $100, then try to earn $1,000 in profit without using my social media audience to sell them. I ended up around $950.
One person later told me they had made a similar design, listed it on Etsy, and sold it in about eight days. That meant a lot to me. Woodworking should have entry points that do not involve buying a slab worth several thousand dollars.
This larger version was also a chance to make something different. Client commissions are wonderful, but people tend to order versions of work they have already seen. Building without a client let me explore the design at a scale I had not attempted before, while the auction gave the finished piece a purpose beyond experimenting.
A Bigger Joint for a Bigger Table
On my smaller sculpted tables, I had joined the stem to the foot with epoxy and a Domino. For a full-size breakfast table, I wanted a more substantial connection.
The solution was an oversized loose mortise-and-tenon joint: matching mortises in the foot and stem, connected by a separate wooden tenon.
One Template, Two Matching Mortises
I made a rectangular router template with square corners and secured it with double-sided tape. Using a brass guide bushing, I routed the mortise in the foot to roughly two inches deep, about as far as the bit allowed.
The same template then went onto the end of the stem. Before routing, I checked the grain orientation. I wanted the dark stripes in the stem and foot to run in the same direction. Getting the joint right would not mean much if I assembled the grain the wrong way around.
The template was slightly rectangular rather than perfectly square, so fitting the loose tenon required adjusting both dimensions independently. I spent about half an hour taking small amounts off until it fit snugly.
This hidden tenon did not need to come from the same tree. Color matching matters a lot less when nobody can see the wood.
A half-inch router bit leaves a quarter-inch radius in the mortise corners. I used a quarter-inch roundover bit on the tenon’s long corners to match. In theory, that should produce a nice fit. In this case, theory actually cooperated.
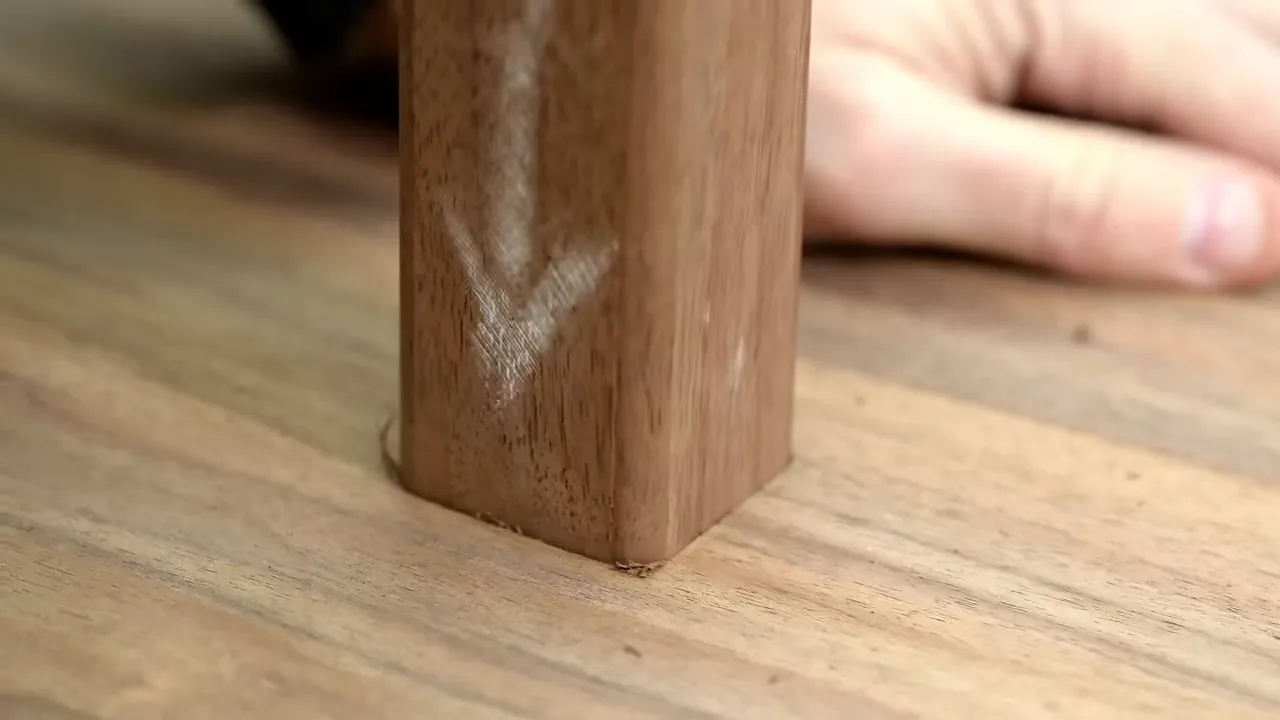
The dry fit was snug enough that taking it apart became its own project. Encouraging for the fit, slightly less encouraging when I needed to get glue inside it.
Marine Epoxy and Bridge Clamping
For this joint, I used a marine bonding epoxy, not the deep-pour epoxy I use for river tables. The connection included end grain meeting long grain, and I preferred epoxy for this application.
Clamping the tall stem down onto the round foot required a simple bridge: a 2-by-4 across the top, with clamps running down to either side of the foot. I had used this arrangement before and thought I had invented something clever. Then someone informed me it already had a name: bridge clamping.
Apparently, the woodworking world had managed to solve that one without me.
Power Carving: Start at the Transition
The most important shaping advice I can give for this style of pedestal is to start where the stem flows into the foot, then work outward.
Starting at the perimeter and carving toward the center can leave you with a transition you do not like and very little material left to fix it. Establishing the center first lets you control the curve and carry it naturally out toward the edge.
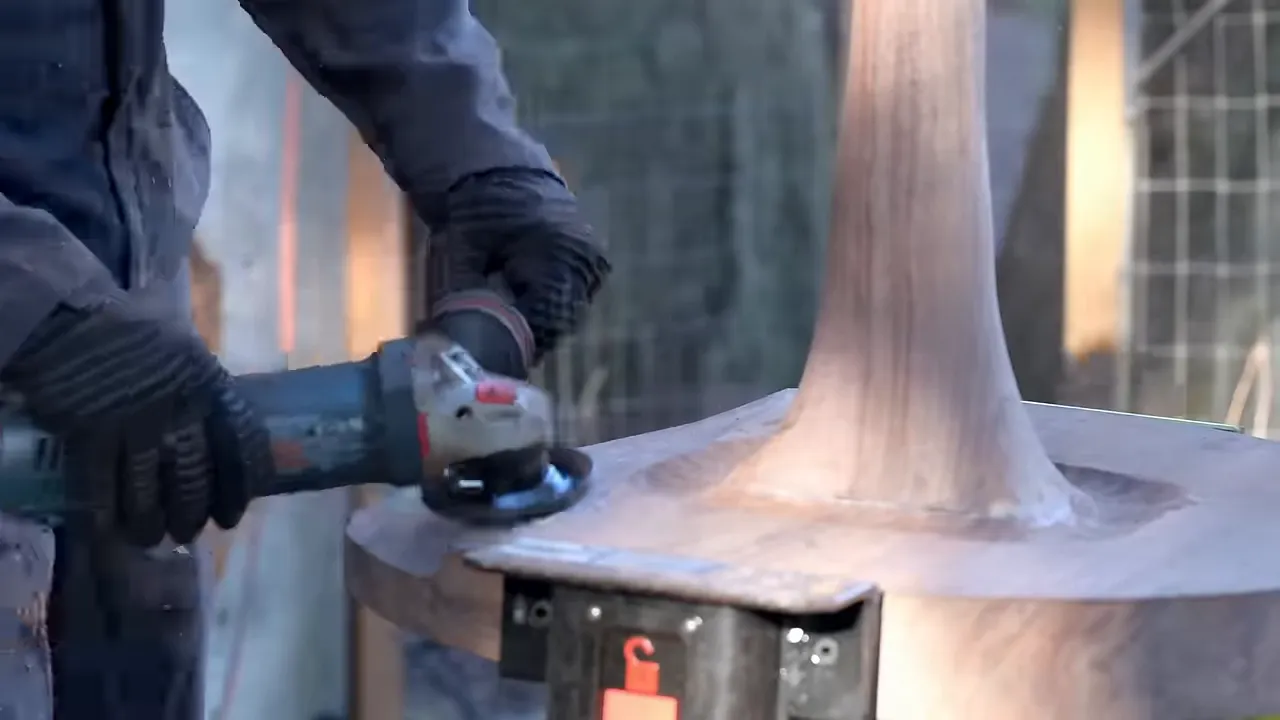
I held the assembly in a JawHorse, a three-legged clamping stand someone had recommended after seeing one of my earlier carving projects move around more than it should. I had been skeptical of the three-leg arrangement, but it worked well for nearly all the rough carving.
My main carving tools had different jobs:
- Arbortech TurboPlane: Fast bulk removal, with a surface that still needs refining.
- Kutzall carving discs: More controlled shaping and smoothing after the rough form is established.
- Abrasive flap disc: A useful experiment for smoothing, but a consumable that wore more quickly than my carbide carving discs.
At the time, the flap disc cost about $10 and a Kutzall disc about $60. The carbide discs had been very durable in my work, which made them a better long-term choice for the amount of carving I do.
You do not need my entire collection to get started. If you already own a compatible angle grinder, one appropriate carving disc is enough to begin learning. I particularly like the original fine Kutzall disc. Add specialized profiles when you find a reason to need them.
This process makes a tremendous amount of dust. Eye protection, a suitable respirator, secure workholding, and following the tool and accessory manufacturers’ safety instructions are not optional details.
I can often rough-carve a smaller base in an afternoon or a day. This one was large enough to push that work into a second day.
Refining the Shape With a Spokeshave and Sander
Once the power carving was finished, I moved indoors and started removing the remaining lumps with a spokeshave.
If you have never used a spokeshave, it is worth trying. Start with a light cut and adjust until it produces small shavings. It is a satisfying way to knock down high spots without immediately turning everything into sanding dust.
I followed that with 40-grit paper on my Rotex sander. At that grit, in its aggressive mode, I was still shaping the base rather than simply preparing it for finish. It removes enough material to adjust curves, so the work is not finished just because the carving disc has been put away.
Making a Sculpted Base Sit Flat
A recurring frustration with these bases is that a blank can start perfectly flat and still develop a little twist, cup, or warp during the build. A beautiful pedestal that rocks on the floor is not much of a success.
I tackled that in two parts: create a recessed underside, then flatten the outer contact ring.
A Textured Recess Under the Foot
Think about the small ring on the bottom of a plate or bowl. It is much easier to make that narrow ring sit flat than to make an entire broad surface contact a flat plane.
I used the same idea under the pedestal foot, carving away the interior so only the perimeter would rest on the floor. Rather than leaving a purely functional hollow, I gave it a textured pattern with an Arbortech Ball Gouge.
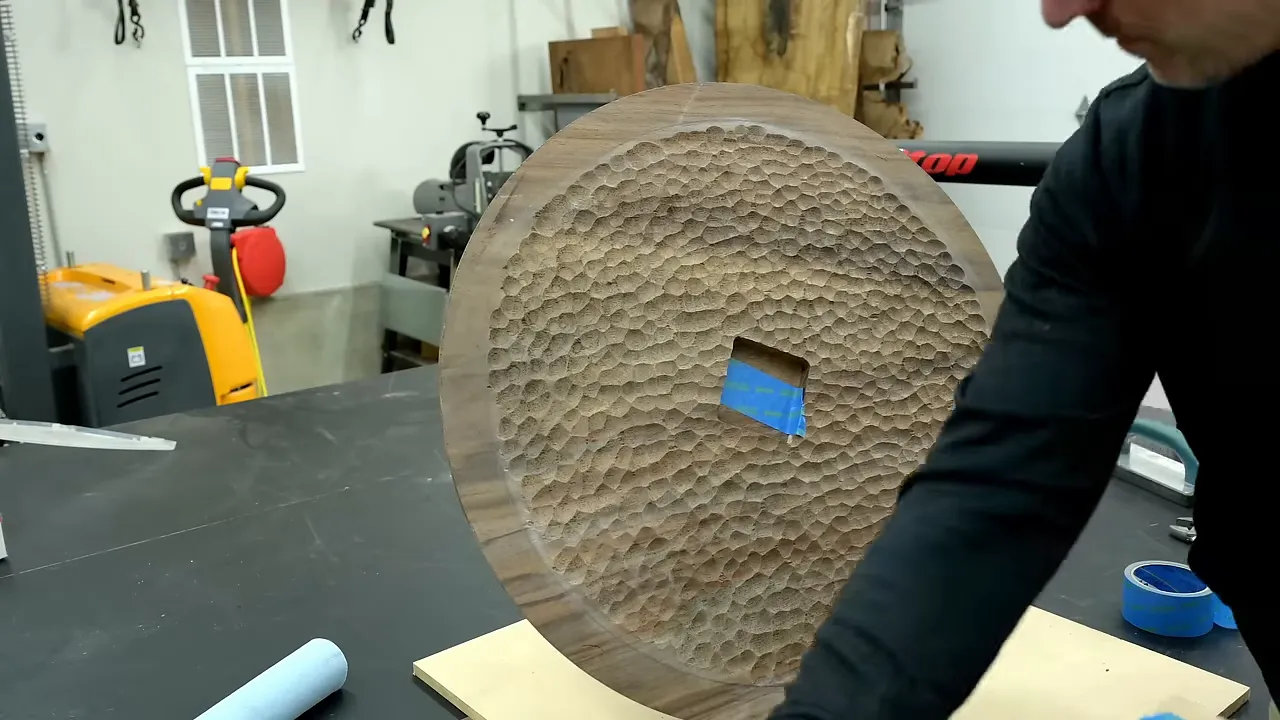
The texture looked interesting, but the ball gouge caused some chip-out that needed cleaning up. Later, I used a Kutzall ball-nose burr in a die grinder. That gave me a cleaner result on this piece, although my die grinder was less powerful than the angle grinder, so progress was slower.
A Pivoting Router-Table Flattening Jig
Before carving, I had routed a small central recess into the underside. That recess gave me a place to fit a plywood block for a pivoting flattening setup.
I connected the block to an MDF reference board with a screw, then slowly rotated the base over a router-table cutter. The pivot controlled the rotation while the cutter brought the outer contact ring into a common plane.
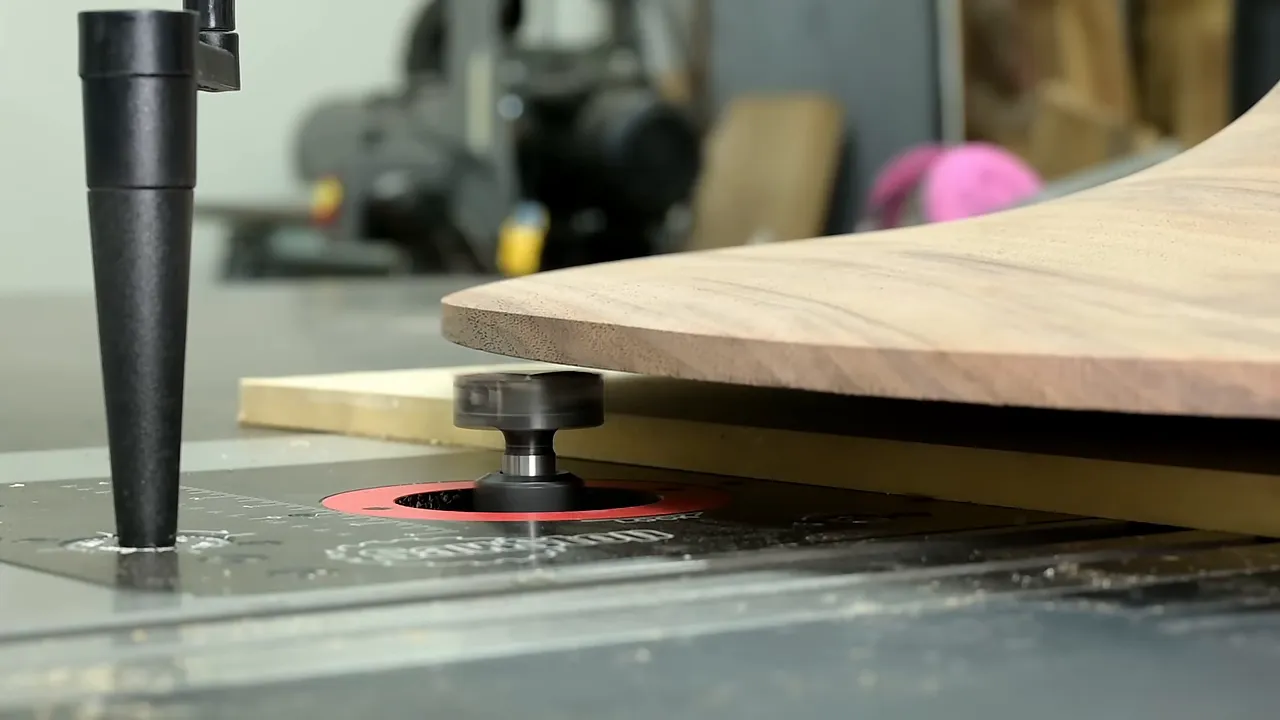
I had not tried this before, and my clever ideas do not always end well. This one worked. Taking it slowly with a sharp bit brought the perimeter level.
There was one catch: removing material from the ring left part of the textured center projecting below it. That area needed to be recessed again.
To track my progress across the irregular texture, I borrowed an automotive trick and applied spray paint as a guide coat. As I removed wood, the remaining paint made it easier to see where I had and had not worked. After recarving the center, I cleaned up the last high spots and checked the underside with a straightedge.
The finished base sat flat. Whether I would texture the entire underside again is another question. It looked cool, but it was a lot of work for a surface most people will never see.
Small Repairs and Finish on the Base
The walnut was surprisingly clean, but there were a couple of small natural cracks, including one in the stem. I filled them with CA glue and activator, then sanded the repairs flush. The stem repair blended in particularly well.
For finish, I used Rubio Monocoat. I like the wipe-on, wipe-off application and the way it preserves the feel of the grain rather than creating a thick, plastic-looking surface.
The finish brought out exactly what I had hoped for: rich reddish-brown color and dark streaks continuing through the foot and up the stem. Using matching offcuts paid off.
I also signed and dated the underside. Signing my work has always felt a little pretentious to me, but for this one I figured, why not?
A Walnut Slab That Had Been Waiting for the Right Project
The top had a much longer history than the base.
I bought the slab on Craigslist years earlier. According to the seller, the tree had been cut down in the 1960s, and the wood had been stored in a barn. It was beautiful material, but I had used it to practice bow-tie inlays early on and eventually decided the results were not up to the standard I wanted.
So it spent a long time leaning against a wall, waiting for me to decide what to do with it.
This table finally gave it a job. Before I could cut the round top, though, I needed to deal with old threaded inserts and a chainsaw scar on what would become the underside.
Patching the Chainsaw Scar With Matching Wood
I used a plywood template with a rectangular opening, a brass guide bushing, and a half-inch router bit to remove the damaged area. I kept routing deeper until the chainsaw mark was gone from the pocket.
Then I cut a patch from an offcut of the same slab, reduced its thickness on the bandsaw, and carefully fitted it to the recess. Instead of rounding the patch corners as I had done with the loose tenon, I squared the pocket corners with a corner chisel.
Here, I chose ordinary wood glue rather than epoxy. The patch offered long-grain bonding surfaces, and wood glue generally gives me a less conspicuous line. Epoxy can leave a dark outline, something you could see at the base joint.
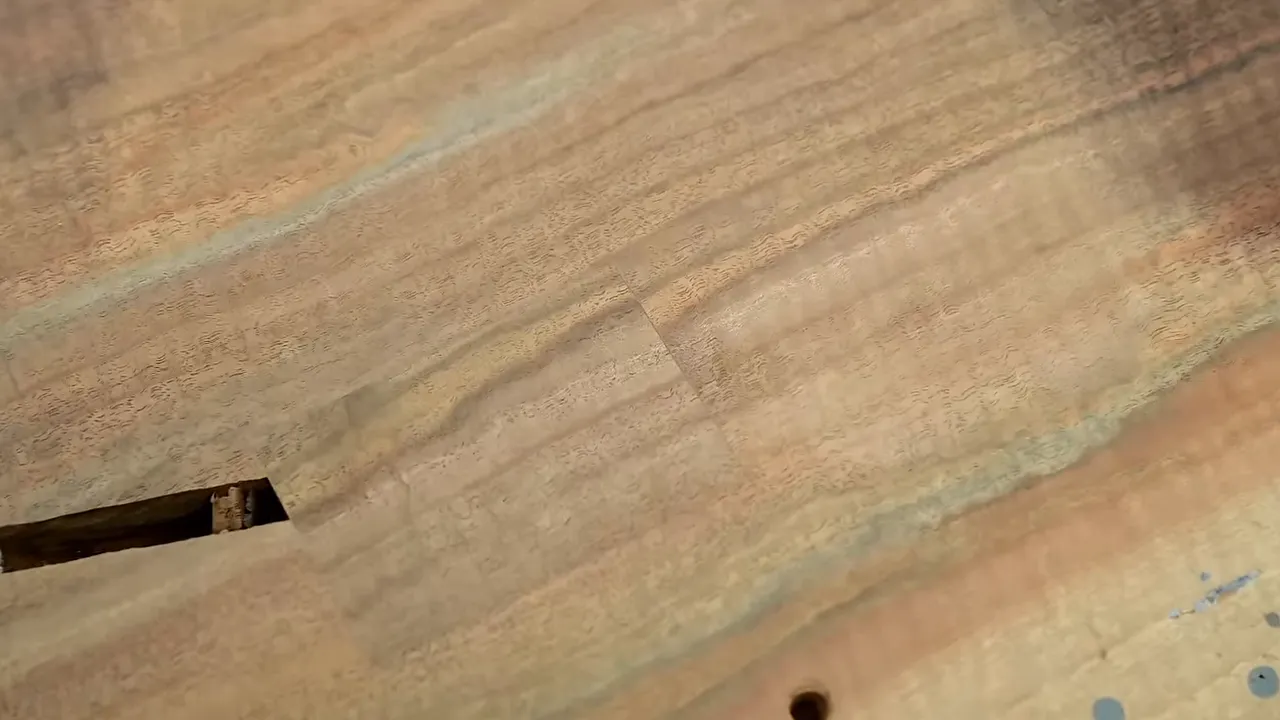
After gluing and clamping, I planed and sanded the patch flush. Repairs like this always carry a little suspense. Sometimes you sand one down and discover that it looks terrible.
This one turned out well enough that I would have been happy with it on a visible surface. On the underside, I felt pretty confident it would go unnoticed.
Cutting the Round Tabletop Without Blowing Out the Edge
I used a purchased router circle-cutting jig to establish the tabletop’s perimeter. There are plenty of homemade jigs that can do the same job.
Rather than routing all the way through the slab and risking splintering the opposite face, I divided the cut into three stages:
- Route the circle partway through to establish an accurate edge.
- Cut away the waste with a jigsaw, staying just outside the routed line.
- Flush-trim the remaining material, using the first routed surface as the bearing reference.
Dust extraction matters here, too. My Festool router collects dust very well when connected to extraction. Without it, the router tended to pile the chips directly over the cut, making the work harder to see.
The result was a clean circle, except for one small touch of live edge I deliberately kept.
I gave the top different edge profiles: a one-inch roundover underneath and a quarter-inch roundover above. I find that more interesting than putting the same radius on both edges. The larger underside curve changes how the thick slab reads, while the smaller upper curve keeps the working edge comfortable.
Five or Six Hours of Sanding, Then the Good Part
As the surface got closer to finished, more tiny imperfections appeared. I filled those with CA glue and activator rather than deciding they were good enough. A few extra minutes spent fixing little defects can make a noticeable difference.
Then came “a little sanding,” which in this case meant about five or six hours.
I also fitted low-profile C-channels into the underside. Their purpose here was to help resist cupping and twisting in the broad slab, not to turn the tabletop into a structural beam.
Finally, I could apply finish and see the figure come alive.
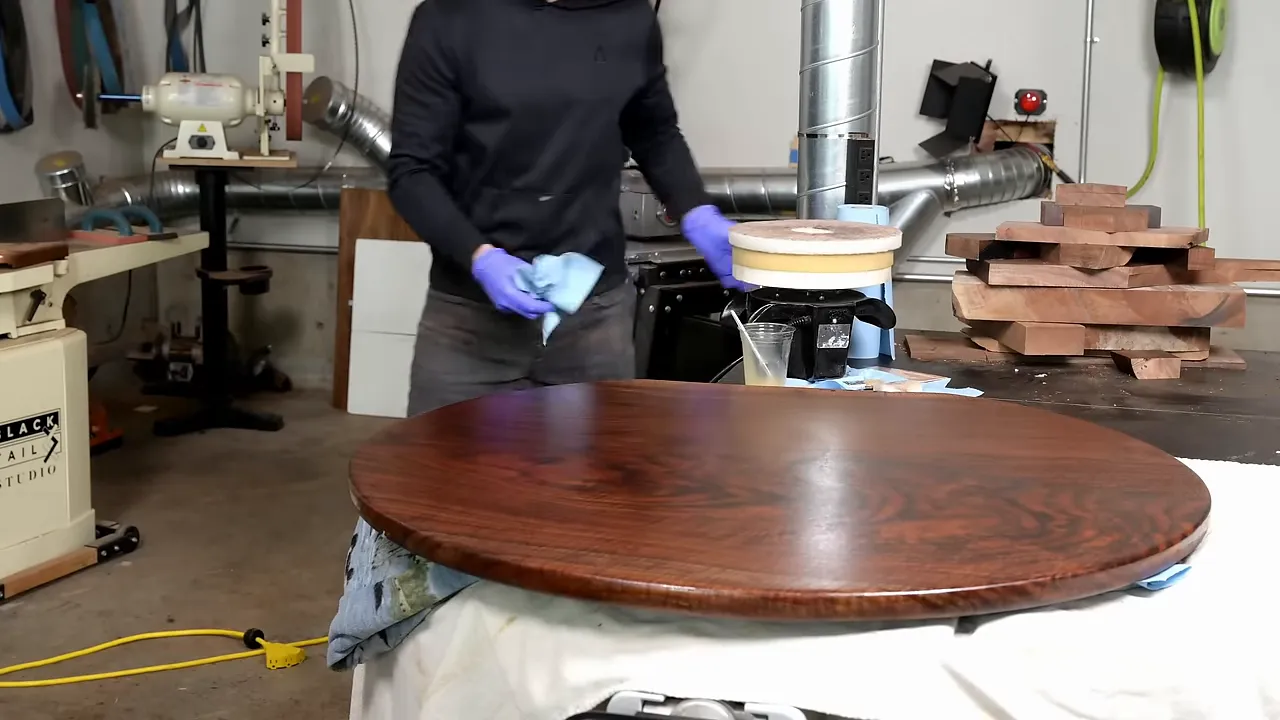
The little three-dimensional-looking ripples are a type of wood figure called curl. The surface is flat, but the grain creates an appearance of depth and movement.
This is the kind of material often used for high-end guitars. A few guitar makers gave me a hard time for using such a large piece as a tabletop when it could have supplied several smaller instruments.
I understood the argument. I was still not going to cut this slab into little chunks.
A Strong Attachment That Stays Out of Sight
For the connection between pedestal and tabletop, I wanted something substantial without a bulky wooden mounting structure underneath.
I bought a quarter-inch-thick steel disc and drilled it at the drill press. Countersunk holes allowed the fastener heads to sit flush. The plate used five fasteners at the stem and six attachment points at the tabletop, with threaded inserts providing the bolted connections.
The low-profile plate kept the mounting hardware visually quiet and left the sculpted stem as the focus.
I built the laminated stem and its oversized base joint to be substantial, even though the flowing curves make the pedestal look lighter than the original blocks of walnut. The finished assembly had the solid feel I wanted without sacrificing the shape.
A Four-Person Table With a Better Purpose
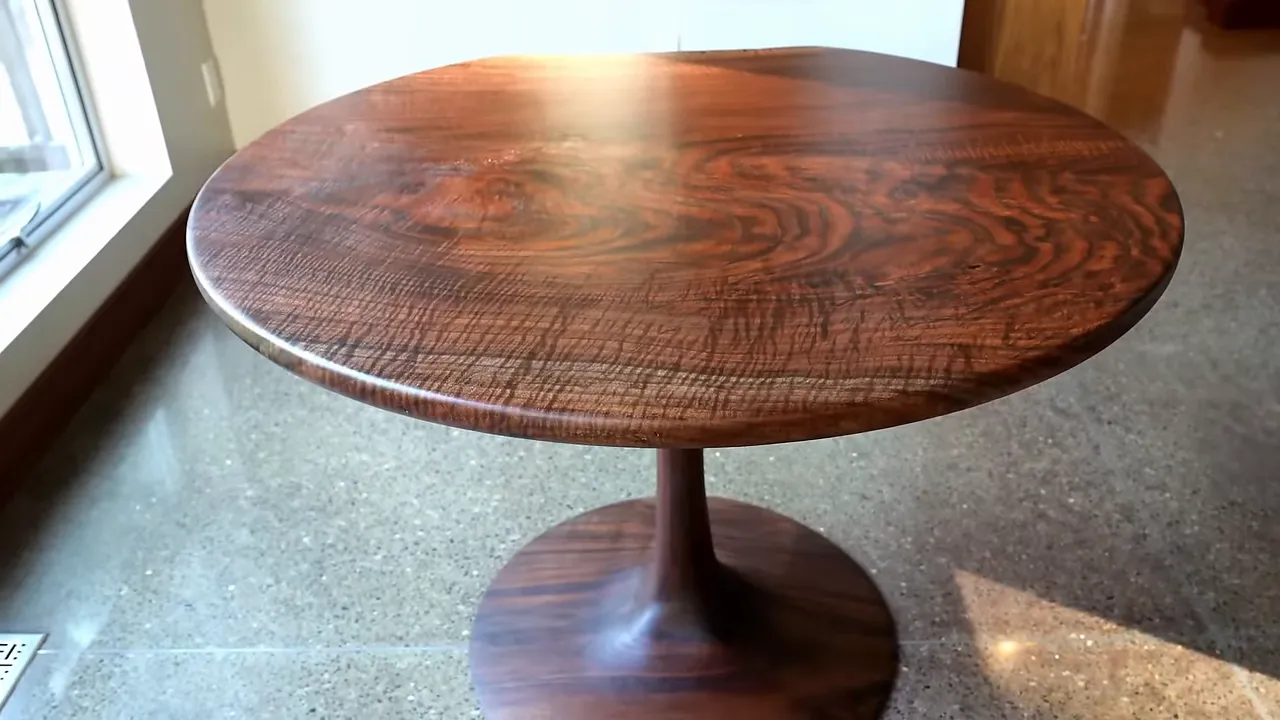
At about 43 inches across and 30 inches tall, the finished table comfortably accommodated four chairs. Sitting at it confirmed that the pedestal left plenty of legroom.
What I like most is how the two parts work together. The top has dramatic curl and swirling grain. The base has those long black streaks and a shape that makes separate pieces of walnut feel like one continuous form.
And both began as wood that had been sitting around, waiting.
The auction was set up to send 100 percent of the proceeds to the local Make-A-Wish chapter, supporting the work of Make-A-Wish. I covered the build, crating, and lower-48 shipping rather than deducting those costs from the donation.
I like making a living building furniture. But getting to experiment, rescue some remarkable wood, and turn the finished piece into support for a good cause? That is better.
|


