The previous owners of our house did an incredible job. My wife and I love the cabinets, the doors, the trim. Pretty much everything except the pantry door, which looked like it had been borrowed from the set of Unforgiven.
There is nothing wrong with a rustic barn door in the right house. Ours has a much more modern feel, and the distressed wood and exposed black track just did not belong. My solution was a solid walnut sliding door with no visible hardware and no handle. Just wood.
I also decided to make it a surprise for my wife while she was away for 10 days. She does not particularly enjoy surprises and generally likes to be involved in decisions like this. But I figured I could turn what might otherwise become a three-month design discussion into a five-day build.
That was the first questionable decision. It would not be the last.
Key Takeaways
- S4S lumber and commercial shop services can eliminate much of the milling and flattening work.
- Concealed sliding hardware requires careful recesses, compatible door construction, and attention to floor level.
- Test-fit the complete door before finishing so installation problems can be resolved first.
- Solid walnut adds weight and seasonal movement considerations to an otherwise minimalist door design.
Starting With $950 of Walnut
I bought about $950 worth of straight-grained, steamed 8/4 black walnut. The goal was a clean panel with fairly consistent color and grain, not a collection of highly figured boards competing for attention.
First, I removed the old door and its exposed track, then patched the mounting holes. With the pantry now permanently on display, I had given myself a little extra motivation to finish.
Back in the shop, I started ripping the thick walnut into planks. Almost immediately, one board reminded me that properly kiln-dried lumber can still contain a surprising amount of internal stress.
As I finished a cut, the wood moved enough to split all the way through. The board had been trying to bow so aggressively that it essentially completed part of the cut for me. Not a service I had requested.
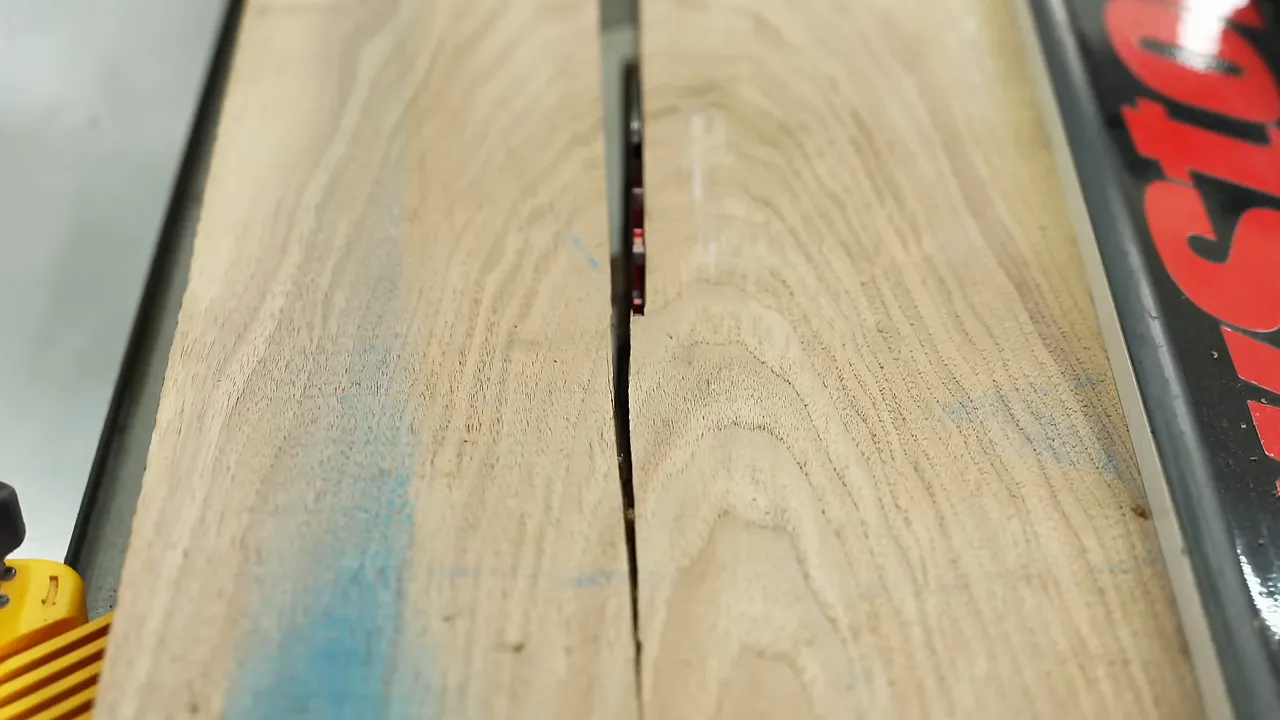
The remaining material still looked usable for this project, but the lesson matters: a straight cut does not guarantee that a board will stay straight after you cut it. Removing material can release stresses that were already inside the wood.
The Easier Alternative: Order S4S Lumber
I milled the lumber myself because I own a jointer and a planer, and using them is a fairly reasonable thing to do when your job is building furniture. That does not mean everyone needs to buy those machines to make a door.
The easier route is to call a lumber supplier and ask about S4S lumber, meaning surfaced on four sides. Give the supplier your required dimensions and confirm what milling they provide. Properly prepared stock can arrive at the thickness and width you need, with straight edges ready for glue-up.
I have a friend with a large woodworking shop who skips this whole milling process and starts with prepared lumber. There is no prize for personally performing every operation.
For my boards, the preparation included:
- Ripping the rough stock into narrower pieces.
- Jointing and planing to establish flat, consistent surfaces.
- Getting all the boards to the same thickness.
- Jointing a straight edge and using the table saw to establish the second edge and consistent width.
- Checking the layout and correcting any edges that did not fit properly.
Gluing a Door-Sized Walnut Panel
Once the boards fit together, I marked the arrangement so I could put them back in the same order during assembly.
I used a Festool Domino for alignment. This is usually the point where someone informs me that they own a circular saw, a framing hammer, and a leaf blower, and would appreciate a version of the project that uses those tools.
Here is the important part: the Domino was not necessary for the strength of this edge-glued panel. The glue joints do that work. The loose tenons mainly help keep the faces aligned while the clamps go on.
If you do not own a Domino, you can still make this panel. You just need to pay more attention to keeping the boards aligned during clamping.
I also did not try to glue the entire door at once. With this many long boards, I was concerned about getting everything coated, assembled, and clamped before the glue began setting up. Instead, I made two smaller panels, then joined those panels into one large door.
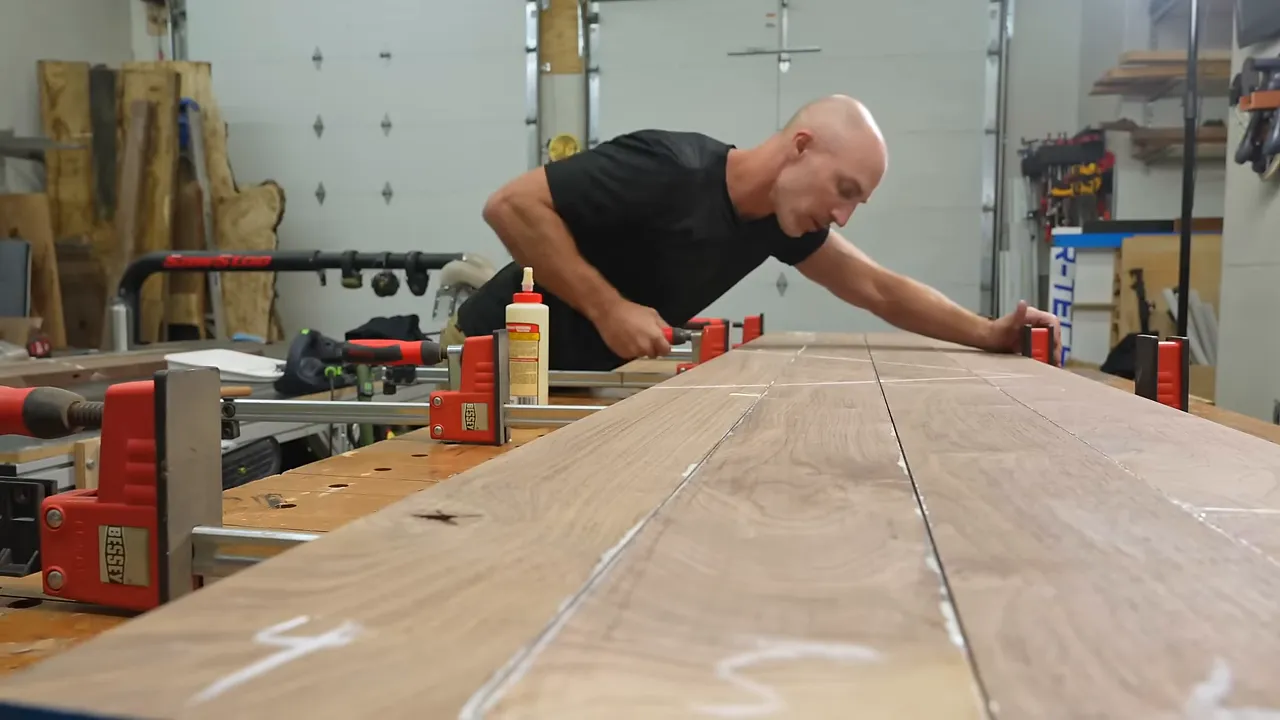
The final assembly stayed in the clamps for about 24 hours before I took it out.
Using a Commercial Shop Instead of Fighting the Panel
The door came out of the clamps fairly flat. I could have flattened and squared it at home, but I live about half an hour from Creative Woodworking Northwest in Portland. For this build, $75 bought a half-hour of shop access with an employee operating the equipment.
Their wide-belt machine combines a planer with two sanding belts. The setup used roughly 80- and 120-grit sanding, and they could also install a finer belt if needed. Flattening the panel took only six or seven minutes.
That left enough time to take it to the sliding table saw and square it up. Mark, who has helped me there before, had the whole thing flat and square within the half-hour session.
Could I have made those cuts with my own circular saw? Absolutely. But I had already paid for access to a very nice sliding table saw. Refusing to use it would have been a strange commitment to doing things the hard way.
This is also why I created Makerbook, a directory for finding shops that can help with projects. Sometimes you need an industrial wide-belt sander. Sometimes you just need someone nearby with a decent garage and the right tool.
Hidden Barn Door Hardware: Great Result, Difficult Instructions
I went back and forth on whether this door needed C-channels. Eventually, I decided to err on the side of caution and recess them into the back. They would not be visible in normal use, so they did not compromise the design.
The channels were installed with threaded inserts and bolts, with slotted mounting holes to accommodate movement. A large solid wood panel still needs to move seasonally. Metal reinforcement does not change that. The USDA’s Wood Handbook is a useful technical reference for understanding wood and moisture behavior.
Then I opened the hidden sliding door hardware kit.
There were no useful instructions in the box. Eventually, I found information online, but the dimensions read more like an algebra problem than installation instructions. There were plenty of attractive renderings and far fewer actual installation photos, which is always reassuring when you are about to start routing a very expensive piece of walnut.
I paid for this hardware myself. This was not a sponsored installation, and I was very happy to have the freedom to say that the instructions were frustrating.
That does not mean I hated the hardware. The finished result was exactly what I wanted. Getting there was simply much more involved than bolting a track above an opening.
How This Door Carries Its Weight
Unlike a conventional barn door hanging from exposed overhead rollers, this system uses wheels recessed into the bottom of the door to carry its weight. Concealed hardware at the back guides the door, and a small floor-mounted guide engages the lower track.
That arrangement hides the mechanism, but it also makes the floor part of the installation. I would learn just how important that was later.
This is not a universal kit that you can attach to any random door without modification. A lighter, standard door could make handling much easier, but the chosen door still needs to be compatible with the hardware and its required recesses.
Routing the Hardware Without Exposing It
There were two different routing problems: fitting the wheel assemblies into the bottom edge and creating a concealed recess for the larger hardware at the back.
For the wheel pockets, I used a straightforward process:
- Position the assembly and trace its outline with a marking knife.
- Remove most of the waste with a router.
- Clean up the remaining material with chisels.
- Test the fit and adjust as needed.
Broken down into individual steps, it was manageable. Doing it to the edge of a large, heavy door made it considerably more awkward.
The larger rear recess needed a design change. The installation information called for cutting through to the sides and covering the openings with plastic caps. To me, visible plastic caps defeated a good portion of the point of having hidden hardware.
Instead, I routed a stopped recess, leaving just over 1/4 inch of wood intact at each end. That preserved the continuous grain on the door’s side edges.
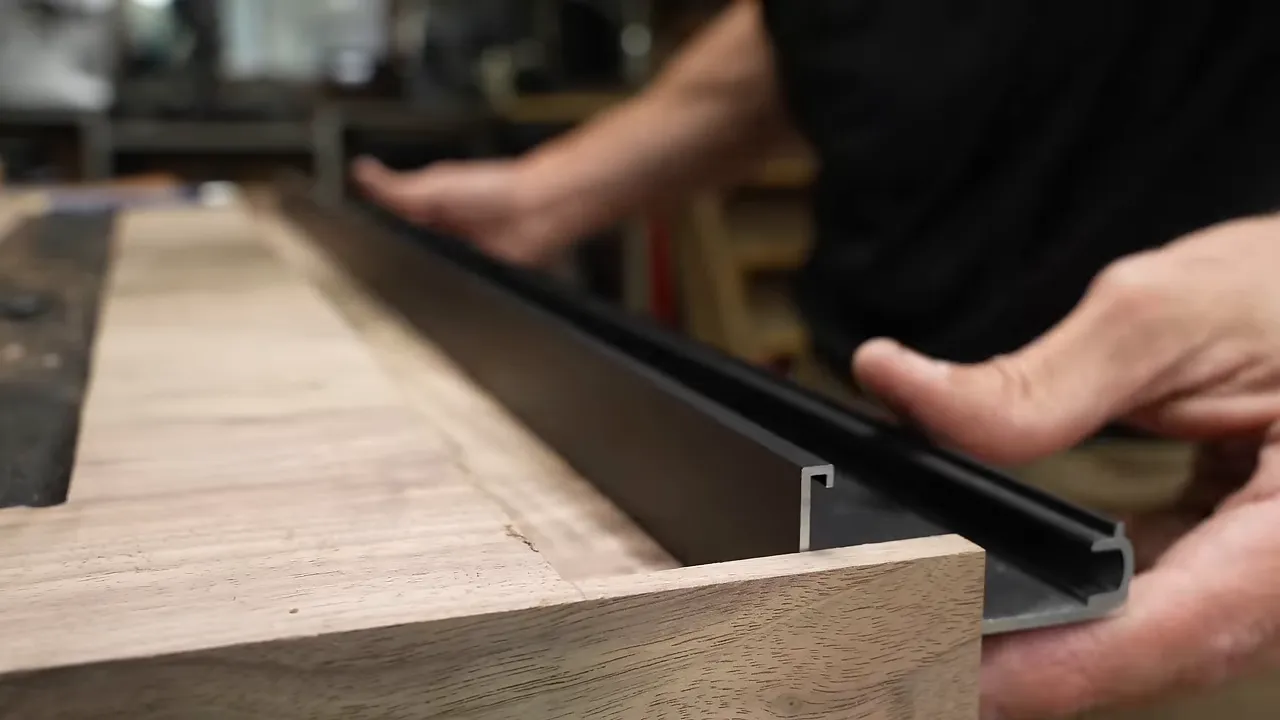
I cut the aluminum channel slightly shorter than the recess so the solid walnut panel had some room for seasonal movement. This was another complication I would not have had to manage in quite the same way with a lighter, more dimensionally stable door construction.
While fitting the mechanism, I discovered that it also had soft-close hardware. I had not even realized that when I ordered it. Finally, a surprise in this project that did not require repairing anything.
Fixing a Crack and Hiding a Knothole
A Small Bow Tie for an End-Grain Crack
With the hardware fitting reasonably well, I noticed a small crack in the end grain. My first instinct was to add a little epoxy and move on.
But I did not want to finish the door, install it in the house, and then discover that the crack had continued spreading. So I spent about an hour making and installing a miniature bow tie across it.
It was not the finest bow tie I have ever made, but it provided a mechanical connection across the crack rather than simply filling the opening.
A Grain-Matched Patch Instead of a Decorative One
The face had a different problem: a knothole that I wanted to remove without turning the repair into a feature.
On a previous desk, I had intentionally used contrasting walnut patches in a disordered, almost computer-glitch pattern. I liked it. My wife was significantly less enthusiastic. That desk eventually earned the name “Glitch,” which suited it much better than trying to name my furniture after an artist who would probably hate my work.
This door needed the opposite treatment. No contrasting squares. No decorative patchwork. Ideally, no evidence that I had done anything at all.
I found a piece of walnut with curved grain that roughly matched the grain surrounding the knot, then spent over an hour positioning it. I shaped the patch, traced it, routed the recess, refined the fit with chisels, and glued it in.
After the glue set, I planed and sanded the patch flush.
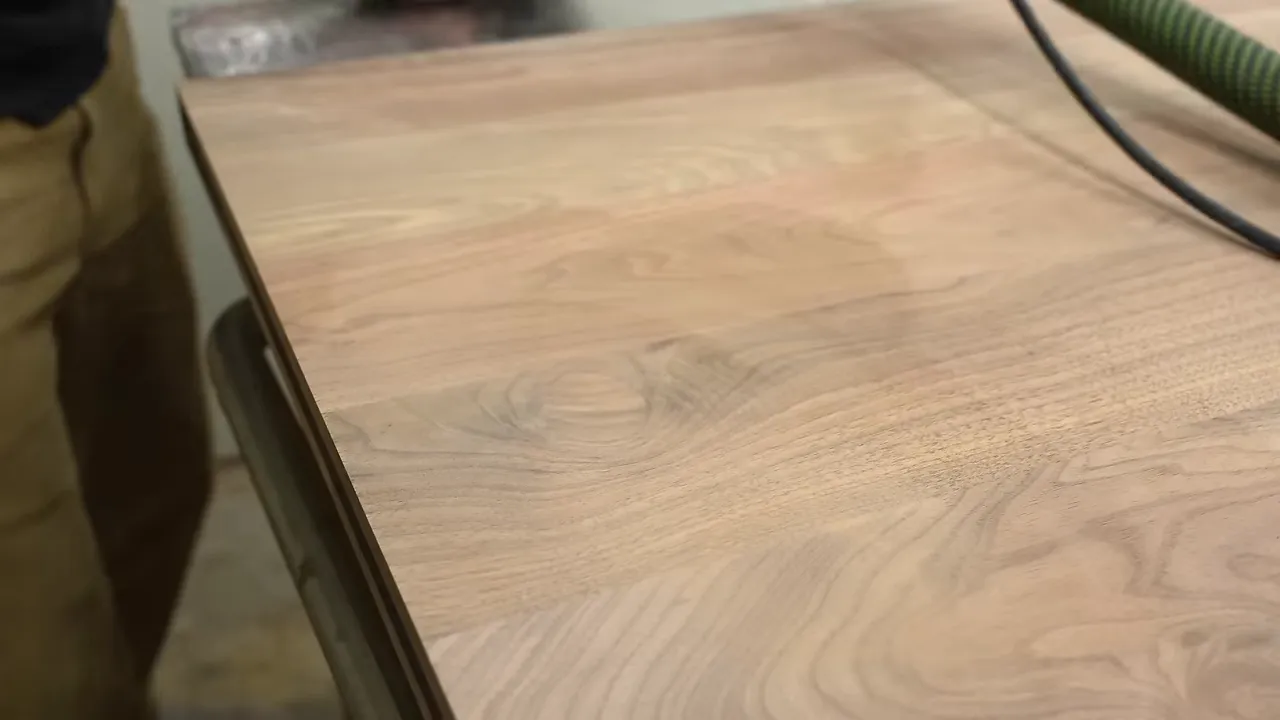
I also deliberately placed this part of the panel at the bottom of the door. Between the grain match, the low position, and the finish, I thought I had a decent chance of getting away with it.
A Recessed Finger Groove Instead of a Handle
A projecting handle would have interrupted the clean front face, so I routed a finger groove instead.
I used a cove bit with a guide rail to form the recessed grip, then refined and sanded the profile. The idea was to make the door usable without adding another object to the front.
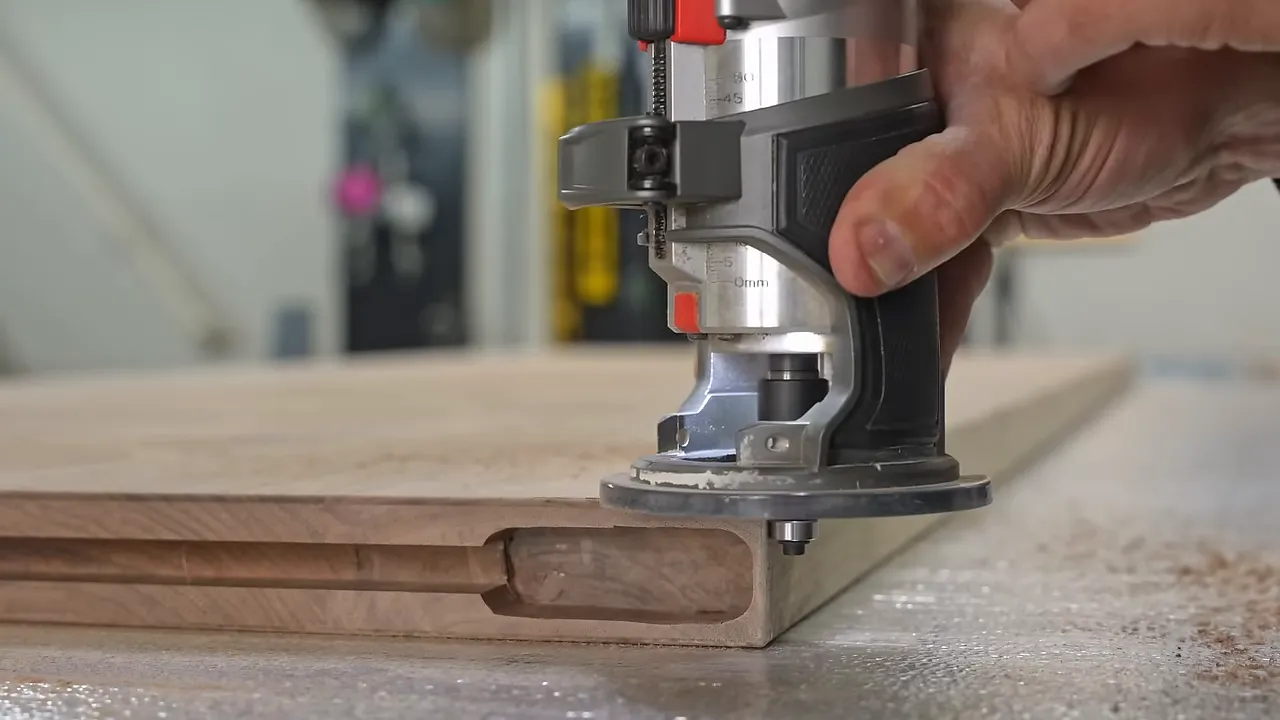
This detail also created a finishing consideration. Without a handle, hands would repeatedly touch the wood itself. And most of those dirty hands would probably be mine.
Test-Fitting Before Finish Saved Me More Trouble
Before applying any finish, I wanted to make sure the mechanism actually worked. I had never used this hardware, and a door that looked good on a workbench was not enough.
I followed the online dimensions carefully, marked the wall bracket location, and installed the supplied anchors. Because the bottom wheels carry the door’s weight, that bracket is not supporting the panel the way a traditional overhead track would.
Even so, the first test was a failure. The door bound up and barely rolled.
I spent a long time troubleshooting, remounted the bracket, and eventually had enough holes in the wall that I needed to open it up and repair the mounting area.
That was when I discovered what I had drilled into.
The Pipe Behind the Wall
There had been unexpected resistance while drilling. I kept going. That was a mistake.
If a drill meets unexplained resistance inside a hollow wall, stop and investigate. Do not assume that pushing harder is the answer.
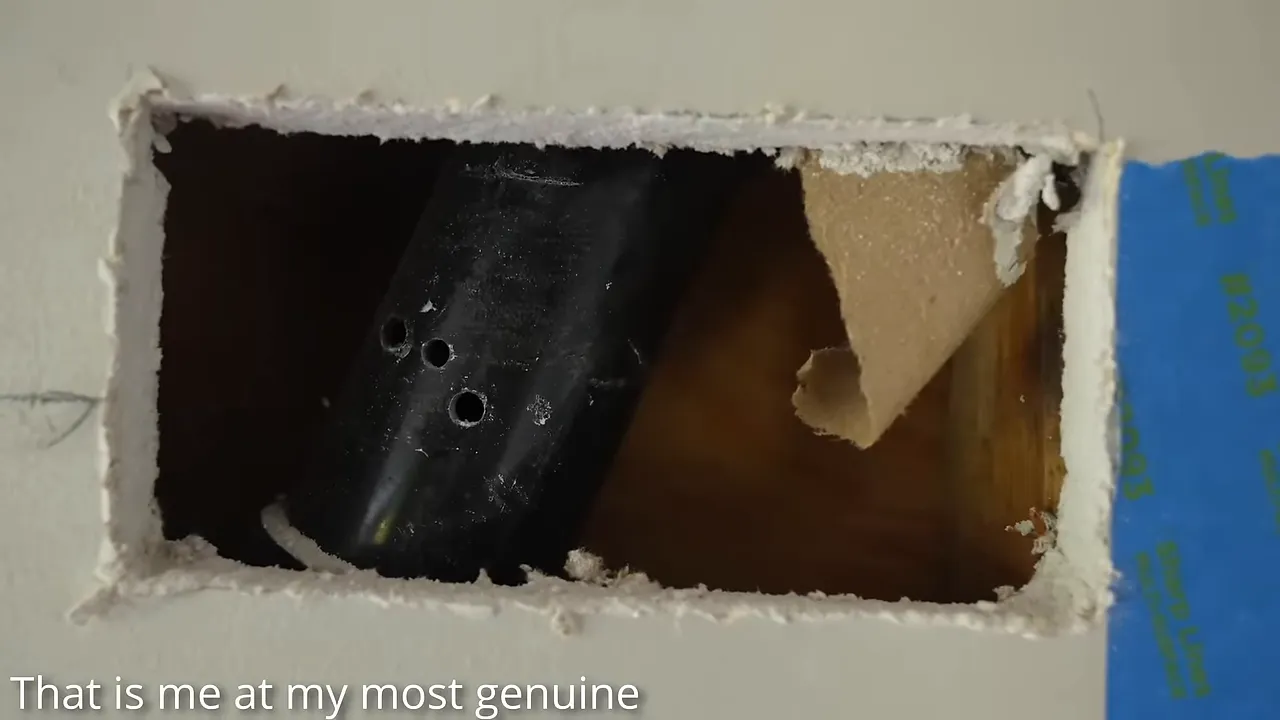
My first thought was that I had hit a gas line. I made calls to people who knew more than I did and, fortunately, learned that it was a vent line for the downstairs bathroom. The repair was much more manageable than the situation I had imagined.
The lesson is not that a black pipe is harmless. It is that I needed someone qualified to identify it rather than trusting my own very enthusiastic panic.
The Floor Was Not Level Enough
The other installation problem was the floor. The hardware instructions required a perfectly level floor. Mine was concrete, and it was not perfectly level.
Releveling the concrete was not an especially appealing next step.
I compensated by adding playing-card shims beneath one wheel assembly. The cards let me adjust the height in small increments until the door sat correctly and moved.
That was my workaround for this particular installation, not a substitute for checking the hardware manufacturer’s requirements. But it solved the binding problem, and I finally had a functioning sliding door.
Finishing Walnut for Consistent Color
For the finish, I mixed equal parts Rubio Monocoat Walnut and Rubio Monocoat Pure. The 50/50 blend toned down the pigmented Walnut color so it would not be too aggressive on actual walnut.
I was not trying to make the wood dramatically darker. I wanted the boards to look more consistent with one another. And, yes, I wanted that patch to blend in.
The lumber was steamed walnut, which already has a more uniform appearance. Steaming reduces the visual contrast between the lighter sapwood and darker heartwood. Normally, I prefer the richer color variation of unsteamed walnut, but uniformity was useful here.
I worked the finish into the recesses and edges, used a large buffer on the broad faces, and removed the excess.
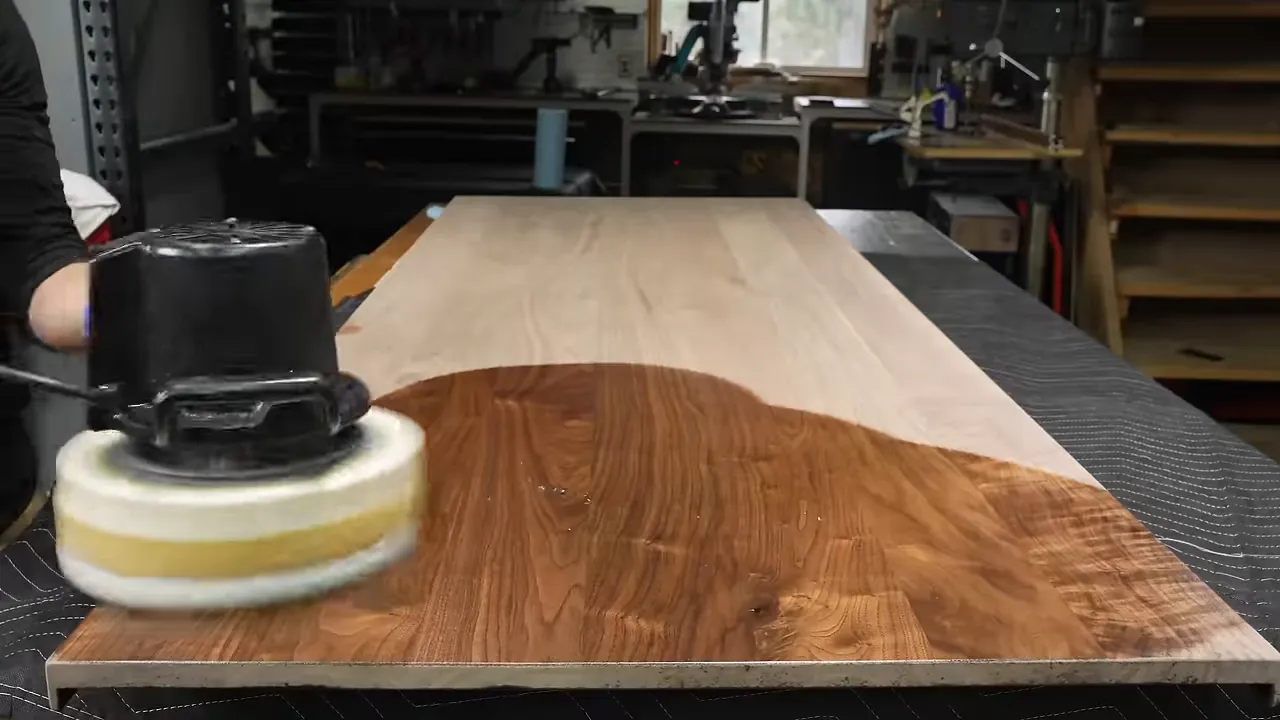
The goal was a clean, consistent panel that belonged with the rest of the house, not a door that announced every individual board and repair.
Rebuilding the Mounting Area and Repairing the Drywall
To mount the wall bracket without putting more screws into the pipe, I installed plywood spanning two studs. That gave me solid backing for heavy-duty wood screws short enough to avoid reaching the pipe behind it.
Then came the part that made me more nervous than building the door: making the wall look like none of this had happened.
I have told my wife that our house is not a practice house. If I cannot do a job as well as a professional, I should hire someone who can. Unfortunately, I was already standing in front of an open wall with a deadline.
I called a friend for advice, patched the opening, blended the compound, and spent considerably more time sanding than the quick version of the process might suggest.
For the texture, I used an aerosol wall-texture product and blotted it to better match the existing surface. After a couple of coats of primer, I painted the entire wall so the color would remain consistent.
I am not going to pretend to be a drywall expert. But I was disproportionately proud of that repair. There is a reasonable argument that I did a better job on the wall than on the door.
Extra Protection for a Handleless Door
Because the door has no handle, its finish needs to deal with repeated hand contact and cleaning. Over the base finish, I applied the Blacktail Studio N3 Nano coating.
It adds a nearly invisible protective layer while increasing the sheen and contrast. Based on my own testing, I was very impressed with the protection, particularly for a surface that would regularly meet dirty hands and household cleaners.
This was an early application of the product, before its launch. For this build, the important point was the finishing strategy: the oil established the look I wanted, and the additional coating provided another layer of protection without adding visible hardware or changing the minimalist design.
The Surprise Was Late. The Pantry Door Was Just in Time.
I did not finish before my wife got home.
She returned at about 1 a.m. and discovered that we no longer had a pantry door. I did not think that was a major issue. Then I learned that roughly 30 people would be arriving for a baby shower in about three hours.
Apparently, a pantry door is an essential part of hosting a baby shower. This was information I could have used earlier.
I called Scott, we scrambled to finish the installation, and we got the door working just in time.
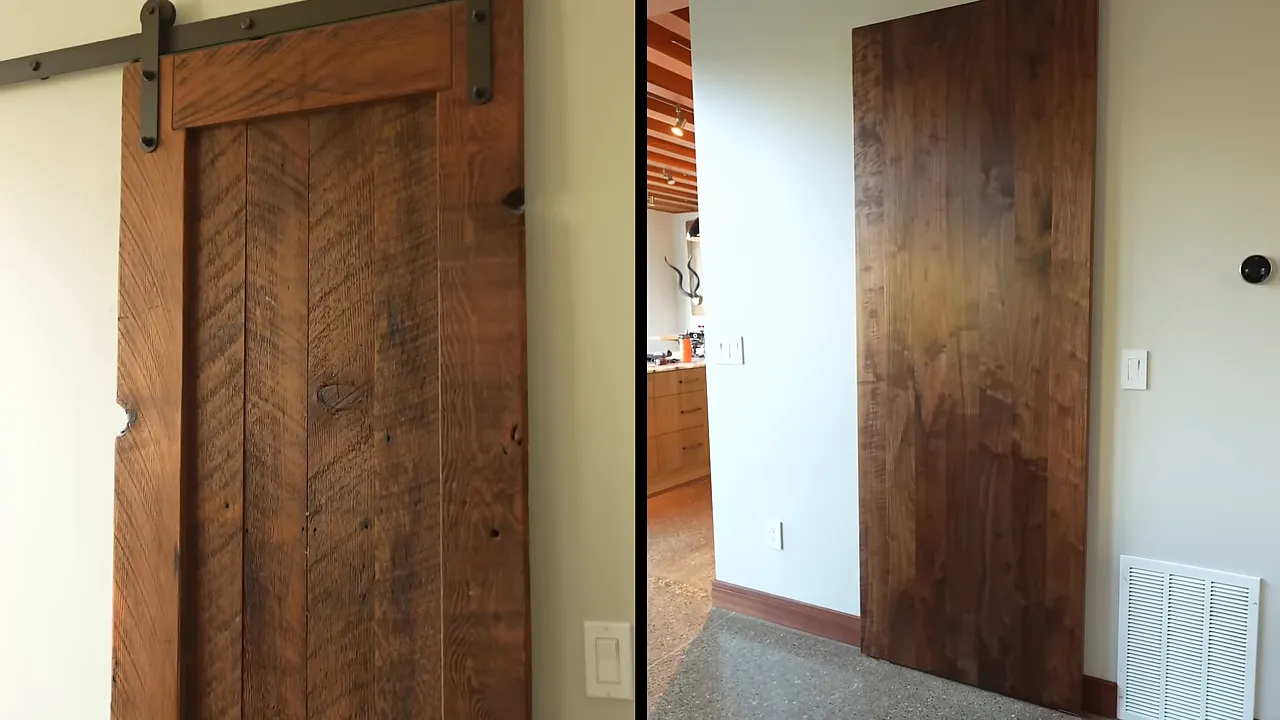
My wife loved the appearance and the soft-close action. She also correctly pointed out that the door was heavy and took some effort to open. Hiding the mechanism does not make a large solid walnut panel weigh any less.
Then she bent down and immediately found the grain-matched patch.
So I am calling this a success at replacing the old barn door, a success at finishing before the baby shower, and a complete failure at hiding a repair from my wife.
The hidden hardware delivered the clean, modern look I wanted. It just required careful routing, attention to wood movement, a full test-fit, floor adjustment, a pipe repair, and a surprising amount of drywall work to get there.
If I were recommending the idea to someone else, I would separate the two challenges. Concealed sliding hardware is one project. Building a huge solid walnut door around it is another. You can pursue the clean appearance without necessarily choosing the heaviest, most complicated version.
I chose both, on a deadline, as a surprise. At least the wall looks excellent.
For a different kind of build, my virtual epoxy workshop covers the complete wood and epoxy table process, including the expensive mistakes I learned the hard way.
|


