A free slab of wood is not necessarily a good reason to build something. I normally pay for my slabs because I want to choose the wood that makes the project interesting, not build a mediocre project because the material happened to be free.
Then Dan at GL Veneer offered me any slab in their inventory. No limitations.
That is approximately where I stopped listening.
After considering massive cottonwood slabs, Lebanese cedar, and buckeye burl, I chose an enormous piece of old-growth redwood. The slab and its crate were so large that the delivery had to go to my wife’s workplace instead of my little shop. Nothing makes you feel like a professional furniture maker quite like dismantling a giant shipping crate in your wife’s parking lot.
My plan was to turn it into two dining tables. Instead, it became a six-foot round epoxy table, a fairly questionable business decision, and eventually something that wasn’t a dining table at all.
Two Sensible Dining Tables Become One Ridiculous Round Table
The original idea was to make two rectangular epoxy dining tables, each about seven to eight feet long. That is a useful size. Plenty of people have room for one, and making furniture that people can actually buy is generally helpful when you run a furniture business.
But once we started experimenting with layouts, Scott, my video guy, looked almost sad. He thought cutting this slab into two smaller tables would waste the opportunity to make something exceptional.
His alternative was a gigantic round table, roughly 72 inches in diameter.
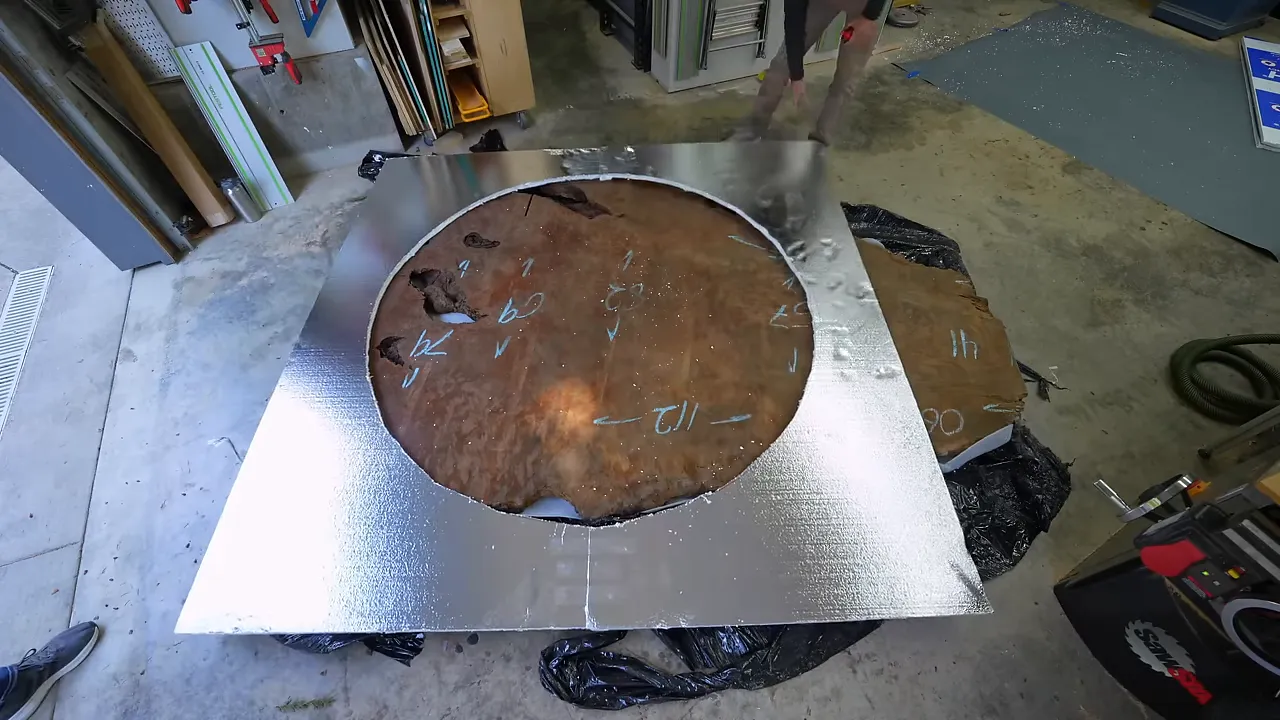
A six-foot round table needs a very particular home. Add redwood and icy white epoxy, and the potential customer pool gets smaller again. I did not expect it to sell easily, but the donated slab gave us some freedom to experiment.
So this became Scott’s passion project. Eventually, he chose the epoxy color, the small wood islands, and the edge profile too. If it turned out beautifully, he could have the credit. If it didn’t, I was equally comfortable giving him that.
Why a Six-Foot Round Epoxy Table Costs So Much
Not long before this build, a potential customer asked about a 72-inch round walnut table with black epoxy. I wanted the project because I had never built a round table that large, so I gave what I considered a competitive custom quote: $25,000.
He was surprised. He had seen my prices, but I think he pictured a six-foot round table as a slightly wider version of a six-by-three-foot desk.
Unfortunately, the price of a wide slab table does not scale that neatly.
The slab is the biggest expense
To get an attractive layout for a six-foot round table, even with epoxy filling some of the space, you may need a slab from a tree six to eight feet wide. Those trees do not politely stop growing at eight feet tall. The slab you need might also be 10, 15, or 20 feet long, leaving substantial material outside your circular layout.
Many sawmills cannot mill that width, and others cut big logs into narrower, more manageable slabs. Exceptionally wide material is both hard to find and expensive.
This redwood slab would have cost more than $7,000 if I had purchased it.
Ordinary machinery stops being an option
For a typical tabletop, I can visit an industrial shop in Portland and use their wide-belt sander. It handles pieces up to 48 inches wide. About 15 minutes and $80 later, I have a beautifully surfaced piece of wood.
A six-foot round slab does not fit.
Instead, I took it to Nick at Maverick Sawmill, who has a large flattening machine. That meant packing up the slab, transporting it, and allowing time for careful machining. A quick shop visit became a much larger undertaking.
The machining difference alone does not explain a price doubling or tripling. But combine scarce material, waste, handling, transport, and all the extra operations involved in a curved perimeter, and the cost starts making more sense. Forty extra minutes here and an hour there eventually become a very expensive circle.
Preparing Redwood for a Transparent Epoxy Pour
For once, I was not making a black epoxy table. The plan was a translucent, lightly frosted pour, which meant bubbles would have nowhere to hide.
People often blame microbubbles entirely on mixing. A paddle mixer certainly introduces air, but in my experience, a major source is the wood itself. Air trapped in the grain can escape into the resin as it cures, even when the mixed epoxy initially looks clear.
The answer starts before the main pour.
Clean and seal the live edges
I cleaned out the loose, deteriorated material around the live edges and openings, then worked penetrating epoxy into those surfaces. The goal was to seal the places where air could enter the main pour.
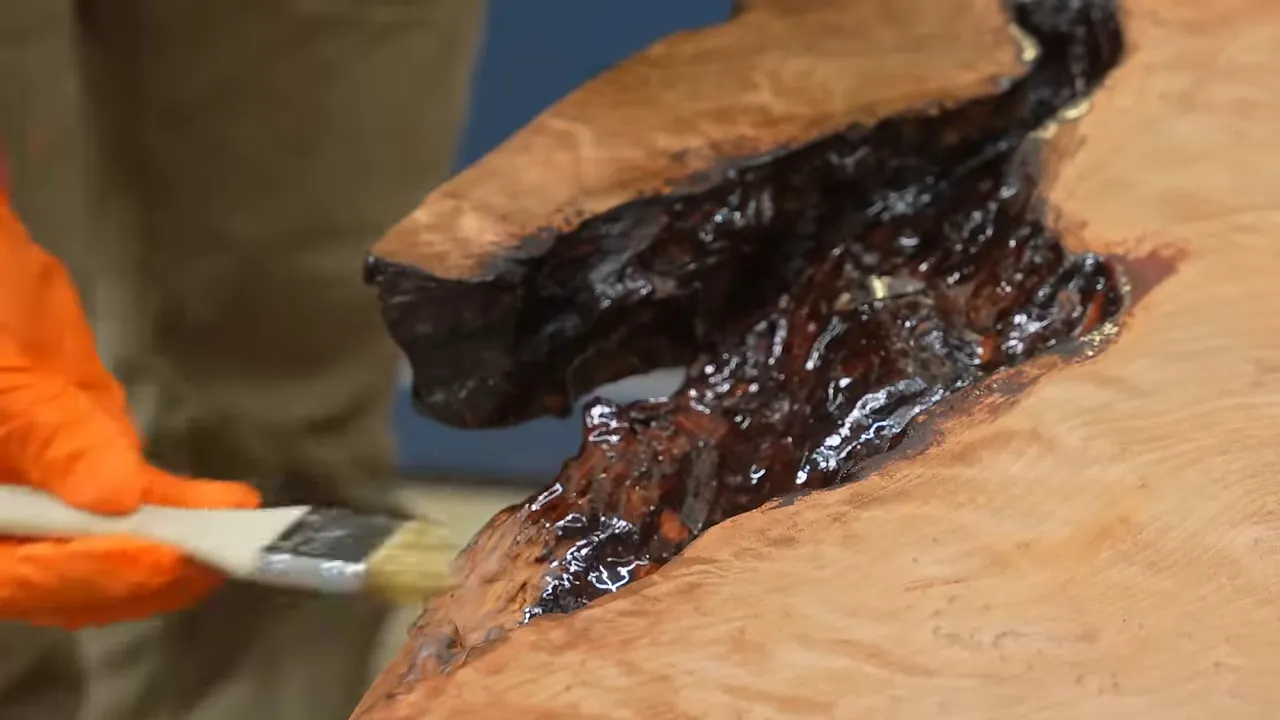
Penetrating epoxy does a good job of getting into the wood. It can also cure very quickly when too much mixed material remains concentrated in a cup. I mixed too much, recognized the problem, and the leftover batch heated up dramatically.
Batch size and working time matter. Follow the instructions for your particular resin rather than assuming every epoxy behaves the same way. For supporting safety guidance, WEST SYSTEM’s epoxy safety information is a useful reference.
Seal both faces, not just the bottom
I also sealed the underside and top with high-performance epoxy. This helps reduce staining, which matters even with a lightly tinted pour.
Just as importantly, I did not want one face sealed while the other remained bare. An exposed top can gain or lose moisture while the bottom is sealed, encouraging the slab to warp or twist during curing. Sealing both faces helps reduce that imbalance.
Scuff the cured edge coating
Once the live-edge seal coat had cured, I scuffed it to give the main pour a good bonding surface. This is not a step I skip.
The scuffed coating looks frosted and unattractive at first. That appearance disappears when the fresh epoxy wets it out.
Keep improving the process
My first epoxy tables were poured in layers about an eighth of an inch thick. They worked, but resin technology and my methods have improved considerably since then.
That is why I keep revising chapters and adding material to my epoxy workshop. Someone who signed up years ago should have access to the practices I use now, not be stuck with the methods I used when I first recorded it.
|
Building a Round Epoxy Mold, Then Discovering the Slab Doesn’t Fit
Most of my ideas are borrowed from other trades. Sealing wood before an epoxy pour is standard boatbuilding practice. My denim-and-epoxy furniture applies an idea that knife makers have used for decades.
One idea I did come up with was using flexible synthetic landscape edging to form a round epoxy mold. It is inexpensive, bends around a circular base, and has worked very well for me on previous builds.
This project would eventually make me slightly less proud of that contribution.
First, we needed a 73-inch mold. Scott, who is both an Emmy winner and an Eagle Scout, helped with the string-and-marker layout. Those are separate accomplishments, although I would enjoy seeing the Emmy category for knot tying.
Drawing the circle still took some adjustment. Apparently, even an excellent knot cannot compensate for the way I hold a marker.
After cutting the base, I applied mold release and installed the flexible perimeter.
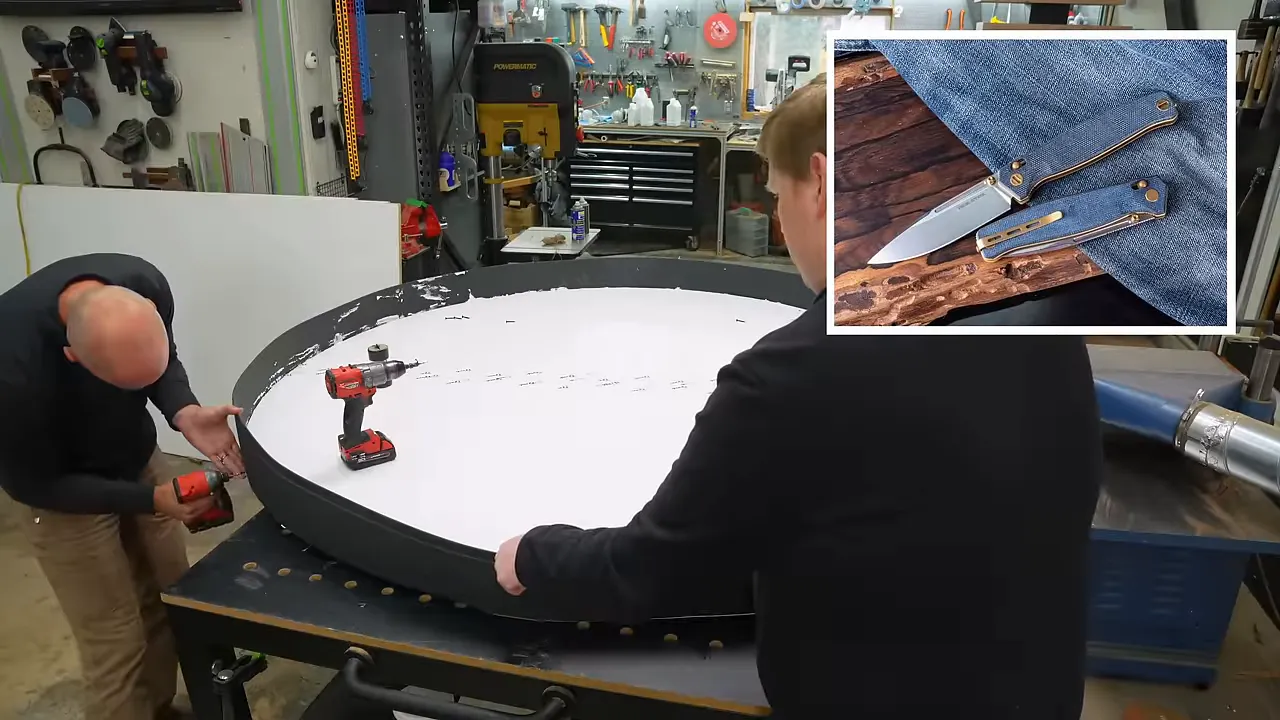
Cover nearby wood before spraying aerosol mold release. The mist travels farther than you expect, and its entire job is preventing epoxy from sticking. That is useful inside the mold and considerably less useful on the slab you need the epoxy to bond to. It also makes the floor slippery.
With the mold ready and the slab sealed, we lifted the wood into position.
It did not fit. Not even close.
I knew the form measured 73 inches. I thought I had measured the slab correctly too. Yet the wood appeared to be several inches too large. We tried different angles, removed a little material, and continued wrestling with it.
I would love to offer a satisfying geometric explanation. I do not have one. Eventually, we got it into the form, but the process was more embarrassing than normal.
A Small Test Pour Is Better Than a Large Leak
After all that struggling, I was concerned we might have damaged the mold seal. Before committing the main pour, I added a very thin layer of faster-curing epoxy to find and seal any leaks.
We found one.
Scott did not initially agree with my assessment that this was good news. But a leak during a small sealing pour is much better than discovering it while a large quantity of deep-pour epoxy drains onto the floor.
Once that initial layer had cured and sealed the problem, I felt considerably better about the main pour.
I also leveled the workbench using the adjustable levelers I had included when it was fabricated. With four adjustable feet, I can level the bench wherever it sits in my shop.
That saves more than frustration. If the mold is off level by an eighth or a quarter of an inch, I need extra resin to cover the high side, and then more material has to be machined away afterward. A level mold saves epoxy and flattening time.
Mixing Icy White Epoxy Without Making It Opaque
The target was not solid white resin. I wanted a subtle frost that would contrast with the redwood without turning the whole thing into a white plastic disk.
Small samples helped me settle on the following color mix:
- Four drops of white epoxy dye per three gallons of mixed epoxy.
- One drop of blue dye per bucket to counter a slight yellow cast.
I used a dropper to keep the amounts consistent. Those proportions describe this particular combination of resin and dye, not a universal formula for every product.
All epoxy can yellow. The small amount of blue was a color adjustment intended to offset yellow visually, not a way to prevent the resin from aging. Modern UV inhibitors are much better than they used to be, and a TotalBoat sample I had left in a window still looked clear, but that is not a guarantee of permanent clarity.
Even after counting the dye drops, I poured the mixed epoxy back and forth between buckets to equalize the color. Independently mixed batches can be extremely close and still leave a slight visible gradient in the finished piece.

During the pour, I also brushed along the submerged edges to dislodge bubbles clinging to them. Think of bubbles sticking to a straw in a carbonated drink. Sometimes a little disturbance is enough to release them from the surface.
The color looked exactly right. The redwood looked incredible. We still had to see how the deep pour would behave during curing, with fans available to help manage heat.
And I still thought finding a buyer for a giant, icy-white redwood circle was going to be a challenge.
Demolding Trouble and an Unexpected Transportation Solution
Normally, the landscape edging peels away from a cured round table very nicely.
This time, it did not.
Instead of releasing cleanly, it fought me in small, stubborn sections. I do not know what changed compared with my previous projects, so I cannot honestly offer a definitive fix. What I can say is that a method working several times does not guarantee an effortless release the next time.
Once the perimeter was finally off, I had another problem: the finished blank no longer fit in my pickup.
My first thought was to buy a trailer. The kind I needed would have cost roughly $8,000 to $11,000, followed by the privilege of paying to store it.
Then I considered renting a trailer, then an enclosed trailer to protect the tabletop from rain. Finally, I realized I could rent an entire moving truck for less.
The enclosed trailer quote was about $100 for a day. The moving truck cost approximately $58, plus $13 in gas. Sometimes the right new shop tool is a rental agreement.
Flattening a Giant Wood-and-Epoxy Table Without Tearing It Apart
Back at Maverick Sawmill, I asked Nick to prioritize the result over speed. He was working hourly, and I told him I was perfectly happy paying for slower passes if that meant a better surface.
Several things can go wrong during this operation:
- A cutter can come loose. I once had a company’s bit work loose and bore a hole into a tabletop. They apologized, then charged me the full amount.
- The workpiece can move. An inadequately secured slab can shift into the cutter and suffer substantial damage.
- Aggressive passes can cause tear-out. Missing chunks of wood or epoxy may be too deep to sand away without losing flatness.
Nick took his time, worked carefully with the grain, and flattened both faces. His machine also had a sanding attachment, which left a much nicer starting surface.
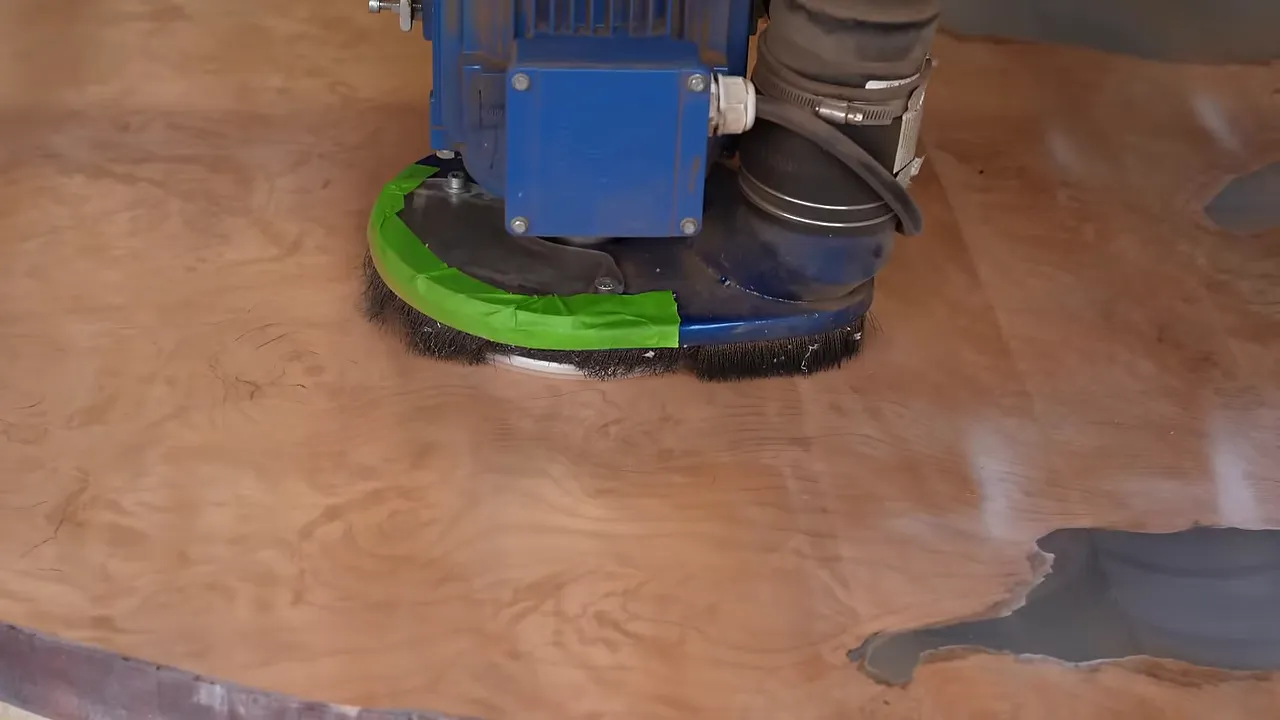
I kept calling it a CNC, although he was guiding the machine by hand. Call it a flattening machine if you prefer. The important part was that it could handle the width and that the operator understood wood-and-epoxy tables.
Cutting a Perfect Circle, Then Making It Slightly Smaller
Back in my shop, I used a router circle-cutting jig to establish the finished perimeter. Making an accurate circle without a CNC is not especially complicated, but it is messy and takes time.
After the initial circular cut, I removed the excess material and used a flush-trim bit to bring the remaining edge into line. All I had to do was keep the router held firmly against the reference edge.
There was really only one way to mess that up.
I did that.
The router wandered into the epoxy, leaving a gouge in about the worst possible location. If it had happened in wood, I might have patched it discreetly. In translucent epoxy, my practical option was to shrink the entire circle.
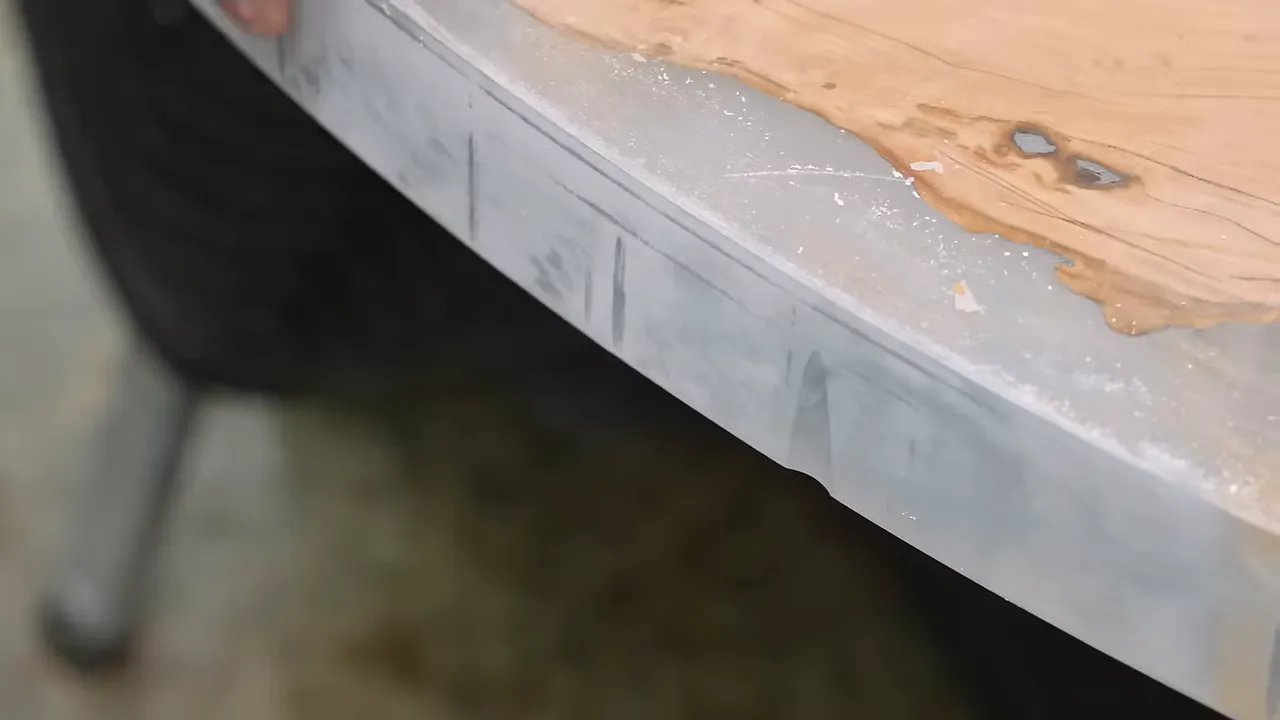
I moved the cutting radius inward by about an eighth of an inch, reducing the diameter by a quarter inch. The finished piece became 71¾ inches across.
This is one genuine advantage of building on spec: no customer was expecting an exact 72-inch diameter. It was now a 71¾-inch table, exactly as I had apparently intended all along.
Making Beautiful but Fragile Redwood More Durable
Redwood has spectacular color and figure. It also comes with baggage.
Compared with familiar dining-table woods such as oak or walnut, this redwood is softer and more vulnerable to dents. Choosing it for furniture means accepting that beauty and everyday durability are not the same thing.
To improve the surface, I spent about two days repeatedly applying marine epoxy. I rolled it on and worked it across the wood until the slab would not absorb any more.
The goal was to strengthen the vulnerable surface and make it less prone to denting and uneven sanding. Once the wood reached saturation, I removed the excess rather than leaving a thick plastic coating on top.
This did not turn redwood into oak. It gave the slab more protection than it would have had without the treatment, but the softer wood was still underneath.
Afterward, I filled a few dozen remaining pits and cracks. A scraper was invaluable for leveling the small epoxy bumps. Putting a power sander directly onto a hard resin lump can remove the surrounding soft wood before leveling the bump, leaving a shallow depression.
I also discovered that some epoxy was not ready to sand. Instead of producing clean dust, it rolled into little balls. That was my signal to stop and give it more curing time.
Sanding Redwood Flat Instead of Sanding Waves Into It
Redwood’s variable density makes sanding tricky. The harder grain ridges resist abrasion while the softer areas between them disappear more readily. Even a flat power sander can gradually create a washboard surface.
Nearly everything I did during surface preparation was aimed at avoiding that.
For this piece, I used 240-grit paper on my Rotex, which is finer than the abrasives I normally use with that sander. I also relied heavily on a firm block sander to help maintain flatness.
The new block had a vacuum connection. I worried the foam body might be too soft and the dust collection might be a gimmick, but it was surprisingly firm and collected dust reasonably well. The connection to my vacuum needed improvement.
Block sanding does not leave the same fine scratch pattern as an orbital sander, so maintaining flatness was only part of the job. I still had to refine the surface afterward.
While waiting for resin to cure, I also tackled the mixing buckets. On some buckets, cured epoxy could be loosened and peeled out as a shell. Did every bucket come out perfectly clean? Absolutely not.
After a long sanding session, I wiped the tabletop with alcohol and inspected it under a light. This temporarily revealed the grain and made remaining scratches easier to spot.
I almost hate this step because it usually uncovers something. But finding a scratch before finishing is much better than finding it while spreading the finish.
Bringing Out the Redwood Figure With Oil and a Nano Finish
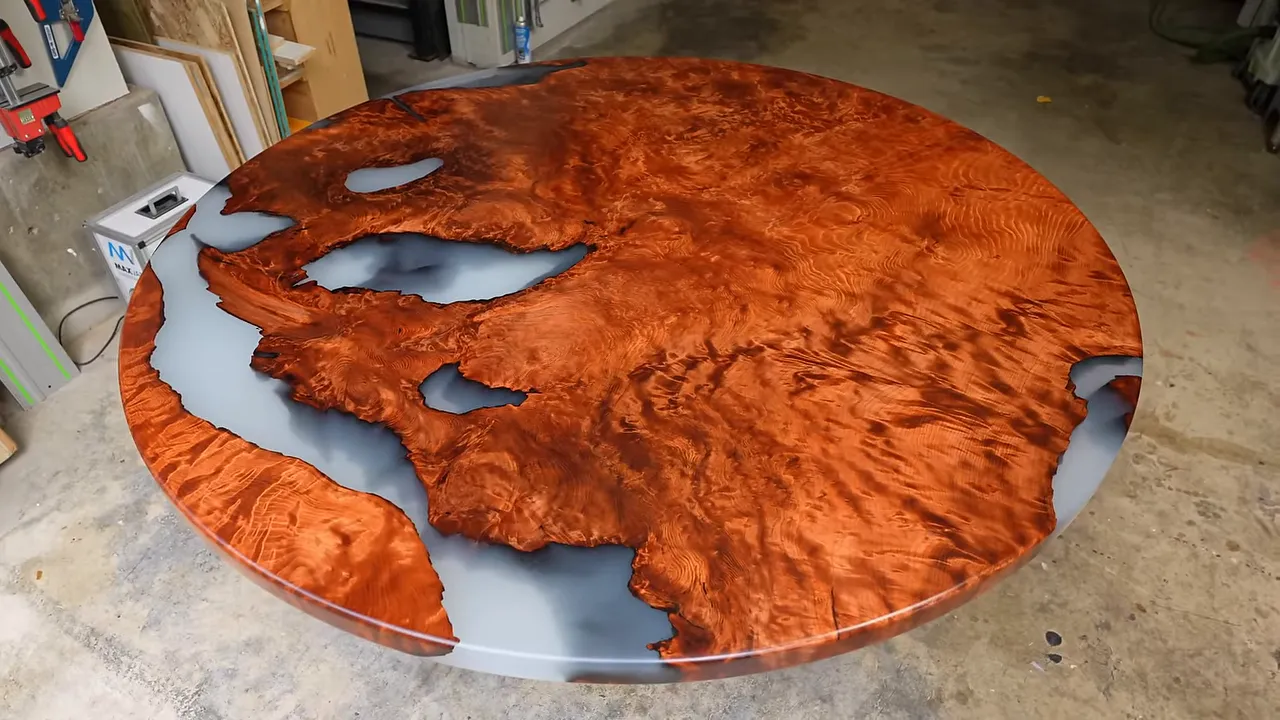
This was some of the most unusual grain I have ever worked with. Charlie, who works on my trees, suggested that the dramatic figure near the base reflected the enormous tree’s weight compressing the wood over time. I still have plenty to learn about exactly how different kinds of figure develop, but the visual result was extraordinary.
For the finish, I used a UV-curing hardwax oil. Its finished appearance is similar to a conventional hardwax oil such as Rubio Monocoat, but it cures under a specialized UV light.
The technology is impressive. The lights are also expensive enough that I would not recommend buying the system for every shop.
After that, I applied several coats of N3 Nano, a nano finish I sell personally. On this piece, it noticeably increased the contrast and sheen. I also finished a separate sample the same way so I could compare the surface with and without the nano treatment.
The Business Problem, and the Wall-Art Solution
Building this without a customer was not an especially sensible move for a furniture shop. As an experimental project for my woodworking channel, I was comfortable with it. Those are different calculations.
I could probably have advertised it for $3,000 or $4,000 and found interest. But the slab alone retailed for more than $7,000, and deeply discounting finished work does not necessarily do the business any favors.
I am not a big believer in the rule that says to total your materials and expenses and multiply by three. Applied here, that method would have suggested roughly $25,000 to $27,000, close to my earlier custom walnut quote.
The problem is that someone spending that much usually wants to choose the slab, epoxy color, and base. That is reasonable. Much of my custom furniture business has been built around giving clients that control.
This piece was already designed. It was essentially off the rack, even if the rack needed its own moving truck.
As I got close to finishing, I contacted GL Veneer and asked whether they wanted to buy it. They discussed it and came back with a different question: could it be a wall piece?
I had not built the base yet, so the answer was yes. Instead, I built a wall mount.
I gave them a deal because they had supplied the slab in the first place, and the finished piece found a home at their Southern California headquarters.
What began as two practical dining tables became one impractical round table, then finally became wall art. Scott got his giant redwood circle, the wood found a home, and I avoided having a six-foot table sitting unsold in my already small shop.
I will take that as a win.


