A designer reached out needing a large dining table for a yacht based in Europe. By large, I mean 3.4 meters long and 1.4 meters wide, or a little over 11 feet by about 55 inches. It would be the biggest table I had ever attempted.
Then came the deadline: two months.
My commissions normally take 12 to 24 months, sometimes longer. But I thought that if I started immediately, I could probably pull it off. So, for my largest table on my shortest timeline, I sent the largest quote I had ever written: $35,000.
At least half of me hoped they would turn it down. They accepted almost immediately. Unfortunately, that meant I now had to build the thing.
Why This Table Cost $35,000
The pair of slabs cost $2,800. I realize that leaves a fairly noticeable gap between the wood bill and the price of the table.
My pricing method is simple: I choose a number high enough that I am comfortable taking the job, but I will not be disappointed if the customer declines. That is not a system I recommend for every woodworking business. In fact, for a cabinet shop trying to build consistent, long-term customer relationships, it could be a terrible system.
This project involved roughly eight collaborators, an enormous tabletop, international delivery, and a very tight schedule. None of the requests were unreasonable. They were simply the sort of requests that, in my experience, lead to sleepless nights and occasional nausea.
I needed a price that accounted for all of that and still left room to make money. For me, that number was $35,000. They could probably have found someone cheaper, but they decided I was the right fit.
The problem with pricing around your willingness to do a job
Imagine building a customer a $10,000 table. They love it, tell their friends, and almost certainly tell those friends what it cost. If your schedule fills up and the next person gets a dramatically higher quote for essentially the same table, both people can feel burned.
The new customer wonders why they are paying so much more. The original customer starts wondering whether they can afford to come back.
For many small shops, a better answer is simply that the books are closed until there is room for more work. My business also revolves around making woodworking content, so interesting projects have value beyond the commission itself. That makes my situation different, not my pricing method universally good.
Finding Bookmatched Slabs Without Losing the Bookmatch
I searched locally, across the country online, and eventually even on Facebook Marketplace. That is how desperate things had become.
Finally, a supplier pulled a pair of slabs out of storage and surfaced them so we could see what we were working with. The clients and I agreed that they were exactly the look we wanted.
They were also twisted.
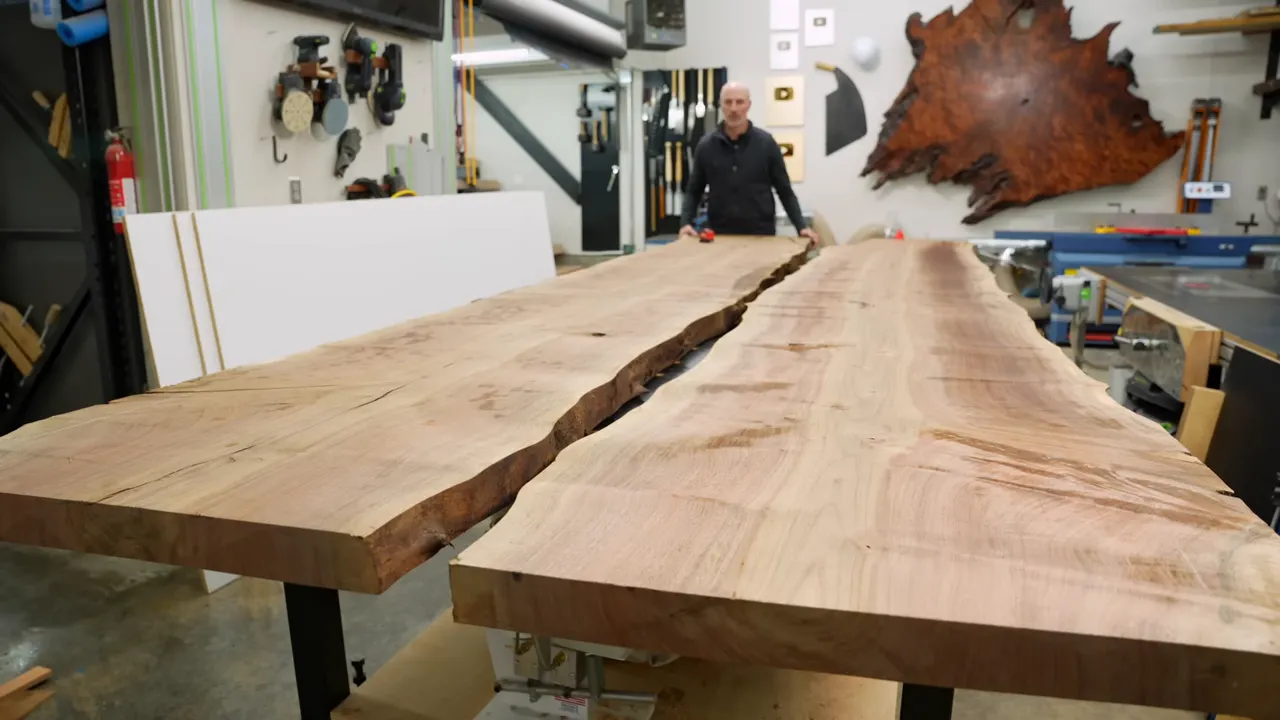
On an ordinary thick slab, twist is often manageable: shim it, flatten it, and accept the lost thickness. With a bookmatched pair, there is another cost.
The farther you cut into the two slabs, the more their grain patterns can stop matching. Adjacent cuts through a tree are similar, but they are not identical at every depth. Removing extra material from one end or one slab can turn a beautiful mirror image into two noticeably different patterns.
I had already learned that lesson on an earlier personal project. I did not need a $35,000 refresher course.
Before making a cut that would make the slabs nonreturnable, I experimented with shims and checked their alignment. It looked possible to preserve both the thickness and the symmetry if I supported them carefully.
Then I immediately created a problem of my own by trying to make one deep track-saw cut instead of several shallow passes. The saw bound up badly and generated enough heat to make the shop smoky. That was not efficiency. It was me trying to save almost no time and making the job considerably worse.
The useful lesson is the boring one: take manageable passes, and follow the saw manufacturer’s instructions for handling a stalled or binding blade. My improvised recovery was not a technique worth copying.
Building and Leveling an Oversized Epoxy Form
Standard melamine sheets are 4 feet by 8 feet. As soon as an epoxy table exceeds either dimension, building the mold becomes more interesting.
Even an oversized 5-by-10-foot sheet would not cover this project. At the pouring stage, the assembly was roughly 12 feet long and 5 feet wide, so I built the form from three sheets.
One of my favorite shop additions is a custom leveling bench. Being able to adjust the supports underneath a large pour is incredibly useful. Unfortunately, a leveling bench is only as good as the measurements you use to set it.
I had an 8-foot level and a 12-foot form. Those are not the same thing, as the epoxy would shortly point out.
Overfilling to protect the grain symmetry
Normally, I fill an epoxy river to the top of the wood. If the resin shrinks slightly, I can flatten the surrounding wood down to meet it later.
That was not a great option here. Every unnecessary flattening pass could cost me some of the bookmatch, so I deliberately overfilled the pour, adding about three extra gallons to give myself a margin.
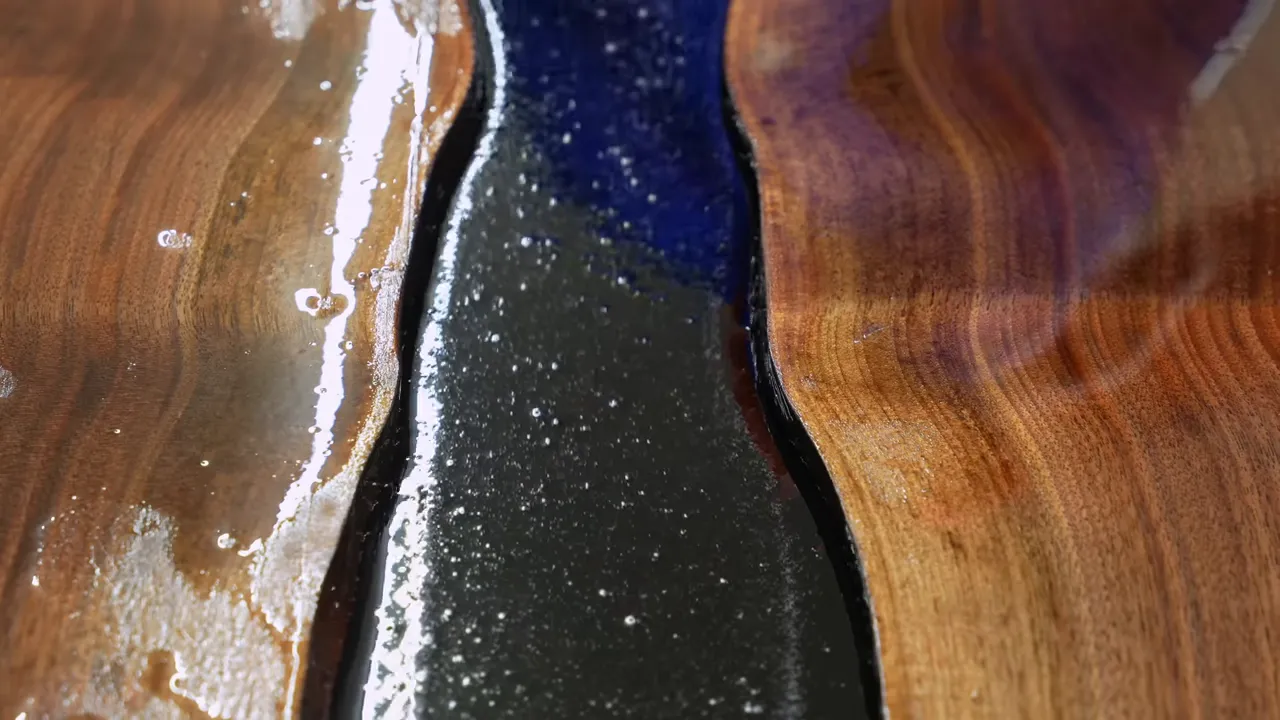
Then I noticed resin moving toward one end. The form had been checked, but not adequately over its entire length. Fortunately, I could adjust the bench levelers with the pour in place.
I was still not completely confident about the resin height, and mixing another batch risked a slight color mismatch. Instead, I used clamped lumber to press the slabs down slightly and make the most of the resin already in the form.
After all that, I left it to cure over the weekend. The big surprise when we came back was that nothing had leaked and everything looked normal. For this project, normal counted as an exciting development.
Hard Epoxy Is Not Necessarily Finished Curing
Epoxy can feel quite hard after a few days without being ready for final finishing. If it continues curing and shrinking afterward, the finished surface can develop an uneven, wrinkled appearance.
In a shop around 60°F, I would normally give a pour like this two or three weeks, sometimes longer, before moving ahead.
On this build, I experimented with heated blankets rather than heating the entire shop. I was getting the table into roughly the 110°F to 120°F range, restarting the blankets after their automatic shutoff. My estimate was that this could reduce the cure time to less than a week.
That was my approach for this particular build, not a universal cure schedule. Resin formulations and heating equipment vary, so any heat-assisted cure needs to stay within the relevant manufacturers’ temperature limits and safety instructions.
It saved time, which was nice. It was also about the last part of this project that did.
The Corner That Became Too Thin
The finished specifications were straightforward:
- Length: 3,400 millimeters, a little over 11 feet.
- Width: 1,400 millimeters, about 55 inches.
- Thickness: 50 millimeters, about 1.97 inches.
The slabs started at roughly 2½ inches thick. I would have preferred something closer to 3 inches for extra insurance, but these were the slabs everyone wanted, and 2½ inches is often enough to finish at 2 inches.
During flattening, I kept measuring the edges and corners with calipers. Most of the top was behaving. One corner was not.
After flattening the first face, one area was still around 2¼ inches thick. The troublesome corner was already down around 1.8 inches, and we still had the other face to surface.
That corner was thinner than the finished table was allowed to be. There was no clever sanding sequence that would put the missing wood back.
We believed the epoxy had pulled that corner upward as it cured. Flattening the resulting shape removed more material there than elsewhere. That was our best explanation, not something we could prove with absolute certainty.
Why I keep every offcut until delivery
I save project offcuts until the finished piece is physically out the door and in the customer’s home. I have needed them too many times to do otherwise.
I have never been happier about that habit.
The repair plan was to make thin patches from the original slab material, matching the grain as closely as possible and restoring the missing thickness. I trimmed the rough offcuts into manageable pieces, selected clean sections, and cut patch blanks around ⅜ inch thick. After fitting and flattening, the patches would be less than ¼ inch thick.
I also cut extras. At this point, optimism was no longer an adequate supply strategy.
Nick at Maverick Sawmill was exceptionally patient through this process. He stored the enormous top while I worked out the repair and then lost several days to being sick. His existing shop was not large, and I am positive this table was more in the way than he admitted.
Making a Large Wood Patch Disappear
The flattening equipment looked like a CNC machine, but the operation was manual. We laid out the patch area with blue chalk and discussed where the cut should stop.
That communication could have been clearer.
I meant not to go past the blue line. The operator apparently understood that the recess needed to reach at least the blue line. The result was a larger repair area than I had planned, which is how four patches became six.
Those extra blanks suddenly looked like an excellent investment.
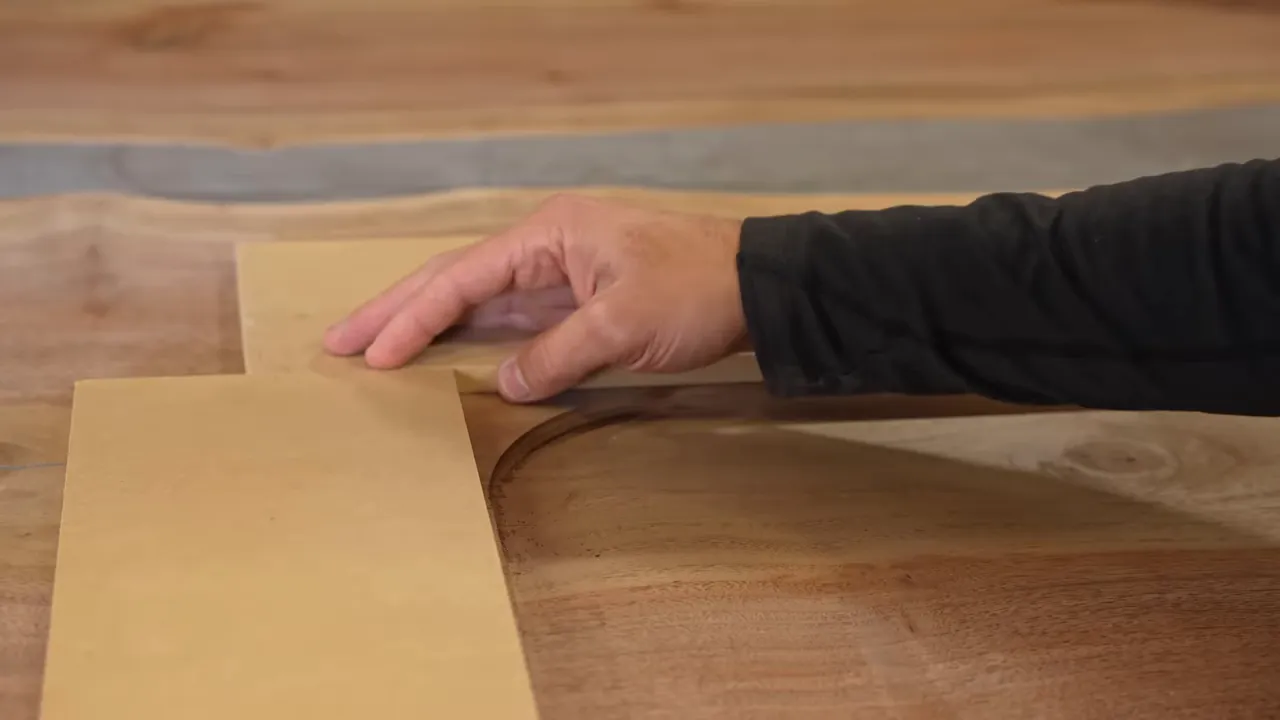
The large flattening cutter also left a slightly dished transition and rounded corners. I brought a router, straightedges, and chisels to clean up the recess so the patches could fit accurately.
The repair depended on several things working together:
- Using wood from the same original slabs.
- Selecting grain that continued naturally through the repaired area.
- Creating clean mating surfaces and carefully fitted edges.
- Gluing, clamping, and flattening the patches back into the surrounding surface.
I had used similar repairs on my own dining table several years earlier. Nobody had ever pointed them out, and I did not notice them in daily use. That was reassuring, but this was a customer’s table with rather different stakes.
Does an expensive slab table have to be flawless?
I understand the reaction that a $35,000 table should be perfect. I also think there is an important distinction between expecting excellent work and expecting a large natural slab to behave like a manufactured sheet.
People choose live edge slabs for their unusual grain, color changes, knots, and character. The same material can contain cracks, internal separations, and stresses that make it difficult to work.
Laminate is a great surface if consistent, uniform perfection is the priority. That is not an insult to laminate. It is an acknowledgment that different materials offer different things.
Natural character is not an excuse to ignore a defect. My job was to address the problems properly and make the repairs disappear into the finished piece, not pretend the problems had never existed.
Cutting to Size Without Making the Table Lopsided
With the thickness repair handled, I could finally cut the top to its finished dimensions.
On a typical table, I might establish one straight edge and measure the final width from there. A bookmatched table needs a little more thought.
I found the center of the epoxy river at both ends and established a centerline. Then I measured half the finished width outward on each side. That kept the wood balanced around the river instead of accidentally leaving an extra inch of slab on one side.
Long tracks and straightedges helped me check the layout before committing to the cuts.
There was also an unwanted epoxy area at one corner. I had left the table oversized in the hope that trimming would remove it. The sizing cuts got almost all of it, and the later edge profile removed what remained.
C-Channel, Base Mounting, and the Problem With Collaboration
I have installed enough C-channel that I ought to remember my router setup. I do not. I still end up consulting my own older instructions like a chef opening a recipe book.
For reference, the setup used here was:
- Spacer: 2⅛ inches.
- Router bit: ¼ inch.
- Guide bushing: ⅜ inch.
Those dimensions describe this particular jig arrangement, not every possible C-channel installation.
A yacht does not eliminate wood movement
Before accepting the commission, I raised concerns about the table’s destination. A large solid-wood top on a boat immediately makes me think about humidity, installation, and whether the mounting hardware will allow movement.
The designer assured me that the table would live in a climate-controlled interior and that the clients accepted the potential risk of cracking associated with the setting.
But the base was being fabricated separately in Europe, and the mounting details were still worrying. The initial examples showed metal plates fitted tightly into recesses and screwed directly into the wood without room for movement.
That is not a minor detail. Restricting a wide slab as it expands and contracts can damage the tabletop. For the underlying material science, the USDA Forest Products Laboratory’s Wood Handbook is a useful reference on moisture and dimensional change.
I sent examples and explained why the proposed mounting arrangement needed to change. The fabricator seemed receptive, but communicating through several people is different from controlling the entire build myself.
If I build the base and top, I can take responsibility for how they work together. Here, I had to trust that the installation details would survive the chain of communication.
A very sharp interruption
I used the fabricator’s large printed drawing to lay out the mounting locations. While cutting around it with my Damascus marking knife, I managed to put my hand where it had no business being and cut myself.
A friend had previously pointed out that the knife could use a sharper blade. I had asked the manufacturer to improve that. They apparently took the request seriously.
The useful takeaway is not that a knife can be too sharp. It is that your hand should stay out of its path, regardless of how confident you feel about the cut.
The Chamfer That Created Another Repair
The designer and I considered a small ⅛-inch roundover or a more pronounced chamfer. On a table this large, I preferred the chamfer, and we settled on a 22-degree profile.
I had an oversized custom router bit made a few years earlier for this kind of work. Compared with cutting the bevel using a track saw, the router gave me more consistent results over such a long edge.
The bit was getting dull, though, so I took many light passes and worked carefully around the corners to avoid tear-out.
Three corners cooperated. One did not.
A chunk broke out, and I spent far too long searching for it. If you can recover a torn-out chip, gluing it back is often the simplest repair because the broken surfaces fit together so well.
I searched the floor and even cut open the dust-extractor bag. No chip.
Back to the offcut pile.
We found a piece with a very good grain match. I prepared the damaged corner, fitted a replacement, glued and clamped it, and worked it back to the intended profile. The fit was good, but the patch was darker than the surrounding wood. That would need attention during finishing.
I am not claiming to be the greatest craftsman in the world. What I can control is whether I keep working until I have delivered the best result I am capable of making. Sending something out knowing I could have done better is the part I want to avoid.
A Hollow-Sounding Shake Under the Surface
Just when the repair list seemed complete, tapping on the tabletop revealed another issue.
One area sounded distinctly hollow. This was not a typical crack running down through the wood that I could simply fill from above. It appeared to be a shake, an internal separation running beneath the surface.
The affected area was roughly a 10-inch oval, with a surface layer around a millimeter thick in places and only a small accessible opening.
A nice-looking finish over that would not solve anything. I needed to stabilize the wood underneath it.
Getting resin beneath the thin surface
I outlined the hollow area with chalk and carefully opened additional access points where necessary. It looked aggressive, but the goal was to preserve as much natural surface as possible while creating a path for the epoxy.
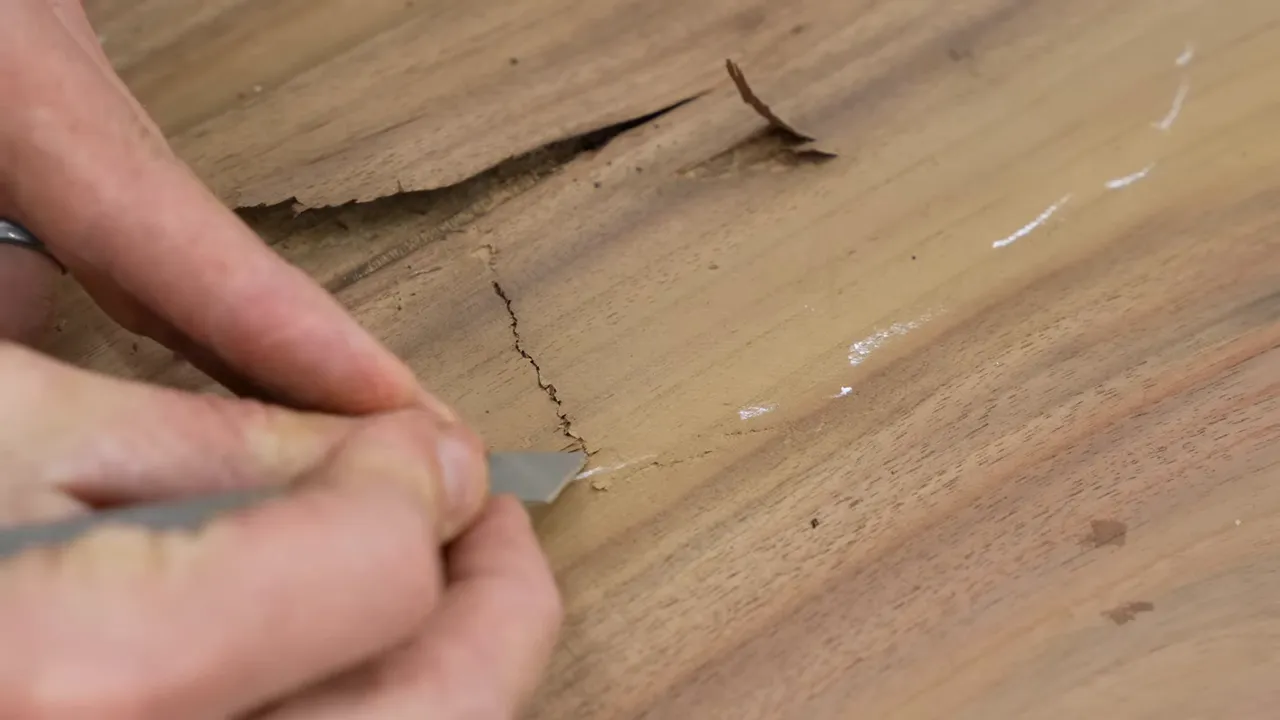
I warmed the epoxy using a hot-water bath to make it flow more easily. Thinner resin could travel deeper into the separation and release bubbles more readily. I also tilted the table roughly 5 to 10 degrees so gravity could help move the resin toward the back of the void.
This was an experiment for me at this scale. I thought it should work, but there was no way to inspect the entire hidden cavity as I filled it.
After the resin cured and the clamps came off, I removed the excess with sanding tools and a scraper. A scraper is particularly useful for leveling epoxy without immediately turning everything into sanding dust.
Then came the important test: tapping the repaired area again.
The hollow sound was gone. Making the surface look good mattered, but making the wood beneath it solid mattered more.
Sanding and Finishing a Huge Black Epoxy Table
This project may be the first time I genuinely needed every sander in my shop. Small corner sander, small belt sander, big belt sander, Rotex, fine-finish sander: all of them earned their place.
At the lower grits, I like drawing a pencil grid across the surface. It helps track coverage, especially while removing flattening marks. On a top this large, missing an area is easy, and discovering it after applying finish is considerably less enjoyable.
Sanding is not the exciting part of a table build. It is, however, one of the most important parts of making the final table look exciting.
Why we chose hardwax oil
I always discuss finish options with the customer. I have preferences, but it is their table.
For this one, we chose hardwax oil, which I also use on my own dining table and on roughly 90 percent of the tables leaving my shop. I like its natural feel, straightforward application, and repairability.
It also gave me a way to blend the darker corner patch. I mixed a colored version of the same hardwax oil with the natural version and adjusted the repaired area so it looked more consistent with the surrounding wood.
That does not mean other finishes make color correction impossible. A traditional stain under lacquer or conversion varnish could also address a mismatch.
The tradeoff is in the finish system. A film finish such as conversion varnish can offer substantial protection, but a major scratch or chip can require much more involved refinishing. Hardwax oil is more approachable for local repairs.
The difficult part: an even sheen over black epoxy
Getting a consistent sheen across wood and black epoxy can be maddening. Black resin makes variations especially obvious.
I worked the surface with a maroon pad, checked it, and worked it again. The sanding underneath had to be right, and I wanted the base finish looking as even as possible before moving to the protective coating.
The nice thing about a repairable finish is that if it is not good enough, you can return to it. The less nice thing is that sometimes you have to.
My free finishing workshop covers the sanding and finishing details that are difficult to fit into a single build story. I originally considered charging for it, then decided to offer the whole process free. At the time of this project, more than 50,000 people had signed up.
|
Adding the N3 Nano coating
Once I was satisfied with the hardwax oil, I applied N3 Nano: two coats of the hard coat, followed by two coats of the top coat.
I use it to add protection and improve the depth and clarity of the finished surface, including the epoxy. It can also help even out minor dry-looking areas and sheen variations. For small surface marks, a maintenance application can address some flaws without a full refinish.
It was not a substitute for the sanding, patching, or careful finishing underneath. All of that work had to happen first.
The Finished Table, and What “Perfect” Really Meant
By the end, the tabletop alone weighed around 500 pounds.
The bookmatch still looked balanced. The large thickness patches blended into the edge. The broken corner was difficult to find, even knowing where it was. The shake repair was solid. We even found an old bullet lodged in the wood, because apparently this material had a complicated life before it reached my shop.
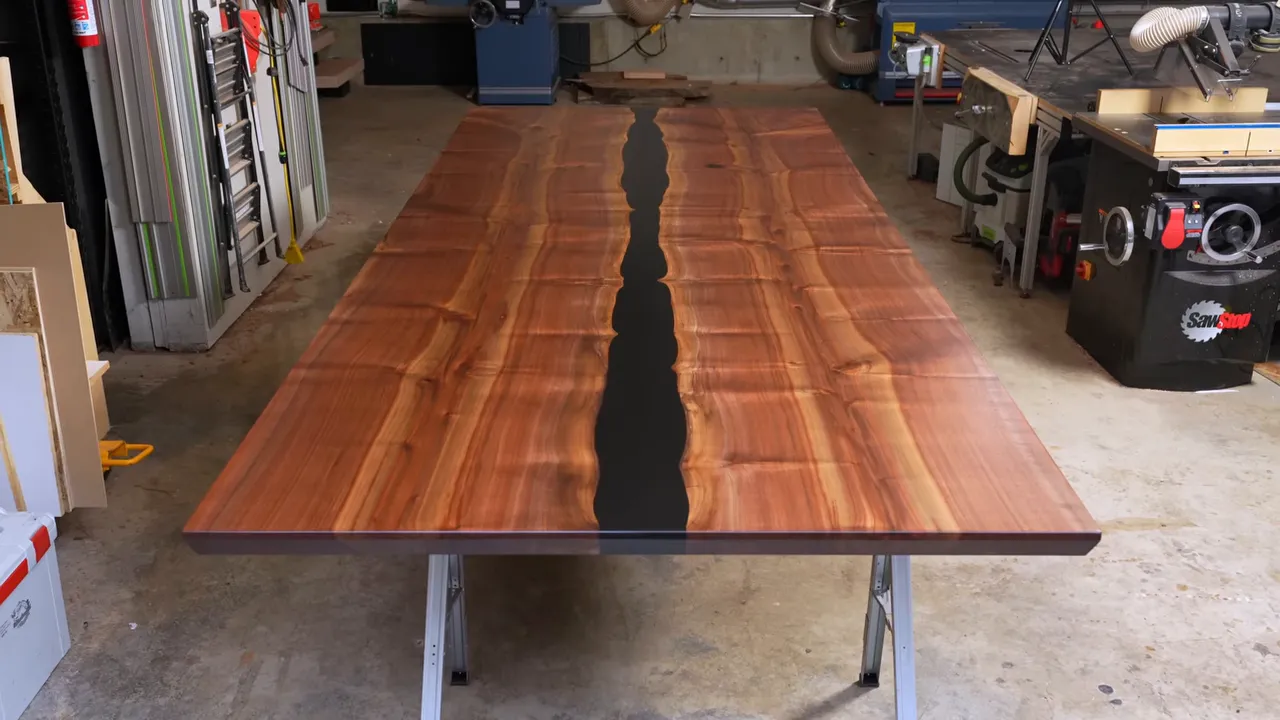
I was genuinely happy with the result, both the design decisions and the repairs. That does not mean the process was flawless. It means the problems were addressed rather than hidden under the hope that nobody would notice.
The completed top went into a crate that brought the shipment to roughly 1,000 pounds. Then I learned it was flying to Europe, not traveling by boat. Apparently, the yacht table had a more glamorous travel itinerary than I did.
This build also reinforced how badly I need more space. I had already spent several years searching for a nearby property, likely agricultural land, where I could move the operation. I documented the requirements and the table-for-a-successful-lead offer in my local property search details. Maneuvering a 500-pound tabletop around the existing shop did not make that search feel less urgent.
Was the table overpriced? I will leave that judgment alone. What I can say is that I went into my most expensive commission secretly hoping it would be easy. It was not.
The standard I could control was to leave nothing unfinished that I knew how to improve. That is what I tried to deliver, right down to the last repaired corner.


