Is glass the new epoxy? Which, ironically, was once the new glass?
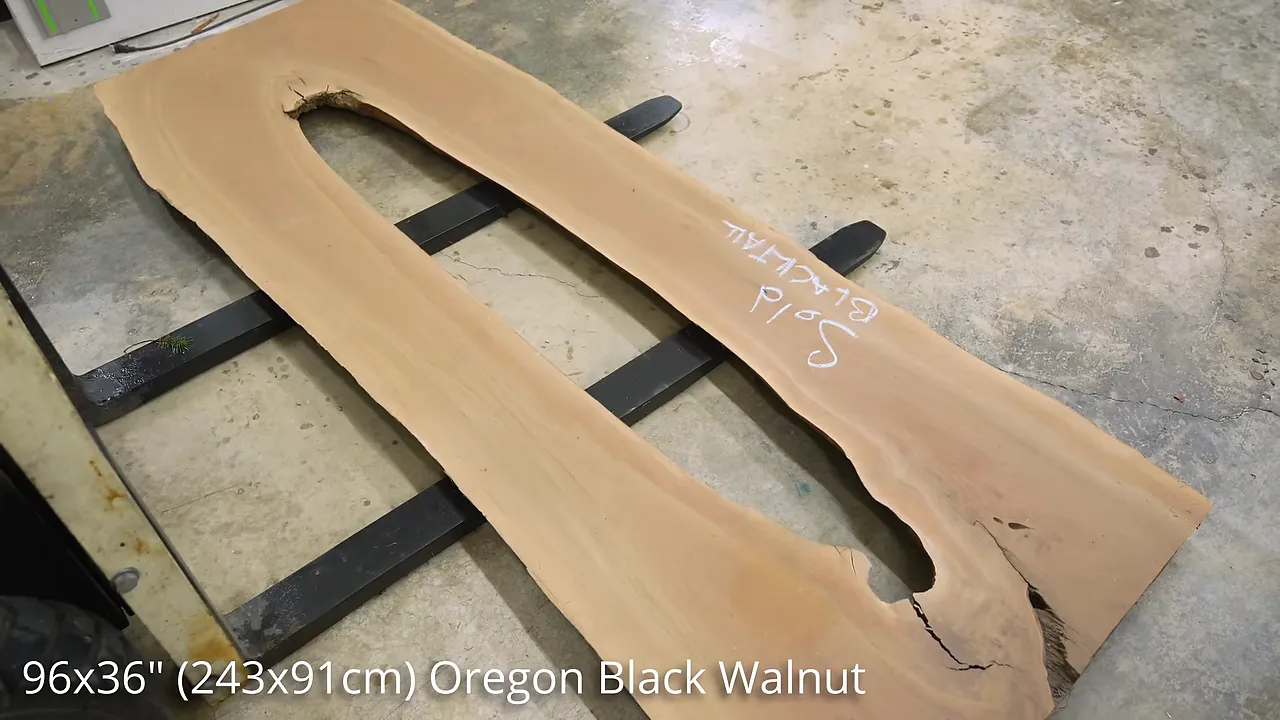
I have built enough epoxy tables to be comfortable with the process. A glass river table was a different story. I knew exactly what I wanted it to look like. I just had no idea how to build it, which is why an $800 piece of Oregon black walnut sat around my shop for four years.
Eventually, I figured out a way to cut the glass accurately, route a consistent recess around an irregular shape, and build a base that would leave the best part of the slab unobstructed. I also shattered some practice glass, messed up the legs, and discovered that my first choice of glass color was not my favorite.
So, a fairly normal project.
A Walnut Slab Worth Waiting Four Years For
The thing that made this slab special was the void running through its center. I have worked with plenty of slabs with holes in them, but those holes are usually accompanied by rot. Stabilizing and filling those areas is one reason I use epoxy.
This one was different. The tree had grown around itself, leaving a long, intact opening with solid wood around it. There was no reason to bury that natural edge under a big pour of resin. A fitted glass panel could make the surface usable while preserving a clear look into the opening.
The push to finally build it came from an unlikely place: volunteering at my old high school woodshop.
I went back a couple of times to talk about woodworking, epoxy tables, and building a business through social media. The kids were legitimately great. They also informed me, indirectly, that ankle socks are apparently for old people now, and crew socks are cool again.
That felt familiar. When I started woodworking, glass tables were everywhere. Then epoxy took over. Trends come around again, whether we are talking about furniture or socks. I wanted to find out whether glass had fallen out of favor because of style, or because epoxy was simply more approachable.
My Very Short Career as a Glass Cutter
I started with an approximately $11 glass-cutting kit and a couple of practice pieces. Calling it a premium kit might have been generous, but I was optimistic.
The basic idea was to score the glass and then break it along that score. I tried a straight line first. Nothing happened. More pressure did not help. Eventually, the practice piece shattered.
It turned out that piece was tempered glass, despite the supplier being fairly sure it was not. That was a useful distinction to discover before touching the actual tabletop panel. Tempered glass is not something to shape by scoring and snapping.
The next practice piece behaved completely differently. The cutter sounded different, the score looked more promising, and my first curved cut broke away surprisingly cleanly.
For about thirty seconds, I thought I had become good at cutting glass.
Then I tried another curve.
That was enough to convince me to regroup. A successful practice cut was not the same thing as being ready to cut a large, expensive, irregular tabletop insert.
The Best Tool for This Shape Was Somebody Else’s Waterjet
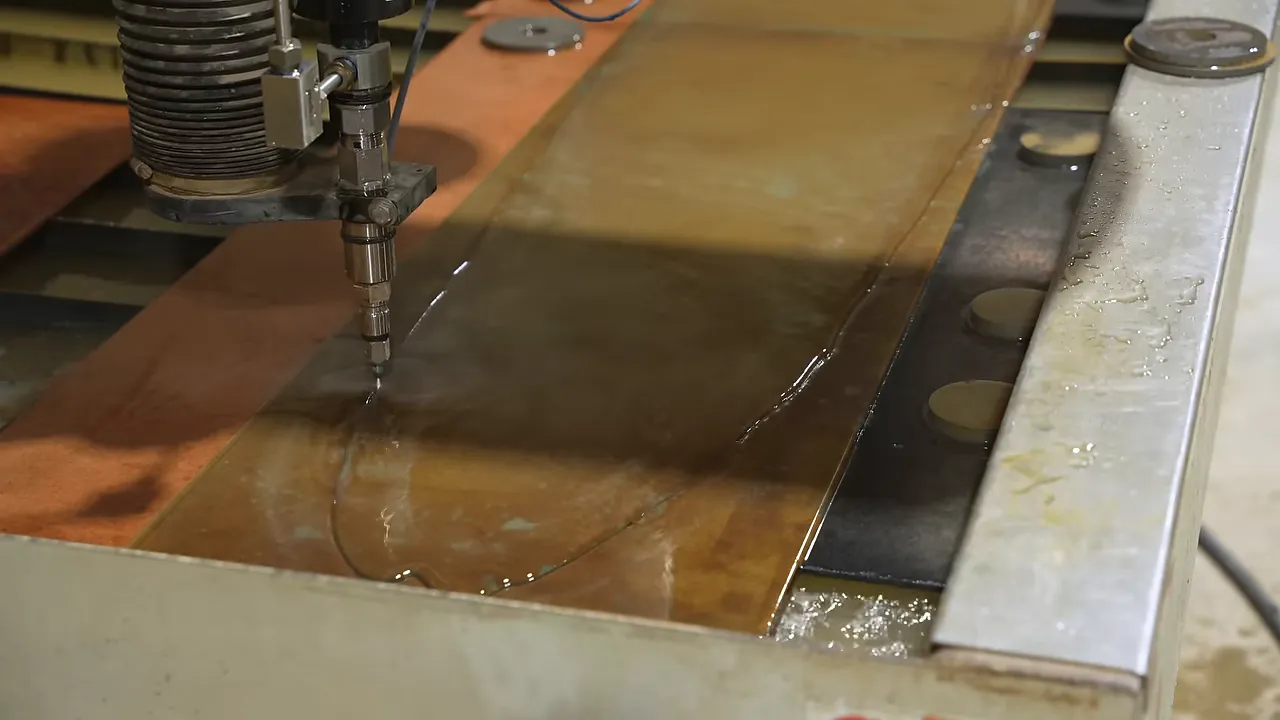
After doing more research, I took my finished shape template to Portland Waterjet. They converted it into a digital file and cut the glass from that file.
The accuracy and speed were impressive, but the biggest benefit was repeatability. If the panel breaks, the file still exists. Another panel can be cut to the same shape without trying to recreate a long series of hand-cut curves.
I may eventually develop the skills to cut something like this by hand. For this table, outsourcing the glass was absolutely the right decision.
Building a Base That Does Not Compete With the Top
I wanted the base to be interesting without becoming the main event. The natural opening and glass were the reasons to build this table. A bunch of structure directly underneath that opening would defeat the purpose.
The design was inspired by a desk I had built several years earlier and given to my wife. Scott made a rendering of the new version, which helped turn the idea in my head into something I could actually evaluate before cutting wood.
It was different enough to feel intentional, but not so different that it distracted from the slab.
Use Templates for Matching Furniture Parts
If you have been hobby woodworking for a while and want to move toward more precise furniture, one of my best pieces of advice is simple: use templates.
This base needed four matching legs. Small differences in angle or height would become a problem once everything came together. Instead of trying to make four independently perfect parts, I made one template and copied it onto the four leg blanks with a flush-trim router bit.
The process was straightforward:
- Work out the leg shape on a single template.
- Rough-cut the blanks close to that shape.
- Use the template and a flush-trim bit to bring each blank to the same profile.
- Keep the template for future builds.
That last point matters. The time spent getting one template right keeps paying off.
Reinforcing the Base Joints
As usual, I had designed part of the project before deciding exactly how to build all of it.
At the meeting points in the base, I did not want to rely on adhesive alone. I also did not want visible screws, plugs covering screws, or an awkward attempt to fit a Domino into a space that did not suit one.
The solution was an inlaid bow tie across the joint. It added reinforcement and made the connection look more deliberate. Instead of hiding a fastener, I could make the reinforcement part of the design.
A Sanding Mistake That Actually Mattered
After the initial glue-up, I rough-sanded the base with about 120-grit abrasive on an orbital sander. Somehow, I managed to crown the tops of the legs so badly that the mounting plates rocked back and forth.
They looked like I had been sanding a basketball.
This was not something I could ignore and hope the bolts would fix. Those plates needed flat bearing surfaces. I used a track-saw setup to re-establish flat tops, then checked the plates again.
The lesson is less about that particular repair and more about protecting reference surfaces. An orbital sander can make a surface feel smooth while quietly making it less flat.
Softening the Base With a Roundover
I used a 5/8-inch roundover on essentially all the exposed edges of the base, leaving the bottom flat so it would sit properly.
The router could not carry that profile cleanly through every inside corner. Those areas needed handwork. A narrow rasp let me reach into the joints and blend the roundover through the corners, followed by plenty of sanding.
It looks more intimidating than it is. Most of the job is matching the profile that already exists on either side.
How I Routed a Consistent Glass Inlay
The glass-cutting problem was only half the challenge. I still needed a recess in the walnut that followed the glass accurately.
A common approach is to lay the glass on the slab, trace it, and freehand the recess with a router. No offense intended. Actually, a little offense intended: I did not want to eyeball a seam this long.
I wanted a template-guided method that would create a consistent clearance around the panel.
The Router Bit and Bushing Combination
The method uses a positive shape template to create a larger negative template. That negative then guides the router while cutting the glass recess.
My first test was wrong. The gap was much larger than intended, which was an excellent reason to do the test in scrap instead of the tabletop.
The combination that worked for this build was:
- To make the negative template: a 1/2-inch guide bushing with a 1/4-inch router bit.
- To route the tabletop recess: a 1-inch guide bushing with a 3/8-inch router bit.
- Resulting clearance: approximately 1/16 inch around the glass perimeter.
Those dimensions make more sense as a repeatable setup than as me waving router parts around and attempting mental math. I put the details into my free glass table guide so the bit and bushing choices are easy to reference.
Make the Negative, Then Position It Carefully
I followed the positive shape with the 1/2-inch bushing and 1/4-inch bit to create the negative template.
Next, I positioned the actual glass on the slab where I wanted it. With the negative placed over it, I could align the template to the panel before securing everything for routing.
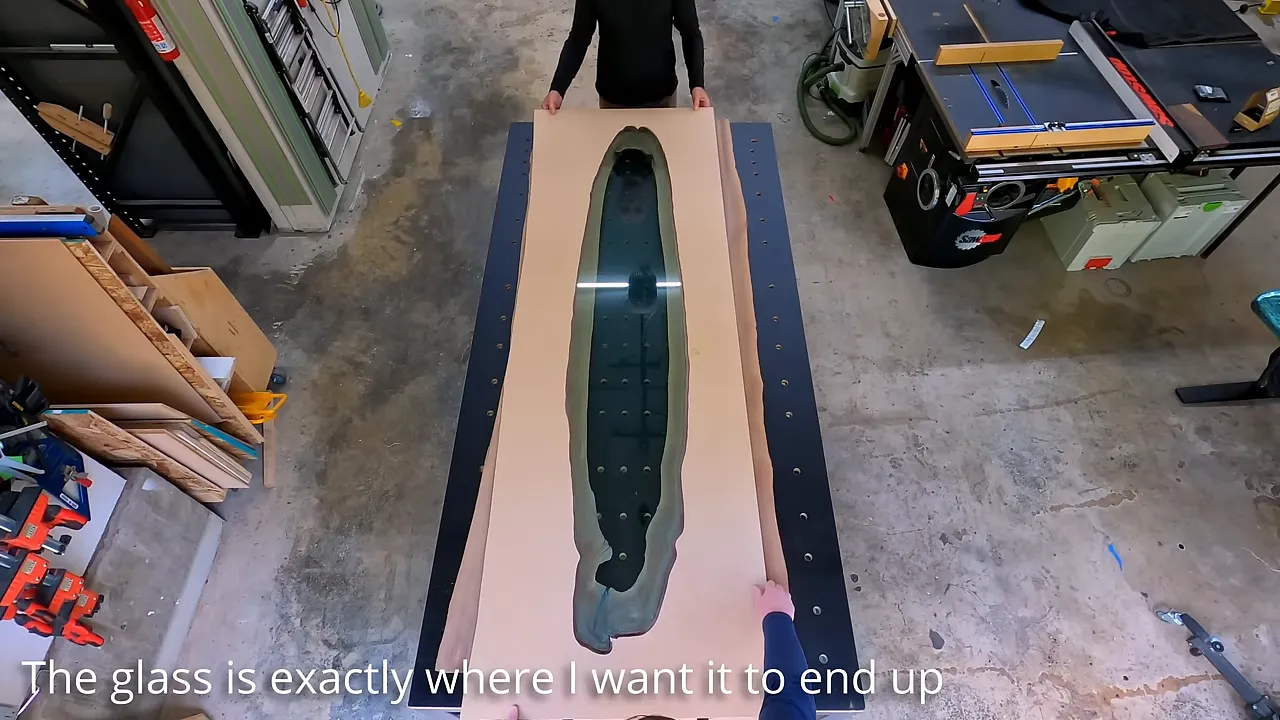
After removing the glass and clamping the template securely, I switched to the 1-inch bushing and 3/8-inch bit and routed the recess.
The advantage is that the template sets the boundary. I did not have to judge the entire perimeter by eye while removing material. It took time, and there was more block-plane cleanup than I would have preferred, but the shape was controlled.
Design Around the Bushing’s Limitations
There was one problem with my shape: a couple of small nooks were too tight for the 1/2-inch guide bushing.
I used a smaller bushing in those sections, knowing it would leave extra wood. Then I test-fitted the glass, marked the areas that still needed clearance, and pared them by hand.
If you want to avoid that extra work, keep the shape accessible to the bushing you plan to use. A curve that looks perfectly reasonable on paper can still be too tight for the tooling.
Why the Glass Needs Clearance
The glass should not be trapped tightly inside the wood. Walnut expands and contracts with seasonal moisture changes. Glass cannot accommodate that movement the way an epoxy-filled section can.
If the wood closes against a tightly fitted panel, the glass can crack. That is why I maintained the clearance even in the little areas I finished by hand, rather than carving right up against the glass.
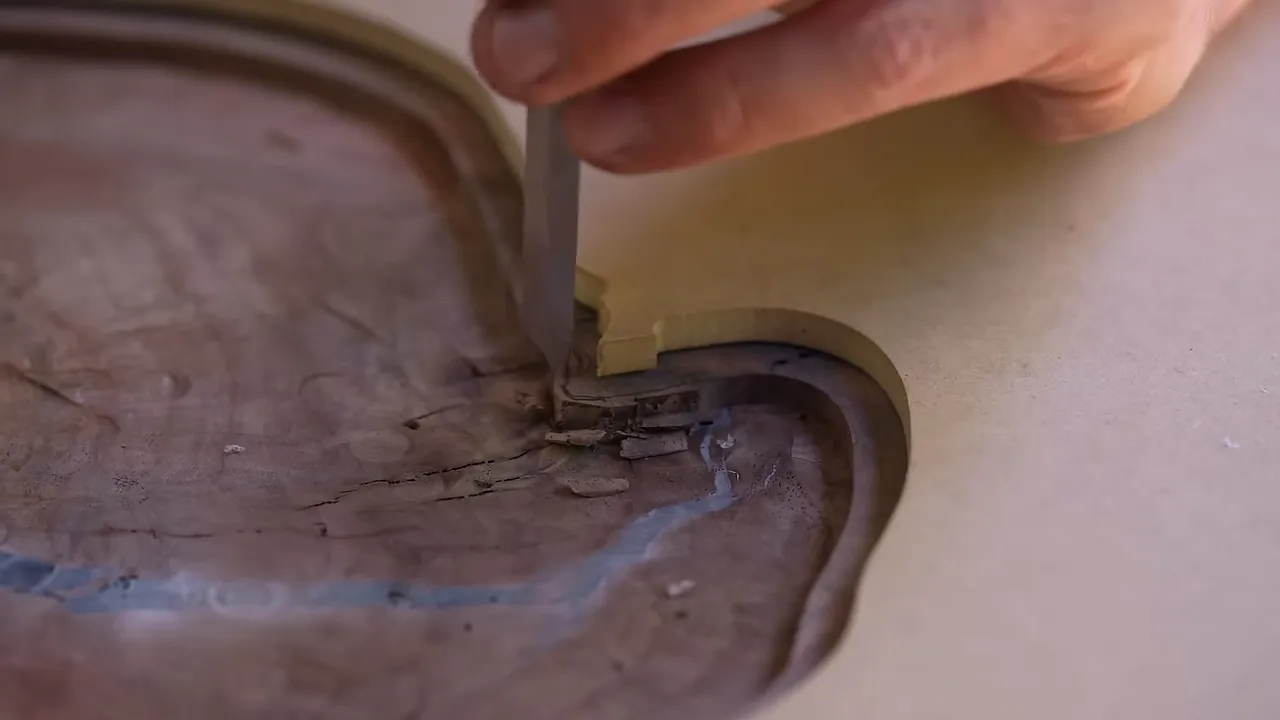
The approximately 1/16-inch gap was the target for this particular build, not a universal allowance for every slab and climate. The principle is to plan for movement rather than treating a perfectly snug fit as the goal. The USDA Wood Handbook is a useful reference for understanding wood’s relationship with moisture and dimensional change.
Adding Contrasting Bow Ties to the Walnut
Once the glass fit, I thought the top could use a little more visual interest. I usually make bow ties from matching wood, but this time I chose a darker hardwood for contrast.
Then, for reasons that seemed sensible at the time, I made the centers ridiculously narrow.
Normally, I leave myself more room to work. Here, even a 1/8-inch router bit looked large in the middle of the inlay. It became an extremely unpleasant game of Operation, except the patient was an expensive walnut slab.
The method itself was familiar:
- Cut the bow ties on the bandsaw.
- Place each one on the slab and score its outline with a sharp marking knife.
- Rout out the interior waste while staying away from the line.
- Set the chisel into the knife line and pare carefully to the final boundary.
- Install the bow tie without forcing it hard enough to break it.
A good marking line makes a real difference. It gives the chisel a precise place to register. A vague or rounded cut is much less helpful when the fit depends on tiny details.
I have broken a bow tie during installation before. There is a special kind of silence that follows hammering a carefully fitted inlay into two pieces. Fortunately, these went in without breaking.
For more detail on the basic process, I have a separate bow tie inlay tutorial.
|
Repairing Four Moisture-Probe Holes
The slab had four small holes left by moisture testing. A supplier can drill into the center of a thick slab and drive in a probe to get a reading from the interior. That is useful information. It also leaves me with holes to repair.
I should have saved matching offcuts from this slab. I did not, because apparently I wanted another challenge.
Instead, I found walnut that was as close in color as possible. Walnut varies enough that “also walnut” is not much of a guarantee.
I chucked small pieces in a drill and sanded them into tapered plugs. After adding a little wood glue, I tapped them into the holes, trimmed the excess, and sanded them flush.
The plugs were delicate because of their grain orientation, so installation needed a light touch. Breaking one while driving it in would create more work, not a better repair.
Whenever I share repairs like this, someone points out that they will become obvious after finishing. That is a fair thing to test. Once the finished table was at Goby Walnut, I offered several employees $100 if they could find all four repairs in sixty seconds. I put that finished repair challenge in a separate short.
Finishing and Mounting Without Blocking the Opening
I used a light-cured hardwax oil finish on this build. The curing process is fast, but it was also a reminder that understanding the finish includes understanding the equipment used to cure it.
During an early session, my hand felt sunburned even though I was wearing gloves. After talking with a friend who had worked with these finishes, I switched to heavier, darker gloves and long sleeves.
This is not a place to assume that a curing lamp is harmless because it is part of a woodworking process. Follow the finish and lamp manufacturers’ exposure precautions and protective-equipment requirements.
Recessed Mounting Plates
The base needed to support the slab without putting a bunch of hardware across the natural opening.
I made a slightly oversized square template, approximately 4 1/2 by 4 1/2 inches, and routed pockets for the mounting plates underneath the top. I deliberately left a little room for adjustment so I could center the base where it looked right.
Recessing the plates also helped the appearance. Instead of looking like legs bolted onto a slab, the finished legs almost seemed to grow out of the underside.
A Protective Coating Over the Finish
After the wood finish, I applied N3 Nano. This is a product I offer myself, not a paid placement from another company, and I use it on my projects.
I like the way it increases the sheen and contrast while adding surface protection. I also like being able to renew the coating over time rather than treating every bit of wear as a reason to refinish the entire table.
The coating is an additional layer over the wood finish, not a replacement for doing the finishing work properly in the first place.
The Last Problem: I Did Not Love the Green Glass
With the base attached, we lowered the glass into place. It fit. The table was together. And I did not love the color.
The subtle green tint worked for Scott. It did not work quite as well for me.
Fortunately, I had suspected this might happen. When the first panel was cut, I also had a dark charcoal panel made from the same shape.
I already knew I liked black and charcoal against walnut. Swapping the panels confirmed it. The darker insert gave the table the look I had been hoping for.
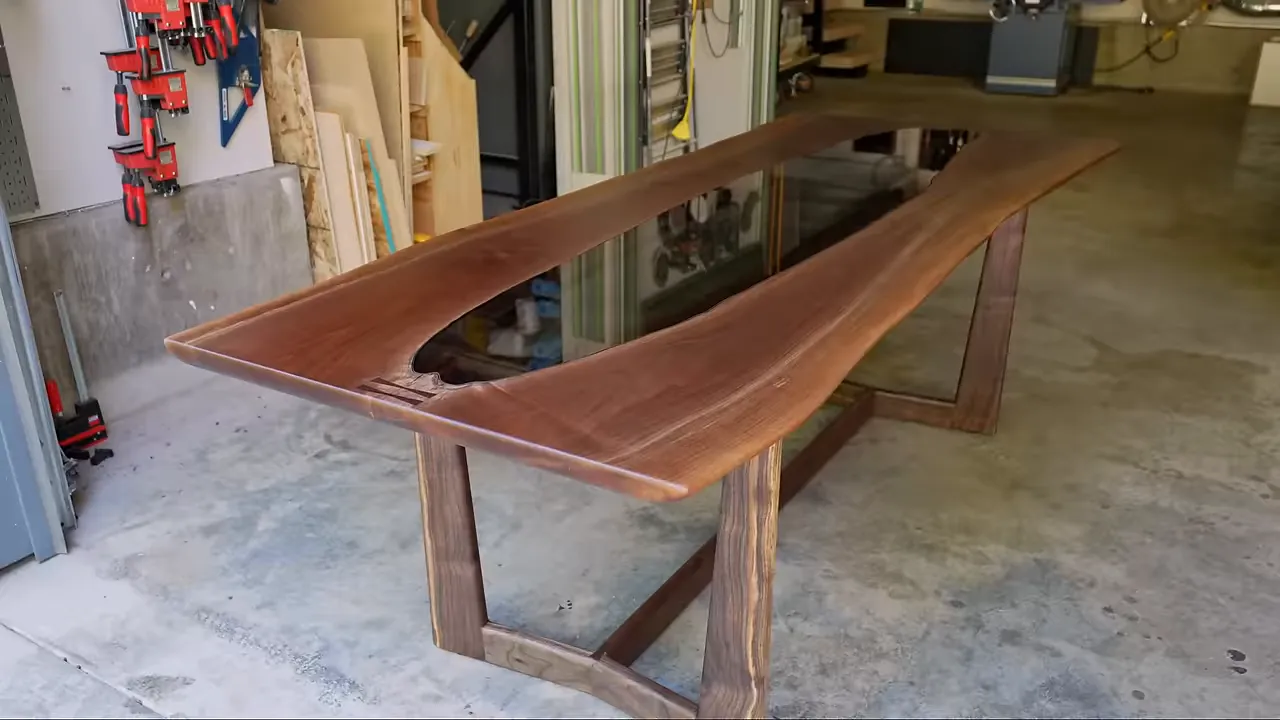
The nice part is that the choice is reversible. Both panels belong with the table, so its eventual owner can choose a favorite or change them seasonally.
Glass vs. Epoxy: Which Table Would I Build First?
After building this table, I would not call glass the end of epoxy. I would call it another option, with some real advantages and some equally real compromises.
I have built one glass table, so this is not me declaring myself an authority on the entire category. But compared with the epoxy process I know well, here is where I landed.
- Beginner friendliness: I would recommend epoxy for a first project. The glass introduced unfamiliar cutting, fitting, and handling challenges.
- Everyday practicality: I prefer epoxy’s continuous surface. The clearance around the glass can collect crumbs and liquids.
- Replacement: Glass can break. Keeping a waterjet cutting file makes a matching replacement much more straightforward.
- Visual impact: The glass may win. It preserves the view into the natural void, and this style is less common than an epoxy river table.
River tables did not begin with epoxy, even though the terms have become almost interchangeable. Glass versions were around before epoxy became so popular. In researching the history, I found a table Oliver Becker called a river table in 2004, though I would not claim that was the first time anyone used the name.
For a particularly impressive example of what glass and wood can do together, my friend Jason at Wayward Grain makes beautiful pieces, including his Pangaea table in maple burl.
That is really the point. Glass does not need to replace epoxy to be worth building with. For this unusually solid, naturally open walnut slab, it offered something different: a usable surface that still lets the tree’s shape remain the highlight.
It took me four years to get around to it, and considerably less time to decide I preferred the charcoal glass. I am glad I waited until I had a method I trusted. I am even more glad I did not trust my first successful practice cut.


