The dream of a craftsman is not necessarily to make great art. Sometimes it is simply having the freedom to make terrible art.
Not because terrible is the goal, but because making the same thing forever sounds exhausting. Padulla Studio once described spending two years as an apprentice building drawer boxes. He makes incredible wood art now, but that drawer-box chapter sounded like his personal nightmare.
I have been fortunate enough to escape my own version of the drawer-box factory. Sometimes that freedom produces a burnt waterfall desk that I really like. Sometimes it produces my trypophobia table, which looked like a diseased stump with legs.
This experiment could have gone either way: black denim, aluminum foil, and epoxy, compressed into a patterned tabletop. I had a small sample suggesting it could work. Whether it should exist was a separate question, and apparently not one I needed answered before buying materials.
From Denim Tables to Aluminum Foil
This idea started several projects ago. My first denim table was simply 50 layers of fabric stacked together with epoxy. After that, I tried putting objects underneath the denim before compressing it. Surfacing the cured panel cut across those raised layers and exposed a pattern that reminded me of Damascus steel.
That led to ten smaller experiments with different colors and patterns. Some looked pretty cool. Others were useful reminders that experimentation does not owe you attractive results.
For this version, I wanted to introduce a second material. The black denim would provide the dark background, and the aluminum foil would hopefully emerge as bright lines when I surfaced the top.
The $160 foil problem
Weeks before starting, I ordered a specialty roll of aluminum foil from an online metal supplier for $160, possibly before shipping. When we ran out partway through preparation, I scrambled around town and found a replacement for $29.99.
The comparison was not especially flattering to my purchasing department, which is also me.
The foil used in the project was about 0.005 inch thick. That is roughly 0.127 millimeter, not the wildly inaccurate metric conversion I was tempted to offer. Even at that thickness, I was surprised later by how clearly the aluminum showed up along the finished edge.
Building the pattern underneath
The pattern did not come from carefully arranging silver lines on the surface. It came from shaping the layers before cutting through them.
- Make a raised plywood form beneath the fabric and foil.
- Build the epoxy-wetted layers over that form.
- Compress the assembly in a vacuum bag.
- Surface the cured panel flat, exposing different layers at different locations.
My small test piece had a large black blob in the middle that I did not particularly like. To avoid repeating that, I hollowed out the plywood form into a ring rather than leaving it as a solid raised shape. I also rounded its edges so the materials could fold over it more easily.
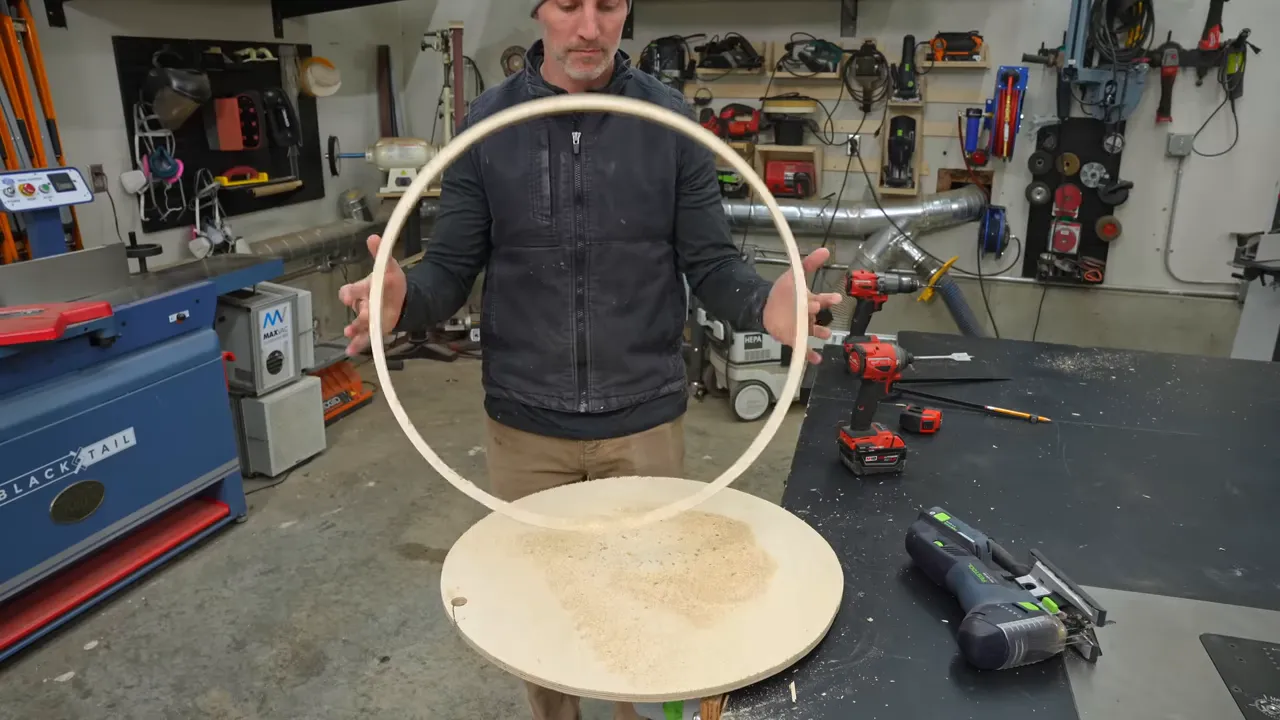
I could explain the principle. Predicting exactly what the final pattern would look like was another matter. My visualization skills were not good enough for that, which is a convenient way of saying I was going to find out after doing all the work.
The Risk Is Bigger Than Making Something Ugly
An ugly experiment is one thing. An experiment that fails after someone buys it is another.
That trypophobia table sold for $2,500. When I mentioned the sale online, plenty of people informed me that I had charged someone actual money for the ugliest furniture they had ever seen.
A few years later, the buyer contacted me because the table had developed cracks. The photos were not as bad as I had feared, but I refunded her money. Standing behind the work matters more than winning an argument about whether the cracks were acceptable.
That experience was sitting in the back of my mind throughout this project. A successful sample is encouraging, but it is not proof of long-term durability. I did not know whether the aluminum and denim would remain bonded across an entire tabletop.
At the beginning, I put my confidence around 80 percent. That number was about to get considerably less impressive.
Foil, Denim, Epoxy, Repeat
On my previous all-denim tables, resin could move between fabric layers. If one piece seemed a little dry, I could make a later layer especially wet and let that epoxy transfer into the surrounding fabric under compression.
Aluminum foil changed that completely.
Each sheet acted as a barrier. An extra-wet piece of denim could no longer compensate as easily for a dry layer on the other side of the foil. Every interface needed attention, and the entire panel was only going to be as good as its weakest layer.
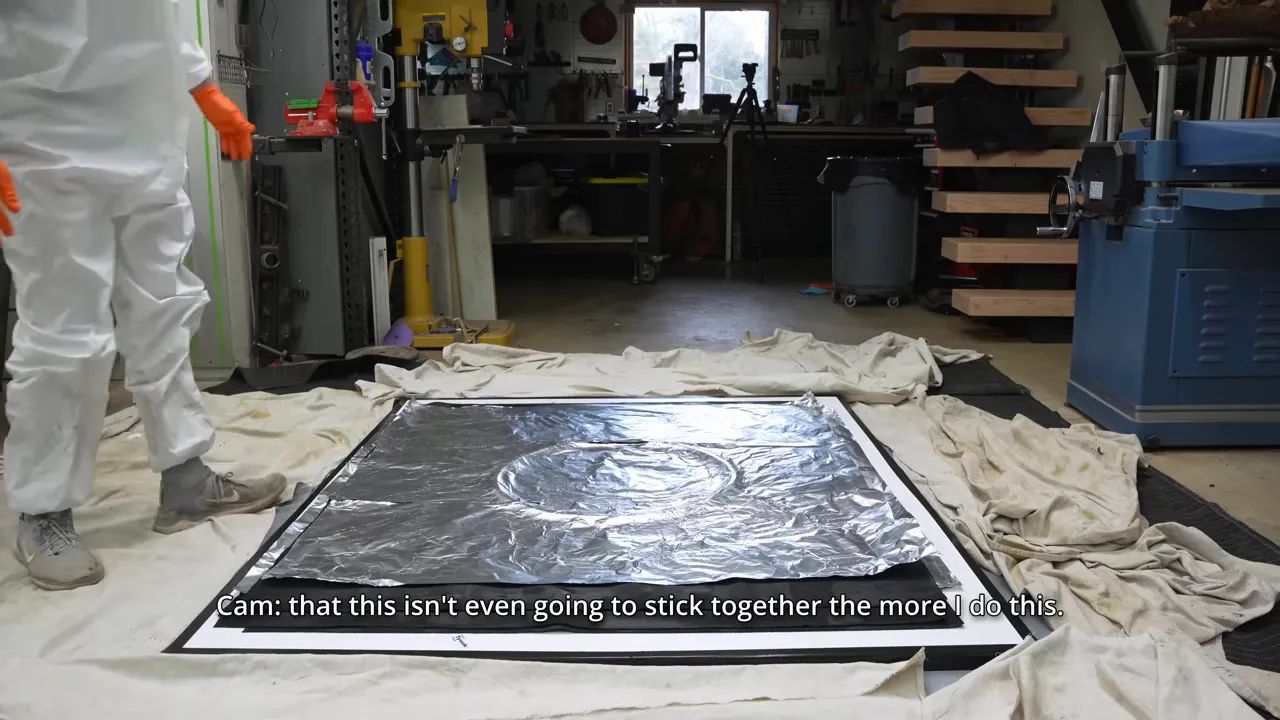
As I alternated foil and black denim, I became increasingly suspicious that I was constructing a very expensive stack of things that did not want to stay together.
I also badly underestimated the time. We started around midday, and I expected a three- or four-hour job. Timing one layer gave us just under four minutes, which sounded manageable until all the preparation, handling, resin application, and troubleshooting joined the party.
My confidence dropped to around 60 percent.
Poking holes in my own idea
Partway through, I started puncturing the aluminum layers. The idea was to create paths for epoxy to move through the foil instead of being trapped entirely on one side.
That brought my confidence back to perhaps 62 percent. A tremendous recovery.
Later, once we finally pulled vacuum, resin appeared through those little holes. At least that part of the reasoning had some visible support. It did not prove that every layer was adequately saturated, but it was better than nothing.
Could I Build It? Sure. Should I?
There is a useful distinction between figuring out whether something is possible and deciding whether anyone actually needs it.
Craftsmen can become so fascinated by a difficult process that we forget the finished object still has to appeal to somebody. In furniture making, there is a fairly direct test: make one, offer it for sale, and see what happens.
I had already done that with the previous Damascus denim table. At the time of this build, it still had not sold. It was the only piece I had made in the preceding year that had not found a buyer.
So naturally, I responded to that market feedback by making an even stranger version.
This is where having a business beyond furniture sales gives me room to experiment. A YouTube channel helps support the freedom to pursue an uncertain idea without every individual piece having to pay all the bills. That freedom is valuable, but it does not magically turn every idea into a good one.
Vacuum Bagging, With Plenty of Leaks
By the time we were ready to compress the layup, my original 5 p.m. finish estimate had become a joke. Scott, who films these projects, stayed through the entire process. He deserves credit for that, and probably a better scheduling department.
This was an account of an experiment, not a vacuum-bagging tutorial. My friend Johnny Builds helped me learn the basic setup, but I still manage to feel less competent each time I assemble one.
The materials above the layup each had a job:
- Peel ply: a removable release layer between the project and the materials above it.
- Bleeder material: a layer that could receive excess resin.
- Rope: an air path intended to help the vacuum reach across the assembly.
- Vacuum bag film and sealant tape: the enclosure needed to maintain vacuum.
- A catch pot: a place to collect excess resin before it could reach the vacuum equipment.
The vacuum bagging tape stays flexible, almost like chewing gum. That flexibility was useful because we spent a long time listening for tiny leaks and pressing the tape until they stopped.
The catch pot also needed downward pressure to seal properly, so I added clamps. After a lot of circling the bag and fixing one leak after another, we finally began pulling vacuum. We were still working at about 9:46 p.m.
The next morning, the assembly felt compressed, which was encouraging. The amount of resin squeeze-out was less reassuring. Some areas showed more than I expected, but I would have preferred a more consistently saturated appearance.
I used heated blankets to help the deep-pour epoxy cure. With the system and conditions I was using, that can shorten a process I would otherwise expect to take two or three weeks to roughly four or five days. Those are not universal epoxy cure times. Any added heat needs to stay within the resin manufacturer’s instructions.
A Very Large White Oak Base
While the top cured, I started on the base: a substantial kiln-dried white oak block from Goby Walnut. I thought its natural shape could make a unique pedestal under the circular top.
Moving it was also an opportunity to practice something I should have learned years earlier: stop lifting things I already know I should not lift.
I spent much of my adult life dealing with back trouble. People repeatedly warned me about moving enormous slabs alone, and I would prefer not to admit that they were right. Unfortunately, they were.
Using the forklift and getting help made much more sense than treating every heavy object as a personal challenge. Listening to my body has helped me far more than continuing to do the same stupid thing and hoping stretching would cancel it out.
Flattening the oak block
I flattened the block with a homemade frame built from aluminum extrusion and a Woodhaven router sled.
The setup worked, but the extrusion was flimsier than I would choose if I built it again. The sled itself was adequate rather than something I would enthusiastically buy a second time.
For occasional work, using what I already owned made sense. For more projects like this, I would want a stiffer, more efficient system. Goby’s adjustable CNC bed was a much slicker solution, and considerably cleaner than the mountain of chips I produced.
Flattening large wood pieces also creates plenty of dust and debris. The OSHA woodworking resources are a useful general reference for workshop hazards and dust control.
Removing the Bag: Almost the Worst Possible Result
About seven or eight days after the layup, it was time to remove the bagging materials.
Peel ply can take serious effort to pull off cured denim. That made this a particularly unpleasant test: I was worried about the layers separating, and the next step involved actively pulling on them.
Then the first surface layer peeled away.
That was about the worst news I could have received. As we removed the remaining peel ply, the exposed surface looked increasingly like a failed experiment.
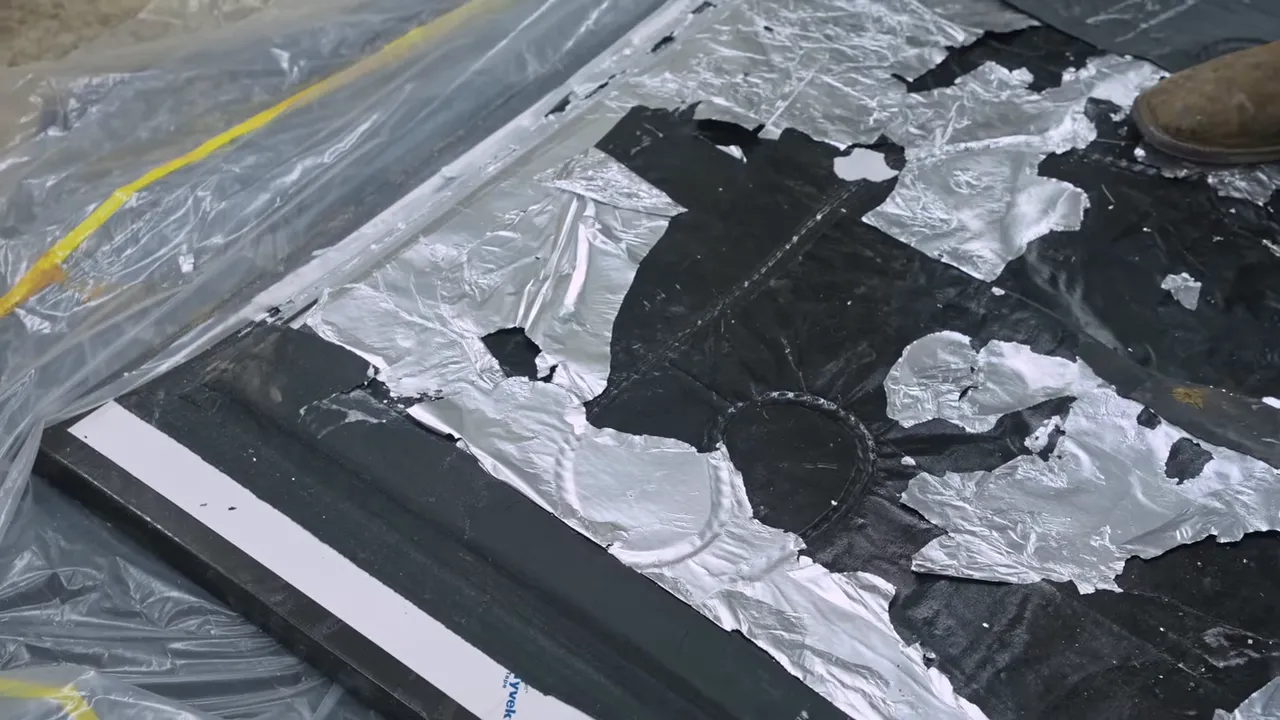
The little coaster-sized sample was the only thing keeping me remotely optimistic. It had held together. Maybe the full panel still had something solid inside.
My confidence was somewhere between two and five percent. At that point, ordinary wood furniture seemed like a wonderful concept. People like it. People buy it. You can exchange the proceeds for goods and services. Nobody had requested an aluminum-and-denim coffee table.
The Sander Saved the Top
We removed the panel from the mold and trimmed the sides. Surprisingly, the freshly cut edges felt fairly solid.
That was enough to justify another step. We took the top to a planer-sander, where Mark helped surface it. The first passes began exposing something close to the pattern I had imagined.
Then a heavier pass sent a large chunk flying out.
I assumed the inside was full of poorly bonded areas and that we would keep finding loose sections until nothing useful remained. Mark tried a less destructive approach: he switched off the planer portion and used only the sanding section.
Removing material gently made the difference. Instead of taking an aggressive cutting pass, we sanded away roughly 1/32 inch at a time. It was slow, but it stopped tearing chunks out.
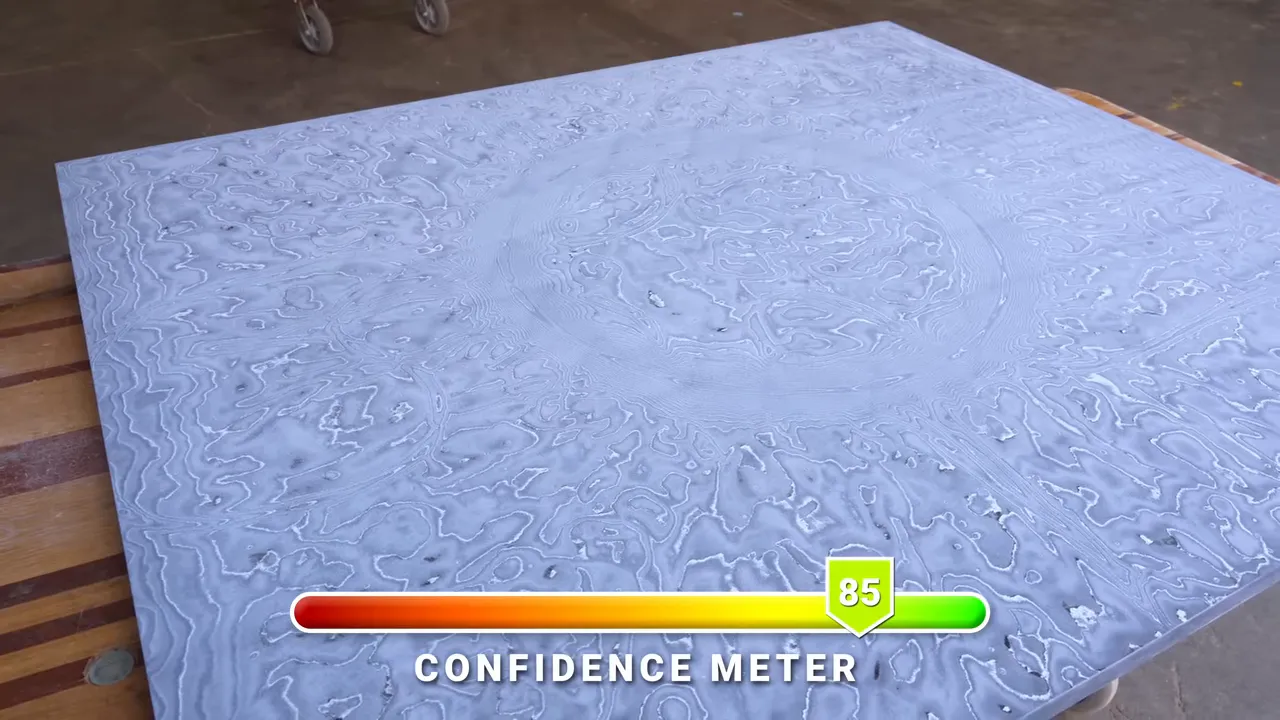
Eventually, we reached a usable surface. Mark gave it a thumbs-up, and my completely unscientific confidence meter climbed back to about 85 percent.
The lesson was not that aluminum and denim are automatically easy to laminate. It was that the way I machined this particular panel mattered enormously.
Turning the Panel Into a 48-Inch Coffee Table
I had considered making wall art. Then I remembered that woodworkers selling their work as wall art can sound a little pretentious.
I have sold several pieces of wall art, so I feel qualified to insult that group.
A coffee table sounded more respectable. Craftsmen make coffee tables. Mine would simply happen to be an extra-large, 48-inch circle made from fabric and foil.
I used a Woodhaven circle-cutting jig, but modified its router attachment. The factory arrangement used clamps, and I did not like the possibility of the router shifting if those clamps were not secured perfectly.
Instead, I attached the jig directly to my Festool router base plate. That gave me a positive mechanical connection rather than relying solely on clamping pressure. With that modification, the jig worked well for cutting the circle.
The Burnt Oak Base Looked Better in My Head
For the oak pedestal, I wanted to char only the natural live-edge areas and leave the flat sections unburnt.
My propane torches spread heat too broadly for the effect I wanted, so I bought an acetylene torch. Its hotter, more concentrated flame gave me much better localization.
There was a small complication: I had never used it before. Learning the procedure and remembering the procedure turned out to be separate skills. After several rounds of reviewing instructions, I finally got the flame working as intended.
This is not a torch setup guide. An unfamiliar fuel-gas system deserves proper instruction, not confidence borrowed from a furniture experiment.
The charred oak looked interesting by itself. Then we set the top on it.
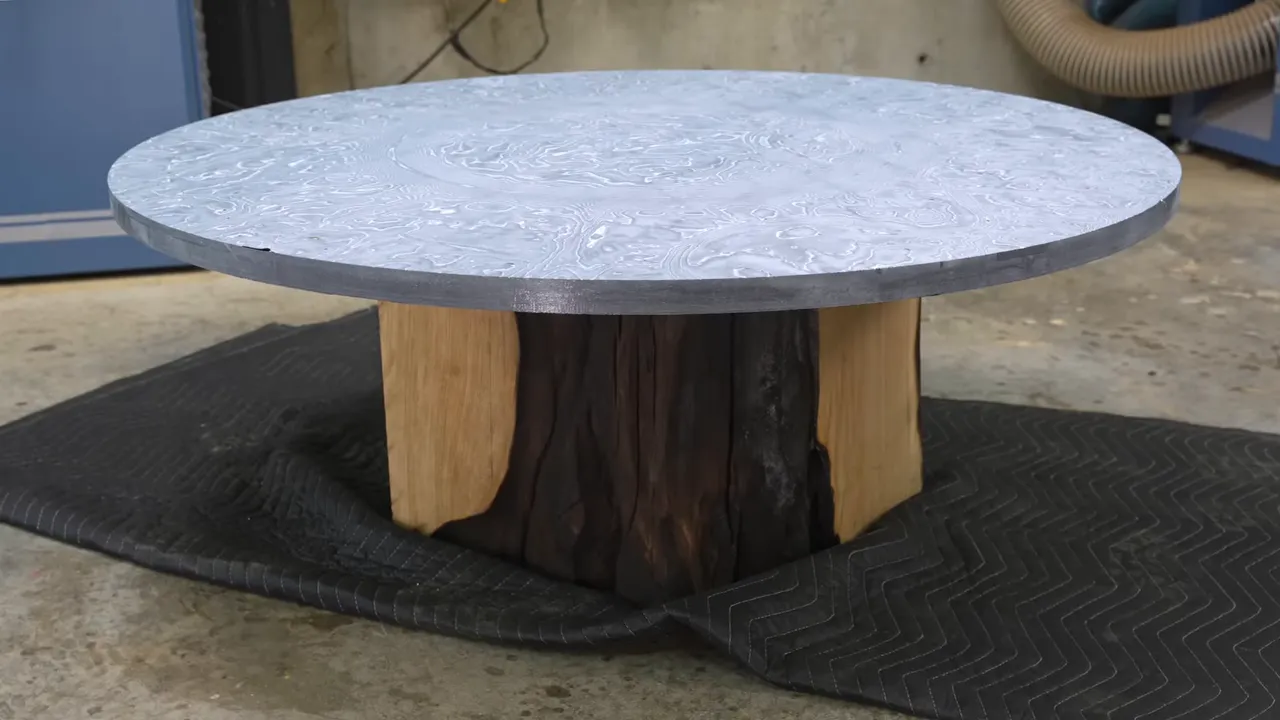
I liked the top. I liked aspects of the base. Together, they were less convincing.
Scott was not particularly enthusiastic either. After staring at the combination overnight, I realized I might dislike it even more than he did.
So we abandoned the oak base. Spending time on a component is not a good enough reason to keep it when it makes the finished piece worse.
Re-Saturating and Finishing the Denim
One lesson from my earlier denim tables was especially useful here: after surfacing and sanding, the exposed fabric needs epoxy worked back into it to produce a good finish.
I spread fresh resin over the surface and worked it across the denim with a plastic spreader. The pale, freshly sanded top darkened, and the aluminum lines became much more distinct.
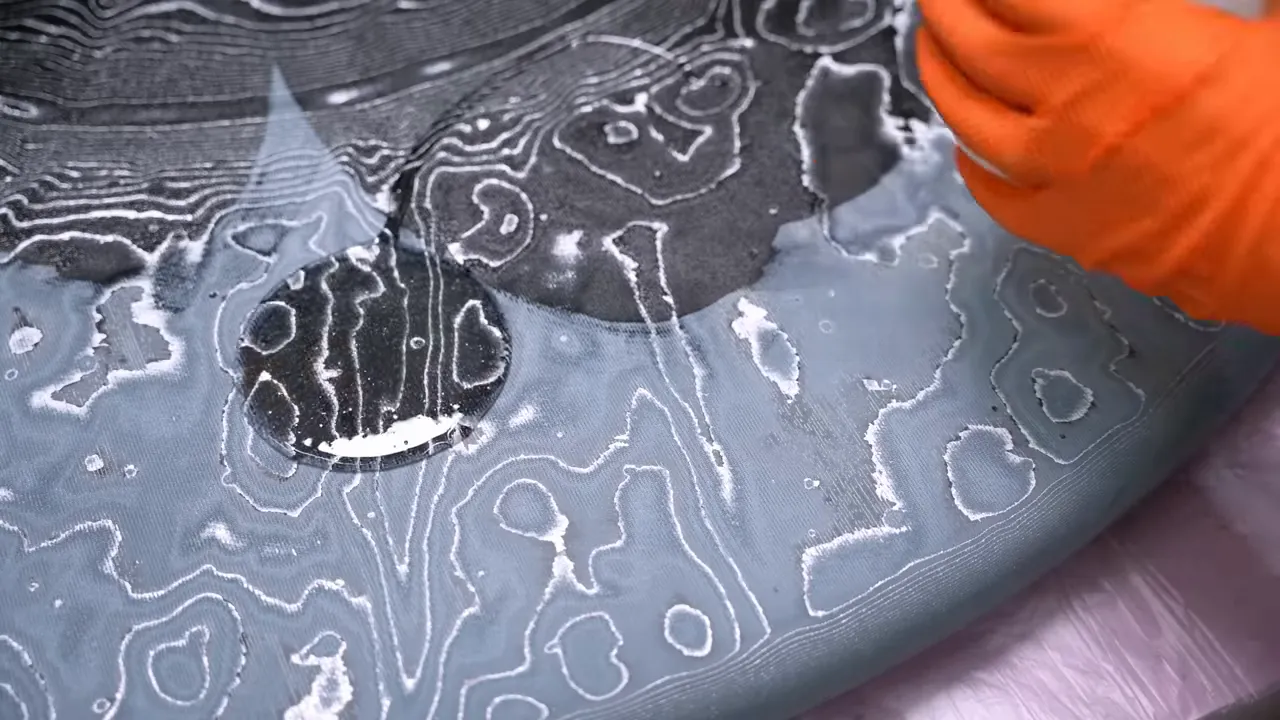
This was not just a matter of putting a decorative gloss over the panel. The freshly exposed fabric needed to be re-impregnated before the remaining sanding and finishing work.
The finishing sequence also included Vesting LED hardwax oil and N3 Nano protection. By then, the top had come a long way from the torn foil mess we pulled out of the bag.
For people who use N3 regularly, we also introduced an N3 Nano Super Pack with twice the hard coat, top coat, and applicators of the Wood Pro Kit, without doubling the price. Apparently, I am not the only person who prefers buying supplies in bulk to paying for shipping repeatedly.
A Metal Base That Actually Suited the Top
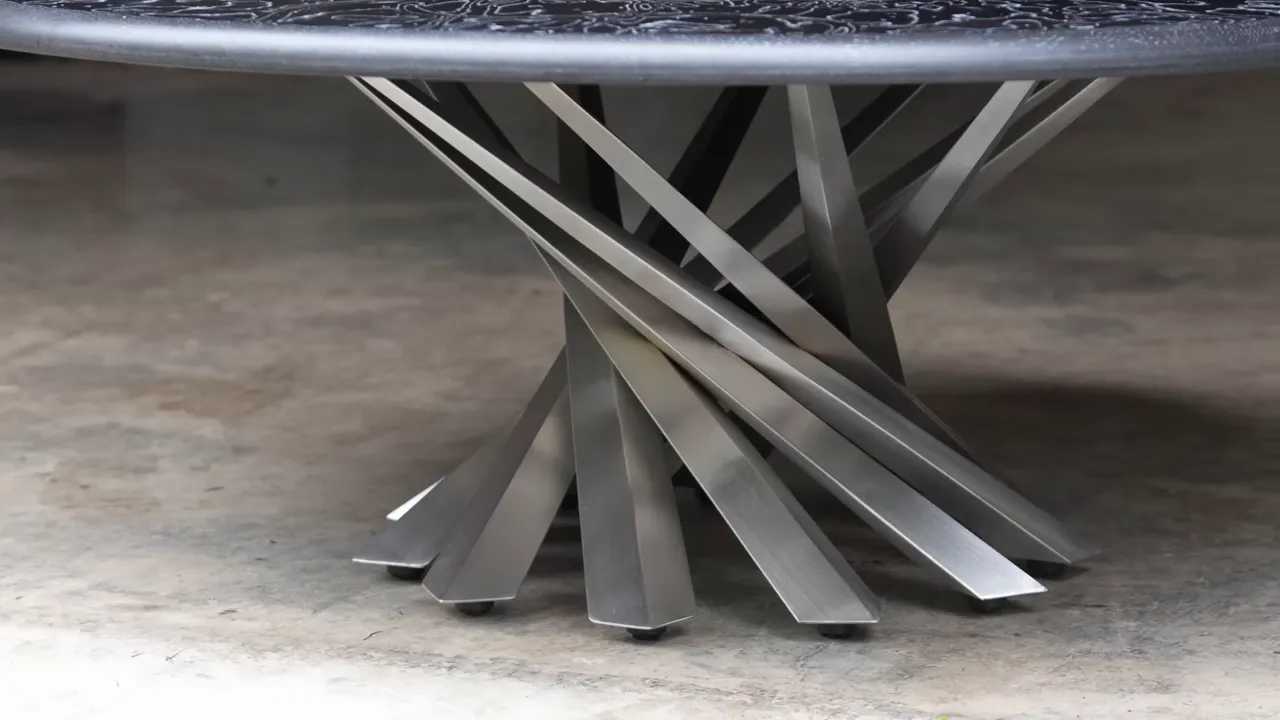
I contacted Alex at Flowyline Design, whose table bases I have used on several projects. There was a dining-table design I liked, but I needed two changes: coffee-table proportions and a stainless finish instead of gold.
The stainless look seemed like a natural match for the aluminum in the top. Alex said they could make it, with an estimated lead time of about six weeks.
The shipment arrived ahead of schedule with a surprise: two bases, one stainless-look and one black.
I had requested the stainless version, but the black looked better than I expected. Possibly better than the stainless. Both suited the top much more convincingly than the chunky oak block.
Installing inserts without splitting the layers
Attaching the base created one final opportunity to ruin the project.
Normally, I would thread inserts into appropriately sized holes in wood. Here, I worried that driving an insert into the laminate could wedge the aluminum and denim apart.
Rather than asking the layers to resist that installation pressure, I routed holes larger than the inserts’ outside diameter. Then I set the inserts into small pockets of epoxy.
That let the epoxy secure the inserts without forcing their external threads into the laminate. It avoided the particular splitting risk I was concerned about, although it was not a substitute for long-term testing of the material itself.
The Finished Table, and the Question That Remains
The finished top has bright, winding aluminum lines against black denim, with a circular pattern created by the raised form underneath. The rounded edge reveals the layers in a different way from the face.
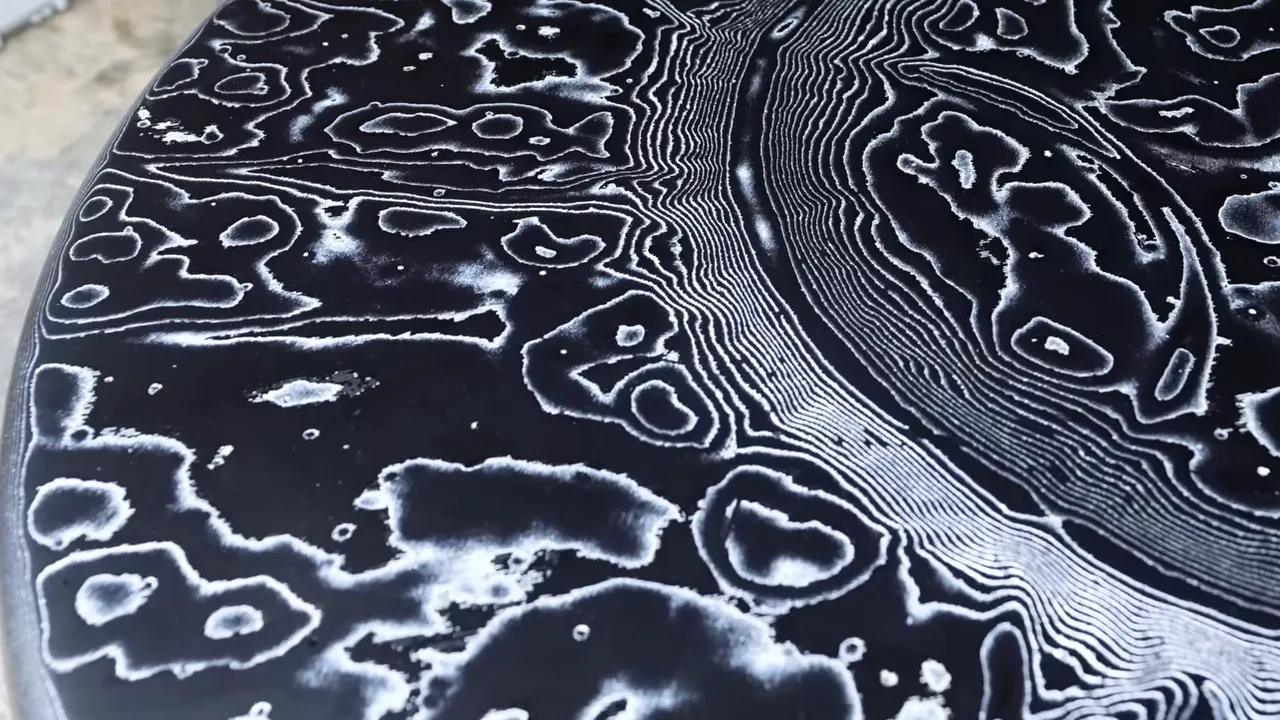
At completion, I offered the buyer a choice between the black and stainless-look bases. The description for the finished Foiled coffee table now marks it as sold, which answers the market-demand question better than my previous denim experiment had.
It does not mean every design decision was right, or that a short build can establish years of durability. I felt confident in the finished piece, but that is different from having years of evidence.
What I do not want is praise simply because the process was difficult. Technical effort and good design are not the same thing. I can disappear a long way into an experiment if nobody points out that the thing at the end is not actually attractive.
This project needed patience, a gentler surfacing method, and the willingness to throw out a base I had already spent considerable time making. It also needed room to fail.
That is the useful part of having the freedom to make terrible art. Not every experiment becomes something worth keeping. But occasionally, the strange idea survives long enough to become a finished piece.
The Business Side of Creative Freedom
The more practical alternative to funding experimental furniture with wealthy parents is building a business that gives you room to try things.
Four friends and I created The Creator Course to share what we have learned about building YouTube channels. It contains five sections and 39 short chapters covering getting started, common myths and mistakes, and working with brands.
The focus is on avoiding the learning curve we went through, including how presentation and an unnecessarily drawn-out ending can hurt retention. The course was offered with a 30-day money-back guarantee. Any current pricing or promotions are listed on the course website.
|


