A comment informed me that there are other woods besides walnut. Apparently, if I stopped copying everyone else and added some color, I could sell a table for ten times as much as one of my regular, boring pieces.
Normally, that earns a moderately sarcastic reply and a spot in my Instagram stories. But this one bothered me, mostly because there was a reasonable point buried underneath it. I do use a lot of walnut. And like most people making furniture, plenty of my ideas start with something I have seen somewhere else.
So I decided to build two end tables: one in spectacular natural walnut, and one in quilted maple dyed an electric, guitar-inspired blue. Same effort. Same commitment to making each one as good as I could. Then I would auction them separately, with 100% of the proceeds going to Make-A-Wish.
I was skeptical about the ten-times claim. But with the money going to charity, I genuinely hoped the blue table would prove me wrong.
Leftover Wood, Not Scrap Wood
Both tables started with wood left over from larger projects. That does not make this a scrapwood build, unless your scrap pile also contains some of the nicest lumber you have ever owned.
The walnut came from the same slab I used for my $118,000 coffee table project. It is Bastogne walnut, and it is hands down some of the most beautiful walnut I have worked with. The top, stem, and base of this little table would all come from that slab.
I also planned to contact the coffee table’s owner about the auction. A matching end table seemed like a reasonable thing to mention to someone who already owned the much larger version, especially if it helped raise more money.
The blue table was not getting the discount treatment, either. I used highly figured quilted maple throughout. That is the material you see on high-end electric guitars, except those often use a relatively thin figured top. Here, the base, stem, and tabletop were all getting the good stuff.
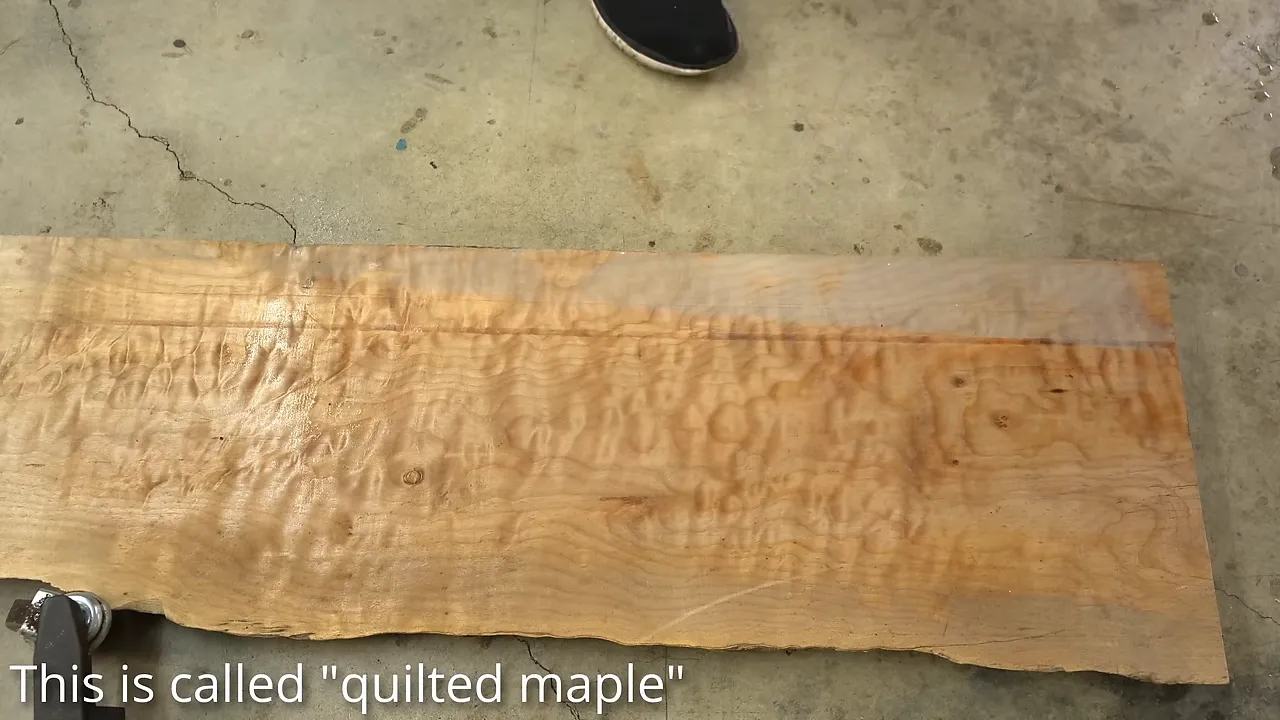
The figure matters because the goal was not simply to make a wooden table blue. I wanted that color to work with the wood’s natural pattern, the way a really good guitar finish does.
Cutting Round Tops, With a Brief Math Problem
The two builds followed essentially the same construction process. I milled the stock, glued up the pieces that needed more width or thickness, and prepared the round tops and bases.
For the tabletops, I tried a circle-cutting setup on my router table. A small pivot pin located the center of the blank, allowing the wood to rotate around a fixed point while the router cut a circular groove underneath.
The top was supposed to be 23 inches across, so I needed an 11 1/2-inch radius. Naturally, I initially marked 12 1/2 inches, because apparently the first challenge in this woodworking project was dividing by two.
Once I corrected that, the router bit landed where it belonged: underneath the wood rather than awkwardly outside it.
I drilled a 1/8-inch pivot hole and used part of a 16-penny nail as the pin. After routing the circle, I removed the waste on the bandsaw, staying close to the routed boundary, and used a bearing-guided flush-trim bit to clean up the remaining edge.
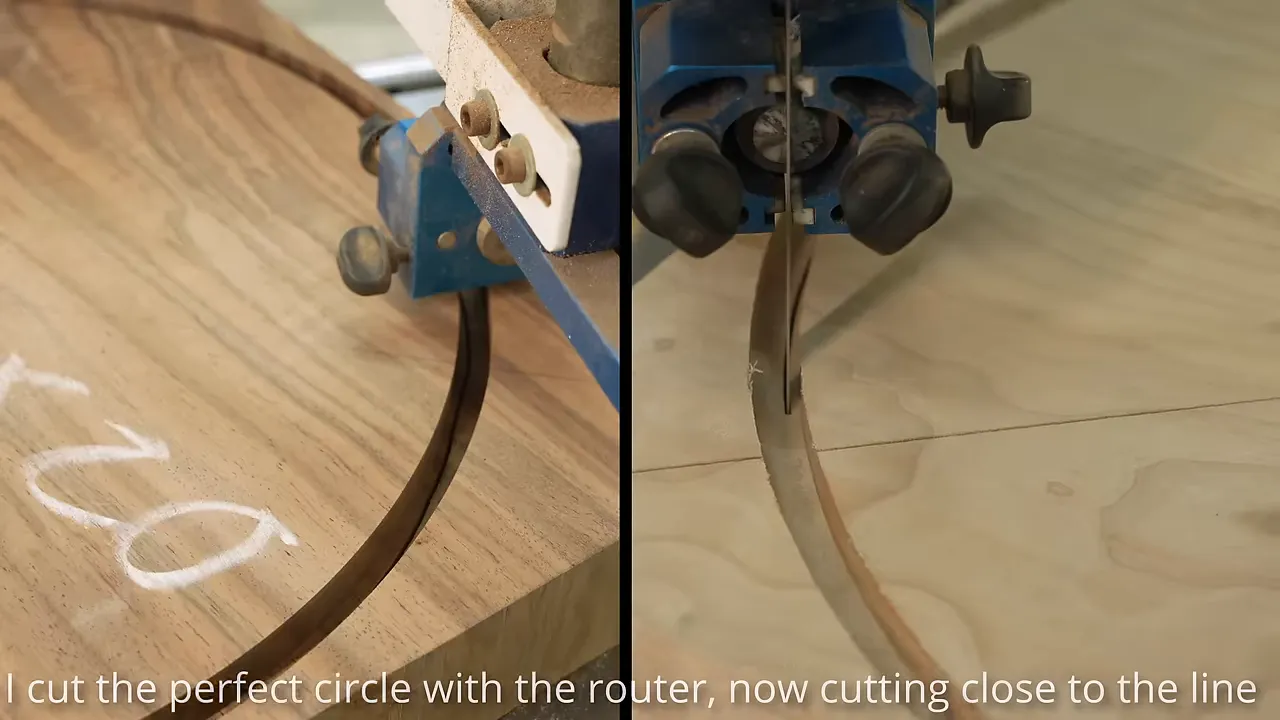
This was an experimental setup, not a blanket recommendation. It seemed reasonable to me at the time, but I was openly questioning whether I had overlooked a safety issue. A method working in my shop is not the same thing as a method being appropriate for everyone else’s equipment or experience.
Building One Fixed, Sculpted Form
I usually make a tabletop that can come off its base. These would be different. I wanted the top, stem, and base permanently joined, then carved into a continuous-looking form.
That does not mean each table was carved from one enormous solid block. The parts were assembled first. I used a single Domino loose tenon and epoxy at each stem connection, then clamped the assemblies while the adhesive cured.
The idea was to carve through those blocky intersections until the separate components looked like they belonged to one flowing shape.
At this stage, they looked like toadstools. Not subtly. The exact thing I did not want them to resemble was the only thing they resembled.
Scott, my video guy and favorite employee, offered a carefully restrained assessment. I appreciated his tone about as much as you might expect.
This is also where expensive tools do not automatically make you a great woodworker. I think of myself as a fairly average woodworker with some decidedly above-average equipment. Basically, I am the guy with $6,000 custom golf clubs and a 19 handicap. I like tools, and I will accept all the help I can get.
Power Carving: Start at the Transitions
I have made several power-carved table bases, and each one has taught me something. I am very happy with the way the more recent pieces have turned out, but I still think an experienced sculptor could take this kind of furniture much further.
There are people who can look at a log and carve an octopus out of it. I look at a chunky table assembly and hope I can make it stop looking like a mushroom. Those are different skill sets.
That is why I think artists with real carving experience should explore sculpted furniture. There is room for more imagination here, and I have already found a market for these pieces with my considerably more limited artistic range.
Establish the curves at both ends first
The most useful carving lesson from this build is simple: start where the stem meets the base and where it meets the underside of the top.
If you begin by shaping the middle of the stem, it becomes difficult to carry that curve naturally into the wider surfaces at either end. Establishing those transitions first gives you something to connect. The middle can then flow between two shapes that already make sense.
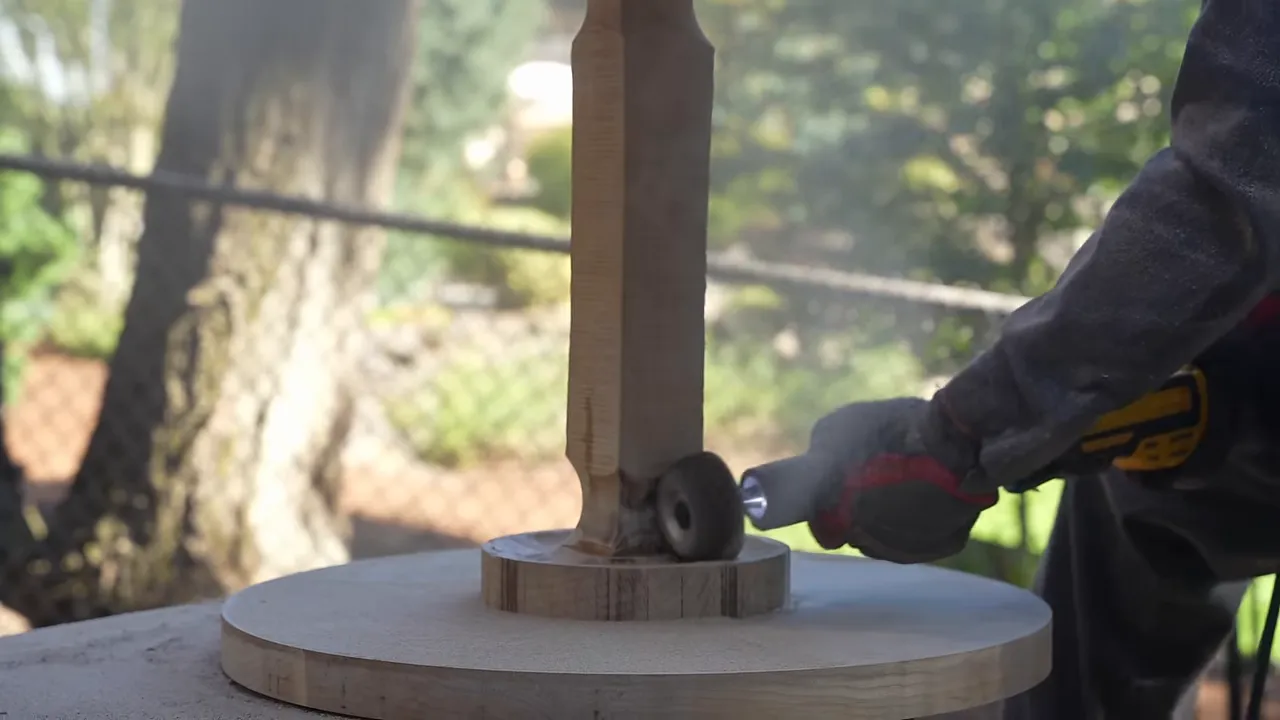
I used power-carving tools to remove the bulk of the material and gradually blend the joints. The work took about three hours per piece before moving into the finer cleanup.
The part I could not carve my way out of
My biggest concern was wood movement.
Removing a lot of material from one side of a board can allow it to warp or twist. When thicknessing stock, alternating material removal between faces is one way to avoid doing all the work on just one side.
These tables did not give me that option. I was taking a substantial amount off the underside of each top while leaving the upper surface largely alone. The bases had a similar imbalance.
That was one reason I had avoided this construction approach before. Once everything was assembled and carved, I did not have an easy reset button. I had to hope the wood was stable enough to stay flat.
Fortunately, it was. Both tops and both bases stayed flat through the shaping process. That was a very welcome result, not something I considered guaranteed.
Refining the Shape Without Guessing at Every Edge
Power carving gets the shape close, but it also leaves lumps and high spots. A spokeshave is one of my favorite tools for cleaning those up.
I use it to take actual shavings and improve the surface. There is another approach popular on social media where you remove half an eyelash of wood, stand back thoughtfully, and admire your contribution to the history of sculpture. I prefer making the lump go away.
I also used a rasp to refine areas around the transitions. But the biggest improvement to my process came from a tool I probably should have been using more often all along: a marking gauge.
Use a reference line for a consistent rim
On earlier sculpted pieces, I had struggled to keep the transition around an edge consistent. Eyeballing a curve is one thing. Eyeballing the same edge thickness around an entire tabletop is another.
I set the marking gauge to the thickness I wanted to preserve and scribed a line around the perimeter. That gave me a physical reference instead of several feet of educated guessing.
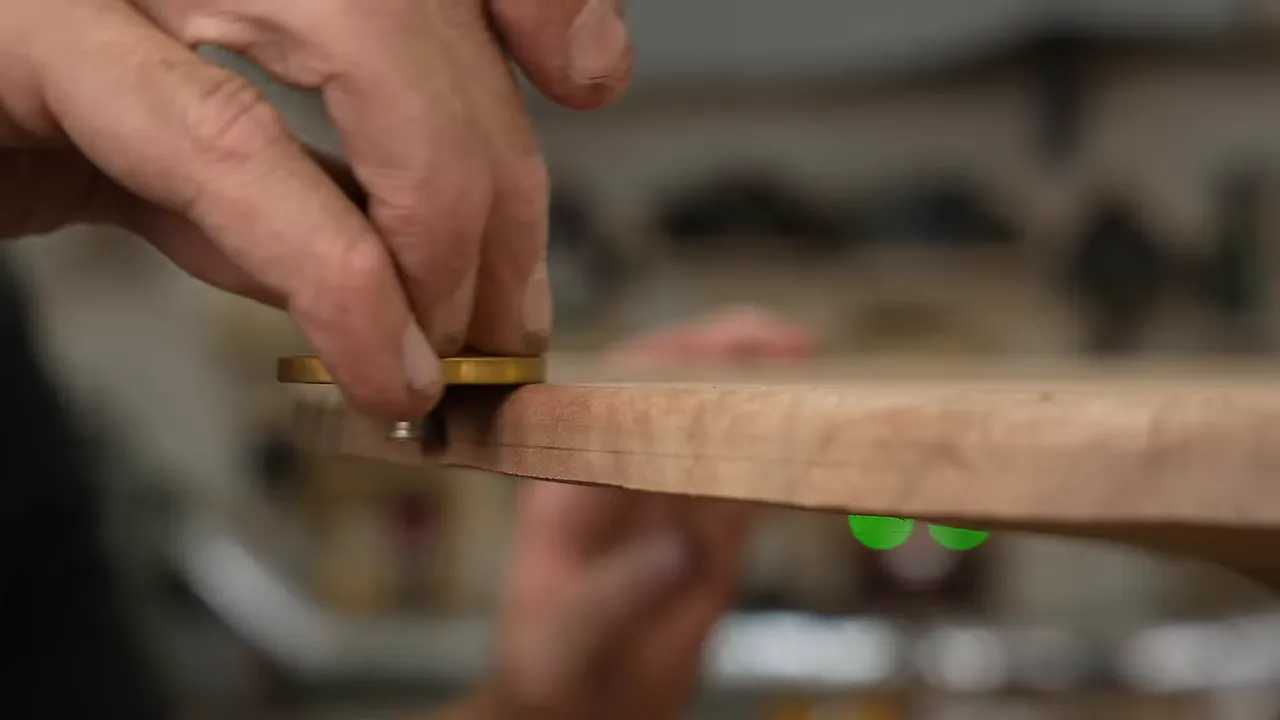
From there, I could carve close to the line and leave a little material for sanding. The important part was not making one section look good. It was making the whole edge look intentional.
Yes, there was still a lot of sanding
The carving tools and hand tools reduced the cleanup, but they did not eliminate it. I spent roughly a day and a half sanding.
I started with 40-grit abrasive to remove the carving marks, then worked up to about 220 grit. A small sander helped around the curved transitions, while the larger surfaces were more straightforward.
There is no particularly glamorous way to describe that amount of sanding. It was a lot of sanding.
Repairing Two Small Holes in the Walnut
The walnut top had two small holes left from the supplier’s moisture-checking process. I knew they would need attention, and I wanted a repair that blended with the surrounding wood rather than just filling the void.
Previously, I had cut a tiny piece of matching wood and hand-sanded it into a rough cone. Someone suggested a much better approach: chuck the little piece into a drill and rotate it against a sander.
That produces a more even tapered plug than I could comfortably shape by hand.
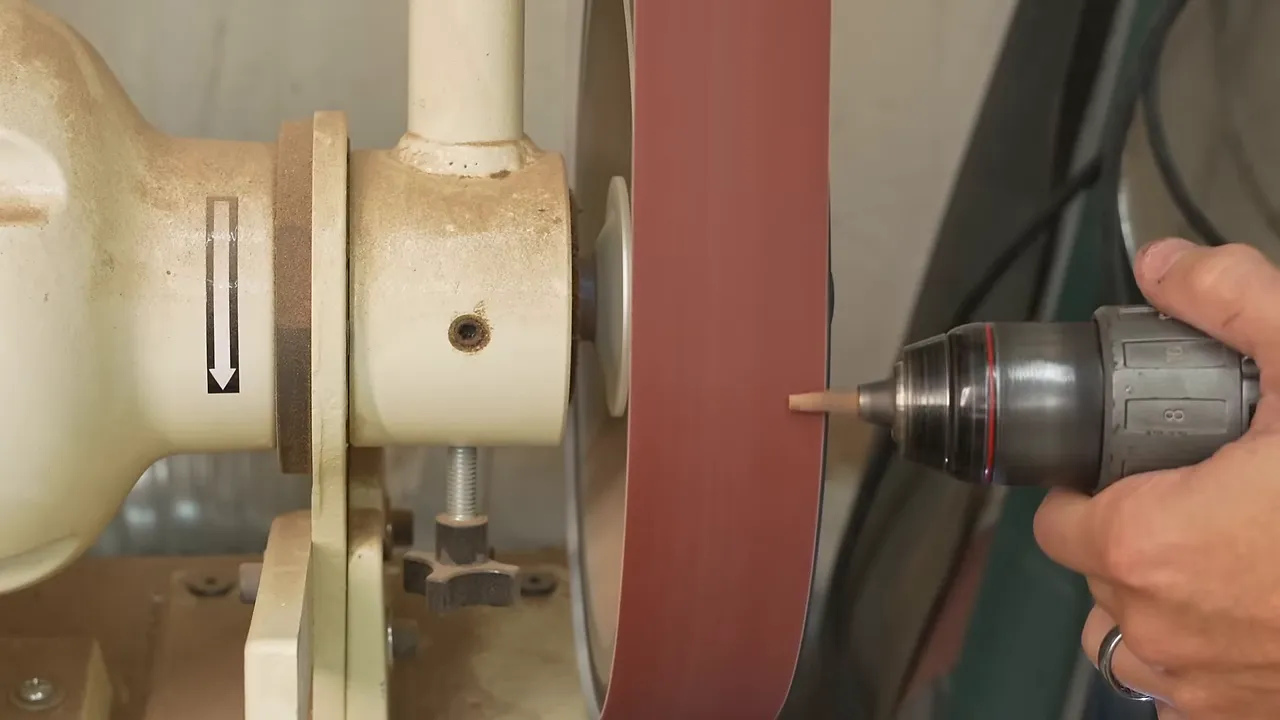
The repair went through a few stages:
- Select a small piece of wood with a reasonably close color match.
- Shape it into a tapered plug and fit it to the hole.
- Add a little adhesive and tap it into place.
- Allow the adhesive to cure, then trim the protruding wood.
- Refine the repair with a rasp and sander.
I used wood glue for one plug and super glue for the repair at the edge, where clamping was difficult. The super glue left a slightly more noticeable mark.
After leaving the repairs overnight, I trimmed them with a flush-cut saw. Normally, I put a playing card or some painter’s tape under the saw to protect the surface. This time I worked carefully without it and got away without scratching the top.
The plugs fit well enough, but the color match was not perfect. On a slab with this much variation, selecting the right little piece of wood is at least as important as making the plug fit.
A Recessed Base That Sits on a Narrow Ring
I like to hollow the underside of these table bases so the table rests on a narrow perimeter ring rather than one large, flat disk.
This is not an idea I invented. Look under a cereal bowl, a bucket, or plenty of other objects designed to sit on a flat surface. A smaller contact area is easier to get sitting properly than an entire broad face.
For these tables, I used a carving disc to remove the center. It left a textured surface that looked like a deliberate handmade detail, even though the main reason for the recess was functional.
The disc was a little slow and made a mess, but the result was clean. I checked across the underside with a straightedge, identified the remaining high spots, and carved those down so the surrounding ring could sit flat.
Two Very Different Finishing Jobs
Until this point, the tables had shared most of their process. Finishing was where they became completely different projects.
Walnut: Let the wood do the work
For the walnut, I used an LED-cured hardwax oil. I applied it with a white pad, much as I would apply other hardwax oil finishes.
The oil brought out the grain and warm color without changing the basic identity of the wood. After application, the compatible curing light cured the finish almost instantly as it passed over the surface.
I love this technology. It is a very different experience from applying a finish and then waiting for it to cure on its own schedule.
Maple: Go very, very blue
The maple started with blue TransTint dye mixed into water. I had used color before, just not really on a furniture piece like this.
I brushed dye into the textured underside because it needed to reach into all those little grooves. On the smoother surfaces, I could work it across the wood with a cloth.
Using water gave me more working time than alcohol or acetone. That extra time helped spread the dye without the lap marks I had encountered with faster-drying mixtures.
The first application was shockingly blue. At that point, I was really hoping the person who suggested this knew something I did not.
Adding the blue-to-turquoise fade
I did not want the tabletop to remain one solid shade. After sanding back some of the blue, I added aqua dye to create a transition from a deeper blue perimeter into a brighter turquoise center.
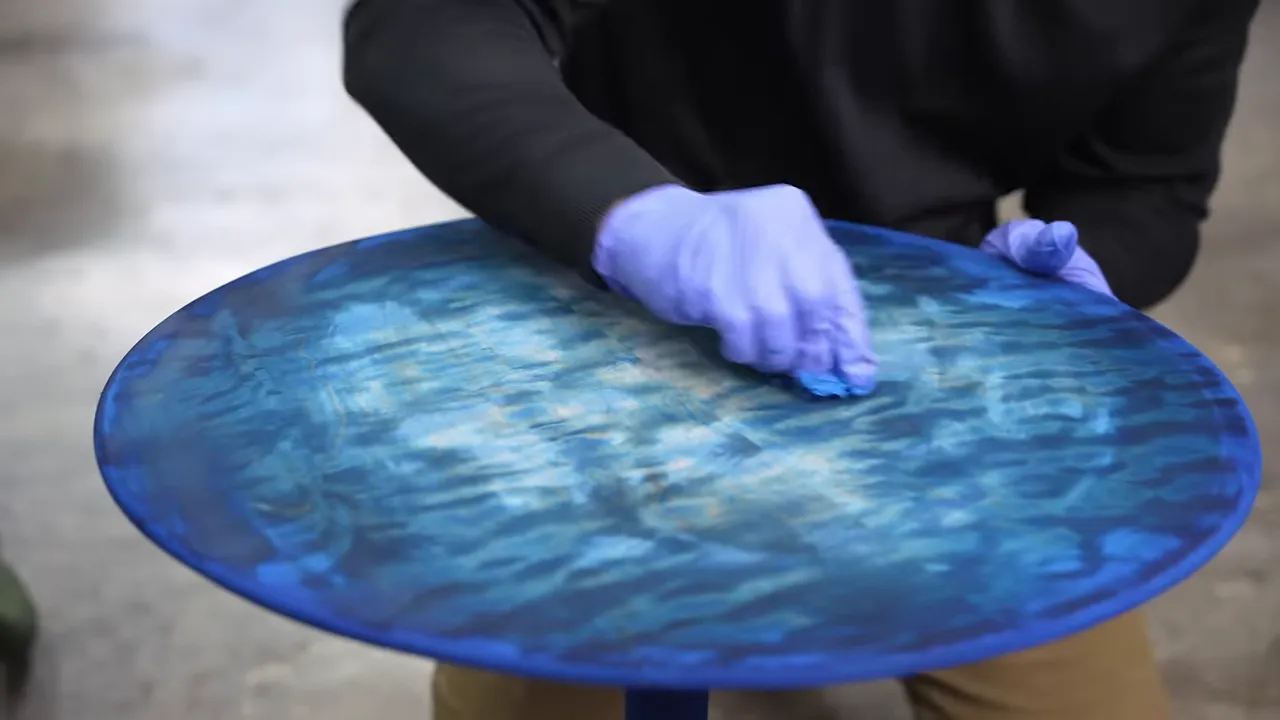
The process took time, but it was also fun. One of the useful things about working with dye on this piece was that I could sand it back and apply another layer when I wanted to change the result.
That made it less of a single irreversible color decision and more of a process of adjusting the pattern until I liked it.
A spray finish and a lot of buffing
The blue table received a 2K acrylic spray finish. I liked the LED-cured oil on the walnut, but it would not give the blue table the look I wanted.
The spray finish was considerably more work. My spraying was not perfect, so buffing became an important part of getting the surface where I wanted it.
I worked over the base, stem, underside, and top with a buffer and compound. The base polished up especially well, with reflections that made the sculpted form much more obvious.
After the finishing and polishing work, I also applied N3 Nano to both tables. The blue table was cleaned with its prep spray first to remove the polishing residue before that final treatment.
The Business Behind the Shop
I describe myself as an average woodworker partly because woodworking is not the only skill behind this business. Social media has been a huge part of it.
I started publishing online when I was trying to sell tables out of my garage. The original goal was simply to find a few more customers. It ended up changing the direction of the entire business.
That experience also led to the Creator Course, which I developed with Brad from Fix This Build That, Sam from DIY Huntress, John from Lincoln Street Woodworks, and Chris from Foureyes Furniture.
The course contains more than four hours of material on building an audience, holding people’s attention, avoiding common mistakes, and generating income from social media. The goal was to help people work toward a $1,000-per-month side business or beyond, not to promise that buying a course guarantees that outcome.
There was another side project during this build, too. Scott asked what had happened to my fire-and-epoxy table, the burnt-wood piece from my most popular project, which had reached 30 million YouTube views. The answer was that it was sitting in a closet at my house.
That seemed like a poor use of a table someone else might really enjoy. I rebuffed and polished it, then announced a worldwide giveaway with shipping included. Details for that original promotion are on the fire-and-epoxy table giveaway page.
Who Would Actually Buy These End Tables?
The finished pieces share a basic shape, but they do not feel like they belong to the same person.
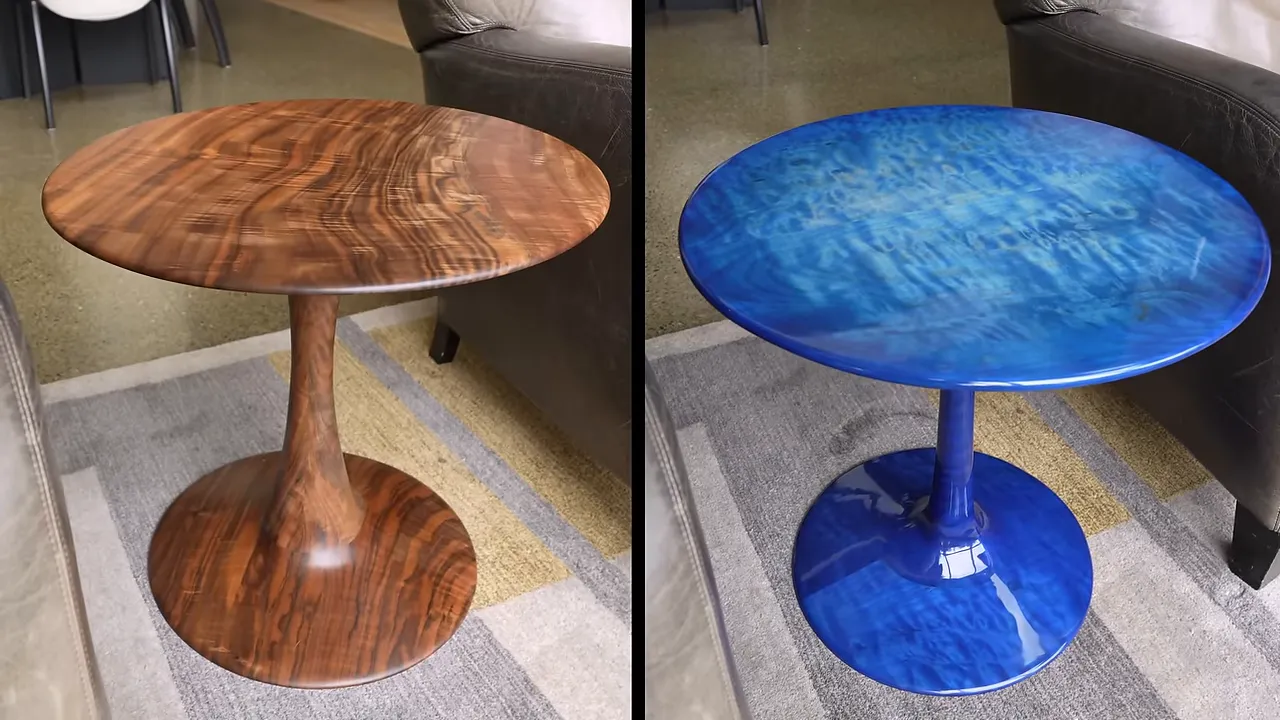
The walnut table belongs in my imaginary shipping tycoon’s mansion. He is sitting in a dark room, illuminated by a fireplace, plotting revenge against another shipping tycoon. Eventually he becomes so angry that he throws his brandy into the fire.
Before that happens, the brandy is sitting on the walnut table.
The blue one belongs somewhere else entirely. In my head, it goes into a coastal art gallery, a music store, or a home owned by someone who wants a piece of furniture to be unapologetically colorful.
Those are obviously imaginary customers, not demographic research. But the difference is real: the walnut emphasizes the material’s natural warmth, while the blue maple turns the figure into something closer to a glossy electric guitar.
And the blue table turned out considerably cooler than I expected. The turquoise fade gave it depth, the quilted figure stayed visible, and the polished finish made the whole thing pop.
The Auction Was the Test, Not My Personal Preference
The plan was to auction each table separately and see which generated more money for Make-A-Wish. Every dollar of the proceeds would go to the charity. I was not recouping the material costs or paying myself back for the work.
I also moved the auction to my own website after an earlier experience with a nonpaying eBay bidder. That person had placed a bid of roughly $12,000 as a joke, then explained that they did not actually have the money to buy the table.
The conversation somehow continued into an attempt at casual friendship. I declined that additional service.
For this auction, we added safeguards intended to reduce fake bids. The point was to raise real money, not collect an impressive number that disappeared when payment was due.
There was no final auction result at the end of the build. The ten-times claim was still a claim, not something I had proved or disproved.
But the experiment had already done something useful. It pushed me into a finish I would not normally choose, gave me a better process for shaping consistent edges, and left me with two tables I was proud to put up for sale.
I still love the walnut. I also genuinely like the blue one. If stepping outside my usual approach helped raise more money for charity, being wrong would have been a pretty good outcome.
|


