I had a walnut slab sitting in my shop for about seven years, and I finally decided to turn it into something a lot of people would absolutely hate.
Not because I wanted to make an ugly desk. I wanted to try overlapping walnut patches, a design I had admired for years. Apparently, cutting squares into a perfectly imperfect slab is enough to upset quite a few people. Even my wife asked why I had done it.
My answer was not especially sophisticated: I thought it would look cool.
Getting there involved years of drying problems, roughly ten hours of inlay work, a damaged router bit, a small fire, and my first set of walnut wishbone table legs. So whether the patchwork is your thing or not, there is quite a bit to learn from this one.
The Craigslist Walnut Deal That Wasn’t Such a Deal
I bought this slab and another one for $500 total. They were roughly seven feet long and 45 inches wide, which seemed like an incredible deal at the time.
The seller in Bend, Oregon, was memorable for reasons that had very little to do with lumber. On another occasion, he actually threatened my dog with a gun. My dog is an absolute sweetheart, but that is probably enough of that story for now.
The woodworking problem was that the slabs had been dried in the hot Eastern Oregon sun. They had developed drying problems, including case hardening, and still had moisture inside. After three years in my shop, they were not ready to become furniture.
I eventually took them to Goby Walnut, where getting them usable required repeated rounds of kiln drying and surfacing. Surface the slab, put it back in the kiln, and repeat. It took about six years from the original purchase before I could actually use this wood.
The price of a slab is not the same thing as the cost of usable lumber. Drying, flattening, lost thickness, and years of storage can make a bargain considerably less impressive.
If you want a deeper explanation of moisture and drying stresses, the USDA Forest Products Laboratory’s Wood Handbook is a useful technical reference. A slab spending years in a shop does not, by itself, prove that its drying problems have been resolved.
Stabilizing the Underside With Bow Tie Inlays
Before doing anything controversial to the top, I needed to address some cracks underneath. This was not the worst slab I have worked with, but it still needed attention.
I made three or four bow tie inlays to stabilize those cracks. For this, I used my own bow tie jig.
I did not invent routing bow ties with a template. I just disliked the shapes of most commercial versions. They always seemed clunky and blocky, so I designed a shape that looked better to me. That is the highly scientific basis for the design.
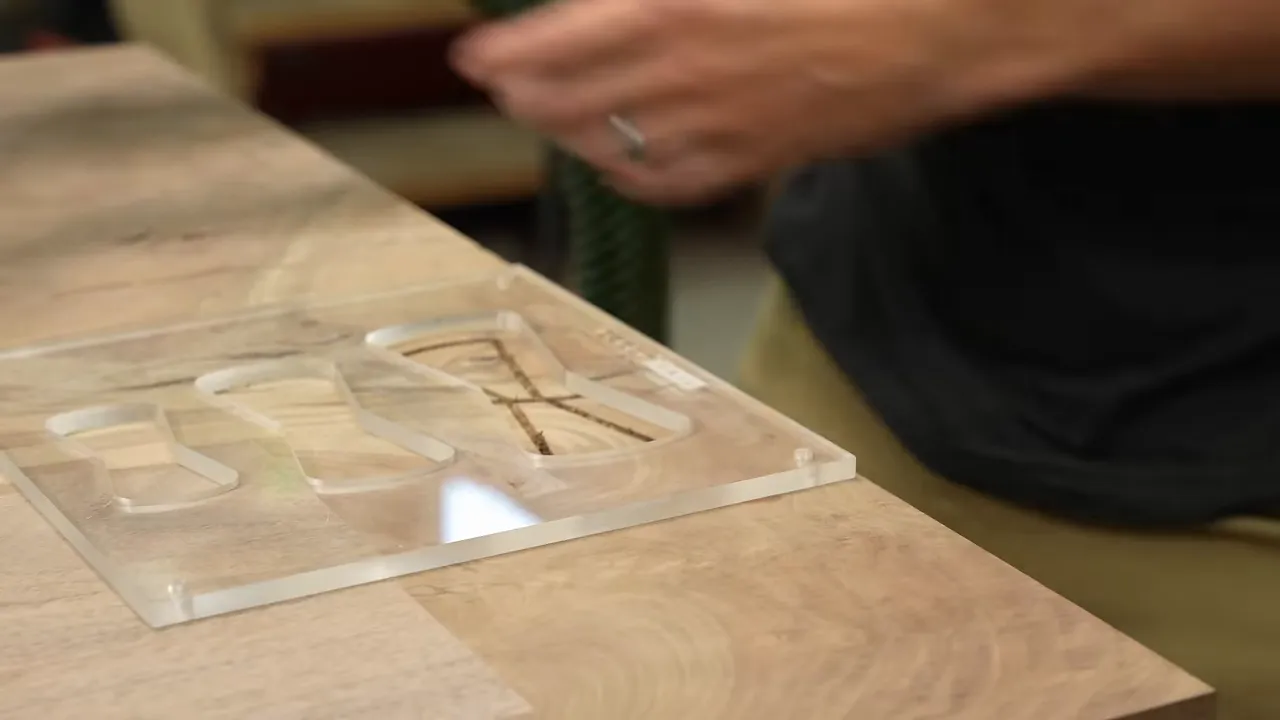
The advantage is repeatability. A router, the appropriate bushings, and a matching template make it much easier to produce an inlay and recess that fit together accurately. There is still setup and cleanup involved, but you are not relying entirely on your ability to freehand the same shape twice.
After routing the pockets, I cleaned them up, glued in the bow ties, trimmed the excess, and sanded them flush.
A Small Detour Into Making Better Tools
The response to that jig gave me the confidence to try another product I had wanted to make: a solid brass Blacktail Studio hammer.
I worked with DFM Toolworks on the brass head. Since I do not turn wood, we brought in Hoffman Blacksmithing to make the handles. If that name sounds familiar, he was a Forged in Fire champion.
The first production run was limited. For me, both projects came from the same place: looking at an existing tool and wondering whether we could make it a little better, and maybe a little cooler at the same time.
Designing the Overlapping Walnut Patchwork
I first came across this approach through COC Design on Instagram. I do not believe they invented patchwork inlays, but they have done an excellent job making them part of their signature style.
I had tried the idea on smaller pieces. This was my first attempt at anything this large.
To figure out the layout, I moved small plywood and paper shapes around the slab before committing to any cuts. That let me judge the proportions and overlap without discovering halfway through that I had created a very expensive checkerboard.
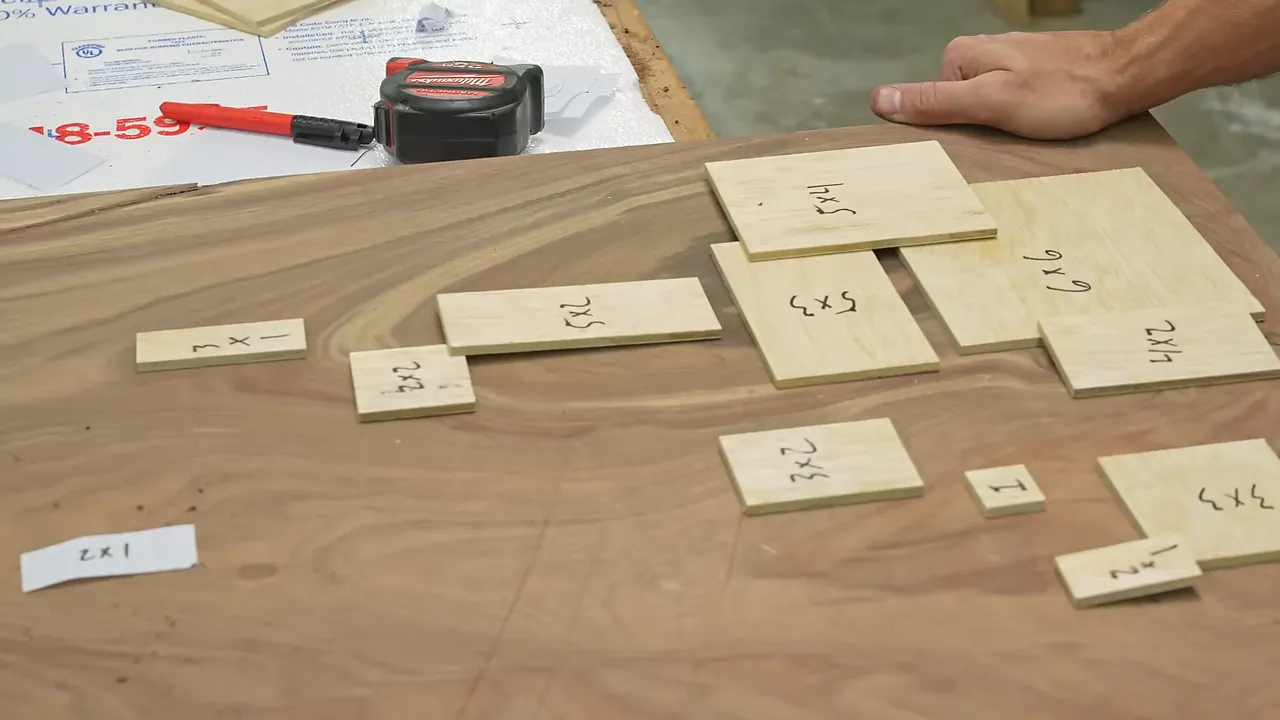
I set a few rules:
- All patch edges would remain parallel or perpendicular to one another.
- Nothing would be tilted at random angles.
- Some patches would overlap to make the arrangement more interesting.
- The patches would address defects while also becoming a deliberate design feature.
The overlap was the detail that made the process complicated. I could not simply route every pocket, glue everything in, and call it done. The design required four stages, with later recesses cutting into patches installed during earlier stages.
The apparent layers had to be built in an actual sequence. That meant routing, fitting, gluing, curing, flattening, and then starting again.
Routing the Recesses, With Two Lessons I Would Rather Not Repeat
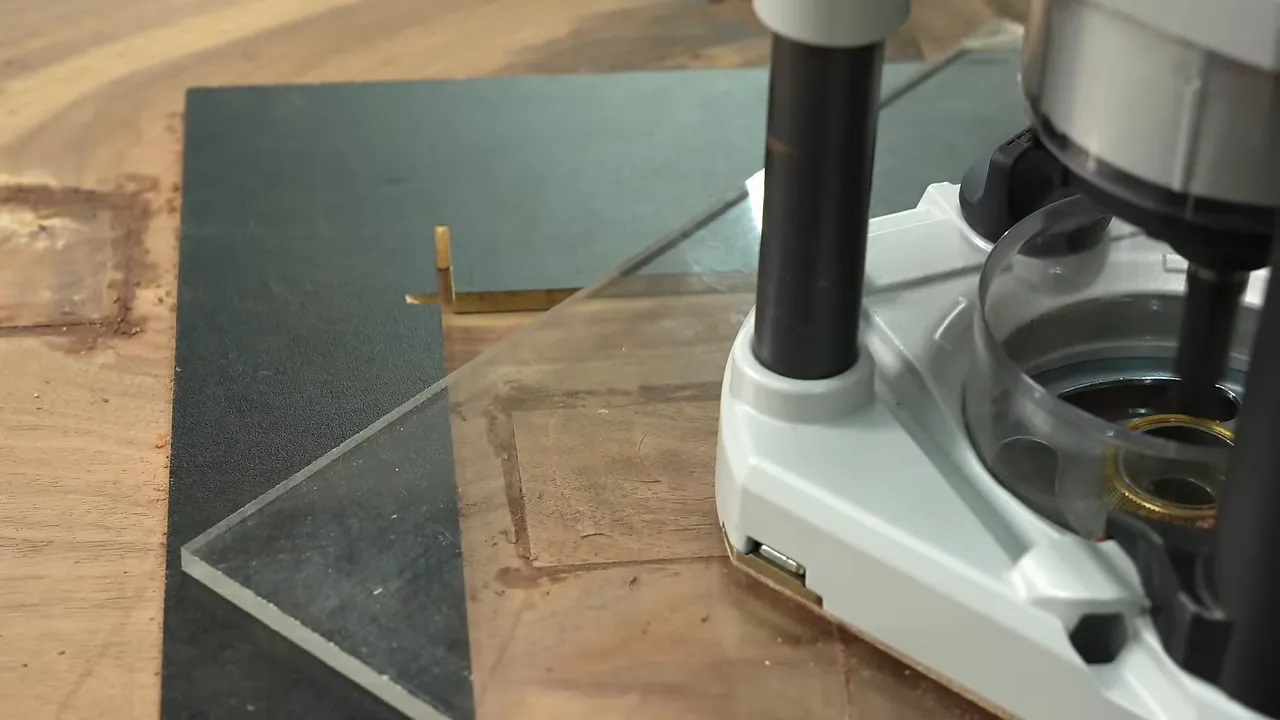
I made square acrylic templates from inexpensive pieces I bought at TAP Plastics for about a dollar each. I also added an acrylic auxiliary base to my large Festool router so I could use a brass guide bushing.
The bushing followed the inside edge of each template, giving me straight, consistent pocket walls. After setting the recess depth, I could route the waste and return later to square the corners.
That was the plan, anyway.
The Guide Bushing Came Loose
During the first round of routing, the brass bushing came loose and contacted the bit. The noise was bad enough that I initially thought the router had blown up.
The router survived. The nearly new bit did not come out nearly as well.
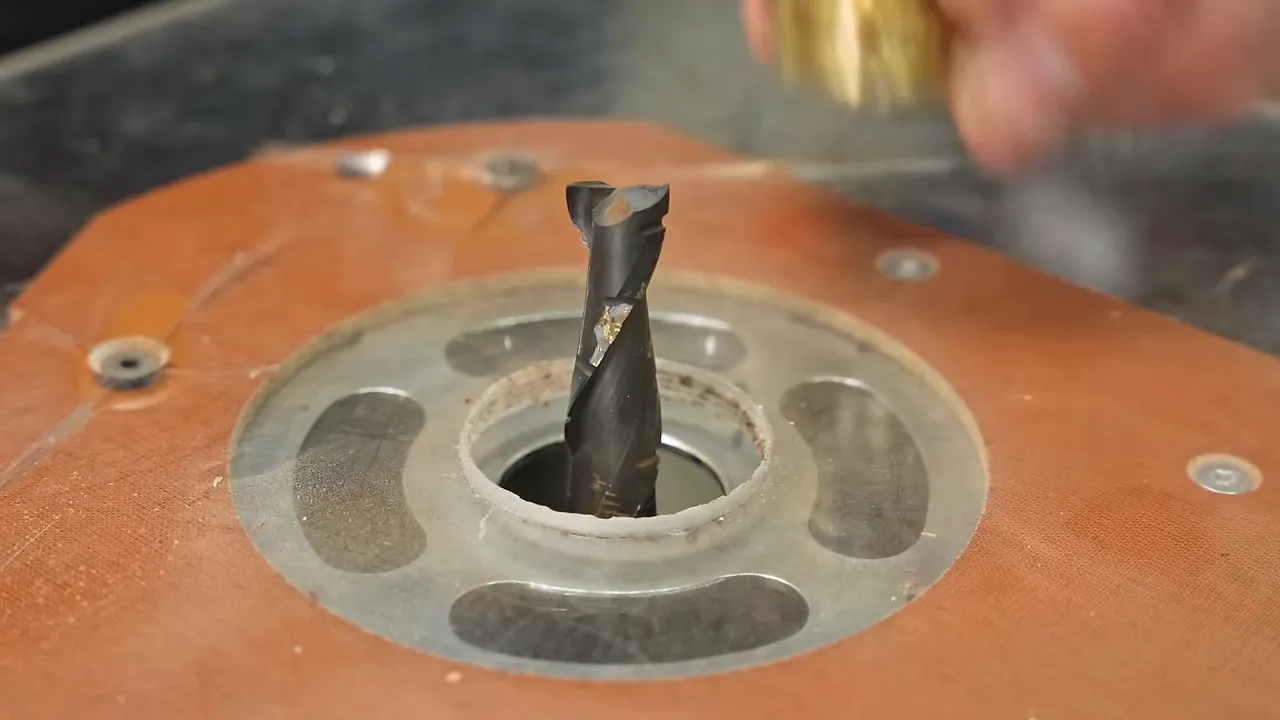
It was a good reminder that the guide bushing is not an accessory you install and forget. Its security matters just as much as the rest of the routing setup. If something suddenly sounds wrong, stop and inspect it.
A Dull Bit Made Things Worse
I ordered replacement bits, but they were several days away. Rather than wait, I put in an old, extremely dull bit.
It routed slowly, made the work frustrating, and eventually caused a small fire in the pocket. That was a new experience for me, and not one I needed.
Continuing with a badly dull bit was the wrong decision. Saving a little time waiting for a delivery is not worth trading cutting performance for excessive heat and a fire risk.
Turning Rounded Pockets Into Square Recesses
The half-inch spiral bit cut straight walls, but it left a quarter-inch radius in every inside corner. Square patches were not going to fit until those corners were cleaned up.
I used a Narex corner chisel that cost about $30. A regular chisel would also work, but the corner chisel was handy when the same operation needed repeating over and over.
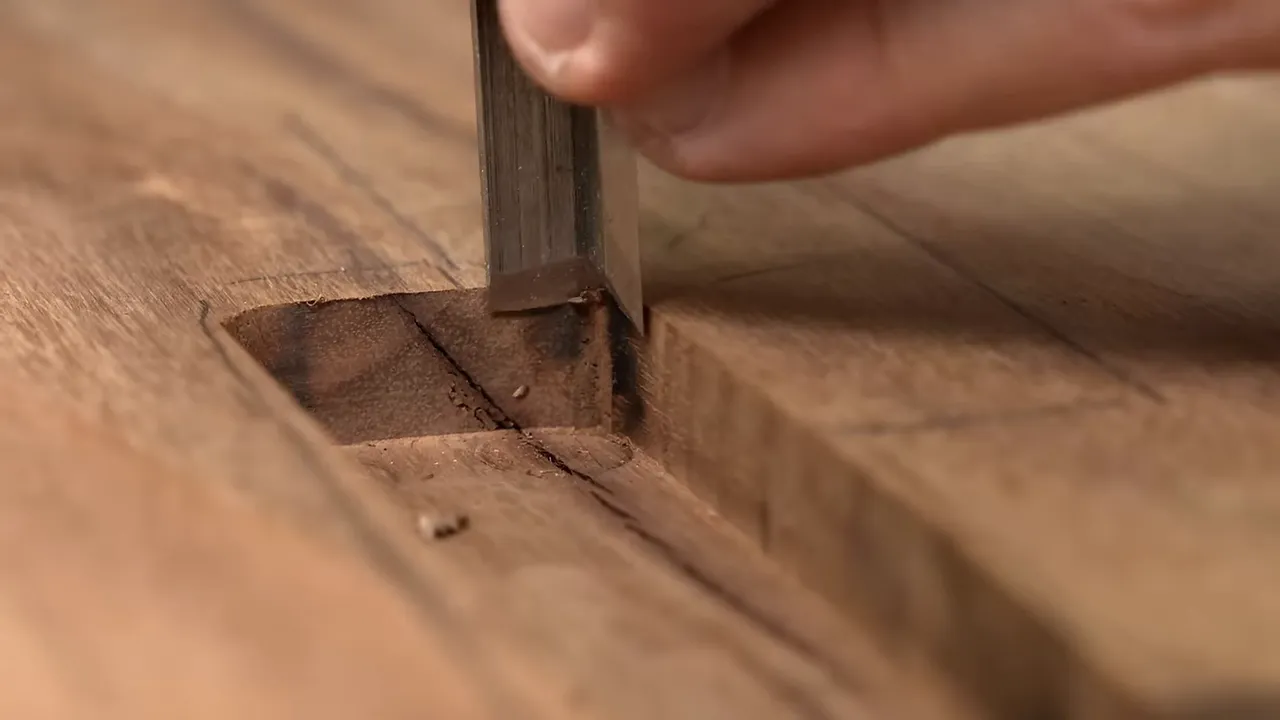
At one edge, I also left a thin sliver of walnut to remove with my Japanese chisels. Was all of that handwork strictly necessary? No. Did I enjoy those clean little shavings? Absolutely.
Fitting the Patches Without a CNC
I cut the walnut patches on the table saw rather than making matching templates for every size.
That sounds straightforward until you start fitting them. One piece would be slightly too large. I would make a tiny adjustment, try again, and occasionally discover that I had now made it too small.
There were plenty of scraps.
A CNC would be an obvious alternative. I do not own one, and I do not know how to use one. For this project, the table saw also seemed faster than fabricating a full set of matching patch-cutting jigs, even though the fitting was extremely time-consuming.
The basic sequence was:
- Measure the cleaned-up recess.
- Cut a patch slightly oversized.
- Trim it incrementally and test the fit.
- Apply wood glue and seat the patch.
- Clamp where needed and allow the glue to cure.
- Flatten the patch before routing any overlapping recess.
I allowed roughly half a day to a full day for the first layer to cure before continuing. Across the project, I estimated about ten hours went into the inlays alone.
I also used filler around some patch perimeters, blending darker and medium tones rather than leaving one obvious light-colored outline.
Flattening the Patches Without Losing My Mind
I started by hand-planing the proud patches. After enough repetition, I decided I was not going to do that for every single one.
I made a simple flattening jig with a broad frame around the patch area. The router’s auxiliary base rode on that frame while the bit trimmed the raised inlays down. That let me flatten a group of patches before moving on to the next overlapping stage.
Why Making Something People Hate Can Be Worth Trying
The progress photos received a surprisingly strong reaction. People could not understand why I would cut up the slab this way.
I understand preferring an untouched walnut top. I like those too. But this slab already had cracks, knot holes, and voids. It was never going to become a flawless natural surface without some kind of intervention.
More importantly, I wanted to make something different.
If you build high-quality furniture but struggle to find customers or charge the prices you hoped for, here is an idea worth testing on a small scale: make something that some people actively dislike.
A restrained, straight-grained white oak dining table is easy to like. It is also easy to forget. That is not an argument against white oak tables. It is an argument for giving people a reason to remember your work.
I have built much of my career around epoxy tables, and plenty of people hate those. The goal is not to win over every person. It is to make something distinctive enough that the right customer really wants it.
A niche audience can be more valuable than universal, lukewarm approval. That is not a business guarantee, and it does not mean every controversial design will sell. It is simply an experiment worth considering.
Building Walnut Wishbone Table Legs
While the first patches cured, I started the legs. This was my first set of walnut wishbone legs, although I had used a similar style in metal for years.
The design came directly from Alex at Flowyline. I love the flowing shape, and this was an opportunity to translate that familiar form into walnut using my wishbone table leg templates.
Glue Up the Blanks Before Shaping
I made approximately 35-degree cuts to join the lower blanks into a shape large enough for the template. The starting angle provided room for the final profile rather than defining the finished outline by itself.
I used wood glue and Domino joinery, along with temporary clamping blocks attached with super glue. Those blocks gave the clamps something useful to pull against. Once the glue cured, I knocked them off.
The acrylic template set defined the components of the wishbone shape. I traced the profiles, rough-cut them at the bandsaw, and then used flush-trim router bits to bring them to the final outline.
Do More Work at the Bandsaw, Less at the Router
I left too much waste outside the line in places. That made the flush-trimming cuts more aggressive than they needed to be.
If I did it again, I would bandsaw closer to the profile before routing. The template controls the finished shape, but it does not make an unnecessarily heavy cut safe.
I used two different flush-trim bits to work through the thickness because I already had them. A suitable longer bit was another option, but there was no need to buy one just to avoid changing bits.
For final assembly, the Domino helped align the components. I treated it primarily as an alignment aid rather than assuming it would provide all the joint strength. I used epoxy for that assembly, clamped everything, then rounded and sanded the legs.
To level the feet, I worked them against sandpaper laid on a flat surface.
The Side Patch I Nearly Skipped
By this point, I was thoroughly tired of patchwork. I may have hated making these inlays more than the people criticizing the design.
Then there was one more crack along the side.
I wanted to fill it with epoxy because that would have been easy. But I had patches everywhere else, and stopping there felt like taking a shortcut right before the finish line.
I routed a recess into the edge, cleaned it up with chisels, fitted another walnut patch, and glued it in.
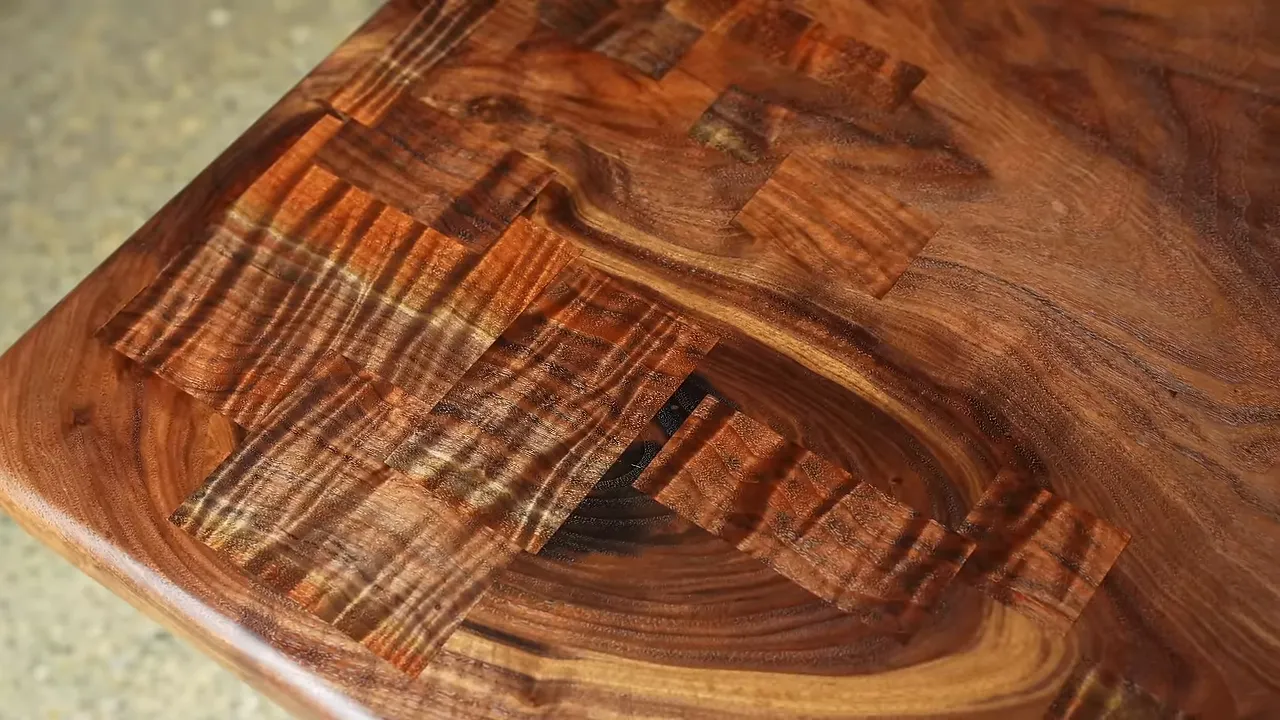
It ended up being one of my favorite parts. Carrying the patchwork onto the edge made the design feel more complete, rather than like a collection of squares applied only to the top.
Mounting the Base and Softening the Desktop
The underside received C-channels to help resist bowing. For the legs, I had mounting plates fabricated, attached them to the walnut bases, and routed matching recesses into the underside of the top.
The final attachment used threaded inserts and machine bolts. The recessed plates kept the mounting hardware neatly integrated into the desk rather than sitting unnecessarily proud of the underside.
My usual preference is for sharp edges, crisp 90-degree corners, and angular chamfers. This desk already felt different, so I went in the opposite direction:
- Desktop corners: a 2½-inch radius.
- Edge treatment: a half-inch roundover.
Those soft edges contrasted with the square patches and tied in with the flowing wishbone legs. COC Design also uses softened edges with patchwork, so that influence may have been sitting in the back of my head.
Blending Walnut Colors Without Hiding the Grain
The patches came from a different tree than the main slab, so matching color was always going to be a challenge.
I generally dislike stain because it can mute the figure and hide the grain I bought the wood for in the first place. My usual preference is Rubio Pure, keeping the walnut as natural-looking as possible.
For this desk, I used a 50/50 blend of Rubio Walnut and the natural, unpigmented finish. That reduced the strength of the Walnut color while helping the different pieces look more cohesive.
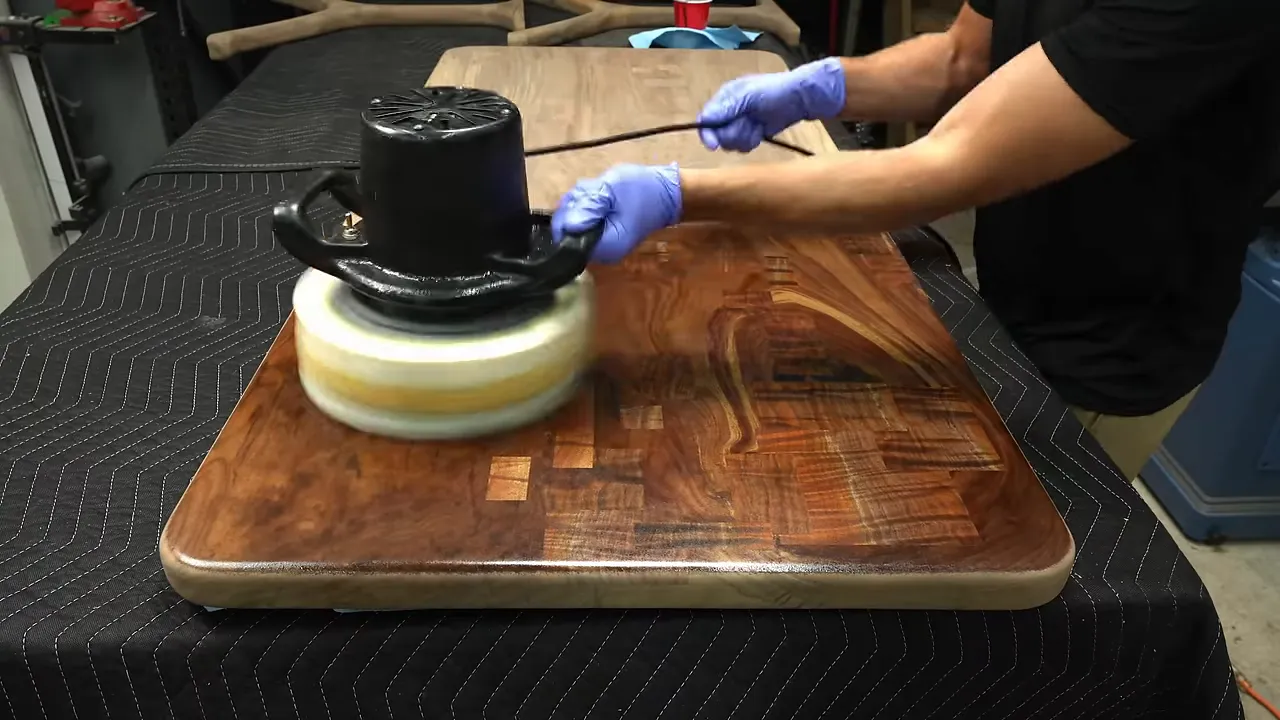
The result evened out the color without making the patches disappear. I used the same blend on the legs.
That distinction matters: I wanted the wood colors to work together, not to pretend every piece came from the same board. The contrast in grain was part of the point.
Adding a Nano Finish for Extra Protection
After the Rubio finishing work, I applied the nano coating I had been helping develop under the Blacktail Studio label, N3 Nano.
I had tried several nano finishes over the previous year and liked them. This sample impressed me enough that I continued working with the company on a version specifically intended for wood and wood finishes.
My own testing included hot sauce, lemon juice, wine, and beer left standing on the surface for 30 minutes. The beer was the worst one in my fridge. There was no reason to waste a good beer in the name of woodworking.
The results impressed me, but I would not call the finish bulletproof. In the beer test, a faint mark was visible immediately after cleanup and dried away in about three minutes. That is a more useful description than pretending nothing can ever affect the surface.
At the time of this build, the coating was still being prepared for release. It added another layer of protection over the finished walnut while keeping the grain and patchwork visible.
A Finished Desk That Doesn’t Need Everyone’s Approval
The finished piece combined overlapping walnut inlays, a patch carried onto the edge, soft desktop corners, and a pair of flowing walnut wishbone bases.
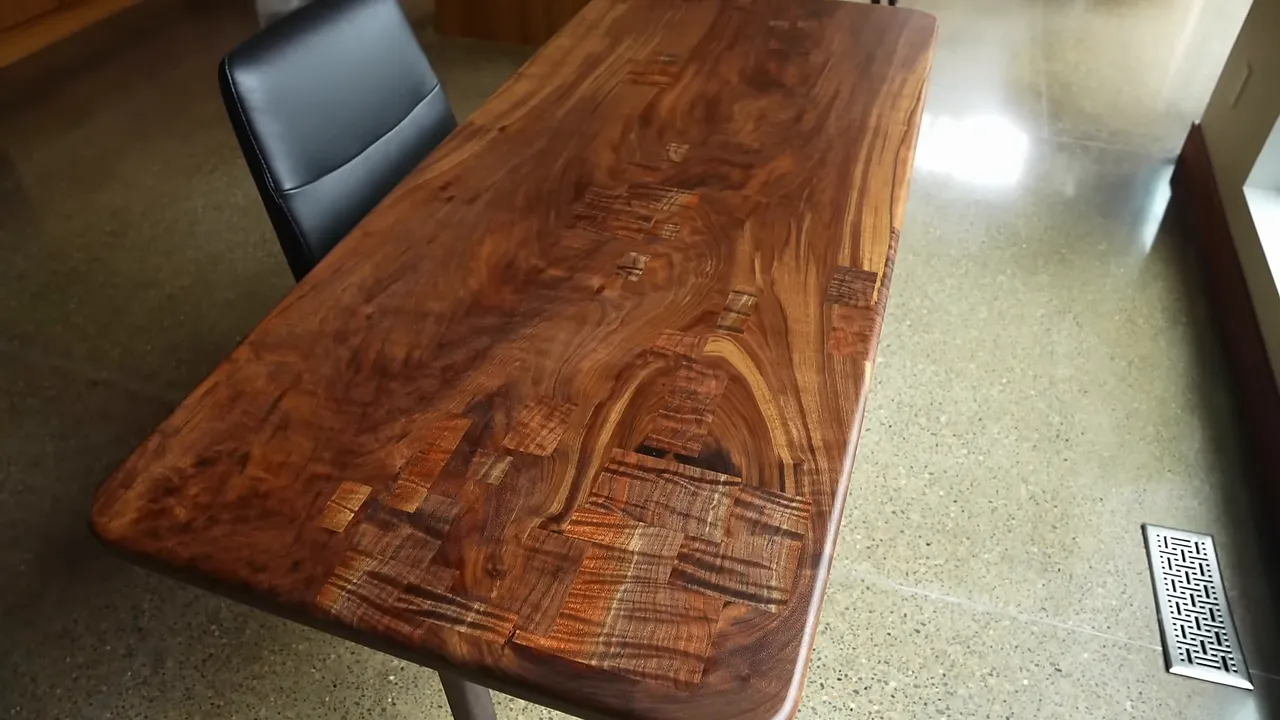
I planned to put it up for auction starting at $1 with no reserve, covering shipping within the lower 48 states. That was a fairly direct way to find out whether the people who liked it liked it enough to buy it. I was not going to assume that a strong reaction automatically meant a strong sale.
I still like big natural walnut tops. I also like a slab with a few scars and some deliberately obvious repairs. Those preferences do not have to cancel each other out.
The useful lesson here is not that every slab needs squares routed into it. It is that repairs can become a design language, templates can make complicated work repeatable, and sometimes the last detail you nearly skip becomes the best part.
Would I rush to do another ten hours of patchwork tomorrow? Probably not. Am I glad I finished this one properly? Absolutely.
For a more structured approach to building wood and epoxy furniture, my virtual Epoxy Workshop walks through the process from the first steps to the finished table, including the expensive mistakes I would rather help you avoid.
|


