People tell me they want a nice dining table, but they’re waiting until their kids move out. Their kid is six. Apparently, the plan is to spend the next couple of decades surrounded by furniture they don’t like.
I don’t have children, which obviously makes me uniquely qualified to criticize this arrangement.
My response was to build something at the opposite end of the childproof furniture spectrum: a roughly 400-pound chunk of walnut burl with sharp facets, a delicate cantilevered shelf, and almost no interest in being practical. Not because children are the problem. Because this piece of wood was too cool to turn into something boring.
The catch was that I started with a 12-inch-thick block of walnut and no complete plan. I knew it needed to become furniture. The rest involved a giant circular saw, several shelves I grew to hate, a finishing mistake, and one very good idea from Scott that I was absolutely certain wouldn’t work.
First, Find a Way to Move the Thing
This was always going to be a forklift-heavy project. The walnut came from Goby Walnut, where it was cut and CNC-flattened before coming back to my shop.
My forklift is thoroughly mediocre, which is still a tremendous improvement over not having a forklift. When you’re working with a solid chunk like this, moving it, turning it, and positioning it become part of almost every operation.
I’ve become an enthusiastic advocate for forklift ownership among people with oversized garages and questionable priorities. Mine gets used for far more than woodworking. That said, handling a load this heavy is not something to improvise casually. The machinery, supports, and positioning matter just as much as the tool making the cut.
Why I Stopped Trying to Make the Cut Edges Look Natural
The first design problem was the chainsaw work around the outside. When the tree came down, protruding sections had been cut off. That’s normal. Nobody processing the tree was obligated to anticipate that I would eventually want to preserve it as one enormous block.
Those cut surfaces looked nothing like the surrounding natural burl. My original thought was to round them over and blend them in. I started doing that, and it immediately looked wrong.
You can carve a natural-looking shape, but you can’t rearrange the grain to match it. Even if I could sculpt the contour perfectly, the exposed grain would still announce that somebody had been there with a tool.
Rather than make a bad imitation of nature, I decided to make the human intervention obvious. The cut areas would become deliberately flat, angular facets, almost like the faces of a gemstone.
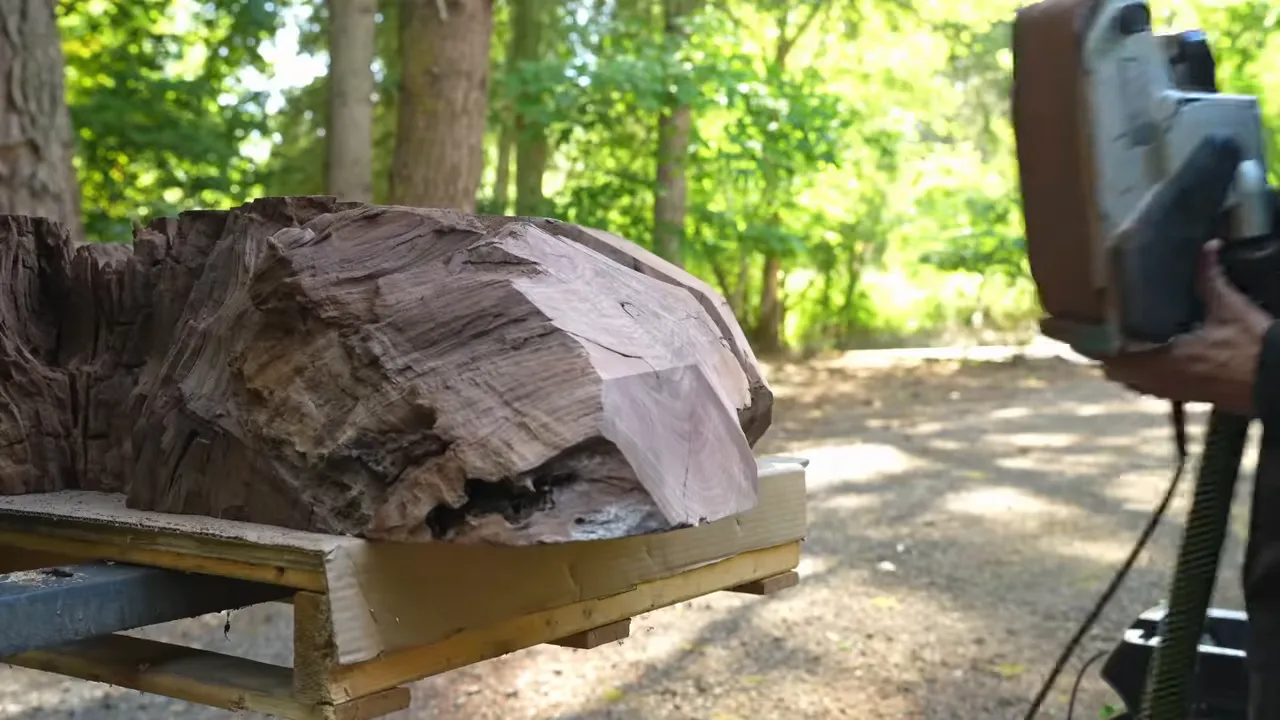
That gave the piece a direction: rough, organic surfaces interrupted by precise planes. Later, the finish would exaggerate that difference with matte texture beside polished wood.
One corner still looked too close to an ordinary 90-degree corner, so I added another bevel. This was less forgiving than changing a shelf. If I ruined a facet on the main burl, I couldn’t simply grab another 400-pound walnut block from the scrap bin.
A Useful Rule for Epoxy Tables, and Why I Broke It Here
When I first started building epoxy tables, my layouts were pretty terrible. I’d compare one with an aerial photograph of a river and wonder why nature’s version looked convincing while mine looked like a woodworking project.
One big difference was straight lines. For a natural-looking river-table layout, I avoid straight interior edges and don’t try to carve fake live edges into them. The grain usually gives away the trick.
This walnut table deliberately breaks that rule. The distinction is intent. I wasn’t trying to make the flat cuts look natural anymore. I was making them unmistakably artificial.
That kind of decision is part of the learning curve I cover in my epoxy workshop, along with the complete building process. It won’t guarantee that you never screw anything up. It does let you learn from a lot of my expensive mistakes instead of paying for all of them yourself.
|
The Original Plan: A Maple Burl Shelf
Walnut and light maple are one of my favorite combinations. The dark walnut gives the lighter wood somewhere to stand out, so I went back to Goby to look through their maple burl inventory.
The idea was a shelf that would slide into the side of the walnut a couple of inches below the upper lip. It would project out from the block without visible legs or brackets.
I spent time mocking up the proportions before choosing a section. The shelf needed enough width and projection to look intentional without taking over the whole piece. With burl, there’s rarely a perfect, uniform section, and that’s part of the appeal.
I resawed the maple into shelf candidates and compared the figure, spalting, and shapes. One had particularly interesting ripples; another had the spalting I liked. Eventually, I chose the middle candidate.
The project also reminded me of Taylor Donsker’s sculptural furniture. His work pushes the boundary between a functional object and something that exists because it looks incredible. I’m not putting myself in his league, but that was the territory I was wandering into.
Would this be the most useful piece of furniture I’d ever built? Almost certainly not. Could it look cool enough to justify itself? That was the hope.
Cutting a Deep Slot With a Giant DIY Track Saw
To make the shelf work, I needed a consistent slot across an irregular, very thick piece of walnut. A track saw offered the right basic concept, but my normal one didn’t have enough cutting depth.
So I bought a handheld circular saw with a blade over 16 inches in diameter. For perspective, my cabinet table saw has a 10-inch blade. This handheld saw was carrying a blade roughly 60 percent larger.
The saw solved the depth problem. It did not solve the guidance problem.
The Simple Plywood Guide
I made a larger version of a guide I used before I could afford a proper track saw:
- Attach a straight fence strip to a wider plywood base.
- Run the circular saw along the fence, trimming off the excess base material.
- Use that freshly trimmed edge as the reference for where that saw will cut.
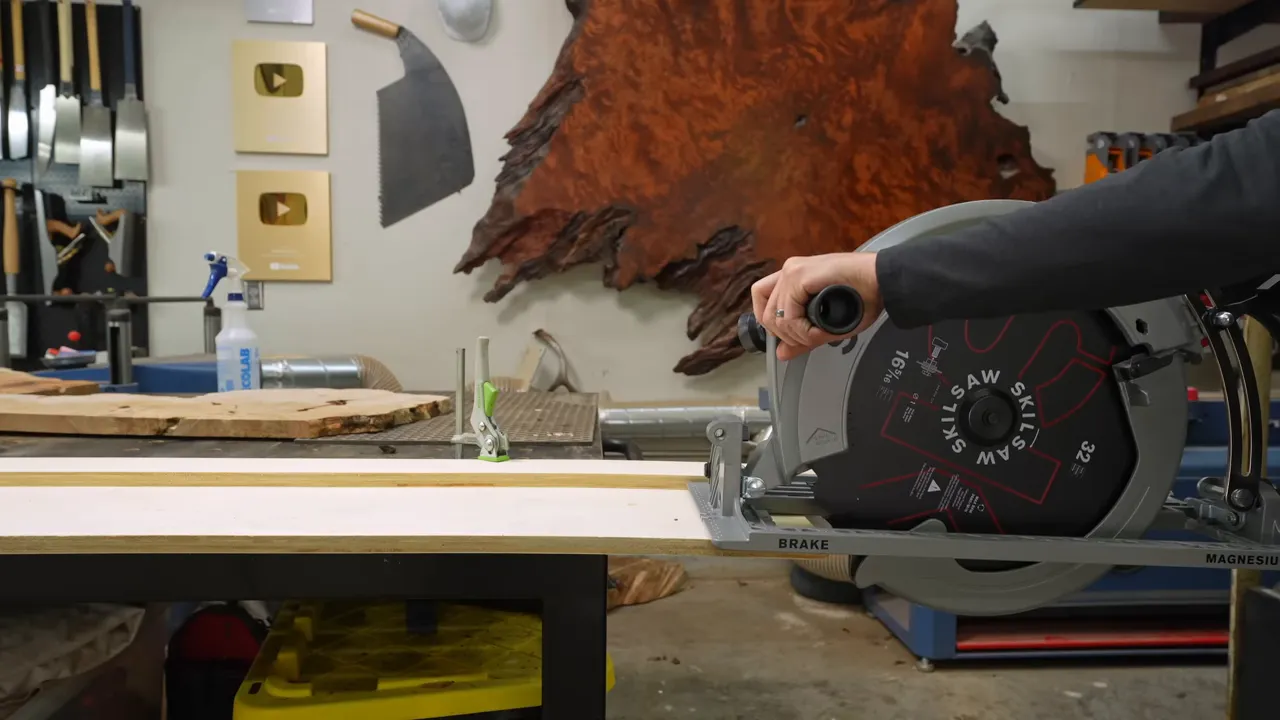
The important detail is that the edge corresponds to the saw and setup used to trim it. It removes the need to measure the offset between the blade and the edge of the saw’s base every time.
For the burl, I mounted the guide to a framework of 2x4s and an offcut. The framework referenced the flattened face so the slot would be square to it. Then I could reposition the guide for successive cuts.
I cut the upper and lower boundaries first, accounting for the blade’s kerf. Remembering that detail was a personal achievement. Then I made intermediate cuts to remove the material between them.
This was an experimental setup, not a recommended beginner cutting method. The same goes for some of the awkward table-saw work that followed. Proper workholding, supported stock, guarding, and protective equipment are not optional just because a cut eventually succeeds. The OSHA woodworking safety resources are a more sensible reference than my willingness to attempt a questionable setup.
The big saw also threw substantially more dust than I expected. I switched from safety glasses to a full-face respirator as the operation continued.
The Wet Surprise Inside the Walnut
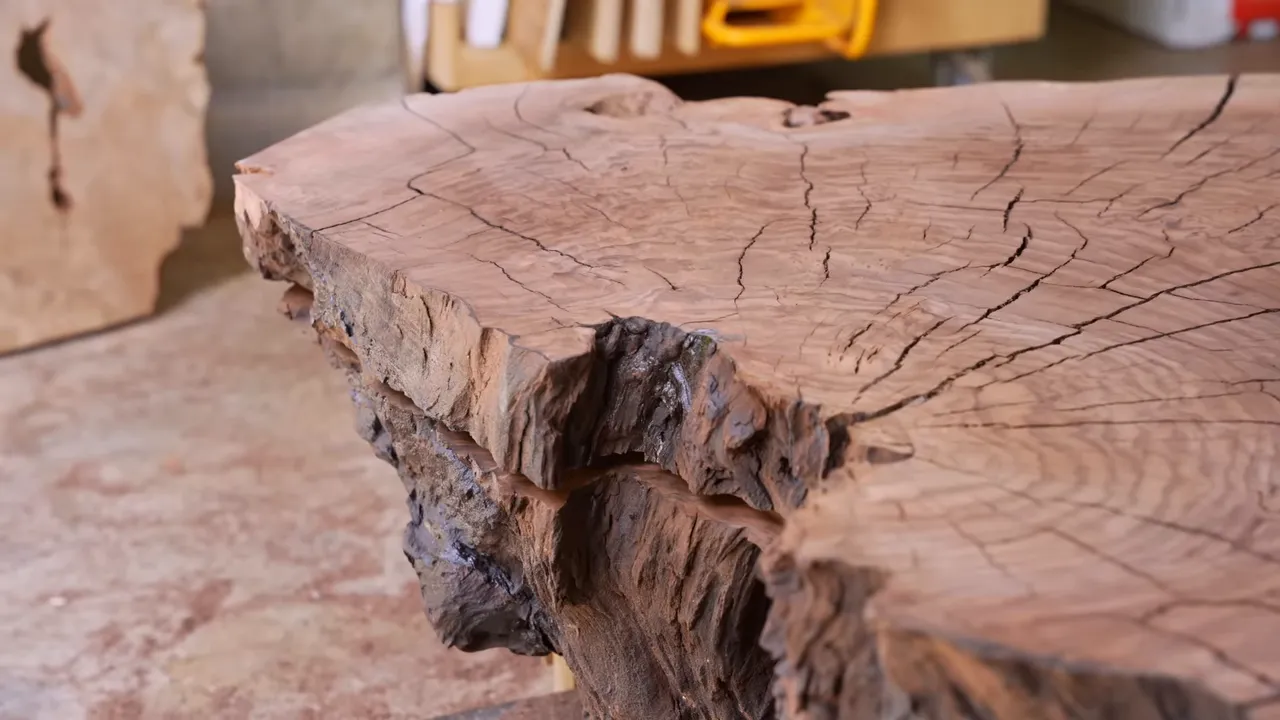
When I pulled the thin sections out of the slot, some areas were noticeably darker. They were physically wet.
I estimated that the interior might still have been around 40 percent moisture content. The outside had dried much more than the center, even after the burl went back into the kiln for another three weeks following its initial CNC work.
A block this thick is a different proposition from ordinary furniture lumber. On this piece, the outer few inches were much drier than the core. That is not a reason to treat 40 percent moisture as acceptable for normal table stock, or to assume the center will never change. It was a condition of this particular oversized chunk that I was choosing to work with.
The Shelf Fit. Unfortunately, I Hated It.
The maple had a problem before I even installed it: it was getting too dark.
What I really wanted wasn’t simply walnut beside maple. It was dark walnut beside light maple. Both species vary substantially in color, and this maple was already on the darker side.
It was also spalted, with softened areas that needed hardening. Applying epoxy helped stabilize those sections, but it deepened the color further.
I continued anyway. At the very least, it could prove whether the joinery worked.
Using a dado stack, I removed about half the shelf’s thickness along the back four or five inches. That reduced section would slide into the walnut’s slot while leaving a thicker projecting shelf.
A height-setting gauge made dialing in the dado depth easier than my usual routine of lining up a ruler and hoping. The irregular stock made the actual cutting much less straightforward. In hindsight, proving a concept is not a good excuse for awkward freehand work around a dado stack.
After some fitting and trimming, the shelf slid into place.
Mechanically, that was encouraging. Visually, it looked like a wart.
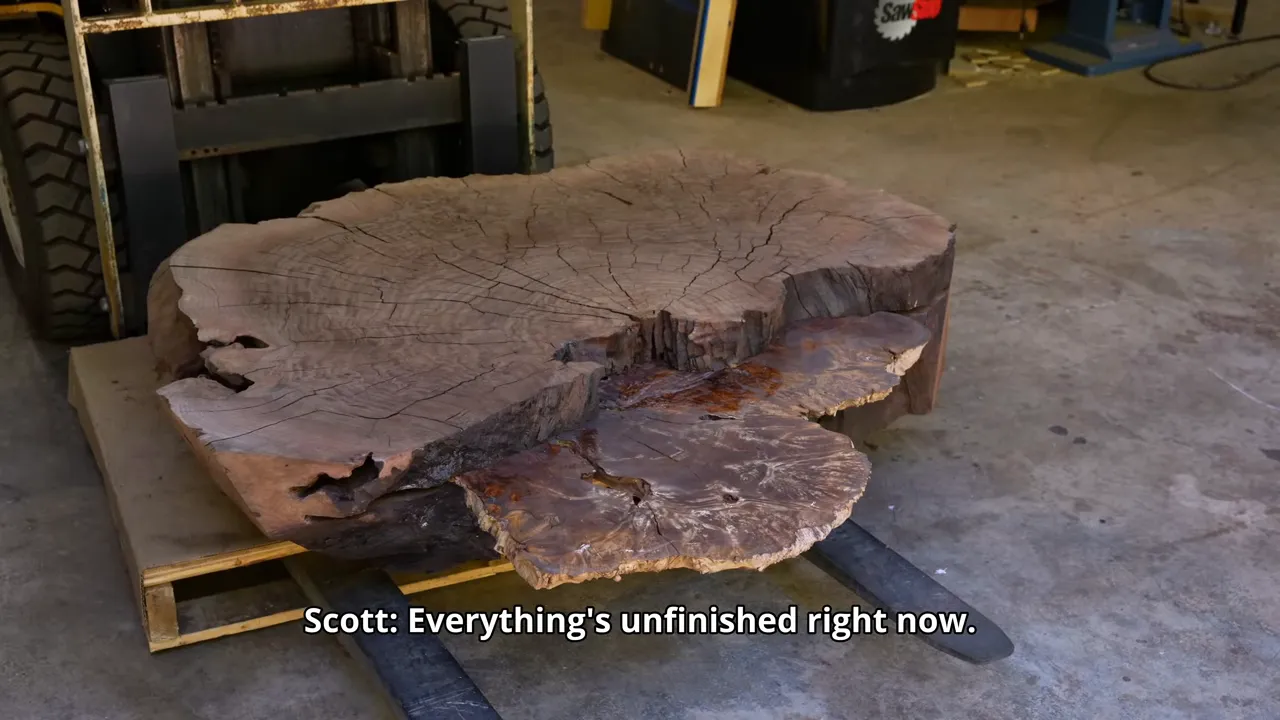
There’s a particular woodworking slump that follows this moment. You spend about 40 minutes feeling sorry for yourself because something you designed failed to turn out better than the version in your head. Eventually, you notice another task and go work on that instead.
That’s what I did. I returned to the walnut’s facets, refined the bevels, and worked with my hand planes.
I also discovered that sharpening the plane iron made the plane work better. Apparently, producing dust instead of shavings was not entirely the tool’s fault. An upsetting development for someone who prefers blaming the tool.
Two More Wood Shelves, Including One With Far Too Much Polishing
The next candidate came from a leftover slab of mapa burl from an earlier desk project. Mapa, not maple. They are different woods, despite the enthusiastic corrections I receive whenever I mention it.
This piece was much lighter and closer to the contrast I originally wanted. It also had straight reference edges, which let me cut the reduced mounting section with the proper edge against the fence instead of repeating the first shelf’s awkward setup.
The natural mapa looked more promising. I considered softening its outline with radiused corners.
Then I made a black version too, because I generally like black with walnut and apparently hadn’t spent enough time building shelves yet.
Getting the Black Shelf to a Gloss
The black finish looked dull straight from the spray gun. It needed leveling and polishing to bring out the figure and reflection.
I would have preferred to begin around 1200 grit, but debris in the finish, including a small hair, forced me to start lower. The progression was approximately:
- 600 grit to level the defects.
- 800 and 1000 grit to refine the scratches.
- 1500 grit, continuing up to 3000 grit.
- Three stages of polishing with the 3M Perfect-It system I’ve used for years.
The finish improved dramatically. Unfortunately, a beautifully polished shelf can still be the wrong shelf.
Neither mapa option ultimately worked for me. The natural one wasn’t right, and I liked the black one even less. Time invested is not evidence that a design deserves to survive.
Stabilizing the Walnut Without Losing the Sharp Facets
Sanding the main burl revealed another problem. Some edges were soft and punky enough that they wouldn’t sand cleanly. I wanted crisp intersections between the flat faces, not rounded, crumbling corners.
I coated the flat surfaces with epoxy to harden those weaker areas. This was surface stabilization, not a claim that coating the outside somehow fixed every condition inside the block.
Once cured, the treated faces sanded much more cleanly and retained the sharp lines I wanted.
I started around 120 grit with the Rotex sander and worked up to 500 grit. That’s higher than I would normally take many wood surfaces, but the whole design depended on a strong contrast between the polished planes and the rough, lower-sheen live edge.
The Ultra-Matte Finish Mistake
The rough sections presented a completely different finishing problem. They felt almost like coarse sandpaper. I wanted them to remain visually matte while becoming more pleasant to touch.
I had used hardwax oil over epoxy-stabilized texture before, including on charred tables. It can make that rough surface feel softer and easier to wipe without a rag immediately catching everywhere.
This time, I tried an unfamiliar ultra-matte version.
The product had a milky appearance and was intended to be applied and then wiped off. On a smooth surface, that might have been fine. On this deeply textured burl, I couldn’t remove all the excess.
The trapped material cured into a whitish crust.
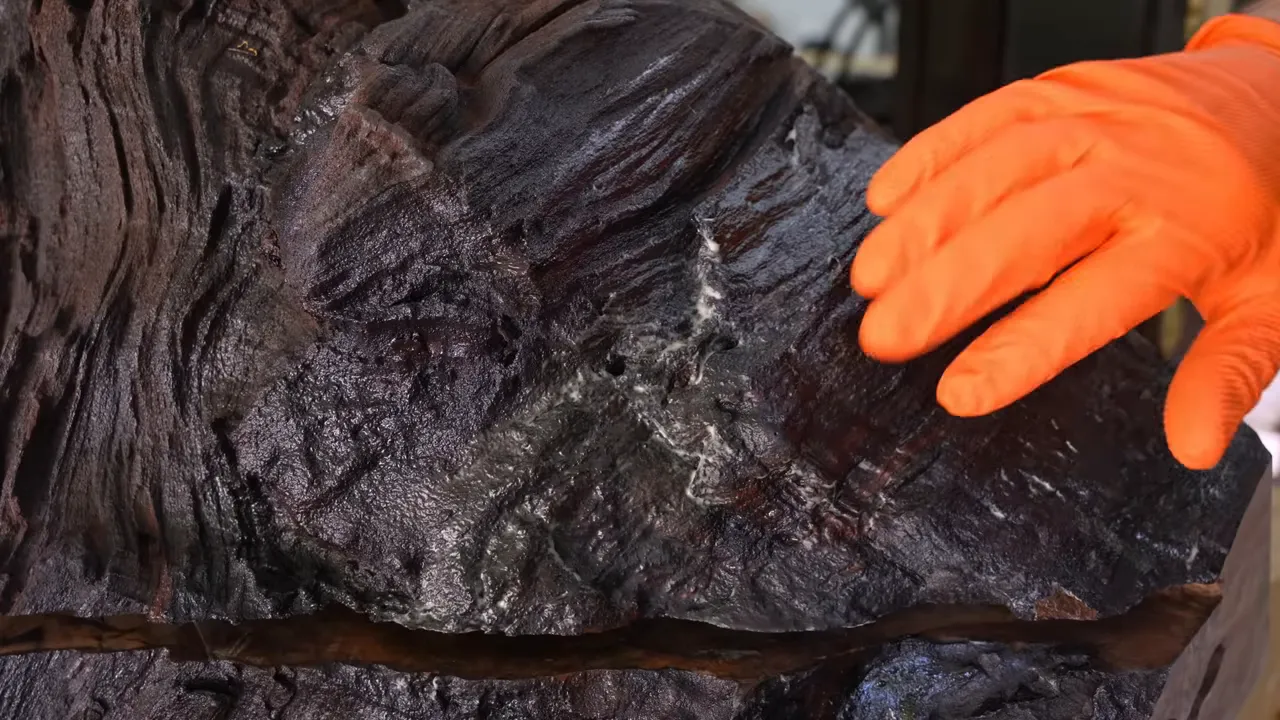
I spent a substantial amount of time removing it with chisels, a nylon wheel, and whatever else would reach the affected areas. Then I switched back to a familiar satin finish that didn’t leave that same milky residue.
Test the finish on a surface that resembles the actual project. Testing on a smooth scrap would not have exposed the main problem here: I couldn’t wipe this texture clean.
Finishing the Flat Faces Separately
Keeping the matte and polished areas distinct required careful application. I used a small paintbrush to approach the boundaries without coating the neighboring texture.
The cracks also ruled out some of my normal application methods. A white pad could catch and leave fibers embedded in the wood, so I used a combination of blotting and brushing instead.
After curing the first coat with the UV light, I lightly scuffed the flat faces by hand with 600-grit abrasive. I used very little pressure, essentially just the weight of my hand, because I didn’t want to soften those edges with an aggressive sanding pass.
A second coat improved the finish further.
I then applied N3 Nano to increase the sheen on the polished sections: two coats of Hard Coat and three coats of Top Coat. Protection is normally the main reason I use it, but on the vertical faces of this table, the goal was mostly aesthetic. I wasn’t anticipating a lot of drinks being spilled sideways.
And yes, the table does have legs. They’re just extremely short. I was willing to make one concession to conventional furniture.
What Cracked Wood Taught Me About UV-Cured Oil
The top still needed attention, including cleaning out a few bark inclusions and preparing the surface for finish. A fine Damascus marking knife is not the appropriate tool for excavating bark, even if it looks excellent doing it.
The more important finishing lesson came from a separate project refinishing the hardwood floors in my house. A flooring expert named Avitas helped me understand an issue that mattered enormously on this cracked burl.
On an ordinary surface, the UV light can reach the thin layer of finish and cure it. But oil that runs deep into a crack can be beyond the light’s reach.
For the system I was using, the solution was an accelerator that enabled a dual-curing process:
- The exposed finish cured under the UV light.
- Finish deeper inside the cracks could continue curing over roughly four or five days.
That process depends on the specific finish and its compatible additives. It is not a reason to mix an arbitrary accelerator into any UV product.
Avitas also suggested allowing the oil to sit for about 30 minutes before wiping off the excess so it could absorb.
I tried that with the shop doors open. The sun was behind the building, so I assumed I was safe from premature curing.
I was not. UV light reflecting off the driveway began curing the finish while I was still working. I scrambled to remove the excess, then completed the cure with the light.
Lesson learned: indirect daylight still counts.
After two coats of UV oil on the top, I repeated the N3 Nano process used on the sides.
Glass Finally Made the Shelf Make Sense
While all that finishing was happening, I kept reconsidering the shelves. I had been convinced that one of the wood options would work. None of them looked right enough.
So I ordered glass.
The frosted glass immediately looked better to me. It brought the contrast I wanted without adding another competing mass of wood grain.
It also fit terribly.
I had imagined a perfectly fitted cantilever. I’d even made a burl support block in case the shelf needed help, but I didn’t like how the block looked. Scott and I spent about six hours trying to shim the glass securely into the slot.
Six hours is plenty of time to establish that a plan isn’t working.
Hidden Set Screws Instead of Endless Shims
Scott suggested adding adjustable pressure points in a recessed area of the walnut. The idea was related to a shelf installation I had done years earlier.
We drilled into the wood, installed threaded inserts, and added set screws with neoprene caps at the contact points. The caps kept bare metal from pressing directly against the glass.
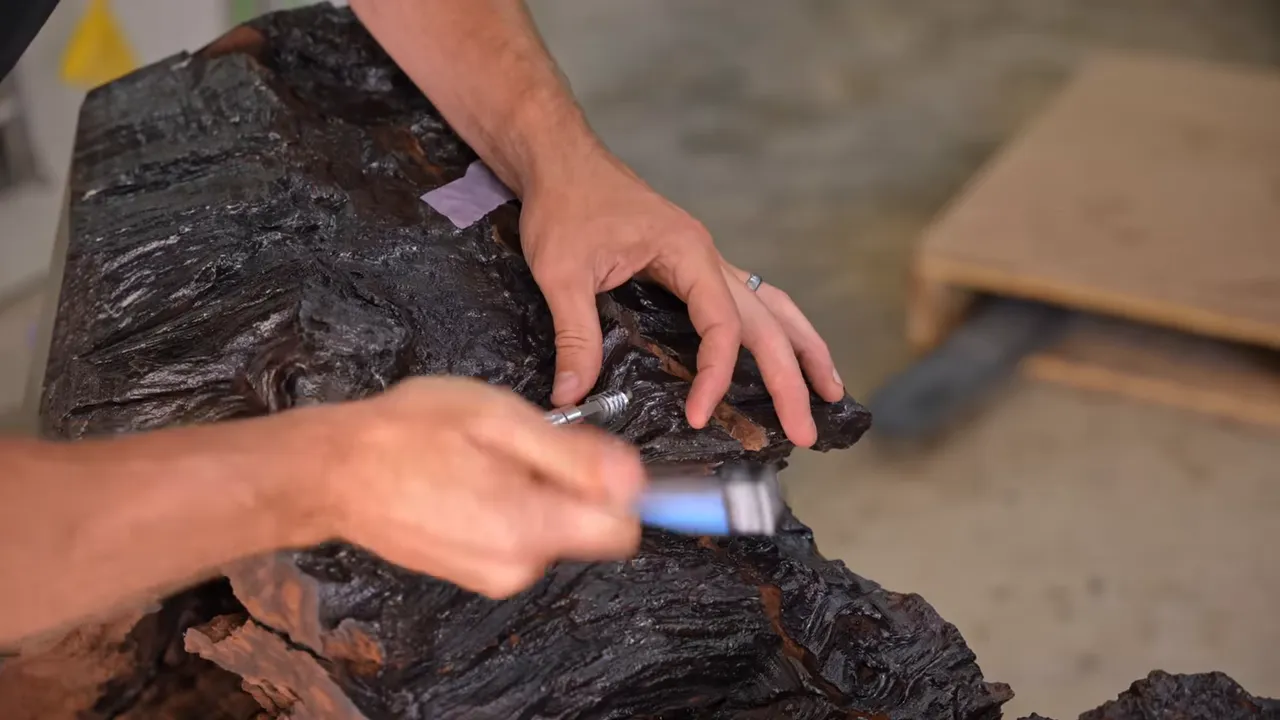
Only two suitable installation locations were available. I didn’t believe two would be enough. Scott did.
The glass was 3/8 inch thick, tempered, and ordered with a fully polished outside edge. Those were deliberate choices, but tempered glass is not unbreakable or incapable of causing injury. This was a custom furniture experiment, not a tested shelf-support specification or a childproof design.
We tightened the adjustments, checked the fit, and carefully lowered the table back into position.
The shelf stayed in place. The movement I initially noticed came from the table itself, not the glass slipping.
Scott was right. I prefer not to dwell on that part.
Black Glass Was the Answer
I had also ordered a black glass shelf, and that turned out to be my favorite version of the whole project. Scott preferred the frosted glass.
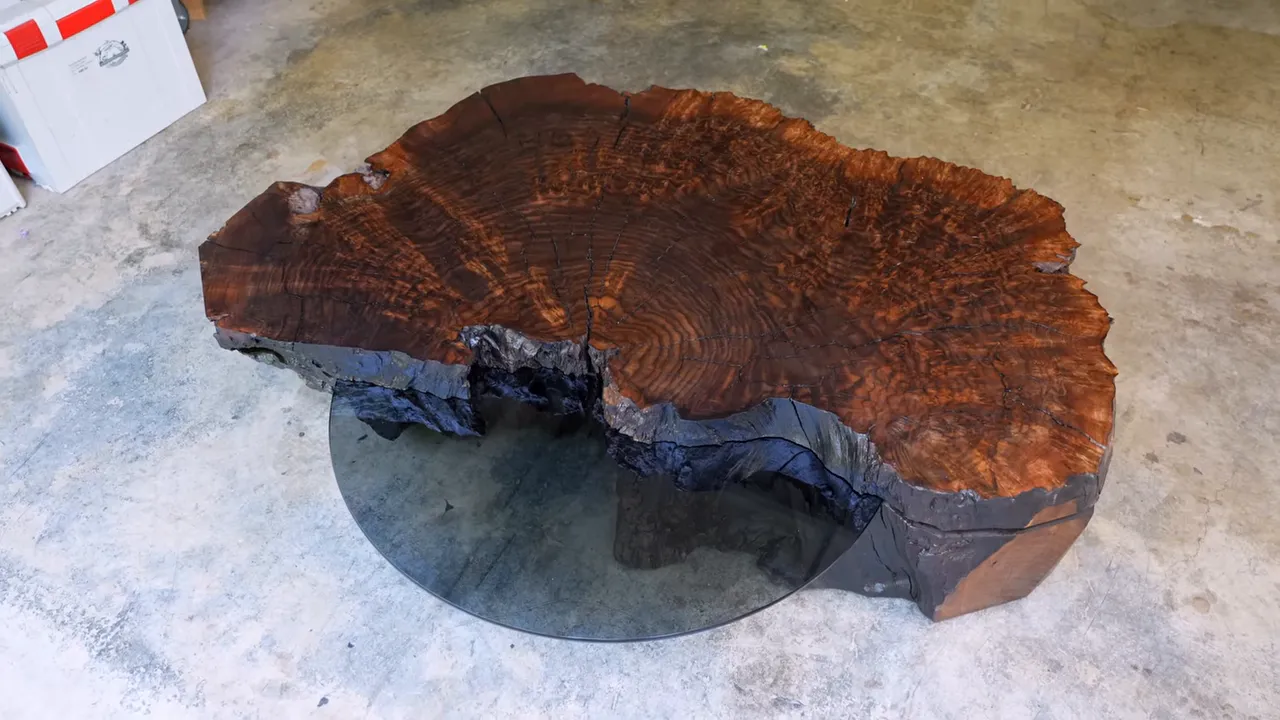
Both glass options worked visually in a way the wood shelves never did. The natural mapa shelf was out. The black mapa was even further out. The original maple was the most tolerable wood option, which is not exactly the endorsement I wanted after all that work.
The glass also made the interchangeable-shelf idea worthwhile. The table could take on a different character with black or frosted glass without changing the main walnut form.
What finally made the piece work was contrast: massive walnut beside thin glass, rough texture beside polished facets, and an irregular natural outline interrupted by deliberately precise cuts.
The biggest lesson wasn’t how to cut a deep slot or polish a black shelf. It was refusing to call something finished just because I had already put a lot of work into it.
If I build something ugly, I’m not going to convince myself it’s awesome to justify the hours. Those wooden shelves weren’t right. The glass was.
This table is heavy, sharp, unusual, and not remotely interested in being everybody’s style. It is also one of those builds that turned out better because the original plan failed.
And yes, I think it looks freaking awesome.


