The basic plan was simple: take an old chunk of walnut and turn it into a slightly shinier old chunk of walnut. Fill the cracks, square it up, add a hidden bracket, and put a nice finish on it.
What actually happened involved an epoxy leak, days of touch-ups, some awkward machinery setups, and a couple of tiny holes that convinced me to redo the entire finish. A simple block of wood can be surprisingly good at creating work.
This walnut fireplace mantel was a $4,000 commission for one of my best clients. The goal was not to make the wood look new. It was to preserve the character of an old, cracked beam while making every surface and detail feel intentional.
Table of Contents
- Key Takeaways
- One Walnut Log, Two Fireplace Mantels
- Cleaning and Sealing the Walnut
- The Deep-Pour Epoxy Found Every Escape Route
- Making a Large, Irregular Beam Flat and Square
- A Quick Saw-Blade Guide for This Kind of Work
- Six Days of Touch-Ups and One Useful Sanding Trick
- Fitting the Hidden Floating Mantel Bracket
- Adding Dutchman Joints to the End Cracks
- Sanding and Applying the Walnut Finish
- The Tiny Holes That Meant Starting Over
- What Makes It a $4,000 Block of Wood?
Key Takeaways
- Thin deep-pour epoxy penetrates complex cracks but demands reliable containment throughout its long working time.
- A supported planer sled establishes the first flat face before the opposite face is made parallel.
- Trace every side of a bow tie before removing it to preserve an accurate inlay layout.
- Small defects discovered after finishing can require sanding and refinishing the entire piece.
One Walnut Log, Two Fireplace Mantels
This project started a couple of years earlier at a sawmill in Pilot Rock, Oregon. I had some logs milled into rectangular chunks for projects I was working on at the time. This particular walnut log eventually needed to be split into two pieces.
At Goby Walnut, I figured their enormous industrial bandsaw would make short work of it. Instead, the walnut pinched the blade badly enough to stop the operation and turn a straightforward cut into a fairly substantial problem.
We finally split it with a large Makita beam saw with an approximately 18-inch blade. One half became a fireplace mantel for a contractor’s client. A couple of years later, that contractor asked whether I still had the other half. He wanted the same treatment for his own house.
He has commissioned several pieces from me, both for his personal residence and for his clients, including projects with black epoxy and walnut. This mantel would fit right in with that look.
The concern with wood and epoxy near a fireplace
I was initially uneasy about the first mantel. Heat and humidity fluctuations can be hard on wood, and I was concerned that the walnut, the epoxy, or both might crack over time.
We talked through that before I accepted the job. He felt the temperature changes would be less severe than I expected and accepted the possibility of cracking. A couple of years later, the original mantel was still in perfect condition.
That was encouraging, but it was not a guarantee that every wood and epoxy mantel will behave the same way. It was the history behind this particular commission.
Cleaning and Sealing the Walnut
Before filling anything, I needed to remove as much loose and rotten material as possible. The cracks wandered through the beam, with pockets of debris and deteriorated wood along the way.
I used chisels and abrasive nylon wheels to clean those areas. The wheels were especially useful for getting into irregular spaces without trying to turn every natural crack into a neatly machined channel.
Once the voids were clean, I prepared the beam for black epoxy:
- Seal the wood with clear tabletop epoxy. This helps keep the black color from bleeding into and staining the surrounding walnut.
- Tape the openings. I used Gorilla Tape to contain the resin wherever the cracks opened through the beam.
- Add a thin black tabletop epoxy pour. The faster-curing resin was supposed to seal the tape and close any little escape routes before the main fill.
On paper, that was a pretty convincing leak-prevention system. The epoxy was not convinced.
The Deep-Pour Epoxy Found Every Escape Route
For the main fill, I chose Liquid Glass deep-pour epoxy, the same type I use in traditional epoxy tables. Its low viscosity was a real advantage here: it could work into the small passages and deep cracks running through the walnut.
Unfortunately, that advantage works in both directions. A thin resin that can find every little cavity can also find every little hole leading out of the wood.
This epoxy stayed fluid for roughly a day under the conditions of this build. Despite the tape and initial sealing pour, I came back later to resin all over the place. The painter’s plastic underneath had not done nearly as much protecting as I hoped.
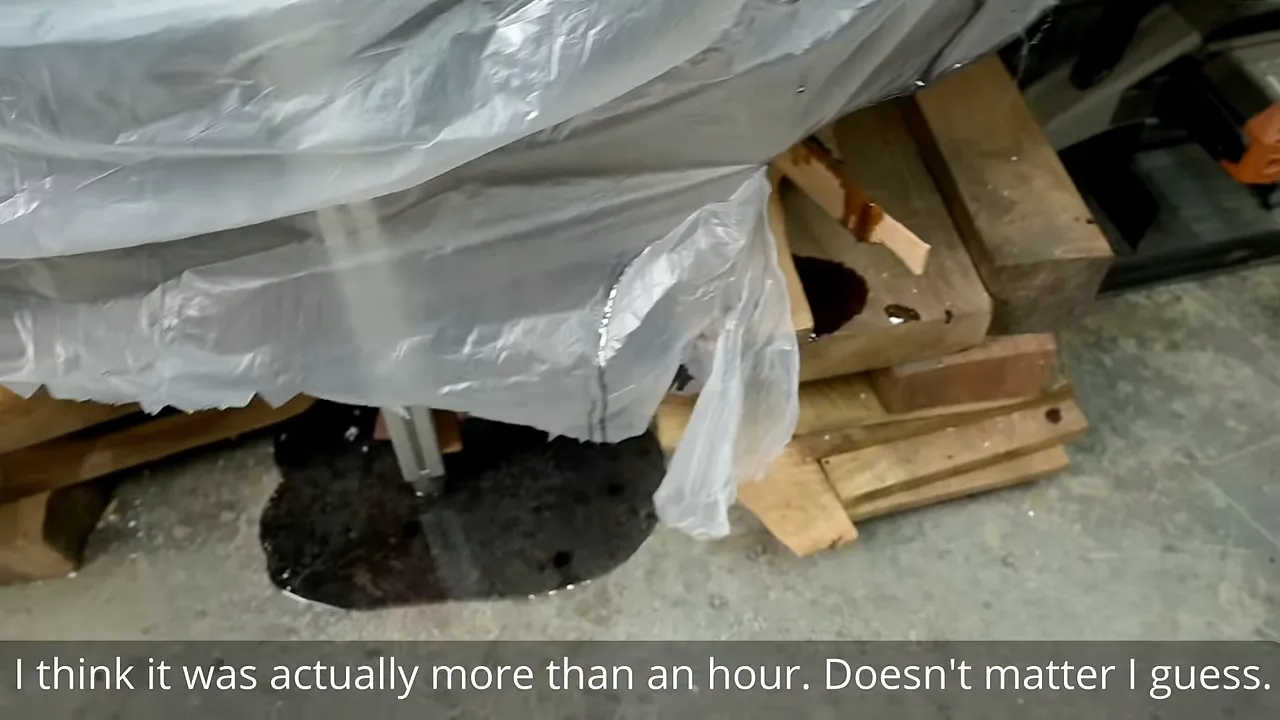
I can live with scratches and spills in a shop. It is a shop. Wasting epoxy bothered me more.
A sensible response might have been to stop, let everything cure, and reassess. I doubled down instead. I poured in some epoxy that had already been setting for about 18 hours, hoping its thicker consistency would finally plug the leaks.
It was not elegant. About 48 hours later, though, the cracks were sealed. At that point, ugly but contained counted as a win.
Switching to shallow tabletop epoxy pours
I scuffed the exposed resin with a nylon wheel to prepare for another bond, then changed tactics. Rather than continue with deep-pour resin, I used black-tinted tabletop epoxy in shallow layers.
For this build, I added approximately 1/4 inch at a time, returning a couple of hours later for another layer until the voids were topped off. Those were the working intervals for the resin and conditions I had, not a universal schedule for every epoxy.
The recovery took more pours than I expected, but once the resin stopped leaving the beam, the job became much more manageable.
The useful lesson is that penetration and containment are separate problems. A resin can be perfect for reaching deep cracks and still be the wrong choice when the containment is questionable.
Making a Large, Irregular Beam Flat and Square
After curing, I had hardened pools of epoxy standing proud of the walnut. Those high spots needed to come down before I could accurately flatten and square the beam. Otherwise, the workpiece could rock or tip as it moved through the planer.
I knocked down the worst areas with an electric hand planer and sanding. I should have worn respiratory protection throughout that cleanup, not just part of it. Wood and epoxy dust are not something to shrug off. The OSHA woodworking safety resources are a useful reference for dust control and machine hazards.
The same goes for gloves near moving woodworking machinery. Gloves can be useful for handling rough material, but they can also become an entanglement hazard. And no, the flip-flops I wore early in this project are not a shop-safety recommendation. I have since moved to substantial boots.
Why a planer alone will not flatten a bowed board
I started with a rough straight cut using the track saw, then made my first DIY planer sled. The sled lets a thickness planer perform the face-flattening job that would ordinarily start at a jointer.
If you simply feed a bowed piece through a planer, you can end up with a thinner bowed piece. You need to support the wood so it cannot rock, twist, or flex into a different position as it feeds through.
My sled was basic. I used shims, including playing cards, to support the beam. It worked, but it was not a design I would call perfected. A proper stop at the front was one obvious improvement it needed.
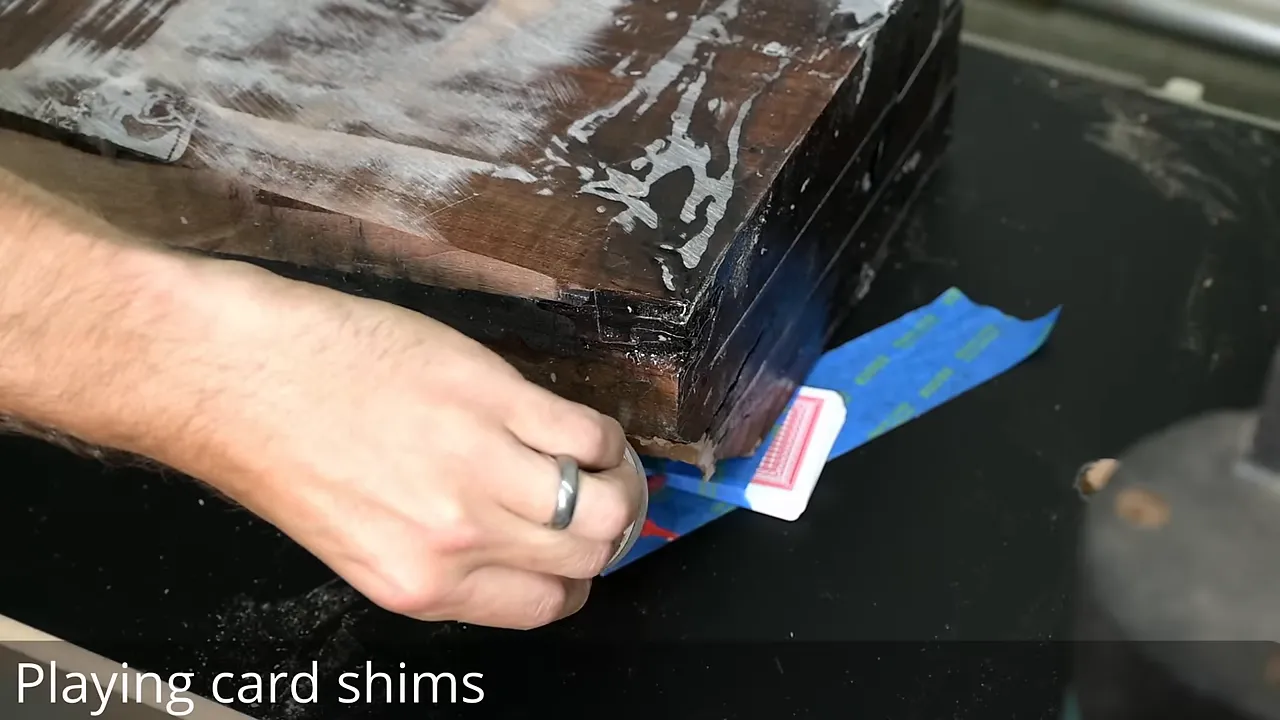
Once I had one flat face, I could remove the sled, place that face on the planer bed, and machine the opposite face flat and parallel.
I could probably have taken this beam to Creative Woodworking in southeast Portland and finished the heavy machining in an hour or an hour and a half. Their industrial shop has 20-inch jointers, huge planers, and a table saw with a 22-inch blade.
Instead, I spent roughly a day and a half doing it in my own capable but much less convenient shop. There was a fair amount of crab-walking around with a giant chunk of walnut.
The flush-trim router trick
That first track-saw cut happened before the top and bottom were flat. It established a rough edge, but it could not establish a finished edge square to faces that did not exist yet.
After flattening, I made another track-saw pass. The saw still could not cut through the beam’s full thickness, so I used a flush-trim router bit to bring the remaining material into line with the sawn surface.
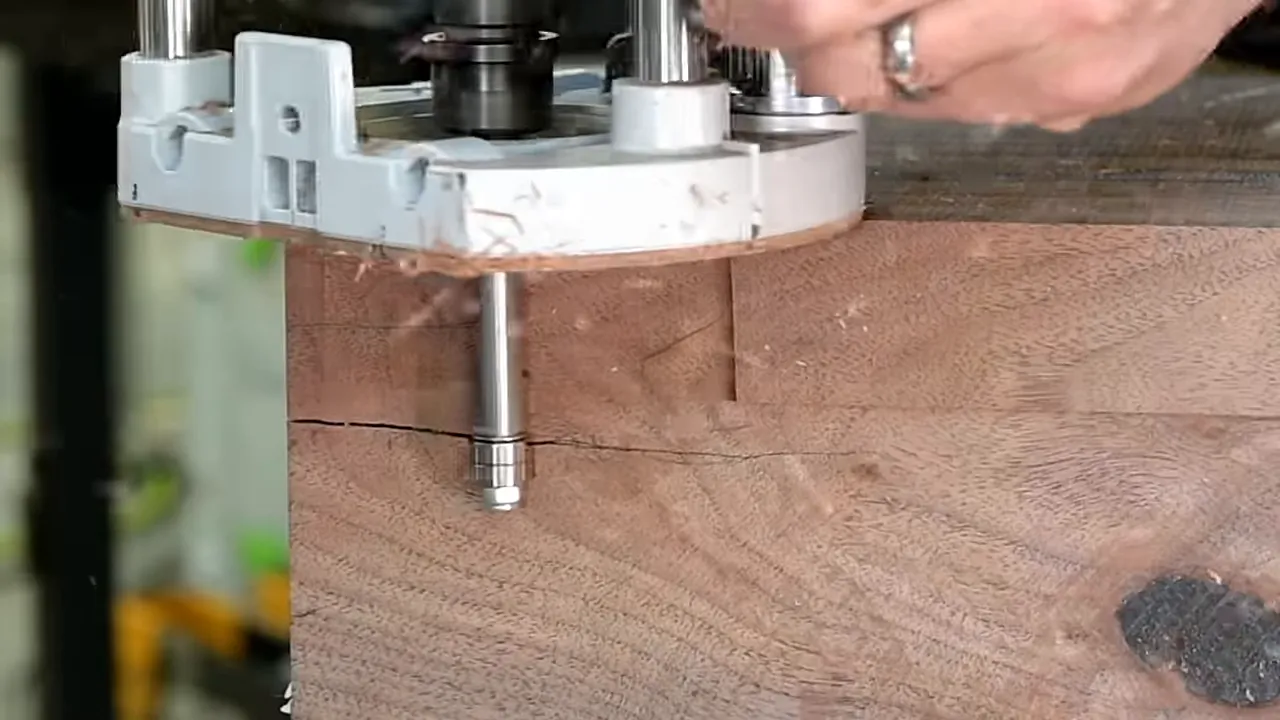
The router’s dust collection made a substantial difference. It did not capture every chip, but connecting the vacuum turned a very messy operation into a much cleaner one.
With the top, bottom, and one edge established, I could use the table saw to bring the beam to its final width, then crosscut the ends. Wherever the saw could not complete the full-depth cut, I used the same flush-trim approach.
A Quick Saw-Blade Guide for This Kind of Work
I remember finding blade selection intimidating when I first started. You go looking for a table-saw blade, and the packaging seems much more interested in tooth counts than explaining what you actually need.
Here is the simple version I used for this build, based on 10-inch blades:
- 24 teeth: A good ripping choice for cuts with the grain.
- 40 teeth: A useful general-purpose choice for both ripping and crosscutting.
- 60 teeth: A good choice when the job is primarily crosscutting.
That is a starting point, not an exhaustive guide to tooth geometry or every possible material. On the track saw, I also chose a lower-tooth-count ripping blade for the deep cuts along the grain.
I prefer full-kerf blades, approximately 1/8 inch wide, for my setup. They give me the cut quality I want, although they require more power. Thin-kerf blades can still be useful, particularly for rough cutting or a different saw setup.
For the final crosscuts here, I switched back to a 40-tooth CMT blade, then finished the remaining thickness with the router.
Six Days of Touch-Ups and One Useful Sanding Trick
Cutting the mantel to size exposed more little voids. Filling those was not a single afternoon’s work.
I needed gravity to help keep each repair where it belonged, so I worked one face at a time, waited for it to cure, rotated the beam, and repeated. Both ends needed attention too. That added up to about six days of touch-ups.
Once those repairs cured, I used a belt sander to level them. Epoxy can load up an abrasive belt quickly, which is where a sandpaper cleaning stick becomes surprisingly useful.
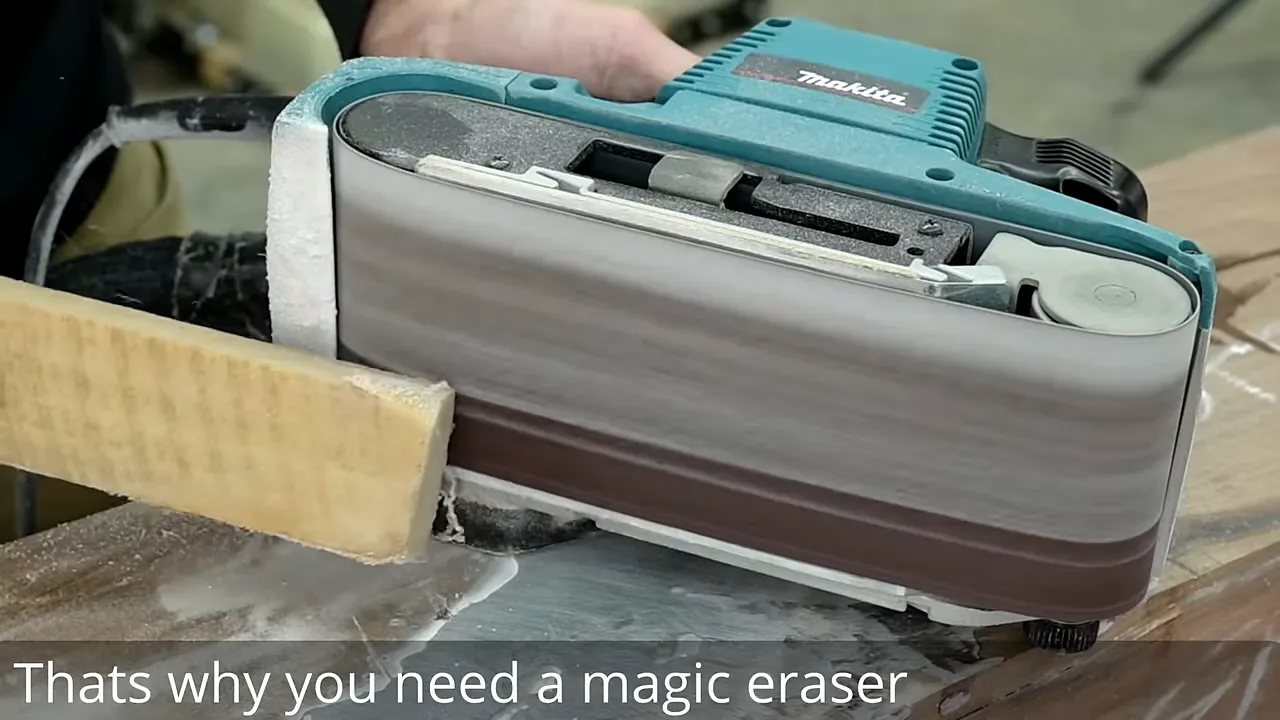
These rubbery cleaning sticks are commonly associated with drum sanders, but they also work on sanding belts and orbital sanding discs. Removing the buildup can give an otherwise loaded abrasive some useful life back.
Fitting the Hidden Floating Mantel Bracket
The mantel used a floating shelf bracket with 1-inch support tubes. I drilled the matching holes with a 1 1/16-inch auger bit.
That extra 1/16 inch in diameter was deliberate. No matter how carefully I laid out the holes, I knew there could be a small error in the position or drilling angle. A nominally exact 1-inch hole over a 1-inch tube would leave almost no forgiveness.
The slightly larger holes gave me enough clearance to assemble and remove the bracket while still producing a snug fit in this particular piece.
That clearance choice describes the fit, not a complete structural mounting specification. The wall connection and bracket still have to suit the mantel and its installation.
Where my tools were not quite enough
I usually feel pretty well equipped, either in my shop or through access to the industrial shop. Drilling these deep holes was one of the few times I felt seriously under-tooled.
Getting the heavy beam aligned under the drill press was awkward. Its weight even pulled the table out of position until I added support. Then I ran into the drill press’s roughly 3 1/2-inch travel limit and finished the holes by hand.
I did not enjoy that part. A large auger bit can generate a lot of torque when it catches, and the drill tried hard to make my wrists regret the decision.
If I did it again, I would look harder at completing the operation on the drill press with a properly supported setup and staged adjustments. I chose an auger rather than a spade bit because I wanted a bit that would track more consistently in a deep hole, although the starting alignment still matters.
Recessing a plate nobody would see
The installation plan was to mount the mantel first, then add stone around the fireplace and mantel. That stone would hide the bracket’s approximately 1/4-inch mounting plate even if I left it proud of the back.
I recessed it anyway.
I laid out the pocket and routed it with a straight bit, using a large homemade acrylic router base to bridge the narrow back edge.
The client likes nice things, and this was a $4,000 piece. I did not feel the need to ask whether he cared about a hidden detail. Making it as clean as I could was part of the job.
Adding Dutchman Joints to the End Cracks
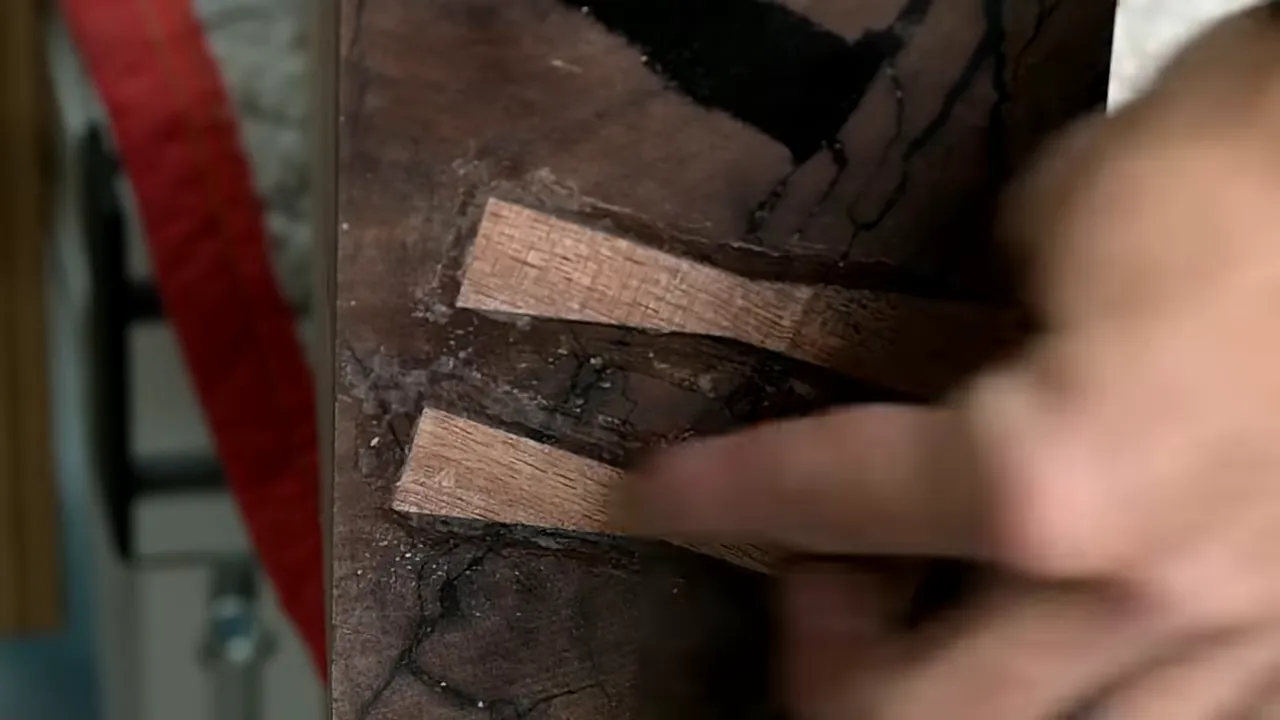
Before finishing, I added Dutchman joints, also called bow ties, across the end cracks.
These joints somehow manage to be controversial every time. Some people love them. Others seem personally offended by the existence of a little bow-shaped piece of wood. I always discuss them with the client first, and the people commissioning these pieces have wanted them.
The installation process is approachable, but the layout rewards patience:
- Secure the bow tie and trace its entire perimeter. Double-sided tape helps keep it from shifting.
- Remove the bulk of the waste. I used a router with a 1/4-inch spiral bit. Chisels alone or a drill with a Forstner bit can also remove the central material.
- Pare to the layout lines with sharp chisels. This is where the final fit happens.
- Glue in the inlay and address tiny imperfections. Then let it set before leveling it.
On the first one, I made the most annoying layout mistake available: I removed the bow tie before marking one of its sides. Getting it back into exactly the same position was much harder than simply finishing the tracing would have been.
Mark every side before lifting the inlay. It is a very easy lesson to understand and apparently an equally easy one to ignore.
Sharp chisels, tougher chisels, and the right glue
I like my Japanese chisels because they take an exceptionally sharp edge and are excellent for precise cuts. The ones I was using were also brittle enough that I did not want to lever out stubborn waste with them.
For that rougher work, I switched to a tougher chisel. That is about choosing an appropriate tool for the cut, not needing an expensive collection to install an inlay.
I still let a chisel get away from me and damaged one little spot along the pocket. For the glue-up, I used wood glue rather than epoxy. In previous inlays, epoxy had left a dark, wet-looking outline around the perimeter even when the fit was tight.
To disguise tiny gaps, I worked a combination of walnut and elm dust into the glue. The mixture broke up the uniform color that a single species of dust would have created.
After an overnight set, I used a block plane to bring the bow ties close to flush, then finished leveling them with a sander.
Sanding and Applying the Walnut Finish
The sanding involved the usual cycle of finding a tiny flaw, filling it, sanding again, and finding another one. I worked from 100 grit up to 180 grit for the initial finishing preparation.
A pencil grid helps me keep track of coverage. It is a simple way to see where I have sanded rather than trusting that I remember every pass across a long beam.
I also tried 3M sanding discs that had been recommended to me. This was not a sponsorship. I was genuinely impressed by how well they resisted clogging and by the scratch pattern they left. I do not normally get particularly emotional about sandpaper, but these were unusually good.
Two coats of Rubio Monocoat
I used Rubio Monocoat for the finish. The application itself was straightforward: work it over the surface, let the wood become evenly saturated, and thoroughly remove the excess.
A handheld photography light helped me inspect the surface while buffing. Shining light across the wood makes leftover finish and uneven areas much easier to catch.
The following day, I lightly abraded the surface with a maroon pad and applied a second coat. The walnut developed that rich color and depth that make all the less enjoyable parts of the build seem worthwhile.
For a little while, I thought I was done.
The Tiny Holes That Meant Starting Over
After the second coat, I found a few tiny holes right on the front of the mantel. They were not huge, but they were there, and once I noticed them, I could not reasonably send the piece out without fixing them.
I cleaned them out and filled them with black CA glue. The repair was small. The consequences were not.
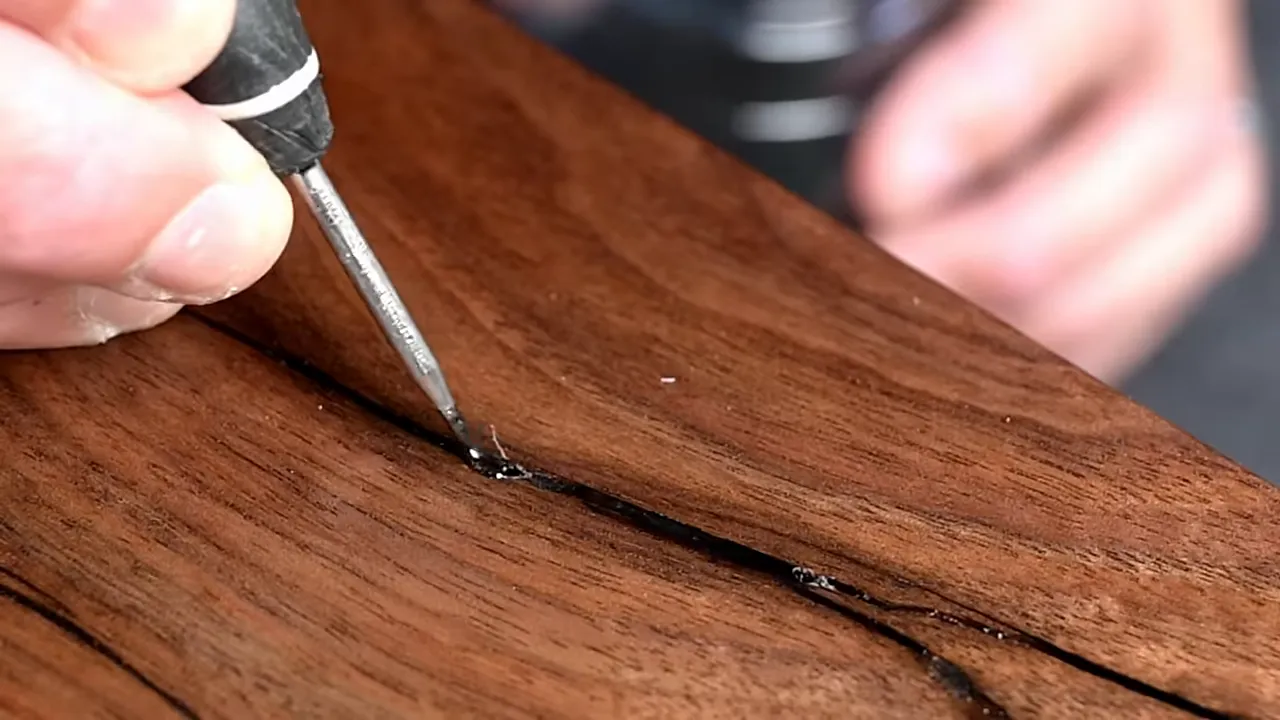
I could not simply smear the repair flat and call it finished. I sanded the entire piece again, starting around 240 grit for that rework, then repeated the two-coat finishing process.
The existing Rubio had not fully cured, so it loaded up the sanding discs. That same abrasive cleaning stick helped clear the buildup from the orbital sander.
I was frustrated, but not as frustrated as I would have been if I missed another flaw and had to do it a third time. Before applying the replacement coats, I inspected everything much more carefully. Then it was back to wiping on finish, removing the excess, and lightly abrading between coats.
What Makes It a $4,000 Block of Wood?
The finished mantel still looks like an old piece of walnut. That was the point. The grain, the black-filled cracks, and the end-grain character are what make it interesting.
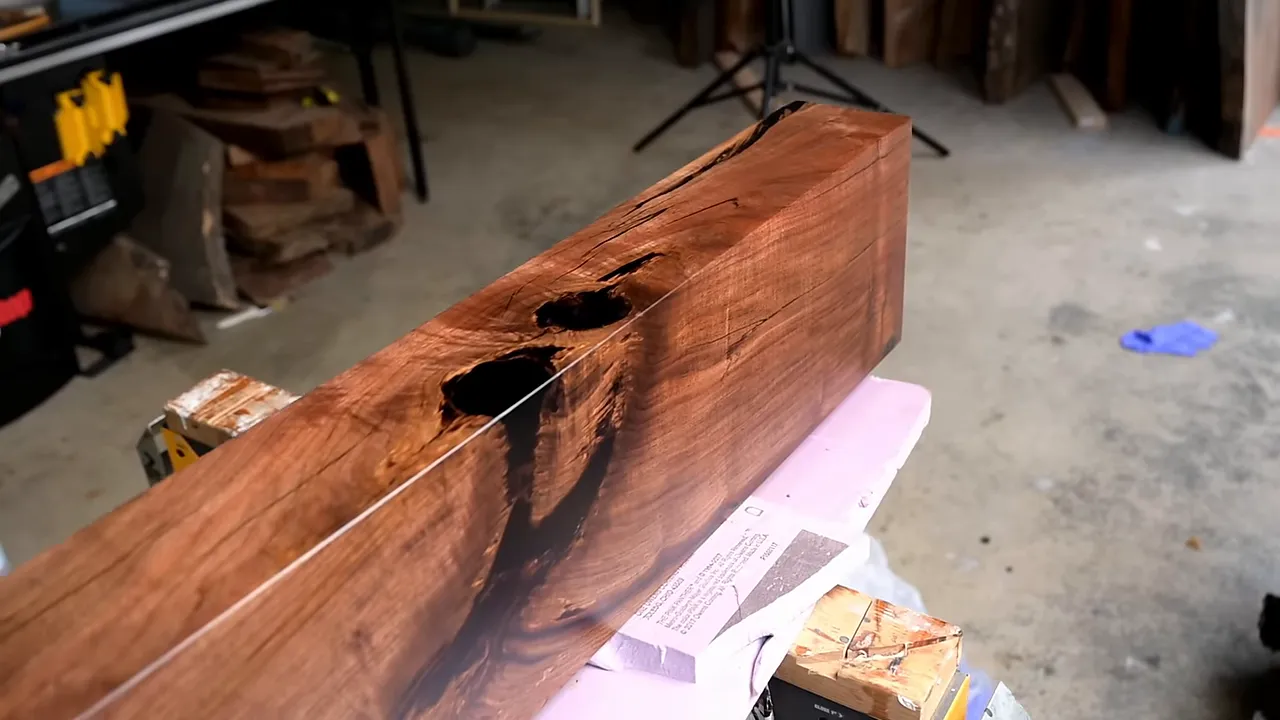
What changed was everything around those features: flat and square surfaces, carefully filled voids, fitted Dutchman joints, a recessed hidden bracket, and a finish that I was willing to redo when it did not meet the standard.
The mantel headed to upstate New York after all of that. The original log had now supplied two related fireplace pieces, commissioned years apart.
A lot of the value in custom woodworking lives in details that do not announce themselves. A hidden plate sits flush. A small hole gets repaired. A nearly finished surface gets sanded again because nearly finished is not finished.
It is still a chunk of walnut. Just one with considerably more work in it than I planned.


