Timber frame joinery is my favorite kind of construction. Big square timbers, wooden pegs, and joints that turn a pile of lumber into something beautiful enough to live in. I have wanted to get better at it for years. Apparently, my preferred learning method is to build something too large to fit at my own house.
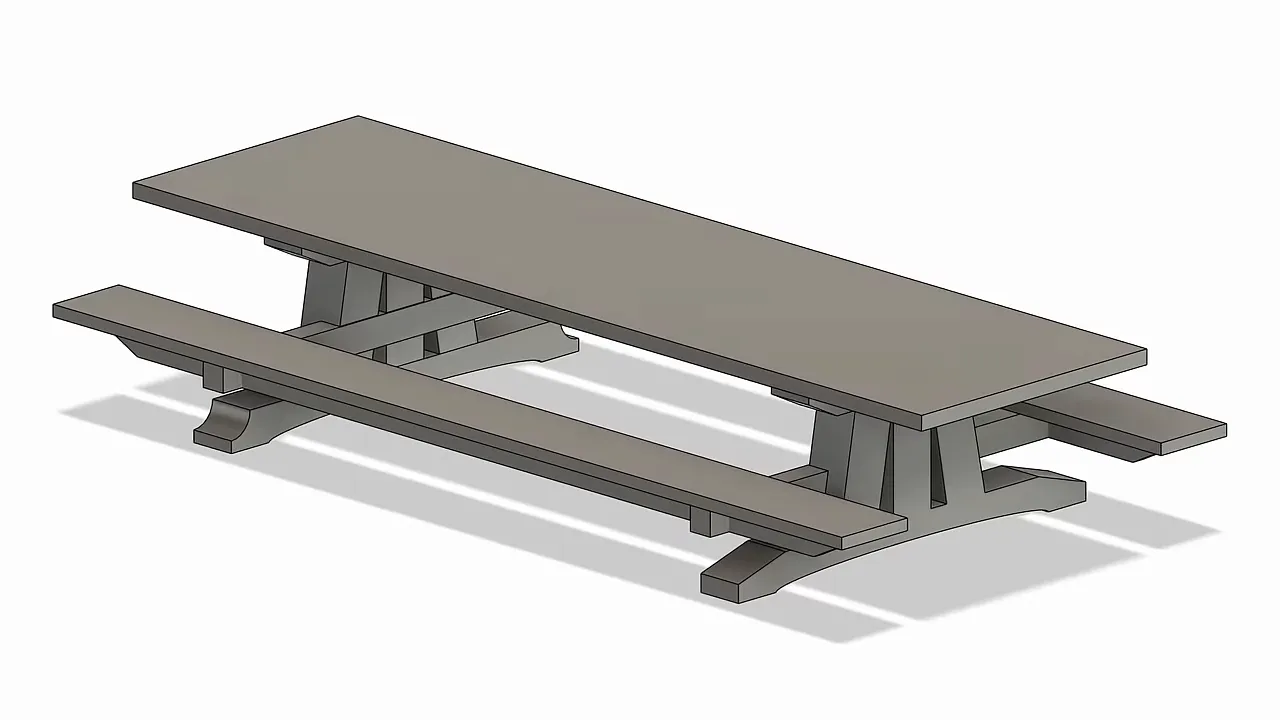
This project started with an outdoor table made by Settlement Post and Beam. I loved their design, so I asked permission to copy it, only much bigger. They graciously agreed.
The goal was a giant Douglas fir table with built-in benches, mortise and tenon joinery, half-lap joints, and lots of wooden pegs. Finished, it would be over 12 feet long and roughly 8 feet wide overall. Getting there involved about a thousand board feet of lumber, some incredible tools, several very satisfying discoveries, and one design mistake that required removing nearly 2 inches from an already assembled base.
Other than that, things went pretty smoothly.
Good Plans, Square Lumber, and a Little Family Perspective
Before buying the lumber, I drew up plans. Then I asked Scott to throw those plans away and make some real ones.
His drawings gave us a proper cut list, lengths, thicknesses, angles, and a clear picture of how all these massive pieces were supposed to fit together. That left only the milling, cutting, joinery, assembly, and finishing. Practically finished.
My original plan was to take the timbers to the industrial shop I use in Portland and have their heavy machinery process everything. Instead, I decided to mill it in my own relatively small shop. It took about a day, which initially felt like quite a sacrifice.
Then I started thinking about my great-great-grandfather, Frank August Anderson.
My dad gave me some of his tools, several stamped with dates from the late 1800s. He built houses with hand tools and worked on an impressive church in Salem. The family story is that a load of lumber would arrive at a jobsite, and he might spend the next couple of years turning it into a house.
That made my day of milling with powered machinery seem a little less heroic.
My dad likes to say the woodworking gene skipped a few generations and landed on me. I think that sells him short. When I was 18, he, a contractor friend, and I built the house he still lives in. He also built the attached shed that holds my dust collector and other tools. He is a very capable craftsman, even if fine woodworking was never his particular interest.
And the most important thing he taught me had nothing to do with joinery.
The Most Useful Thing My Dad Taught Me
When I was around eighth grade, my dad bought an $800 motorcycle that did not run. He was not a motorcycle mechanic, and we were not going to pay someone else to fix it. When I asked how he planned to get it running, his answer was simple: he would figure it out.
As a kid, that was incredible to me. He did not already know the answer, but he trusted that he could find it. That attitude has stayed with me through pretty much every woodworking project I have attempted.
I once worked with a pilot who wished his son would develop an interest in something beyond sleeping and video games. But when I asked what hobbies he pursued at home, he could not really name any. It was a useful reminder that the example we set can matter more than the advice we give.
Of course, I would also have accepted the athletic genes in my family. My grandfather played football and basketball at Oregon State and later played for the 49ers. My nephew Brooklyn DePriest made the U.S. snowboard team. Meanwhile, I managed to hurt my back tying my shoes.
So woodworking it is.
Cutting the Easy Tenons Before the Angled Ones
All that milling paid off when the rough timbers became square 7-by-7-inch posts. Accurate joinery starts with accurate stock. If the lumber is not square, every measurement and angle that follows becomes harder to trust.
The straight vertical supports were the easiest place to start because they did not involve complicated angles. For a centered 3-inch tenon in a 7-inch post, I needed to remove 2 inches from either side.
I cut the shoulders on the table saw, then used the bandsaw to remove the waste and form the cheeks. When the cuts met and the waste dropped away cleanly, it felt like a major achievement. It may have been one of the simplest joints in the project, but I am absolutely willing to celebrate a simple joint going right.
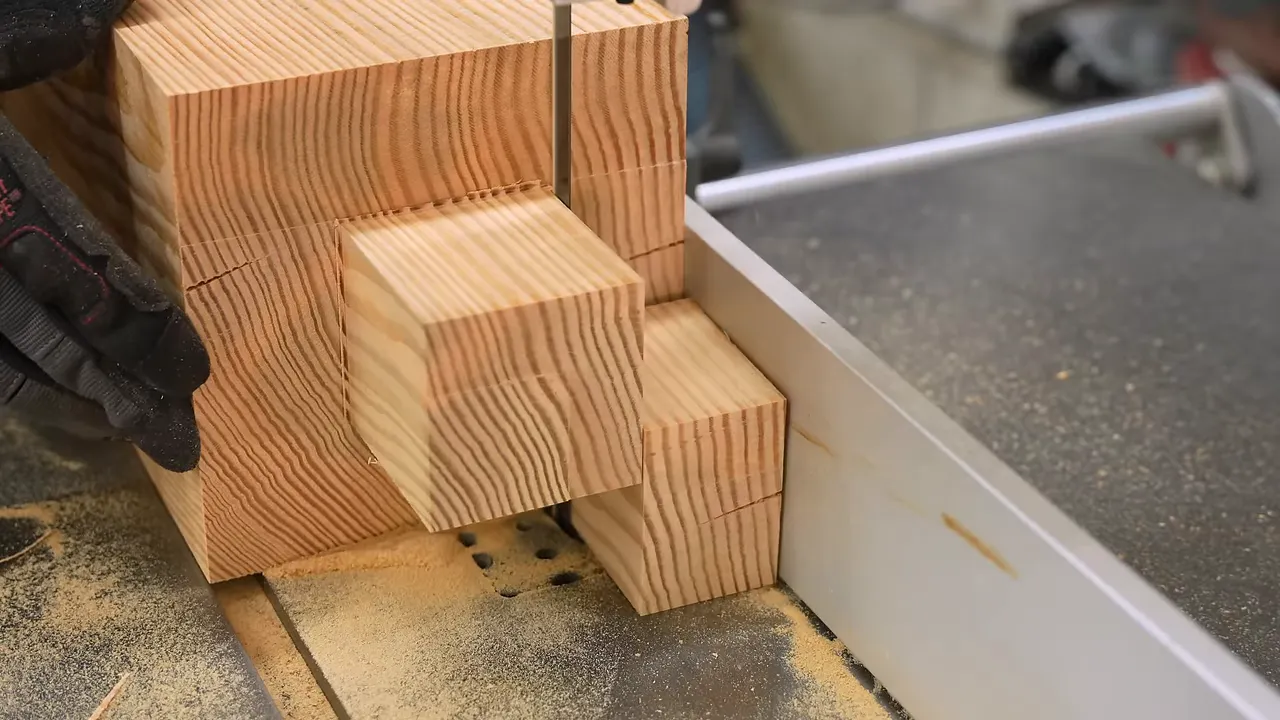
The legs with 10-degree angles were less cooperative. Those required more setup, more attention to orientation, and a combination of saw cuts and hand-tool cleanup.
This was not a case of me demonstrating the one correct way to cut an angled timber tenon. I was working out a process with the tools I had. Sometimes there is a better method that simply has not occurred to me yet. Sometimes the suggested alternative would not actually work. Both are important possibilities to keep in mind.
I used the saws to establish the geometry and remove most of the material, then refined the shoulders and cheeks by hand. Considering how little experience I had with this kind of work, the tenons were coming out surprisingly square and accurate.
The Timber Framing Tools That Actually Earned Their Place
My previous timber framing project was a staircase for the shop that I built with my friend Johnny. It turned out well, but our specialized tool collection mostly consisted of two enormous timber slicks. Experienced timber framers were kind enough to explain that those were not especially useful purchases for that job.
For this table, I put together a more suitable collection: framing chisels, a Japanese timber slick, a marking knife, a hand saw, a mallet, and a Mafell portable bandsaw, along with the routers and other machines already in the shop.
The bandsaw was the expensive new arrival. It was also intimidating enough that my first challenge was figuring out how to turn it on. Nothing builds confidence like needing to search for the power switch on a tool you already own.
Why the Japanese Timber Slick Was My Favorite
The surprise favorite was the Japanese timber slick recommended by Shelter Institute. They helped me choose several tools and offered advice throughout the project. This was not a sponsorship. They were simply very helpful.
The slick was excellent for paring tenon shoulders, cleaning notches, and finishing details that a router could not reach. It also held an impressive edge. After working through a whole batch of tenons, I had stropped it but had not needed to fully sharpen it.
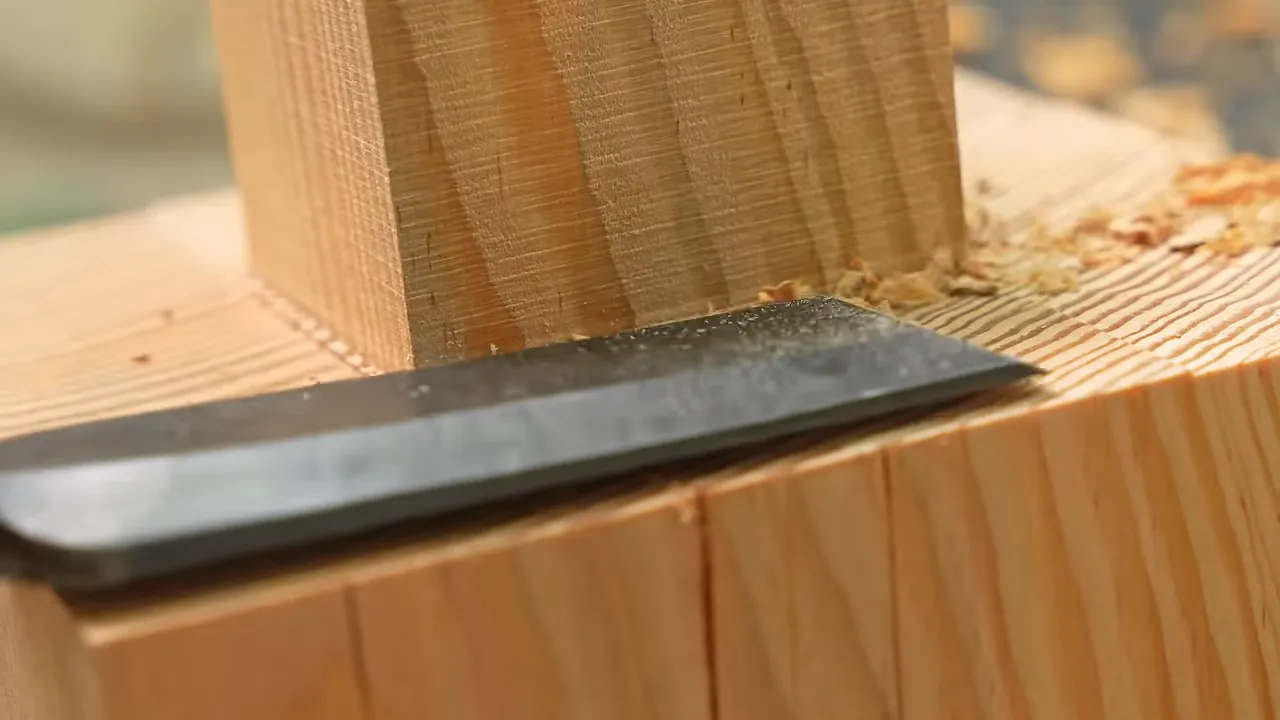
There is a tradeoff with the very hard steel used in tools like this: edge retention can be excellent, but the edge is also more brittle. Use it to cut, not as a pry bar. Chipping an expensive cutting edge would take some of the fun out of owning it.
My Tool-Buying Test: Wins Above Replacement
Baseball has a statistic called wins above replacement, or WAR. I think tools deserve something similar.
The question is not simply whether a tool is good. It is how much more it lets you accomplish compared with a cheaper alternative.
My Mafell jigsaw is incredible, but at around $800, it does not have a particularly strong rating by that standard. A much less expensive jigsaw can do most of the same jobs.
The Mafell portable bandsaw was a different story. Cutting large curves through these heavy timbers would have been extremely awkward on a stationary bandsaw, assuming the pieces fit at all. Bringing the saw to the timber gave me a capability that was much harder to replace.
For a limited tool budget, that seems like a better question than asking which brand makes the nicest version of everything.
Finding a Faster Way to Make Big Mortises
A mortising machine would have been the appropriate tool for these joints. Naturally, that was one machine I did not own.
Instead, I used an auger bit in the drill press to remove most of the material, then cleaned up the mortises with chisels. It worked. It also gave me plenty of time to think about owning a mortising machine.
My first method was straightforward:
- Lay out the mortise with a sharp marking knife.
- Drill out the bulk of the waste.
- Chisel carefully back to the layout lines.
- Use a square reference block to help keep the chisel vertical.
- Test-fit the tenon and refine the joint.
A corner chisel helped in places, but these mortises were deep and contained a lot of wood. Cleaning up one of the first ones took about an hour and a half.
Short woodworking clips make this process look effortless. Skilled craftspeople and green timber probably help. Selective editing does not hurt either.
The Router Template Changed Everything
The better method was to place 3/4-inch melamine guides right against the mortise layout and use a bearing-guided router bit to follow them. With the bulk of the waste already drilled out, the router could establish clean, consistent walls.
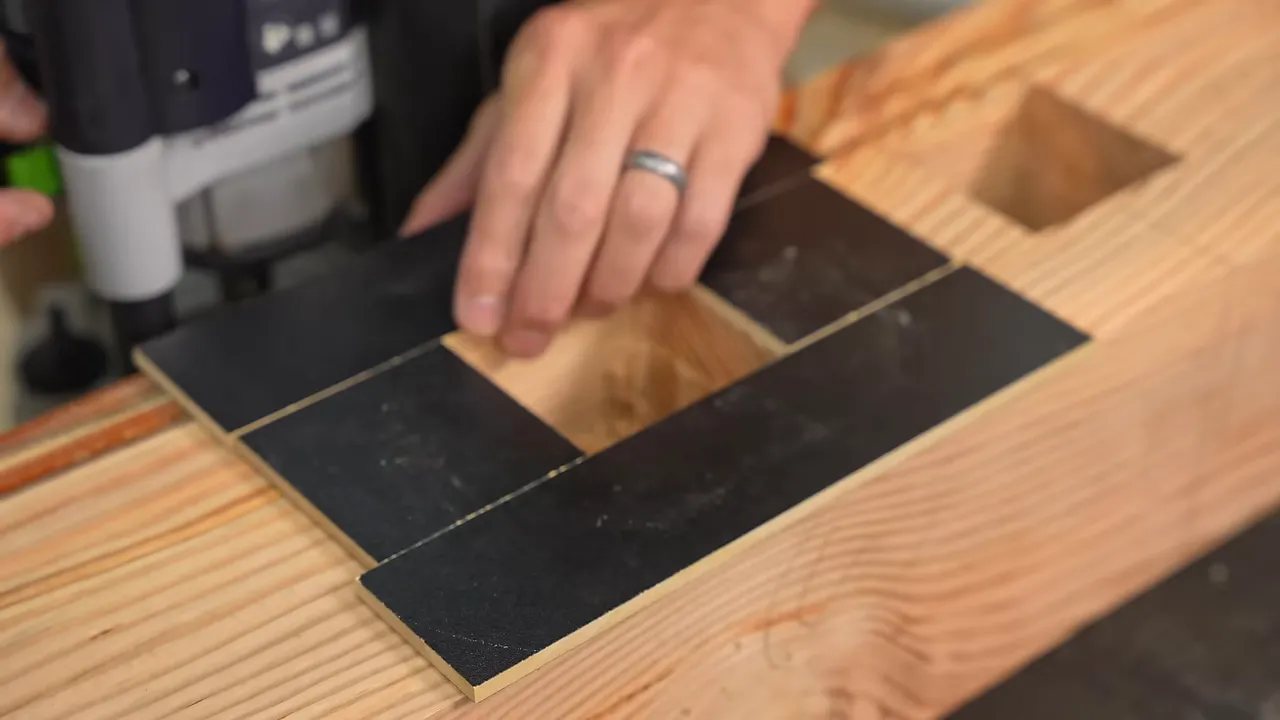
A longer flush-trim bit let me reach farther into the mortise and reduce the amount of hand cleanup. My largest bit had roughly a 2-inch cutting length. It was not especially fast in this material, so I had to take my time, but it did the job.
Then came the next useful discovery: it was easier to round the tenon corners than square every mortise corner.
I used a roundover of approximately 5/8 inch on the tenons to match the rounded corners left by the router. The joints slid together, and I probably cut the fitting time in half, if not more.
This is one of my favorite parts of learning a skill. The first attempt takes forever. The next one might take half as long. Soon you feel like a professional, mostly because you are comparing yourself with the person who spent 90 minutes cleaning one hole yesterday.
Fixing a Shoulder That Was Slightly Too Long
Dry-fitting the end assemblies revealed one shoulder that sat a little higher than the others. It was not a catastrophic mistake, but it prevented the upper member from seating as neatly as I wanted.
I checked the shoulders with a straightedge, made a shallow corrective cut with the track saw, and used the timber slick to blend that cut into the rest of the shoulder.
I was not completely convinced it would work. It did, which is always a pleasant outcome when you are inventing the repair as you go.
Chamfers, End-Grain Sealing, and Wooden Pegs
A 45-degree chamfer became a consistent detail throughout the table. It softened the edges and made the big timbers look more finished.
It also hid small fitting errors.
A tiny gap is obvious when two square edges are supposed to meet perfectly. Add an intentional bevel, and that same small discrepancy becomes much less noticeable. It is not a replacement for sound joinery, but it is a very useful finishing detail.
The angled legs needed some block-plane cleanup where the router did not create an even chamfer. Later, I used the slick to extend bevels into places the router could not reach.
My Weatherproofing Plan Created More Fitting Work
This table was intended for outdoor use in western Oregon, so rain was not a remote possibility. I applied penetrating epoxy to the end grain and tenons of the vertical supports.
The idea was to let the epoxy soak into the wood without building a thick surface film. We already had tight-fitting joints, and I did not want a coating to change that.
Unfortunately, after the treatment, the tenons no longer fit. The wood appeared to have swollen enough that we had to go back and fit the joints again.
A successful dry fit before sealing is not necessarily your final dry fit. Any treatment that changes the fit needs to happen before you commit to assembly.
Assembling and Pegging the Base
Someone at Shelter Institute explained that they generally do not use adhesive on their timber-frame mortise and tenon joints or pegs. They also pointed out that a house has considerably more weight holding everything in place than my table did.
For this application, I chose to add thickened epoxy to the joints as an extra precaution. That was my choice for this build, not a claim that traditional timber framing requires glue.
Before assembly, I had drilled the peg holes through one face of certain members at the drill press. Those holes gave me a guide for drilling through the assembled joints.
Once the epoxy went in, the leisurely fitting stage was over. I clamped the assembly, drilled through the joints, used a backer board to limit exit tear-out, and drove in the oak pegs.
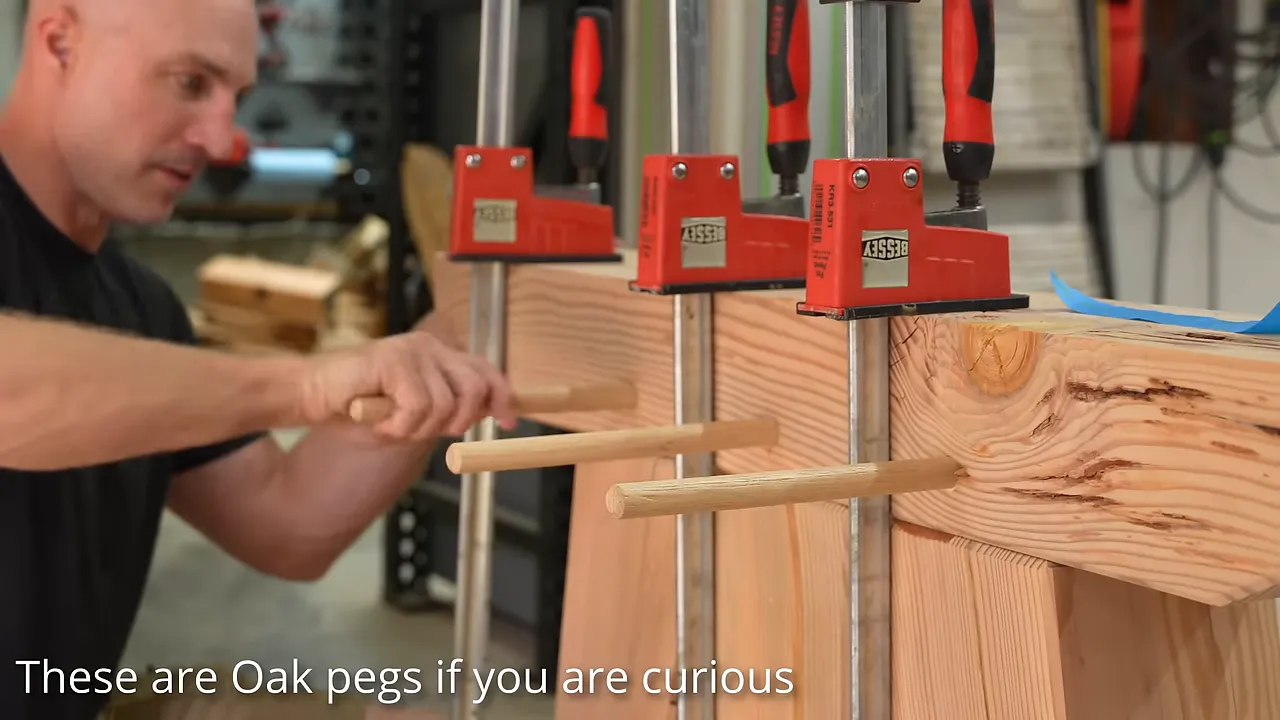
I also tried a little Titebond III on the pegs. Judging by how much glue they pushed out, I am not convinced it contributed much. The fit itself was very tight.
On later joints, the pegs were not long enough to pass all the way through, so I added pegs from the opposite side as well. Drilling those freehand made me wish I had developed a better alignment jig.
Building the Slab Top and Cutting the Big Notches
At this point, the project finally reached the stage where most of my table builds begin: a couple of enormous slabs and a decision about the best layout.
The timbers and slabs all came from Goby Walnut. Despite the supplier’s name, this project was Douglas fir. All the slabs came from the same tree, including a sequential bookmatched pair chosen for the tabletop. The remaining pieces would become benches and connecting members.
The slabs arrived a little over 16 feet long. I laid out the bookmatched pair, worked through the orientation with Scott, and used the track saw to bring them toward their finished dimensions.
Scott is good at helping with these choices. He is also generally willing to let me make my own mistakes. He did question whether something might fall during one cut. I thought he meant the wood. He meant the track.
The track fell.
It was an excellent demonstration of why it helps to clarify a warning before confidently dismissing it.
The big open notches were much more enjoyable. I made closely spaced saw kerfs to establish the depth, broke out the thin sections between them, and cleaned the surfaces with the slick and other hand tools.
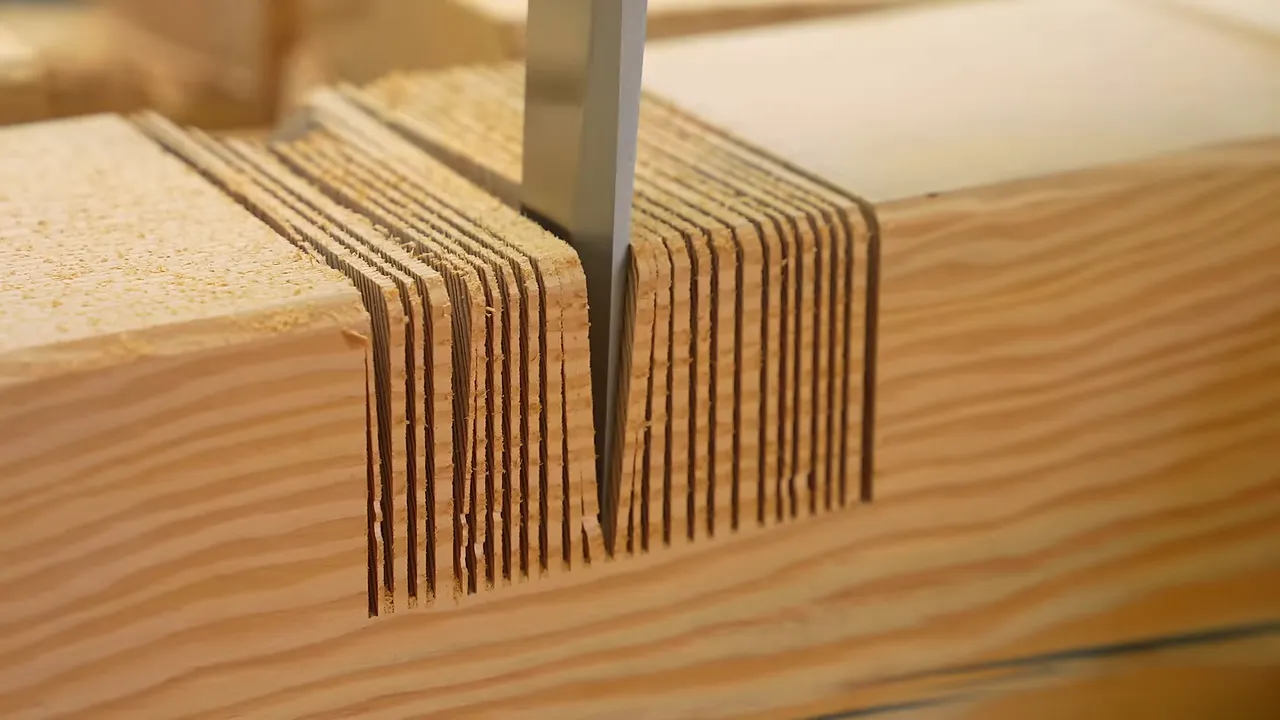
I already liked the feeling of a sharp plane taking a shaving or a peg seating in a joint. Breaking out these large kerfed sections might be my new favorite. It was satisfying on a scale I had not really experienced before.
The Base Was 30 Inches Tall. Unfortunately, So Was the Whole Table.
Everything was going suspiciously well until we set the tabletop on the base.
We had designed the base to be 30 inches tall. The intended finished height of the entire table was 30 inches. Add the thick slab top, and we were almost at 33 inches.
That might not sound dramatic until you sit at it. It was high for me, and it would have been much worse for a shorter adult or a child.
Removing a little thickness from the tabletop would barely help. We needed a bigger correction.
Removing Nearly 2 Inches From an Assembled Base
Scott suggested a fairly bold solution: kerf-cut the top of the base down nearly 2 inches, break away the waste, and flatten what remained.
He may have been joking initially. We eventually decided to do it anyway.
The track could ride across the remaining wood while I made repeated cuts to the new depth. After that, we broke out the thin sections and cleaned up the surface.
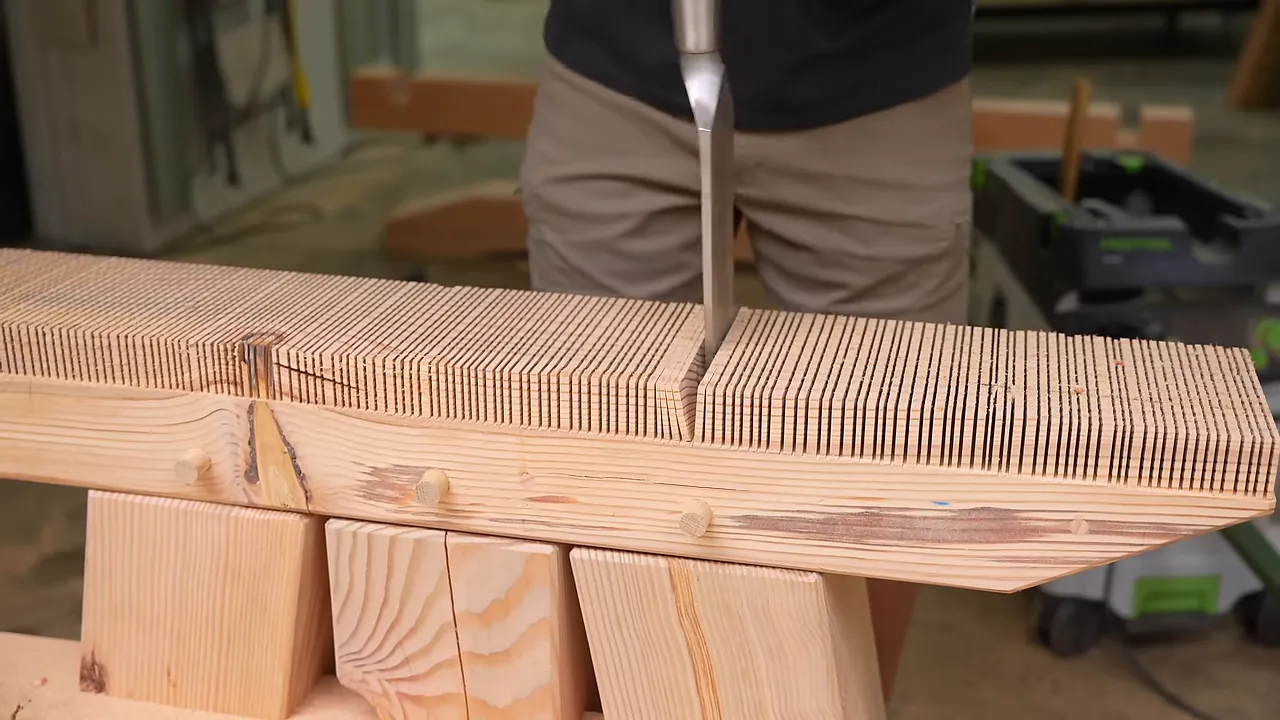
A single slicing cut in another orientation was not practical because the projecting wooden pegs interfered with the track or saw. Running the whole assembly across a jointer was also not a realistic option for me, either physically or accurately.
The kerf method worked surprisingly well. The actual correction took around 45 minutes. We had spent much longer than that discussing it.
There are two lessons there:
- Check finished dimensions, not just component dimensions. The tabletop thickness belongs in the height calculation.
- Once you have a workable repair, do the repair. Talking about it for another day does not make the wood shorter.
The correction did expose parts of a few mortises. Some of the remaining wood was thin enough that we removed it and filled those areas with thickened epoxy. It was a consequence of the fix that needed attention, not something I had planned into the joinery.
Supporting the Benches With Half-Lap Joinery
The benches had a span of more than 8 feet between the end supports. I wanted substantial support underneath them, so I made deep members that ran on edge beneath the seating.
I briefly considered setting those pieces in place and screwing them down. But after coming this far, abandoning the joinery theme felt wrong. They received half-lap joints instead.
The process was familiar by then: lay out the recess, make repeated cuts, remove the waste, and refine the fit with hand tools.
One practical detail mattered more than I expected: label every fitted component and its location.
In a perfect world, identical parts would be interchangeable. In my shop, one piece often fits one location better than another. We proved that by trying to install members on the wrong sides, then swapping them and suddenly finding that the joinery worked again.
I carried the 45-degree chamfers through the rest of the assembly, cleaned the areas blocked by pegs or intersecting members, and used a small router jig to restore neat bevels on the shortened peg ends. Those details helped the whole table feel consistent rather than simply enormous.
Bow Tie Inlays for the Cracks That Worried Me
The horizontal slabs were mostly solid, with a few small cracks. Since this was outdoor furniture, I accepted that more checking would develop over time.
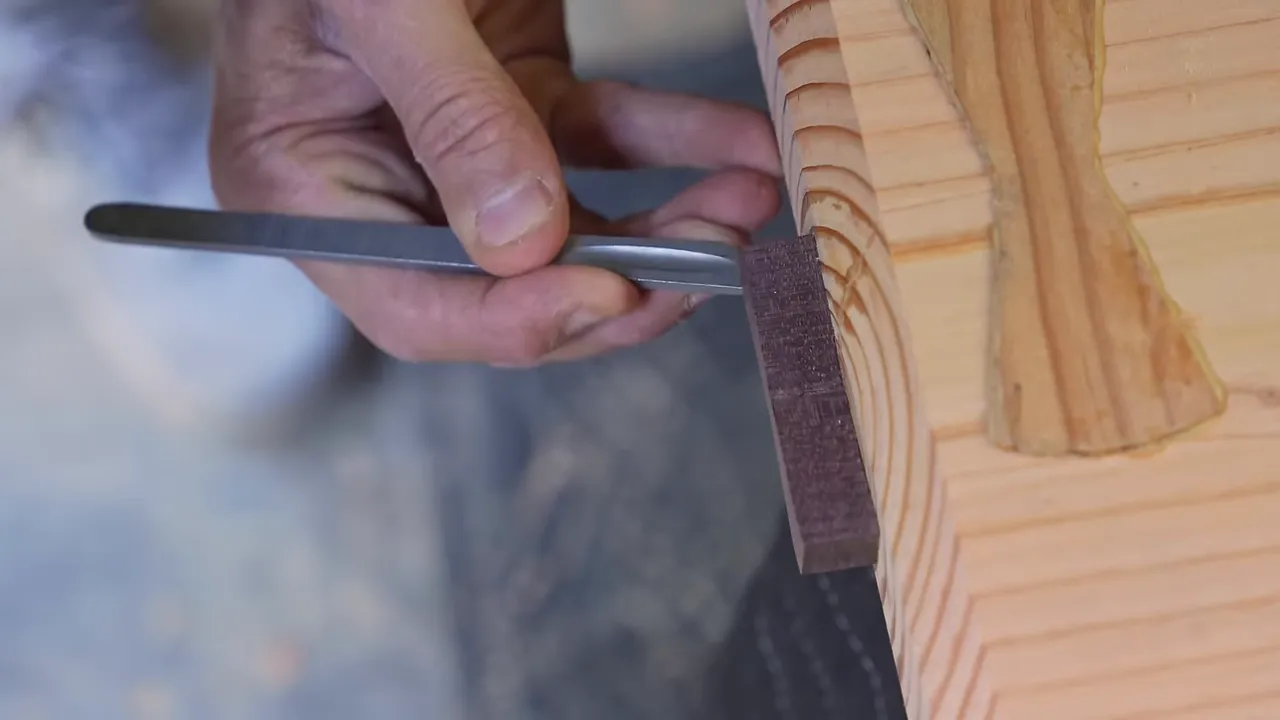
What I did not want was a large split continuing from the end of a slab. Three cracks were substantial enough that I chose to reinforce them with bow tie inlays.
I often prefer hand-cut bow ties because I like the crisp appearance. Douglas fir made a router jig the more appealing option here.
Softwood can actually be harder to inlay neatly than hardwood. A hard wood can leave a beautifully crisp chiseled edge. Softer fibers are easier to crush or bend over, especially at the corners. It is a little like trying to cut precision joinery into a loaf of bread.
The bow tie jig helped me get a consistent fit without relying entirely on my ability to chisel perfect corners in fir.
This build pushed me well beyond where I started in woodworking. Seven or eight years earlier, epoxy tables seemed like an approachable way into the craft. They turned out to be more complicated than I expected, but they gave me a starting point.
That starting point eventually led to projects like this. You do not have to begin with a giant timber-framed table to work toward one.
A Natural Outdoor Finish, Not a Plastic Shell
For the finish, I wanted something natural. I did not want the table to feel coated in plastic, and I did not expect it to retain its fresh color forever. I wanted it to weather, turn gray, and become part of its environment.
Shelter Institute recommended a finish that suited that goal. It would not offer the same protection as a thick marine varnish, but it also avoided the peeling-film appearance I wanted to stay away from.
I applied about three coats. The process was to wet the surface, let the wood absorb the finish over the course of the day, wipe away the excess, and repeat after a couple of days.
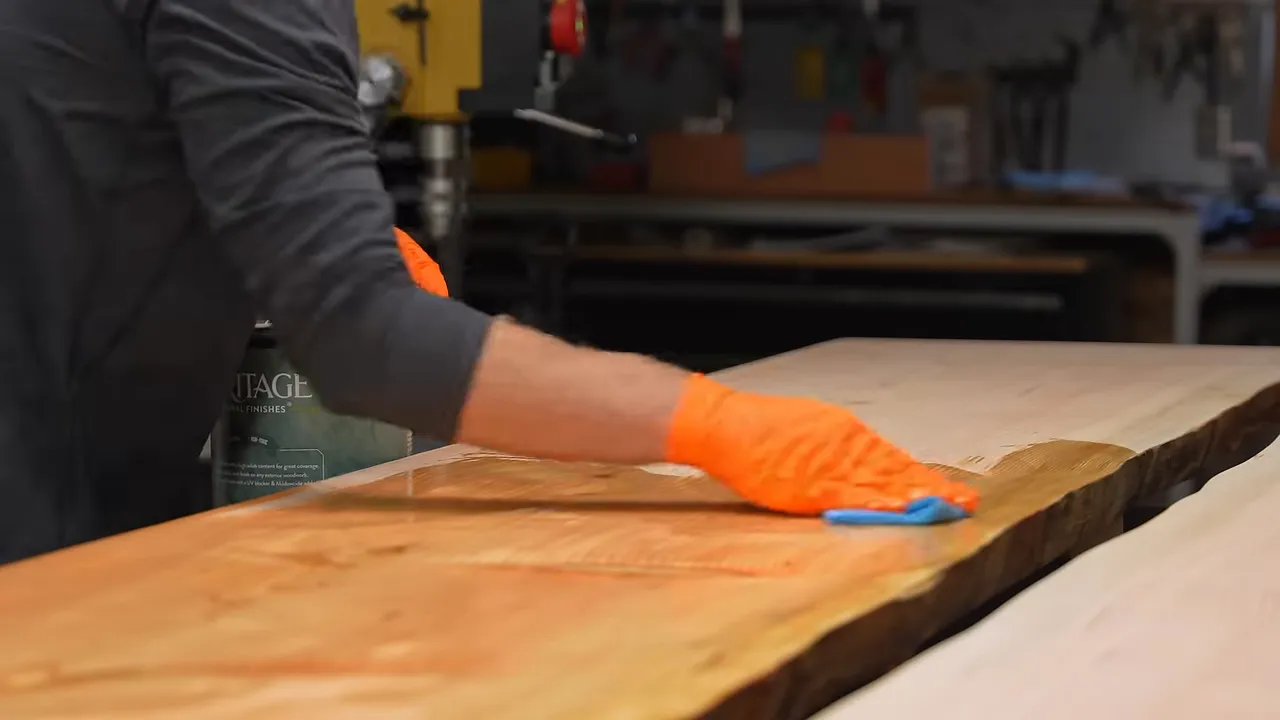
Those were the application and timing choices for this particular finish, not a universal schedule for every outdoor product.
The longer cure time also changed my usual routine. It could be dry to the touch in a day or two, but full cure took roughly three to four weeks. I planned to wait until then before applying N3 Nano rather than adding it immediately.
Small cracks, fading, and some evidence of weather were acceptable to me. The goal was a beautifully made outdoor table, not an indoor finish fighting a losing battle with Oregon rain.
Finding a Home for a 2000-Pound Table
I started this project without a definite recipient. My first thought was to put it in a public park in Portland. As the build progressed and the table turned out better than I expected, I became more attached to finding the right place for it.
Then an obvious possibility occurred to me: the park in Bend named after my grandfather.
After about 20 calls and several emails, I reached someone and explained that I did not need payment, publicity, or installation help. I only needed permission to donate the table.
They politely declined.
I also contacted Oregon State University, Portland’s parks department, and other possible locations. None of those efforts produced a home for it.
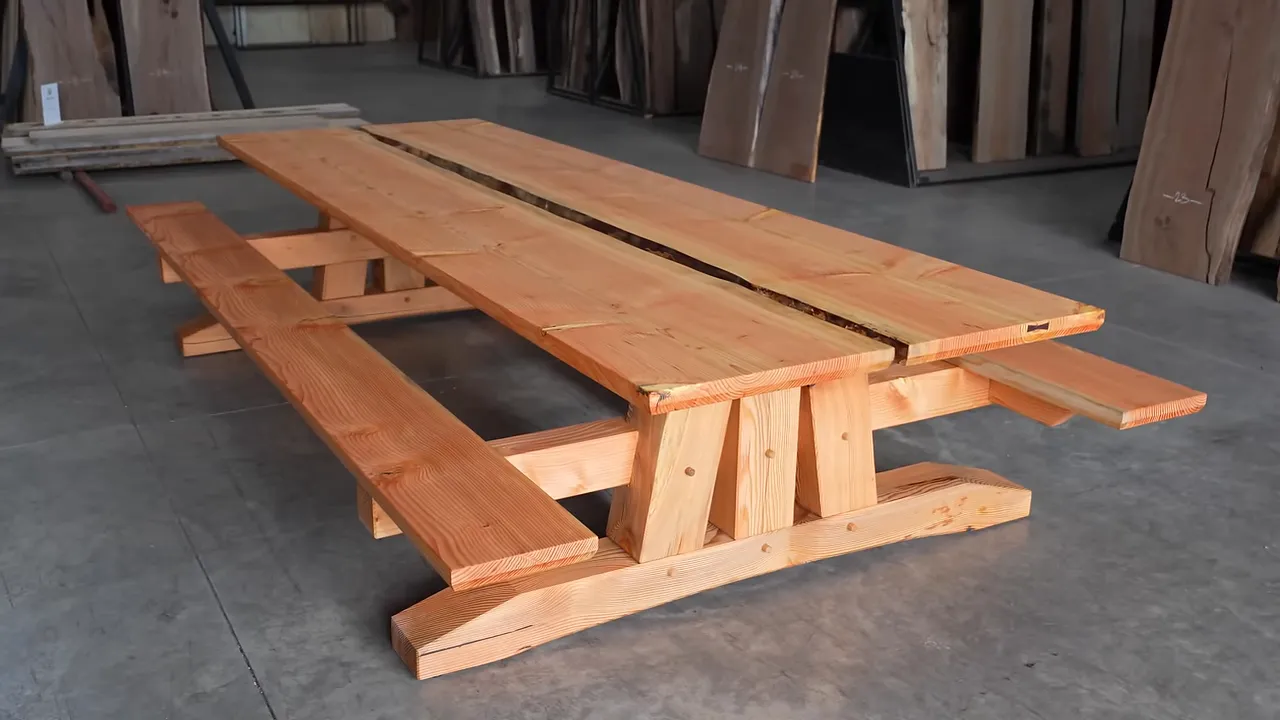
So the table went back to where the lumber started: Goby Walnut, where they agreed to display it temporarily while I continued looking.
That was not the ending I expected, but it did not change how I felt about the project. This was easily the biggest and one of the most satisfying things I had attempted. I learned how to make better mortises, discovered a favorite hand tool, fixed a mistake I would have preferred not to make, and ended up with a table I was genuinely proud of.
I still wanted it to become a public table. It could weather. It could get used. It did not need to stay perfect. After all the work of fitting those joints, the point was still to make something people could sit around.
A Small Shop Upgrade That Saves Some Frustration
One much smaller project came from years of digging through loose sandpaper in a plastic tub. After trying storage boxes with tabs and hinges that kept breaking, I developed a purpose-built Blacktail Studio sandpaper storage bin. I use six of them myself. Organized abrasives are not as exciting as timber frame joinery, but finding the grit you need without emptying a box is pretty satisfying too.
|


